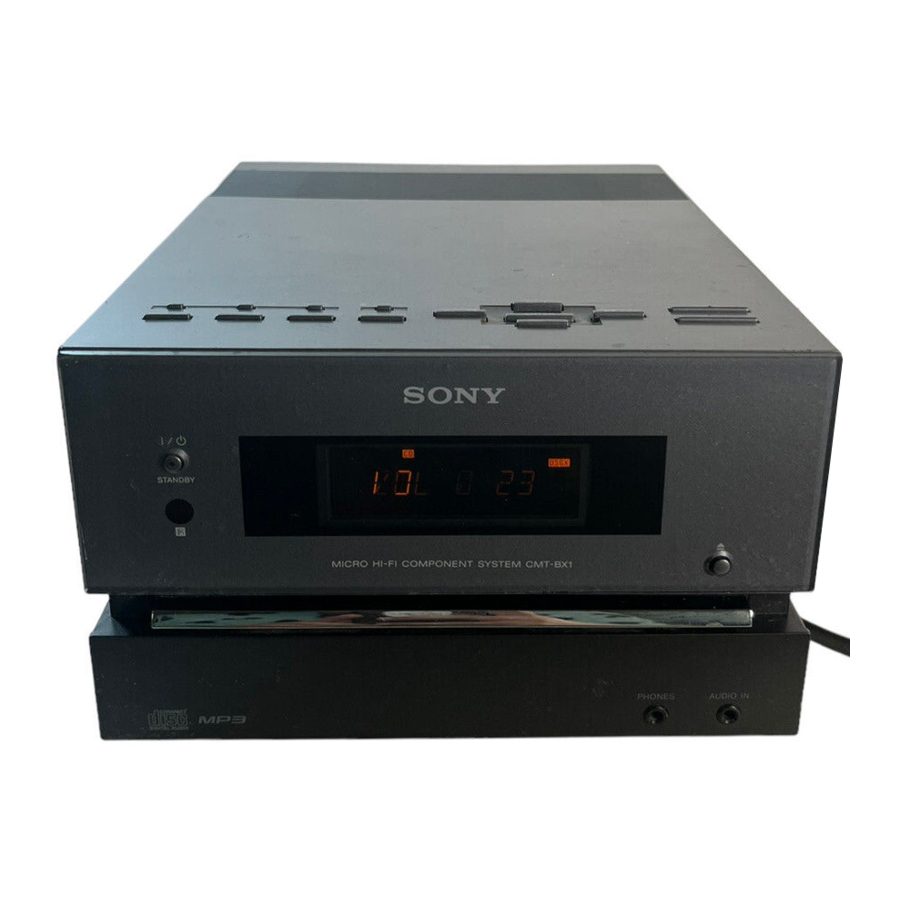
Sony CMT-BX1 - Micro HI-FI Component System Manual
- Service manual (116 pages) ,
- Operating instructions (2 pages) ,
- Specifications (2 pages)
- 1 Hooking up the system securely
- 2 Basic Operations
- 3 Before using the system
- 4 Selecting a music source
- 5 Adjusting the sound
- 6 Playing a CD/MP3 disc
- 7 Listening to the radio
- 8 Changing the display
- 9 Using optional audio components
- 10 Creating your own program (Program Play)
- 11 Presetting radio stations
- 12 Using the Timers
- 13 Troubleshooting
- 14 Messages
- 15 Display examples
- 16 Precautions
- 17 Specifications
- 18 Documents / Resources
Hooking up the system securely

Basic Operations

Before using the system
To use the remote
Slide and remove the battery compartment lid  , and insert the two supplied R6 (size AA) batteries,
  side first, matching the polarities shown below.

Notes on using the remote
To set the clock
- Turn on the system.
Press![]() (power)
(power) ![]() .
. - Select the clock set mode.
Press CLOCK/TIMER SET![]() on the remote. If the current mode appears on the display, press
on the remote. If the current mode appears on the display, press ![]()
![]() repeatedly to select "CLOCK SET" and then press ENTER
repeatedly to select "CLOCK SET" and then press ENTER ![]() .
. - Set the time.
Press![]()
![]() repeatedly to set the hour, and then press ENTER
repeatedly to set the hour, and then press ENTER ![]() . Use the same procedure to set the minutes.
. Use the same procedure to set the minutes.
The clock settings are lost when you disconnect the power cord or if a power failure occurs.
To display the clock when the system is off, press DISPLAY![]() . The clock is displayed for about 8 seconds.
. The clock is displayed for about 8 seconds.
 (power)
  .
. on the remote. If the current mode appears on the display, press
 repeatedly to select "CLOCK SET" and then press ENTER
  .
. . The clock is displayed for about 8 seconds.
Selecting a music source
Press the following buttons (or press FUNCTION  repeatedly).
| To select | Press |
| CD | CD on the remote. |
| Tuner | TUNER/BAND . |
| Component (connected using an audio cord) | AUDIO IN . |
Adjusting the sound
To adjust the volume
Press VOLUME +/ - on the remote (or VOL +/ - on the unit)  .
.
To add a sound effect
| To | Press |
| Generate a more dynamic sound (Dynamic Sound Generator X-tra) | DSGX  on the unit. on the unit. |
| Set the sound effect | EQ on the remote repeatedly to select "BASS" or "TREBLE," and then press +/-  on the remote repeatedly to adjust the level. on the remote repeatedly to adjust the level. |
Playing a CD/MP3 disc
- Select the CD function.
Press CD on the remote![]() .
. - Place a disc.
Press![]() (open/close)
(open/close) ![]() on the unit, and place a disc with the label side up on the disc tray.
on the unit, and place a disc with the label side up on the disc tray.

To close the disc tray, press![]() (open/close)
(open/close) ![]() on the unit.
on the unit.
Do not force the disc tray closed with your finger, as this may damage the unit. - Start playback.
Press![]() (play) on the remote (or CD
(play) on the remote (or CD ![]() (play/ pause) on the unit)
(play/ pause) on the unit) ![]() .
.
 (open/close)
  on the unit, and place a disc with the label side up on the disc tray.
 on the unit.
 (play) on the remote (or CD
 | To | Press |
| Pause playback |  (pause) on the remote (or CD (pause) on the remote (or CD  (play/pause) on the unit) (play/pause) on the unit)  . To resume play, press the button again. . To resume play, press the button again. |
| Stop playback |  (stop) (stop)  . . |
| Select a folder on an |  (select folder) (select folder) |
| Select a track or file |  (go back/go forward) (go back/go forward)  . . |
| Find a point in a track or file | Hold down (rewind/fast forward) during playback, and release the button at the desired point. |
| Select Repeat Play | REPEAT  on the remote repeatedly until "REP" or "REP1" appears. on the remote repeatedly until "REP" or "REP1" appears. |
To change the play mode
Press PLAY MODE  repeatedly while the player is stopped. You can select normal play ("
 " for all MP3 files in the folder on the disc), shuffle play ("SHUF" or " SHUF*"), or program play ("PGM").
* When playing a CD-DA disc, (SHUF) Play performs the same operation as normal (shuffle) play.
Notes on Repeat Play
Notes on playing MP3 discs
- The maximum number of:
Notes on playing multisession discs
- A disc with a mixed CD format is recognized as a CD-DA (audio) disc.
Listening to the radio
- Select "FM" or "AM."
Press TUNER/BAND![]() repeatedly.
repeatedly. - Select the tuning mode.
Press TUNING MODE![]() repeatedly until "AUTO" appears.
repeatedly until "AUTO" appears. - Tune in the desired station.
Press +/- on the remote (or TUNE +/- on the unit)![]() . Scanning stops automatically when a station is tuned in, and then "TUNED" and "ST" (for stereo programs only) appear.
. Scanning stops automatically when a station is tuned in, and then "TUNED" and "ST" (for stereo programs only) appear.

 repeatedly.
 repeatedly until "AUTO" appears.
 . Scanning stops automatically when a station is tuned in, and then "TUNED" and "ST" (for stereo programs only) appear.
To stop automatic scanning
Press  (stop)
  .
.
To tune in a station with a weak signal
If "TUNED" does not appear and the scanning does not stop, press TUNING MODE  repeatedly until "AUTO" and "PRESET" disappear, and then press +/- on the remote (or TUNE +/- on the unit)
  repeatedly to tune in the desired station.
To reduce static noise on a weak FM stereo station
Press FM MODE  on the remote repeatedly until "MONO" appears to turn off stereo reception.
Changing the display
| To | Press |
| Change information on the display1) | DISPLAY  repeatedly when the system is on. repeatedly when the system is on. |
| Check the clock when the system is off | DISPLAY when the system is off 2). The clock is displayed for 8 seconds. |
1) For example, you can view CD/MP3 disc information, such as the track or file number or folder name during normal play, or the total playing time while the player is stopped.
2) The STANDBY indicator on the unit lights up when the system is off.
Notes on the display information
- The following are not displayed:
- The following are not displayed correctly:
- The following is displayed:
Using optional audio components
To connect an optional headphones
Connect headphones to the PHONES jack  on the unit.
To connect an optional component
Connect additional audio component to the AUDIO IN jack  on the unit using an audio analog cord (not supplied). Turn down the volume on the system, and then select the AUDIO IN function.
Other Operations
Creating your own program (Program Play)
- Press CD
![]() to select the CD function.
to select the CD function. - Press PLAY MODE
![]() repeatedly until "PGM" appears while the player is stopped.
repeatedly until "PGM" appears while the player is stopped. - Press
![]() repeatedly until the desired track or file number appears.
repeatedly until the desired track or file number appears.
When programming files, press![]() repeatedly to select the desired folder, and then select the desired file.
repeatedly to select the desired folder, and then select the desired file.
")
- Press ENTER
![]() to add the track or file to the program.
to add the track or file to the program.
"![]() " appears when the total program time exceeds 100 minutes for a CD, or when you select a CD track whose number is 21 or over, or when you select an MP3 file.
" appears when the total program time exceeds 100 minutes for a CD, or when you select a CD track whose number is 21 or over, or when you select an MP3 file. - Repeat steps 3 through 4 to program additional tracks or files, up to a total of 25 tracks or files.
- To play your program of tracks or files, press
![]() .
.
The program remains available until you open the disc tray. To play the same program again, press![]() .
.
 to select the CD function.
 repeatedly until "PGM" appears while the player is stopped.
 repeatedly until the desired track or file number appears.
 repeatedly to select the desired folder, and then select the desired file.
 ")
 to add the track or file to the program.
 " appears when the total program time exceeds 100 minutes for a CD, or when you select a CD track whose number is 21 or over, or when you select an MP3 file.
 .
.To cancel Program Play
Press PLAY MODE  repeatedly until "PGM" disappears while the player is stopped.
To delete the last track or file of the program
Press CLEAR  on the remote while the player is stopped.
Presetting radio stations
You can preset your favorite radio stations and tune them in instantly by selecting the corresponding preset number.
Use buttons on the remote to preset stations.
- Tune in the desired station (See "Listening to the radio").
- Press TUNER MEMORY
![]() .
.

- Press +/-
![]() repeatedly to select your desired preset number.
repeatedly to select your desired preset number.
If another station is already assigned to the selected preset number, the station is replaced by the new stations. - Press ENTER
![]() .
. - Repeat steps 1 through 4 to store other stations. You can preset up to 20 FM and 10 AM stations. The preset stations are retained for about half a day even if you disconnect the power cord or if a power failure occurs.
- To call up a preset radio station, press TUNING MODE
![]() repeatedly until "PRESET" appears, and then press +/-
repeatedly until "PRESET" appears, and then press +/- ![]() repeatedly to select the desired preset number.
repeatedly to select the desired preset number.
 .
.
 repeatedly to select your desired preset number.
  repeatedly until "PRESET" appears, and then press +/-
 Using the Timers
The system offers two timer functions. If you use the Play Timer with the Sleep Timer, the Sleep Timer has priority.
Sleep Timer
You can fall asleep to music. This function works even if the clock is not set.
Press SLEEP  repeatedly. If you select "AUTO," the system automatically turns off after the current disc stops or in 100 minutes.
Play Timer
You can wake up to CD or tuner at a preset time.
Use buttons on the remote to control the Play Timer.
Make sure you have set the clock.
- Prepare the sound source.
Prepare the sound source, and then press VOLUME +/-![]() to adjust the volume.
to adjust the volume.
To start from a specific track or file, create your own program. - Press CLOCK/TIMER SET
![]() .
. - Press
![]() repeatedly to select "PLAY SET," and then press ENTER
repeatedly to select "PLAY SET," and then press ENTER ![]() .
.
"ON" appears, and the hour indication flashes. - Set the time to start playing.
Press![]() repeatedly to set the hour, and then press ENTER
repeatedly to set the hour, and then press ENTER ![]() .
.
The minute indication flashes. Use the procedure above to set the minutes. - Use the same procedure as in step 4 to set the time to stop playing.
- Select the sound source.
Press![]() repeatedly until the desired sound source appears, and then press ENTER
repeatedly until the desired sound source appears, and then press ENTER ![]() . The display shows the timer settings.
. The display shows the timer settings. - Press
![]() to turn off the system.
to turn off the system.
The system turns on 15 seconds before the preset time. If the system is on at the preset time, the Play Timer will not play.
 to adjust the volume.
 .
. to turn off the system.
To activate or check the timer again
Press CLOCK/TIMER SELECT  , press
  repeatedly until "PLAY SEL" appears, and then press ENTER
  .
.
To cancel the timer
Repeat the same procedure as above until "TIMER OFF" appears, and then press ENTER .
To change the setting
Start over from step 1.
 Tip
Tip
The Play Timer setting remains as long as the setting is not canceled manually.
Troubleshooting
- Make sure the power cord and speaker cords are correctly and firmly connected.
- Find your problem in the checklist below, and take the indicated corrective action.
If the issue persists, contact your nearest Sony dealer.
If the STANDBY indicator flashes

Immediately unplug the power cord, and check the following items.
- If your system has a voltage selector, is the voltage selector set to the correct voltage?
- Are you using only the supplied speakers?
- Is anything blocking the ventilation holes on the top or back of the system?
After the STANDBY indicator  stops flashing, reconnect the power cord, and turn on the system. If the issue persists, contact your nearest Sony dealer.
General
Sound comes from one channel, or the left and right volumes are unbalanced.
Severe hum or noise.
The remote does not function.
- Remove any obstacles between the remote and the remote sensor
![]() on the unit, and position the unit away from fluorescent lights.
on the unit, and position the unit away from fluorescent lights.
 on the unit, and position the unit away from fluorescent lights.
CD/MP3 player
The sound skips, or the disc will not play.
Play does not start from the first track.
- Press PLAY MODE
![]() repeatedly until both "PGM" and "SHUF" disappear to return to normal play.
repeatedly until both "PGM" and "SHUF" disappear to return to normal play.
Starting playback takes more time than usual.
- The following discs take a longer time to start playback.
- a disc recorded with a complicated tree structure.
- a disc recorded in multisession mode.
- a disc that has not been finalized (a disc to which data can be added).
- a disc that has many folders.
Tuner
Severe hum or noise, or stations cannot be received. ("TUNED" or "ST" flashes on the display.)
To change the AM tuning interval
The AM tuning interval is factory-preset to 9 kHz (or 10 kHz, for some areas).
Use buttons on the unit to change the AM tuning interval.
- Tune in any AM station, and then turn off the system.
- While holding down TUNER/BAND
![]() , press
, press ![]() .
.
All the AM preset stations are erased. To reset the interval to the factory preset, repeat the procedure.
 , press
  .
.To improve tuner reception
Turn off CD player power by using the CD power management function. By default, CD power is turned on.
- Press FUNCTION
![]() repeatedly to select the CD function, and then turn off the system.
repeatedly to select the CD function, and then turn off the system. - After "STANDBY" stops flashing, press
![]() on the unit while holding down
on the unit while holding down ![]() /CANCEL
/CANCEL ![]() on the unit.
on the unit.
"CD POWER OFF" appears. With CD player power turned off, disc access time is increased. To turn on CD player power, repeat the procedure until "CD POWER ON" appears.
 /CANCEL
  on the unit.
To reset the system to factory settings
If the system still does not operate properly, reset the system to factory settings.
Use buttons on the unit to reset the unit to its factory default settings.
- Disconnect and reconnect the power cord, and then turn on the system.
- Press
![]() ,
, ![]() /CANCEL
/CANCEL ![]() and
and ![]() at the same time.
at the same time.
All user-configured settings, such as preset radio stations, timer, and the clock, are deleted.
 ,
,  /CANCEL
  and
and Messages
CD OVER: You have reached the end of the disc while pressing  during playback or pause.
COMPLETE: The preset operation ended normally.
INVALID: You pressed an invalid button.
LOCKED: The disc tray does not open. Contact your nearest Sony dealer.
NO DISC: There is no disc in the system, or you have loaded a disc that cannot be played.
NO STEP: All of the programmed tracks or files have been erased.
PUSH SELECT: You tried to set the clock or timer during timer operation.
PUSH STOP: You pressed PLAY MODE  during playback.
READING: The system is reading information of the disc. Some buttons are not available.
SET CLOCK: You tried to select the timer when the clock is not set.
SET TIMER: You tried to select the timer when the Play Timer is not set.
STEP FULL: You tried to program more than 26 tracks or files (steps).
TIME NG: The Play Timer start and end times are set to the same time.
Display examples

Precautions
Discs that this system CAN play
Discs that this system CANNOT play
Notes on discs
On safety
On placement
On heat buildup
On the speaker system
This speaker system is not magnetically shielded, and the picture on nearby TV sets may become magnetically distorted. In this situation, turn off the TV, wait 15 to 30 minutes, and turn it back on.
If there is no improvement, move the speakers far away from the TV.
Cleaning the cabinet
Clean this system with a soft cloth slightly moistened with a mild detergent solution. Do not use any type of abrasive pad, scouring powder, or solvent, such as thinner, benzine, or alcohol.
Specifications
Main unit
AUDIO POWER SPECIFICATIONS POWER OUTPUT AND TOTAL HARMONIC DISTORTION:
With 6 ohm loads, both channels driven, from 120 - 10,000Hz; rated 12 watts per channel minimum RMS power, with no more than 10% total harmonic distortion from 250 milliwatts to rated output.
Amplifier section
Continuous RMS power output (reference): 15 + 15 W (6 ohms at 1 kHz, 10% THD)
Inputs
AUDIO IN (stereo mini jack): voltage 250 mV, impedance 47 kilohms
Outputs
PHONES (stereo mini jack): accepts headphones of 8 ohms or more
SPEAKER: accepts impedance of 6 to 16 ohms
CD player section
System: Compact disc and digital audio system
Laser Diode Properties
Emission duration: continuous
Laser Output*: Less than 44.6µW
* This output is the value measurement at a distance of 200mm from the objective lens surface on the Optical Pick-up Block with 7mm aperture.
Frequency response: 20 Hz -20 kHz
Signal-to-noise ratio: More than 90 dB
Dynamic range: More than 90 dB
Tuner section
FM stereo, FM/AM superheterodyne tuner
FM tuner section:
Tuning range: 87.5 - 108.0 MHz (100 kHz step)
Antenna: FM lead antenna
Antenna terminals: 75 ohms unbalanced
Intermediate frequency: 10.7 MHz
AM tuner section:
Tuning range:
530 - 1,710 kHz (with 10 kHz tuning interval)
531 - 1,710 kHz (with 9 kHz tuning interval)
Antenna: AM loop antenna, external antenna terminal
Intermediate frequency: 450 kHz
Speaker
Speaker system: Full Range, 10 cm, cone type
Nominal impedance: 6 ohms
Dimensions (w/h/d): Approx. 140 × 245 × 135 mm
Mass: Approx. 1.5 kg net per speaker
General
Power requirements: 120 V AC, 60 Hz
Power consumption: 40 watts
Dimensions (w/h/d) (excl. speakers): Approx. 200 × 132 × 298 mm
Mass (excl. speakers): Approx. 3.4 kg
Supplied accessories: Remote Commander (1)/R6 (Size AA) batteries (2)/AM loop antenna (1)/FM lead antenna (1)
Design and specifications are subject to change without notice.


Documents / ResourcesDownload manual
Here you can download full pdf version of manual, it may contain additional safety instructions, warranty information, FCC rules, etc.
Thank you! Your question has been received!


Need Assistance?
Do you have a question about the CMT-BX1 that isn't answered in the manual? Leave your question here.