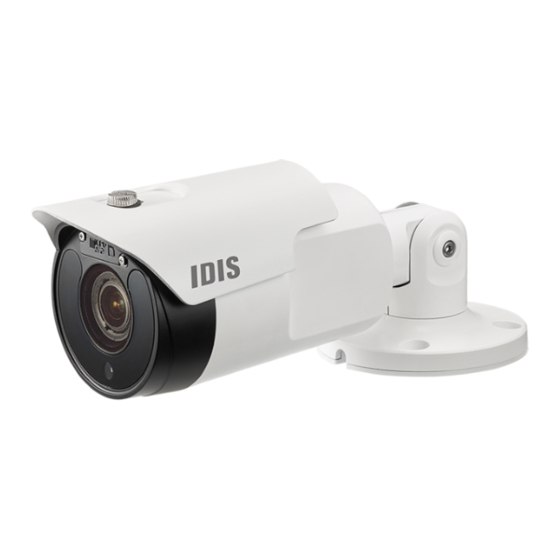
Summary of Contents for Idis DC-T4236 Series
- Page 1 DC-T Series Installation Manual DC-T4236WRX / DC-T4236HRX DC-T4236WRX-A / DC-T4236HRX-A Powered by...
- Page 2 Before reading this manual This is a basic installation manual for use of an IDIS network camera. Users who are using this product for the first time, as well as users with experience using comparable products, must read this manual carefully before use and heed to the warnings and precautions contained herein while using the product.
- Page 3 Before reading this manual Safety Precautions WARNING RISK OF ELECTRIC SHOCK DO NOT OPEN WARNING: TO REDUCE THE RISK OF ELECTRIC SHOCK, DO NOT REMOVE COVER (OR BACK). NO USER-SERVICEABLE PARTS INSIDE. REFER SERVICING TO QUALIFIED SERVICE PERSONNEL. Important Safeguards 1.
- Page 4 IDIS Co., Ltd. reserves all rights concerning this manual. Use or duplication of this manual in part or whole without the prior consent of IDIS Co., Ltd. is strictly prohibited. Contents of this manual are subject to change without prior notice for reasons such as functionality enhancements.
-
Page 5: Table Of Contents
Table of Contents Part 1 – Introduction ......... 6 Product Features . -
Page 6: Part 1 - Introduction
Web) lets you remotely view live video using a web • Automatic web casting code (HTML) generation browser. In addition, you can use the IDIS Solution Suite • Up to 10 simultaneous remote monitoring Compact to manage network cameras and view/record connections video. - Page 7 • Redundant firmware and auto recovery features for Remote monitoring and recording via multistreaming improved system stability are available using the IDIS Solution Suite Compact program. For more information on using IDIS Solution • Network-based integrated management of multiple Suite Compact, refer to its operation manual.
-
Page 8: Accessories
Part 1 – Introduction Accessories Upon purchasing the product, check inside the box to make sure all the following accessories are included. External appearances and colors of the accessories may vary depending on the model. Network Camera Quick Guide Bushings (4 ea.) Camera Sun Shield Sun Shield Screw, O Ring Screws, Anchors (each 4 ea.) -
Page 9: Overview
Part 1 – Introduction Overview Product color and design may vary depending on the model. Body • Lens Motorized focus and zoom lens is installed. • IR LED A sensor in the bottom middle monitors lighting levels and activates the IR LED during low-lighting conditions. -
Page 10: Cable
For more information on network connection setup, refer to the IDIS Discovery operation manual. • Audio In DC-T4236HRX/DC-T4236WRX model only Connect an audio source to this port. (line in) •... -
Page 11: Factory Reset
IP CAMERA It's also possible to do a factory reset by pressing and releasing the reset switch while the camera is turned on or using the IDIS Discovery program from a remote location. A factory reset will • Check your local laws and regulations on making reboot the system. -
Page 12: Inserting A Sd Memory Card
Part 1 – Introduction Inserting a SD Memory Card Loosen the screws counterclockwise and remove the cover. Make sure that the cover is joined properly when screwing it; otherwise, the IP67 level is not guaranteed. Waterproof Cable Installation Insert a SD memory card into the SD memory card slot with the 'micro SD' print facing upward. -
Page 13: Installation
Part 1 – Introduction Insert a round rubber ring (silicone rubber) into the RJ45 jack. Lock the waterproof cap into the waterproof cap body. Insert the network cable into the waterproof cap, rubber bushing, and waterproof cap body in order. Not pulling the cable back may cause water to seep in and damage the product. - Page 14 Part 1 – Introduction Adjust the camera angle by bending the stand. After Dimensions fully assembling the joint screws, unscrew it 2 ~ 2.5 turns again and move the cover of the joints of the left 3 places slightly. (The screws should not be 244.1mm completely released to prevent it from falling.) After adjusting the direction of the camera, turn the screw...
-
Page 15: Part 2 - Camera Connection
Part 2 - Camera Connection Use the camera by connecting to DirectIP™ NVR or non DirectIP™ NVR, VMS such as IDIS Solution Suite Compact. With DirectIP™ NVR-based Layout Audio In Power Audio Out Sensor In Alarm Out Network Camera Monitor Out... -
Page 16: With Non Directip™ Nvr-Based Layout
Ideal for using the camera over the network from a remote location. The contents in the camera operation manual are only for users using the camera with non DirectIP™ NVR connection or VMS connection such as IDIS Solution Suite Compact. -
Page 17: Part 3 - Appendix
Unable to launch IDIS Web. If the IDIS Web login screen is not loading, check which version of Microsoft Internet Explorer you are using. IDIS Web may not launch properly on versions 8.0 or below. -
Page 18: Specifications
Part 3 - Appendix Specifications These product specifications may change without prior notice. Video Image Sensor 1/2.8" CMOS Max. Resolution 1920 x 1080 Scanning Mode Progressive Scan Lens type Motorized Vari-focal Focal Length f=2.8 - 12.0mm Aperture F1.4 - 2.8 Iris Control DC Iris Angular Field of View... - Page 19 Part 3 - Appendix * microSD logo is a trademark of SD-3C, LLC. Audio In/Out DC-T4236HRX/ Line-in 1ea / Line-out 1ea DC-T4236WRX model only Alarm In 1 TTL, NC/NO Programmable, 4.3V(NC) or 0.3V(NO) threshold, 5V DC Alarm Out 1 TTL open collector, 30mA @ 5 VDC General Vandal Resistance Out-door Ready...
- Page 20 IDIS Co., Ltd. For more information, please visit at www.idisglobal.com...


