
Related Manuals for Panasonic NV-GS230


Summary of Contents for Panasonic NV-GS230
-
Page 1: Operating Instructions
VQT1D15ENG.book 1 ページ 2006年10月30日 月曜日 午後8時23分 Operating Instructions Digital Video Camera NV-GS230GN Model No. Before use, please read these instructions completely. VQT1D15... -
Page 2: Information For Your Safety
VQT1D15ENG.book 2 ページ 2006年10月30日 月曜日 午後8時23分 Information for your safety WARNING: TO REDUCE THE RISK OF FIRE, ELECTRIC SHOCK OR PRODUCT DAMAGE, ≥ DO NOT EXPOSE THIS APPARATUS TO RAIN, MOISTURE, DRIPPING OR SPLASHING AND THAT NO OBJECTS FILLED WITH LIQUIDS, SUCH AS VASES, SHALL BE PLACED ON THE APPARATUS. - Page 3 VQT1D15ENG.book 3 ページ 2006年10月30日 月曜日 午後8時23分 Pages for reference Pages for reference are indicated by dashes either side of a number, for example: The menu operation flow is indicated by >> in the description. IF THE POWER CORD OF THIS EQUIPMENT IS DAMAGED, IT MUST BE REPLACED WITH AN ELECTRICALLY APPROVED POWER CORD.
-
Page 4: Table Of Contents
VQT1D15ENG.book 4 ページ 2006年10月30日 月曜日 午後8時23分 Contents Information for your safety ... 2 Before using Accessories ... 5 Optional ... 5 Parts identification and handling... 5 Fitting the lens cap... 7 The grip belt... 8 Using the LCD monitor ... 8 Using the viewfinder ... 8 Power supply ... -
Page 5: Before Using
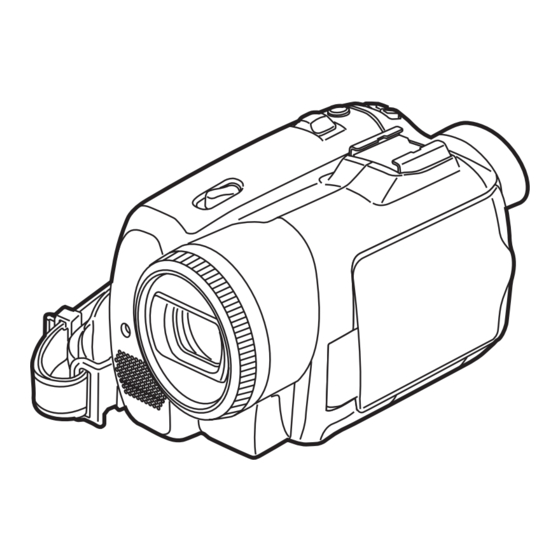
VQT1D15ENG.book 5 ページ 2006年10月30日 月曜日 午後8時23分 Before using Accessories The followings are the accessories supplied with this product. 1) AC adaptor, DC input lead, AC mains lead 2) Battery pack 3) Remote control, button-type battery 4) Lens cap 5) AV cable -39- 6) Shoulder strap 7) Digital video head cleaner -54-... - Page 6 VQT1D15ENG.book 6 ページ 2006年10月30日 月曜日 午後8時23分 (10) (11) (12) S-VIDEO (10) Viewfinder -57- Due to limitations in LCD production technology, there may be some tiny bright or dark spots on the Viewfinder screen. However, this is not a malfunction and does not affect the recorded picture. (11) Battery holder (12)
-
Page 7: Fitting The Lens Cap
VQT1D15ENG.book 7 ページ 2006年10月30日 月曜日 午後8時23分 (37) Shoulder strap fixture ≥Put the strap through the fixture 1 and through the stopper 2 so it will not come off. Extend part 3 by at least 2 cm. ≥Fit the other end of the belt similarly. (38) (38) Lens hood... -
Page 8: The Grip Belt
VQT1D15ENG.book 8 ページ 2006年10月30日 月曜日 午後8時23分 The grip belt Adjust the belt length so it fits your hand. Adjust the belt length and the pad position. 1 Flip the belt. 2 Adjust the length. 3 Fix the belt. Using the LCD monitor You can record the image while viewing it on the LCD monitor opened. -
Page 9: Power Supply
Charge the battery before using this product. ≥Battery charging time ( -10- ≥We recommend using Panasonic batteries. ≥If you use other batteries, we cannot guarantee the quality of this product. ≥If the DC input lead is connected to the AC adaptor, then the battery will not get charged. -
Page 10: Charging Time And Recordable Time
VQT1D15ENG.book 10 ページ 2006年10月30日 月曜日 午後8時23分 Charging time and recordable time The times shown in the table below show the times at a temperature of 25 oC and a humidity of 60%. This is just a guide. If the temperature is higher or lower than the specified value, the charging time will become longer. -
Page 11: Inserting/Removing A Card
VQT1D15ENG.book 11 ページ 2006年10月30日 月曜日 午後8時23分 ≥After using, make sure to rewind the cassette completely, remove it, and put it in a case. Store the case in an upright position. ( -56- ≥When condensation is formed on the lens or the main unit of the movie camera, even if no condensation alarm is indicated, condensation may have formed on the heads or the cassette tape. -
Page 12: Turning The Camera On
VQT1D15ENG.book 12 ページ 2006年10月30日 月曜日 午後8時23分 ª Card access lamp ≥When the camera accesses the card (reading, recording, playback, erasing, etc.), the access lamp lights up. ≥If the following operations are performed when the access lamp is lit, then the card or the recorded data may be damaged or the camera may malfunction. -
Page 13: How To Use The Joystick
VQT1D15ENG.book 13 ページ 2006年10月30日 月曜日 午後8時23分 How to use the joystick ª Basic joystick operations Operations on the menu screen and selection of files to be played back on the multi-image display Move the joystick up, down, left, or right to select an item or file, and then push in the centre to set 1 Select by moving up. -
Page 14: Switching The Language
VQT1D15ENG.book 14 ページ 2006年10月30日 月曜日 午後8時23分 5) Card recording mode ([AUTO/MANUAL/FOCUS] switch is set to [MANUAL]) White balance Shutter speed Iris or gain value Select/Adjust Select/Adjust 6) Picture playback mode Playback/stop Erase Playback previous picture Playback next picture Switching the language You can switch the language on the screen display or the menu screen. -
Page 15: Setting Date And Time
[OFF], the battery is still being recharged.) WARNING THE LITHIUM BATTERY IN THIS UNIT MUST ONLY BE REPLACED BY QUALIFIED PERSONNEL. IF THIS IS NECESSARY, CONTACT THE PANASONIC CUSTOMER CARE CENTRE ON 132600 FOR YOUR NEAREST AUTHORIZED SERVICE CENTRE. VQT1D15... -
Page 16: Adjusting Lcd Monitor/Viewfinder
VQT1D15ENG.book 16 ページ 2006年10月30日 月曜日 午後8時23分 Adjusting LCD monitor/viewfinder ª Adjusting the brightness and colour level Set [SETUP] >> [LCD SET] or [EVF SET] >> [YES]. Move the joystick up or down in order to select the item to be adjusted. [LCD SET] Brightness of the LCD monitor Colour level of the LCD monitor [EVF SET]... -
Page 17: Using The Remote Control
VQT1D15ENG.book 17 ページ 2006年10月30日 月曜日 午後8時23分 Using the remote control ª Remote control Using the remote control supplied will enable controlling almost all the functions of this camera to be controlled. On-screen display button [EXT DISPLAY] -35- Date/time button [DATE/TIME] Audio dubbing button [AUDIO DUB] Record button [¥REC] -40- Direction buttons [3, 2, 1, 4]... - Page 18 VQT1D15ENG.book 18 ページ 2006年10月30日 月曜日 午後8時23分 ª Install a button-type battery Install the button-type battery supplied in the remote control before using it. While pressing the stopper 1, pull out the battery holder. Set the button-type battery with its (i) mark facing upward and get the battery holder back in place.
-
Page 19: Record Mode
≥We recommend using the SP mode for important recording. ≥In order to fully exhibit the performances of the LP mode, we recommend using Panasonic cassettes marked LP mode. ≥It is not possible to dub audio onto image recorded in the LP mode. ( ≥In the LP mode, the picture quality will not be... -
Page 20: Recording On A Tape
VQT1D15ENG.book 20 ページ 2006年10月30日 月曜日 午後8時23分 Recording on a tape Remove the lens cap. ( (When the camera is turned on with the lens cap fitted, the automatic white balance adjustment may not function properly. Please turn the camera on after removing the lens cap.) ≥Set to Tape Recording Mode. -
Page 21: Check The Recording
VQT1D15ENG.book 21 ページ 2006年10月30日 月曜日 午後8時23分 Check the recording The last image recorded is played back for 2 to 3 seconds. After checking, the camera will be set to a recording pause. ≥Set to Tape Recording Mode. Press the joystick during the recording pause until the icon 1 appears. - Page 22 VQT1D15ENG.book 22 ページ 2006年10月30日 月曜日 午後8時23分 ≥You can record stable pictures without shaking by using a tripod and the remote control. ≥For the number of still pictures to be recorded on a card, refer to -60- ≥The sound cannot be recorded. ≥While data are recorded on a card, do not operate the mode dial.
-
Page 23: Zoom In/Out Function
VQT1D15ENG.book 23 ページ 2006年10月30日 月曜日 午後8時23分 Zoom in/out function You can zoom in up to 10k optically. ≥Set to Tape/Card Recording Mode. Wide-angle recording (zoom out): Push the [W/T] lever towards [W]. Close-up recording (zoom in): Push the [W/T] lever towards [T]. 10tW ≥When zooming in and taking a picture while holding the movie camera by hand, we... -
Page 24: Quick Start
VQT1D15ENG.book 24 ページ 2006年10月30日 月曜日 午後8時23分 Quick start This camera will be put into standby in approx. 1.7 seconds after the power is turned on. ≥Please note in Quick Start Mode approximately half the pause recording power is being consumed. Using Quick Start Mode will reduce the battery recording/playback time. -
Page 25: Night View Functions
VQT1D15ENG.book 25 ページ 2006年10月30日 月曜日 午後8時23分 Night view functions This function allows you to record colour subjects in dark locations to stand out against the background. Attach the camera to a tripod, and you can record images free from vibration. ≥Only manual focusing can be used. ≥Recorded scene is seen as if frames were missed. -
Page 26: Tele-Macro Function
VQT1D15ENG.book 26 ページ 2006年10月30日 月曜日 午後8時23分 Tele-macro function By focusing only on the subject and blurring the background, the image can be impressive. This camera can focus on the subject at a distance of approx. 40 cm. ≥Set to Tape/Card Recording Mode. Press the joystick until the icon 1 appears. -
Page 27: Wind Noise Reduction Function
VQT1D15ENG.book 27 ページ 2006年10月30日 月曜日 午後8時23分 Wind noise reduction function This reduces the wind noise coming into the microphone when recording. ≥Set to Tape Recording Mode. Set [BASIC] >> [WIND CUT] >> [ON]. ª To cancel the wind noise reduction function Set [BASIC] >> [WIND CUT] >> [OFF]. ≥Reduces the wind noise depending on the wind strength. -
Page 28: Image Stabilizer Function
≥Intervals between recording pictures may become longer depending on the card. We recommend using a Panasonic SD Memory Card. ≥When using the card formatted by other equipment or a card that was recorded and erased repeatedly, the intervals between recording pictures may become longer. -
Page 29: Recording In Various Situations (Scene Mode)
VQT1D15ENG.book 29 ページ 2006年10月30日 月曜日 午後8時23分 Recording in various situations (Scene mode) When you record images in different situations, this mode automatically sets optimum shutter speeds and apertures. ≥Set to Tape/Card Recording Mode. Set the [AUTO/MANUAL/FOCUS] switch to [MANUAL]. Set [BASIC] >> [SCENE MODE] >> select the desired mode. -
Page 30: Recording In Natural Colours (White Balance)
VQT1D15ENG.book 30 ページ 2006年10月30日 月曜日 午後8時23分 Recording in natural colours (White balance) The automatic white balance function may not reproduce natural colours depending on the scenes or lighting conditions. If so, you can adjust the white balance manually. ≥Set to Tape/Card Recording Mode. Set the [AUTO/MANUAL/FOCUS] switch to [MANUAL]. -
Page 31: Manual Focus Adjustment
VQT1D15ENG.book 31 ページ 2006年10月30日 月曜日 午後8時23分 Manual focus adjustment If auto focusing is difficult due to the conditions, then manual focusing is available. ≥Set to Tape/Card Recording Mode. Set the [AUTO/MANUAL/FOCUS] switch to [MANUAL]. Set the [AUTO/MANUAL/FOCUS] switch to [FOCUS]. ≥The MNL and the manual focus indication [MF] will be displayed. - Page 32 VQT1D15ENG.book 32 ページ 2006年10月30日 月曜日 午後8時23分 Manual iris/gain adjustment ≥If the value does not become “OPEN”, you cannot adjust the gain value. ≥If the gain value is increased, the noise on the screen increases. ≥Depending on the zoom magnification, there are iris values that are not displayed. ª...
-
Page 33: Playback Mode
VQT1D15ENG.book 33 ページ 2006年10月30日 月曜日 午後8時23分 Playback mode Playing back tape ≥Set to Tape Playback Mode. Operate with joystick. 1/;: Playback/Pause Rewind/Review playback (Reverts to playback with the 1/; icon.) Fast forward/Cue playback (Reverts to playback with the 1/; icon.) ∫: Stop ≥During cue/review playback, fast-moving images may show noise as a mosaic. -
Page 34: Variable-Speed Search Function
VQT1D15ENG.book 34 ページ 2006年10月30日 月曜日 午後8時23分 Frame-by-frame playback During playback, press the [;] button on the remote control. Press the [E] button or the [D] button on the remote control. ≥Pushing the [s /VOLr] lever towards [T] (normal direction) or towards [W] (reversed direction) of this camera during playback pause also turns into the frame-by-frame playback. -
Page 35: Playback On Tv
VQT1D15ENG.book 35 ページ 2006年10月30日 月曜日 午後8時23分 Playback on TV Images recorded by this camera can be played back on a TV. ≥Insert a recorded tape into this camera. Connect the movie camera and a TV. [VIDEO IN] [AUDIO IN] S-VIDEO ≥Connect the movie camera and a TV by using the AV cable 1. -
Page 36: Deleting Files Recorded On A Card
VQT1D15ENG.book 36 ページ 2006年10月30日 月曜日 午後8時23分 ª To display multiple playback files Multiple files on the card (6 files on 1 screen) are displayed. Move the [s /VOLr] lever to switch the images. NO.25 NO.25 NO.25 100-0005 100-0005 100-0005 Towards [r]: Full-screen display (Displays 1 image.) Towards [`]: Multi-screen display... -
Page 37: Formatting A Card
VQT1D15ENG.book 37 ページ 2006年10月30日 月曜日 午後8時23分 Formatting a card Please be aware that if a card is formatted, then all the data recorded on the card will be erased. Store important data on a personal computer, etc. ≥Set to Picture Playback Mode. Set [ADVANCE] >>... -
Page 38: Writing The Printing Data On A Card (Dpof Setting)
VQT1D15ENG.book 38 ページ 2006年10月30日 月曜日 午後8時23分 Writing the printing data on a card (DPOF setting) You can write the data of pictures to be printed, number of copies, and other information (DPOF data) onto the card. ≥Set to Picture Playback Mode. Set [ADVANCE] >> [DPOF SET] >> [SET]. Move the joystick to select a file to be set, and then press it. -
Page 39: Edit Mode
VQT1D15ENG.book 39 ページ 2006年10月30日 月曜日 午後8時23分 Edit mode Recording from a tape onto a card Still pictures can be recorded on a memory card from scenes that have already been recorded on a cassette. ≥Set to Tape Playback Mode. ≥Insert a tape which already has recorded contents and a card. -
Page 40: Using The Dv Cable For Recording (Digital Dubbing)
VQT1D15ENG.book 40 ページ 2006年10月30日 月曜日 午後8時23分 ≥For more information, refer to the operating instructions for your TV set and recorder. ≥When you do not need functional indications or date and time indications, press the [EXT DISPLAY] button on the remote control for no indication. -
Page 41: Audio Dubbing
VQT1D15ENG.book 41 ページ 2006年10月30日 月曜日 午後8時23分 Audio dubbing You can add music or narration to the recorded cassette. ≥Set to Tape Playback Mode. Insert an external microphone securely into the [MIC] terminal as far as it will go. Find a scene that you want to add sound to, and press the [;] button on the remote control. -
Page 42: Printing Pictures By Directly Connecting To The Printer (Pictbridge)
VQT1D15ENG.book 42 ページ 2006年10月30日 月曜日 午後8時23分 Printing pictures by directly connecting to the printer (PictBridge) To print pictures by directly connecting the movie camera to the printer, use a printer compatible with PictBridge. (Read the operating instructions for the printer.) ≥Insert a card and set to Picture Playback Mode. -
Page 43: Menu
VQT1D15ENG.book 43 ページ 2006年10月30日 月曜日 午後8時23分 Menu Menu list Menu figures and illustrations are provided for easy-to-understand explanations, and so they are different from the actual menu indications. ª [TAPE RECORDING MENU] 1) [BASIC] [SCENE MODE] -29- [REC SPEED] -19- [BLANK SEARCH] -21- [WIND CUT] -27-... - Page 44 VQT1D15ENG.book 44 ページ 2006年10月30日 月曜日 午後8時23分 ª [CARD RECORDING MENU] 1) [BASIC] [SCENE MODE] -29- [PICT. QUALITY] -22- [PICTURE SIZE] -22- [SELF TIMER] -27- [CLOCK SET] -15- 2) [ADVANCE] [BURST MODE] -28- [SHTR EFFECT] -22- [DATE/TIME] -45- [INITIAL SET] -46- 3) [SETUP] [REC LAMP] -45- [DISPLAY]...
-
Page 45: Menus Related To Taking Pictures
VQT1D15ENG.book 45 ページ 2006年10月30日 月曜日 午後8時23分 Menus related to taking pictures ª [DATE/TIME] This switches between date and time indications. ≥The movie camera automatically records the date and time of picture taking on the tape. ≥You can also show or change the date/time indication by repeatedly pressing the [DATE/ TIME] button on the remote control. -
Page 46: Menus Related To Playback
VQT1D15ENG.book 46 ページ 2006年10月30日 月曜日 午後8時23分 Menus related to playback ª [AV JACK] This switches among the output settings of the AV/headphone terminal. [OUT/Ë]: Automatically switches between AV and headphone output. [OUT]: Use this setting when image or sound is not output normally to the TV in [OUT/Ë]. -
Page 47: Others Indications
VQT1D15ENG.book 47 ページ 2006年10月30日 月曜日 午後8時23分 Others Indications Various functions and the movie camera status are shown on the screen. Basic indications Remaining battery power 0h00m00s00f: Time code 15:30:45: Date/Time indication Recording indications R0:45: Remaining tape time ≥Remaining tape time is indicated in minutes. (When it reaches less than 3 minutes, the indication starts flashing.) Standard Play mode... -
Page 48: Warning/Alarm Indications
VQT1D15ENG.book 48 ページ 2006年10月30日 月曜日 午後8時23分 ≥For images not recorded with this movie camera, the size display is determined as follows according to the number of horizontal pixels. 2048 or more QXGA 1600 or more, less than 2048 UXGA 1280 or more, less than 1600 SXGA 1024 or more, less than 1280 800 or more, less than 1024... -
Page 49: Functions Cannot Be Used Simultaneously
VQT1D15ENG.book 49 ページ 2006年10月30日 月曜日 午後8時23分 CHANGE MODE TO USE USB: The USB cable is connected to the movie camera in Card Recording Mode. DISCONNECT USB CABLE: You are attempting to turn the mode dial in PC mode with the USB cable connected to the movie camera. -
Page 50: Before Requesting Repair (Problems And Solutions)
VQT1D15ENG.book 50 ページ 2006年10月30日 月曜日 午後8時23分 ≥Scene mode ≥When setting the [AUTO/ MANUAL/FOCUS] switch to [AUTO] ≥When the colour night view function is used ≥Change of ≥When digital zoom white balance (10k or higher) is used ≥When the colour night view function is used ≥When a menu is displayed ≥Adjusting the... - Page 51 VQT1D15ENG.book 51 ページ 2006年10月30日 月曜日 午後8時23分 5: The movie camera cannot be operated though powered up. The movie camera does not operate normally. • Remove the cassette and then press the [RESET] button. ( ) If normal conditions are -53- not restored yet, turn off the power. Then, about 1 minute later, turn on the power again.
- Page 52 VQT1D15ENG.book 52 ページ 2006年10月30日 月曜日 午後8時23分 Playback (Sound) 1: Sound is not played back from the built-in speaker of the movie camera or the headphones. 0 Is the volume too low? During playback, push the [s /VOLr] lever to display the volume indication and adjust it.
- Page 53 VQT1D15ENG.book 53 ページ 2006年10月30日 月曜日 午後8時23分 5: During playback, [UNPLAYABLE CARD] is displayed. • The image was either recorded in a different format, or data is damaged. Others 1: The indication disappears, the screen is frozen, or no operation can be performed. •...
-
Page 54: Cautions For Use
VQT1D15ENG.book 54 ページ 2006年10月30日 月曜日 午後8時23分 Cautions for Use In the event of abnormal operation (e.g. if the unit emits smoke or an unusual smell), immediately stop operating the unit and consult the Panasonic Customer Care Centre on 132600. ª About condensation... - Page 55 VQT1D15ENG.book 55 ページ 2006年10月30日 月曜日 午後8時23分 ≥Recordings on the tape may be damaged, or images may be distorted, by strong magnetic fields created by speakers or large motors. ≥Electromagnetic wave radiation generated by digital circuits including microprocessor may adversely affect the movie camera, causing the disturbance of images and sounds.
- Page 56 VQT1D15ENG.book 56 ページ 2006年10月30日 月曜日 午後8時23分 ≥To store the battery for a long period of time, we recommend you charge it once every year and store it again after you have completely used up the charged capacity. ≥Dust and other matter attached to the battery terminals should be removed.
-
Page 57: Explanation Of Terms
VQT1D15ENG.book 57 ページ 2006年10月30日 月曜日 午後8時23分 ª LCD monitor/viewfinder LCD monitor ≥When the LCD monitor gets dirty, wipe it with a dry soft cloth. ≥In a place with drastic temperature changes, condensation may form on the LCD monitor. Wipe it with soft dry cloth. ≥If your movie camera is extremely cold, the LCD monitor is slightly darker than usual immediately after you turn the power on. - Page 58 VQT1D15ENG.book 58 ページ 2006年10月30日 月曜日 午後8時23分 ª White balance The image recorded by the movie camera may become bluish or reddish under the influence of light sources. To avoid such phenomena, adjust the white balance. White balance adjustment determines the white colour under different light sources. By recognizing which is the white colour under sunlight and which is the white colour under a fluorescent lamp, the movie camera can adjust...
-
Page 59: Specifications
SD Memory Card (8 MB/16 MB/32 MB/64 MB/ 128 MB/256 MB/512 MB/1 GB/2 GB (Maximum) Please confirm the latest information on the following website. http://panasonic.co.jp/pavc/global/cs (This Site is English only.) Still picture recording file format: JPEG (Design rule for Camera File system, based on Exif 2.2 standard), DPOF corresponding... - Page 60 VQT1D15ENG.book 60 ページ 2006年10月30日 月曜日 午後8時23分 Maximum number of still pictures recordable on an SD Memory Card (optional) PICTURE [640] [1280] SIZE PICT. QUALITY 8 MB 16 MB 32 MB 64 MB 128 MB 1760 256 MB 1760 3520 512 MB 3520 7040 1 GB 7040...
- Page 61 For_Anzen_memo.fm 66 ページ 2006年10月30日 月曜日 午後4時8分 VQT1D15...
- Page 62 VQT1D15ENG.book 61 ページ 2006年10月30日 月曜日 午後8時23分 VQT1D15 F0000Nm0 ( 0000 A) Matsushita Electric Industrial Co., Ltd. Web site: http://panasonic.net...