
Related Manuals for WPPO Traditional 25


Summary of Contents for WPPO Traditional 25
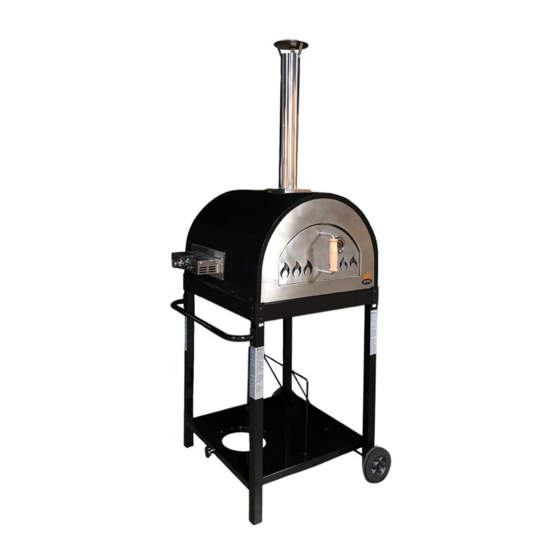
- Page 1 Traditional 25" With Gas User Manual 400 S. Railroad St. Warren, Il 61087 815-745-1021 [email protected] www.wppollc.com...
-
Page 2: Safety Symbols
DANGER If you smell gas: 1.Shut off gas to the appliance. 2.Extinguish any open flame. 3.If odour continues, keep away from the appliance and immediately call the fire department. Failure to follow these instructions could result in fire or explosion which could cause property damage, personal injury or death. - Page 3 WARNING Never leave the appliance unattended. Keep children and pets away from the appliance at all times. The use of alcohol, prescription or non-prescription drugs may impair the consumer's ability to properly assemble or safely operate the appliance. This appliance shall not be used on or in any apartment or condominium balcony or deck.
- Page 4 WARNING Installation Safety Precautions. Use appliance only with LP (liquid propane) gas and the regulator/valve assembly supplied. Installation must conform with local codes or, in the absence of local codes, with the National Fuel Gas Code, ANSI Z223.1/NFPA 54, Storage and Handling of Liquefied Petroleum Gases, ANSI/NFPA 58;...
- Page 5 WARNING Never leave the appliance unattended. Keep children and pets away from the appliance at all times. This appliance is not intended for and should never be used as a heater. Never operate appliance with LP tank out of correct ...
- Page 6 LP (Liquefied Petroleum Gas) LP gas is non toxic, odorless and colorless when produced. For your safety, LP gas has been given an odor (similar to rotten eggs) so that it can be smelled. LP gas is highly flammable and may ignite unecpectedly when mixed with air. ...
- Page 7 WARNING Do not insert any tool or foreign objects into the valve outlet or safety relief valve. You may damage the valve and cause a leak. Leaking propane may result in explosion, fire, severe person-al injury, or death. Never attempt to attach this appliance to the self-contained LP system of a ...
- Page 8 Your gas will have following method of ignition: Ignition device Control Knob (AA battery should be installed inside.) Gas connection Intake Pulse igniter valve Switch button Ignition: 1. With control knobs on the Gas in the “OFF” position, turn on the gas cylinder. To create a spark, you must push &...
- Page 9 CAUTION If burner does not light OR if burner flame is accidentally extinguished, turn knob to OFF, wait 5 minutes, try again. If the burner does not ignite with valve open OR if burner flame accidentally extinguished after lighting, gas will continue to flow out of the burner and could accidentally ignite with risk of injury.
- Page 10 PROBLEM POSSIBLE CORRECTIVE ACTION CAUSE The burner does The connection Check and make sure the regulator coupling nut is tightened to not light. between the the LP tank valve. regulator and LP tank are not in good condition. The LP tank valve The LP tank valve is opened in counter-clockwise direction.
- Page 11 CAUTION All cleaning and maintenance should only be done when the appliance is cool, and with the fuel supply turned off at the LP tank. DO NOT clean any part in a self-cleaning oven. The extreme heat will damage the finish. Correct care and maintenance will keep your appliance operating smoothly.
-
Page 12: Installation Steps
Installation steps... - Page 13 1.Top Shelf 2.Left front leg 3.Left back leg 4.Right front leg 5.Right back leb 6.Fixed plate 7.Bottom Shelf 8.Wheel*2 9.Axle 10.Rack-a(optional) 11.Side handle 12.Firebox assembly 13.Chimney assembly 14.Chimney cover 15.Door assembly 16.Gas burner( optional, need to be purchased separately) 17.Rack-b(optional) 18.PLUG M6*12 screws M10 Lock nuts...
- Page 19 M6*12 screws 2pcs M8 Lock nuts 2pcs...
- Page 20 Fasten the screw with your hand...
-
Page 21: Warranty Information
LIMITED WARRANTY The Problem Can be Remedied in Two Ways: 1.Turn the regulator control to the OFF position. Close the tank valve completely by turning it clockwise until it stops. Check that the Type1 Connection(black/green knob) is completely tightened to the tank valve. Wait 5 seconds for the pressure to equalize and for the flow limiting device to reset Turn tank valve ON(counterclockwise.) Turn the regulator control to an ON position. - Page 22 WPPO LLC 3131 West Orangeville Rd Orangeville Illinois 61060, USA 001-815-616-8314 NEVER cover the pot ALWAYS turn the...
- Page 23 WPPO LLC 3131 West Orangeville Rd Orangeville Illinois 61060, USA 001-815-616-8314 NEVER cover the pot ALWAYS turn the...
-
Page 24: User Information
Oven Location Your WPPO LLC Oven is designed for outdoor use only. When locating your oven, ensure the following: • Maintain a clearance distance of at least 12ft. (3.7m) between the oven and any combustible materials while the oven is in use. Take into consideration walls, ceilings, awnings, canopies, foliage, power lines, construction materials, and clearance to combustibles from all directions of the oven when in use. - Page 25 USER INFORMATION NOTICE • When heating up your oven, gradually increase the flame up to the desired temperature. Maximum airflow is recommended during this process, so do not place the door over the opening of the oven after lighting the fire. •...
- Page 26 USER INFORMATION Smoking Your oven may be used as a smoking unit. Add wood chips to the firewood and restrict air flow to the oven buy closing the damper on the Chimney. Extinguishing To extinguish your oven, stop adding firewood and allow the fire to die. Oven Maintenance and Cleaning CAUTION OVEN DAMAGE...
-
Page 27: Warranty
Warranty Claim, if known. Please examine all of the contents of your delivery as soon as possible after receipt and inform WPPO Llc within fifteen (15) days if any items... - Page 28 GET FIRED UP WITH FAMILY, FRIENDS, & FOOD 400 S. Railroad St. Warren, Il 61087 815-745-1021 [email protected] www.wppollc.com...