Table of Contents
Quick Links
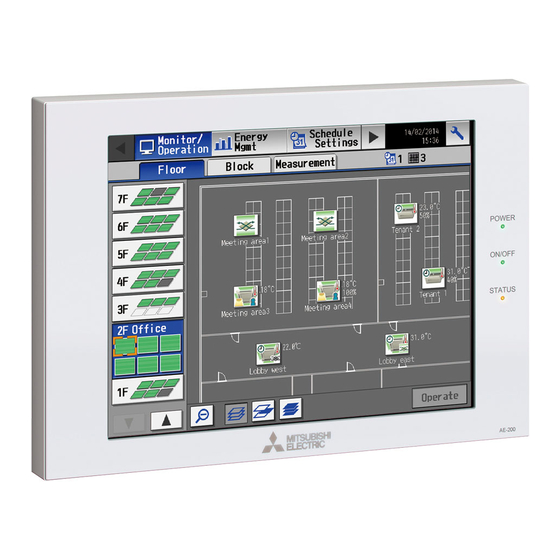
Air Conditioning Control System
Centralized Controller
AE-200A/AE-50A
AE-200E/AE-50E
Before using the controller, please read this Instruction Book carefully to ensure proper operation.
Retain this manual for future reference.
-Web Browser for Initial Settings-
Contents
1. Introduction .........................................................................2
1-1. Terms Used in This Manual ........................................................2
1-2. PC Requirements .......................................................................2
TG-2000A ...................................................................................2
2. Setting the Operating Environment .....................................3
2-1. Setting the IP Address of the PC ................................................3
2-2. Setting the Web Browser ............................................................5
3. Logging in to the Web Browser for Initial Settings ..............8
4. Initial Settings .................................................................... 11
4-1. Date and Time ..........................................................................12
4-2. Basic System ............................................................................13
4-3. Groups ......................................................................................22
4-4. Interlocked LOSSNAY ..............................................................25
4-5. Blocks .......................................................................................26
5. Functions 1 .......................................................................27
5-1. E-Mail .......................................................................................27
5-2. Peak Cut (Energy-save control function) ..................................31
5-3. Measurement ............................................................................39
5-4. Energy Management Settings ..................................................43
6. Functions 2 .......................................................................44
6-1. Set Temperature Range Limit ...................................................44
6-2. Night Mode (quiet operation) Schedule ....................................45
6-3. System-changeover ..................................................................46
7. Functions 3 .......................................................................47
7-1. External Temperature Interlock .................................................47
7-2. Night Setback Control ...............................................................49
7-3. Interlock control ........................................................................51
7-4. AHC Port Name Settings ..........................................................60
8. User Settings ....................................................................61
9. Utility .................................................................................63
9-1. Back up/import settings data ....................................................63
10. License registration for optional functions .........................65
Instruction Book
Table of Contents

Related Manuals for Mitsubishi Electric AE-200A-50A


Summary of Contents for Mitsubishi Electric AE-200A-50A
-
Page 1: Table Of Contents
Air Conditioning Control System Centralized Controller AE-200A/AE-50A AE-200E/AE-50E Instruction Book –Web Browser for Initial Settings– Contents 1. Introduction .................2 1-1. Terms Used in This Manual ............2 1-2. PC Requirements ...............2 1-3. Notes on using the integrated centralized control software TG-2000A ...................2 2. -
Page 2: Introduction
1. Introduction This Instruction Book explains how to make initial settings for the AE-200A/AE-50A and AE-200E/AE-50E using a Web browser. 1-1. Terms Used in This Manual - “Centralized Controller AE-200A/AE-200E” is referred to as “AE-200.” - “Centralized Controller AE-50A/AE-50E” is referred to as “AE-50.” - “Booster unit”... -
Page 3: Setting The Operating Environment
2. Setting the Operating Environment This chapter explains how to make PC settings and Web browser settings to monitor and operate the air conditioning units. 2-1. Setting the IP Address of the PC Follow the instructions below to set the PC’s IP address for the Web browser to recognize the AE-200 unit. The PC’s IP address must have the same network address as the AE-200/AE-50’s IP address. - Page 4 (4) In the [Internet Protocol Version 4 (TCP/IPv4) Properties] window, check the radio button next to [Use the following IP address]. Enter the PC’s IP address (e.g., [192.168.1.101]) in the [IP address] field, and enter the subnet mask [255.255.255.0] (unless otherwise specified) in the [Subnet mask] field.
-
Page 5: Setting The Web Browser
2-2. Setting the Web Browser Web browser setting varies with the Internet connection type. See the sections below for how to make Web browser settings for different types of Internet connection. To prevent unauthorized access, always use a security device such as a VPN router when connecting the AE-200/AE-50 to the Internet. - Page 6 2-2-2. Dial-up Internet connection To monitor and operate the air conditioning units from a PC that connects to the Internet through a dial-up connection, follow the instructions below to set the environment for the Web browser. (1) Click [Tools] in the menu bar, then click [Internet options]. (2) In the [Internet Options] window, click the [Connections] tab.
- Page 7 (2) In the [Internet Options] window, click the [Connections] tab. (3) Check the radio button next to [Never dial a connection] in the middle of the window. (4) Click [LAN settings] under [Local Area Network (LAN) settings]. (5) In the [Local Area Network (LAN) Settings] window, check [Bypass proxy server for local addresses], and click [Advanced].
-
Page 8: Logging In To The Web Browser For Initial Settings
3. Logging in to the Web Browser for Initial Settings (1) Enter the web page address in the address field of the Web browser as follows: http://[IP address of each AE-200/AE-50]/init/administrator.html Press the [Enter] key. A login screen will appear. Note: If the IP address of the AE-200/AE-50 is [192.168.1.1], the web page address is [http: //192.168.1.1/init/administrator.html]. - Page 9 (2) Enter the user name and the password in the login screen, and click [Login]. A setting screen will appear. The table below shows the default user names, passwords, and functions that are available for maintenance users and building managers. Default Default User...
- Page 10 Encrypting the communication data and logging in to the Web browser (HTTPS connection) AE-200/AE-50 can encrypt communication data using HTTPS (SSL). When connecting the AE-200/AE-50 to the LAN that is accessible to the general public, it is recommended that the following settings be made so that the units are monitored and controlled on the encrypted web page. Note: Depending on the operating system or the Java version, HTTPS encrypted communication may not be enabled properly.
-
Page 11: Initial Settings
4. Initial Settings This chapter explains how to set the initial settings on the Web Browser for Initial Settings. Note: When one or more AE-50 controllers are connected, all initial settings must be made on each AE-50’s Web browser. Important ●... -
Page 12: Date And Time
4-1. Date and Time Click [Initial Settings] in the menu bar, and then click [Date and Time] to access the date and time settings screen. Set the current date and time, and then click [Save Settings]. Note: The date and time settings may not be accessible if logged in as a building manager. Note: The date and time settings made on this screen will be reflected on all the units in the M-NET system, all connected AE-50 units, and the AE-200 units whose [Time Master] setting is set to [Sub]. -
Page 13: Basic System
4-2. Basic System Click [Initial Settings] in the menu bar, and then click [Basic System] to access the Basic System settings screen. Make necessary basic system settings such as AE-200/AE-50 unit settings, network settings, and M-NET settings, and then click [Save Settings] to send the settings to the AE-200/AE-50. A message will appear asking whether or not to restart the AE-200/AE-50. - Page 14 4-2-2. M-NET Settings (1) Enter [0] in the [M-NET Address] field (unless otherwise specified). (2) When the local remote controller operation is prohibited on the Web Browser for System Maintenance Engineer, this setting determines the scope of its applicability. Select [SC/RC] to prohibit the operation from both the sub system controllers and the remote controllers.
- Page 15 (2) Select [Emergency Stop (Level signal)] when using a level signal to collectively run or stop all the air conditioning units connected to the AE-200 or AE-50 in an emergency. During an emergency stop, the ON/ OFF operation from the local remote controllers will be prohibited, and the ON/OFF operation and Prohibit/ Permit settings on the AE-200 or AE-50 will be prohibited.
- Page 16 (4) Select [ON/OFF/Prohibit/Permit (Pulse signal)] when using a pulse signal to collectively run or stop all the air conditioning units connected to the AE-200 or AE-50, or to collectively prohibit or permit the operation from the local remote controllers. ON signal OFF signal Prohibit signal Permit signal...
- Page 17 4-2-4. Advanced Setting 4-2-4-1. Time Master/Sub In the [Time Master] section, select [Master] or [Sub]. The default setting is [Master]. This setting is required to change only for a system with multiple AE-200 controllers. Set to [Master] on only one of the AE-200 controllers in a system, and set to [Sub] on the rest of the AE-200 controllers. The date and time synchronization is performed from the AE-200 whose [Time Master] setting is set to [Master] to the AE-200 whose [Time Master] setting is set to [Sub].
- Page 18 4-2-5. Network Settings Network settings vary depending on whether the AE-200/AE-50 is connected to a dedicated LAN or an existing LAN. See the sections below for how to set the AE-200/AE-50 IP, subnet mask, and gateway addresses in the [Network Settings] section. Note: Do not use the LAN2 port.
- Page 19 (3) When monitoring the system remotely or using e-mail function via a dial-up router, enter the router IP address in the [Gateway] field. Leave the [Gateway] field blank when not connecting a dial-up router. [Remote Monitoring System example] Telecommunication Network Dial-up router Dial-up router, cellular phone etc.
- Page 20 4-2-6. Display Format Follow the instructions below to set the items in the [Display Format] section. (1) In the [Unit of Temperature] section, select [ºC] or [ºF]. (2) In the [Pressure unit of measure] section, select [MPa], [PSI], or [kgf/cm (3) In the [Date Format] section, select the desired display format for year, month, and date.