Quick Links
Before you begin - Read these instructions completely and carefully.
IMPORTANT – OBSERVE ALL GOVERNING CODES AND ORDINANCES.
Note to Installer – Be sure to leave these instructions with the Consumer.
Note to Consumer – Keep these instructions with your Owner's Manual for future reference.
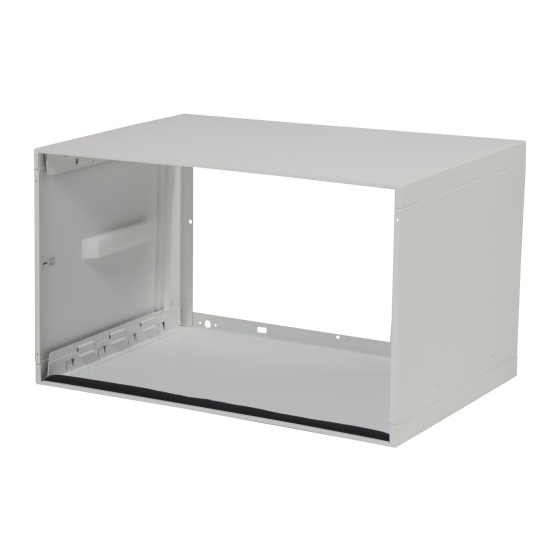
WALL SLEEVE LOCATION
As a general rule, the air conditioner should be located in an outside wall to ensure proper distribution of
conditioned air. It should be located in a portion of the wall where there is no electrical wiring or plumbing, and
where there are no obstructions immediately inside or outside.
NOTE: Handle the wall sleeve carefully.
CRITICAL DIMENSIONS
Outside wall
"C"
NOTE: Care should be taken in location of electrical
supply entry in relationship to wall sleeve to ensure
access to power once the unit is installed.
Ceiling
"A"
"B"
Roomside
"D"
Installation Instructions
for your new
RAB24
Standard Steel Wall Sleeve for 24"
Thru-The-Wall Air Conditioners
Dimensions Recommended Installation Clearance
A
min.
B
C
min.
D
E
Left/Right side of wall sleeve to adjacent
INSTALL WALL SLEEVE LEVEL FROM SIDE TO SIDE
AND WITH A SLIGHT TILT FROM FRONT TO REAR
Top of wall sleeve
Top of Sleeve
"E"
Outside wall
"E"
31-5000413 Rev. 2 06-22 GEA

Related Manuals for GE RAB24


Summary of Contents for GE RAB24
- Page 1 Installation Instructions for your new RAB24 Standard Steel Wall Sleeve for 24” Thru-The-Wall Air Conditioners Before you begin - Read these instructions completely and carefully. IMPORTANT – OBSERVE ALL GOVERNING CODES AND ORDINANCES. Note to Installer – Be sure to leave these instructions with the Consumer.
-
Page 2: Installation Instructions
Installation Instructions STEP 1: Preparation of the wall STEP 2: Assemble Wall Sleeve The wall sleeve should be installed during construction and lintels should be used to support the block above Front View the wall sleeve. The wall sleeve will not support the con- crete block or brick. - Page 3 Installation Instructions STEP 3: Installation of the wall sleeve in INSTALLATON OF WEATHER BARRIER (cont) 3. Insert the push pins into the 4 holes in the weather the wall opening (cont.) barrier. OPTION 2 * Remove weather barrier Installation of the wall sleeve into wall using prior to unit installation/ mounting brackets operation*...
- Page 4 RAD10 External Drain from the unit and the building. To install, follow the instruction manual included with the kit. A Quality Product of GE Appliances...
- Page 5 RAB24 EMPLACEMENT DE LA GAINE En règle générale, le climatiseur doit être placé dans un mur extérieur pour assurer une distribution d’air climatisé convenable. Cette section de mur doit être dépourvue de câblage électrique, de plomberie et d’obstructions DIMENSIONS CRITIQUES Dimensions Dégagements d’installation recommandés...
-
Page 6: Étape 1: Préparation Du Mur
ÉTAPE 1: Préparation du mur ÉTAPE 2 : Préparation de la gaine pour Il faut installer la gaine murale pendant la construction et utilis murale. La gaine ne supportera pas les blocs de béton ou les niveau. Front View Il faut pratiquer des ouvertures dans le cas d’une construction complètement. - Page 7 OPTION 2 l’utilisation de l’unité* l’un des trous du support de montage, procure la saillie désirée l’ouverture murale trous de montage latéraux de la gaine sont décalés par rapport OPTION 1 en plastique dans les trous vides. Construction du cadre et parement en briques prévenir le scellement des trous de vidange dans le rebord arrière de la gaine et, si on le désire, faciliter l’installation ALTERNATE OPENING...
- Page 8 Des dispositions doivent être prises pour que la prise équivalent. Linteau en acier Steel lintel Calfeutrage* Caulk* Calfeutrage* Caulk* Appareil Room Boîtier Sleeve dans la cabinet pièce Outdoor extérieure grille Calfeutrage* Caulk* Calfeutrage* Caulk* Inside Finishe oor or top of carpet MODEL “A”...