ZKTeco InBio160 Pro User Manual
Access control panel
Hide thumbs
Also See for InBio160 Pro:
- Installation and connection manual (3 pages) ,
- User manual (40 pages)

Related Manuals for ZKTeco InBio160 Pro


Summary of Contents for ZKTeco InBio160 Pro
- Page 1 USER MANUAL Applicable Models: InBio160/260/460 Pro Access Control Panel Version: 1.0...
- Page 2 Important Statement Thank you for choosing our product. Before use, please read this manual carefully to avoid damage to the device. We remind you that through proper use, you may experience good effect and verification speed. No part of this document can be extracted, copied or transmitted by any means without prior written consent of our company.
- Page 3 About This Manual This manual introduces the operation of user interfaces and menu functions of Applicable Models: InBio160/260/460 Pro Access Control Panel. For the installation, Please refer to Applicable Models: InBio Pro Series Access Control Panels Installation Guide. Not all the devices have the function with★, the real product prevails. ...
-
Page 4: Table Of Contents
Table of Contents SAFETY INSTRUCTIONS ........................... 1 ....................... 1 MPORTANT ECURITY NSTRUCTIONS ........................... 2 NSTALLATION NSTRUCTIONS SYSTEM INTRODUCTION ......................... 4 ........................4 YSTEM UNCTIONAL ARAMETERS ......................... 4 RODUCT ECHNICAL ARAMETERS ........................... 5 ONTROL ANEL NDICATORS INSTALLATION AND CONNECTION ......................7 .......................... -
Page 5: Safety Instructions
Safety Instructions Important Security Instructions Read and follow the instructions carefully before operation. Please keep the instructions for future reference. Accessories: Please use the accessories recommended by the manufacturer or delivered with the product. Other accessories are not recommended, including major alarming systems and monitoring systems. -
Page 6: Installation Instructions
Power supply: Operate the equipment with only the type of power supply indicated on the label. Contact the technician for any uncertainty about the type of power supply. Violation of any of the following cautions is likely to result in personal injury or equipment failure. - Page 7 To protect the access control system against the self-induced electromotive force generated by an electronic lock at the instant of switching off/on, it is necessary to connect a diode in parallel (please use the FR107 delivered with the system) with the electronic lock to release the self-induced electromotive force during onsite connection for application of the access control system.
-
Page 8: System Introduction
System Introduction The Access Control management system is a new modernized security management system, which is an effective measure of security and protection management. It is mainly used to manage the entrances and exits of highly secured places, such as banks, hotels, equipment rooms, offices, smart communities, and factories. -
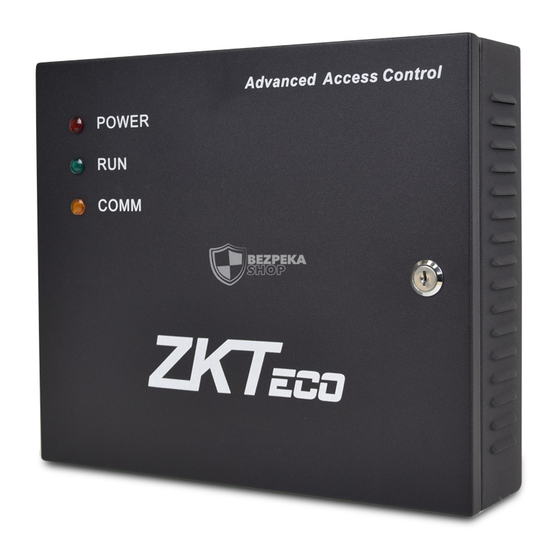
Page 9: Control Panel Indicators
Outline dimensions of the control PCB: 181mm(length) × 106mm (width) for InBio160/260 Pro; 226mm (length) × 106mm (width) for InBio460 Pro. External box dimensions: 350(L)mm × 300(W)mm × 90(H)mm. Valve regulated lead-acid battery: Constant voltage charge voltage regulation ... - Page 10 Indicator Diagram: Figure 2-1 Indicators in the InBio460 Pro...
-
Page 11: Installation And Connection
Installation and Connection Installation Procedure Appearance and Internal of the panel box: Installation steps for the control panel:... -
Page 12: Installation Of Access Control Panel Wires
Installation of Access Control Panel Wires +12V Power line TCP/IP Network communication wire RS485 Network communication wire Ceiling Control Panel Door sensor Electronic lock Exit button Outdoor wiegand Indoor wiegand card reader card reader Indoor Outdoor Figure 3-1 Access Control Panel Wire Installation Diagram Remarks: Ensure the power supply is disconnected before connecting the wires;... -
Page 13: Control Panel System Installation
Control Panel System Installation Figure 3-2 Schematic Diagram of System Installation... -
Page 14: Control Panel Connection Terminals
NOTE: The diagram above takes the InBio460 Pro for example. By contrast, only one-door two-way access is applicable to the InBio160 Pro system; only two-door one-way or two-door two-way access is applicable to the InBio460 Pro system. The access control management system consists of two parts: Management Workstation (PC) and Control panel. - Page 15 InBio260 Pro Terminal connection diagram...
- Page 16 InBio460 Pro Terminal connection diagram...
-
Page 17: Connection With Door Sensors , Exit Switches , Auxiliary Input Devices , And Pc485 Extension
SD card function: Backup event records of access control for client. Ports of InBio160/260/460 Pro Control Panel: InBio460 Pro InBio160 Pro InBio260 Pro Functional Port (Four-Door One-Way/ (One-Door Two-Way) (Two-Door Two-Way) Two-Door Two Way) - Page 18 door sensor can be omitted if it is unnecessary to monitor the open/closed status of a door, raise the alarm when the door is not closed for a long time, monitor if there is unauthorized access, and use the interlock function. Exit switch ...
- Page 19 PC485 extension communication The Control panel supports extensive modules which like EX0808, through PC485. An inBioX60 Pro can connect eight EX0808 at most. As shown in the following figure. Figure 3-4 Connection between inBio460 Pro and EX0808 through PC485 NOTE: A maximum of eight EX0808 extended boards can be connected to an inBio460 Pro controller.
-
Page 20: Connection With Readers
Connection with RS485 readers The InBio160 Pro can connect two RS485 readers in the one-door two-way mode. The InBio260 Pro provides four readers, which can be connected in the two-door two-way mode. The InBio460 Pro provides four readers, which can be connected in the two-door two-way or four-door two-way mode. - Page 21 Connection with Wiegand Readers The InBio160 Pro can connect two Wiegand readers in the one-door two-way mode. The InBio260 Pro provides four readers, which can be connected in the two-door two-way mode. The InBio460 Pro provides four readers, which can be connected in the two-door two-way or four-door one-way mode.
- Page 22 Figure 3-6 The connection between the Control Panel and Wiegand Readers Wiegand common connection reference as shown below: NOTE: For more detailed information on the use of QR50 such as connection and software configuration, please refer to the QR50 user manual.
-
Page 23: Relay Output Connection
Relay Output Connection InBio160 Pro has two relays (one used as control lock by default, and the other one used as auxiliary output); InBio260 Pro has four relays (two used as control locks by default, and the other two used as auxiliary outputs);... - Page 24 Take the InBio160 Pro as an example here, as shown in the following figure. Figure 3-7 “Dry mode” wiring diagram of lock connecting with external power supply(recommend) Figure 3-8 ”Wet mode” wiring diagram of lock and controller common power supply...
-
Page 25: Access Control Operator Panel System Power Supply Structure
Access Control Operator Panel System Power Supply Structure An access control operator panel is powered by +12V DC. Generally, to reduce power interference... - Page 26 between control panels, each control operator panel should be powered separately. When high reliability is required, control panels and electronic locks should be powered respectively. To prevent power failure of a control operator panel from making the whole system unable to work normally, the access control management system is usually required to have one UPS at least, and access control locks are powered externally to guarantee the access control management system can still work normally during power failure.
-
Page 27: Equipment Communication
Equipment Communication The background PC software can communicate with the system according to two protocols (TCP/IP and RS485) for data exchange and remote management. Access Control Networking Wires and Wiring The power supply is 12V DC converted from 220V. As an electronic lock has a large current, it generates a strong interference signal while functioning. -
Page 28: Tcp/Ip Communication
troughs or pipes. Noted that a shielding enclosure can have a shielding effect only when it is grounded reliably. Ground wire connection method: Reliable large-diameter ground wires in compliance with applicable national standards are needed on the wiring site and should be connected in a tree form to avoid DC loop. -
Page 29: Rs485 Communication
RS485 Communication RS485 communication wires are made of internationally accepted RVSP wires (shielded twisted pairs), which prove effective to prevent and shield interference. RS485 communication wires should be connected by means of bus cascade instead of in a star form, to achieve a better shielding effect by reducing signal reflection during communications. -
Page 30: Dip Switch Settings
DIP Switch Settings This part introduces how to set the RS485 address setting, factory setting and terminal resistance setting of the control panel through the DIP switch. 485 address setting Places 1-6 of the DIP switch are reserved to set device number for RS485 communication. The code is binary, and the lower places are in the front. - Page 31 Switch Setting Place Address...
-
Page 32: Zkpanelweb
Connect the controller to the network or PC, start the browser, enter the IP address of the controller, which is https://192.168.1.201 by default. Then you can visit the Web Server. When Web Server is used, “User Name“ and “Password“ should be set firstly. The default “user name” is admin and the default “password” is zkteco@12345. - Page 33 Click Sign In to access the ZKPanelWeb. NOTE: IP addresses of both the server (PC) and the controller must be in the same network segment. IP address of the controller could be found by searching devices with the BioSecurity software ([Access - Access Device - Device - Search Device]).
- Page 34 Language Settings Click , change the language in which the server interface is displayed, and click Confirm. Use Conditions of the Server Click , and you can view the version of the current server, as well as thebrowser and resolution recommended for the server.
- Page 35 Exit Click , and then click Confirm to return to the server login page. Network Settings TCP/IP Settings Function introduction: Set the TCP/IP communication parameters, which are used in the communications between device and PC.
- Page 36 Operating steps: Click Network Setting > TCP/IP Settings. Input the device’s IP address, Subnet Mask, Default Gateway. IP address: the default IP is 192.168.1.201, and you can modify according to the actual. Subnet Mask: the default subnet mask is 255.255.255.0, and you can modify according ...
- Page 37 Port Settings Http Port: Indicates that the client initiates an HTTP request to a specified port on the server. the default HTTP Port is 80, and you can modify it according to the actual. Communication Password Communication Password: Indicates that network communication is encrypted. The default value is null, and you can set its value.
- Page 38 Time Settings You can manually configure the controller time or synchronize the controller time with the PC time, and click Confirm to complete the setting. System Settings Click Reboot. The device will be restarted. Device Information ...
-
Page 39: Connect To Zkbiosecurity Software
Connect to ZKBioSecurity Software Login to ZKBioSecurity software, click System > Communication > Communication Monitor to set the ADMS Service Port, as shown in the figure below: 4.6.1 Add Device on the Software Add the device by searching. The process is as follows: Click Access >... - Page 40 After downloading and installing the App, the user needs to set the Server before login. The steps are given below: In [System] > [Basic Management] > [Parameters], set Enable QR Code to ‘’Yes’’, and select the QR code status according to the actual situation. The default is Dynamic, the valid time of the QR code can be set.
- Page 41 Open the App on the Smartphone. On the login screen, tap [Server Setting] and type the IP Address or the Domain Name of the Server, and its Port Number. Tap the QR Code icon to scan the QR code of the new App client. After the client is identified successfully, set the Client Name and tap [Connection Test].
- Page 42 The QR code can replace a physical card on a specific device to achieve contactless authentication to open the door. When using this function for the first time, the App will prompt to authorize the modification of screen brightness settings, as shown in the figure: The QR code is automatically refreshed for every 30s, and it also supports manual refresh.
-
Page 43: Privacy Policy
Privacy Policy Notice: To help you better use the products and services of ZKTeco and its affiliates, hereinafter referred as “we”, “our”, or “us”, the smart service provider, we consistently collect your personal information. Since we understand the importance of your personal information, we took your privacy sincerely and we have formulated this privacy policy to protect your personal information. - Page 44 IV. Others You can visit https://www.zkteco.com/cn/index/Index/privacy_protection.html to learn more about how we collect, use, and securely store your personal information. To keep pace with the rapid development of technology, adjustment of business operations, and to cope with customer needs, we will constantly deliberate and optimize our privacy protection measures and policies.
-
Page 45: Eco-Friendly Operation
Eco-friendly Operation The product's "eco-friendly operational period" refers to the time period during which this product will not discharge any toxic or hazardous substances when used in accordance with the prerequisites in this manual. The eco-friendly operational period specified for this product does not include batteries or other components that are easily worn down, and must be periodically replaced. - Page 46 ZK Building, Wuhe Road, Gangtou, Bantian, Buji Town, Longgang District, Shenzhen China 518129 Tel: +86 755-89602345 Fax: +86 755-89602394 www.zkteco.com Copyright © 2021 ZKTECO CO., LTD. All Rights Reserved.