Table of Contents
Quick Links
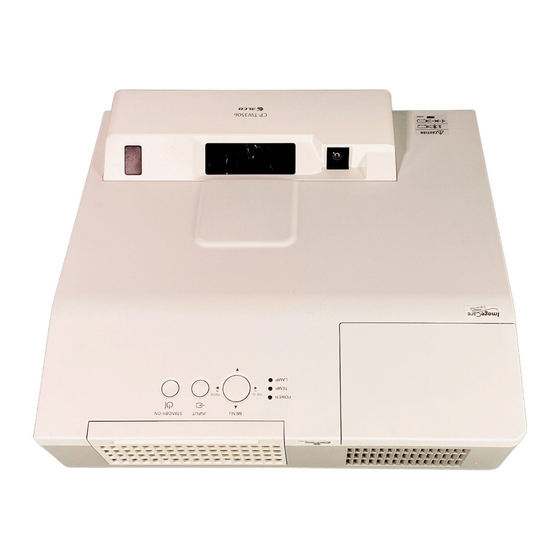
LCD Projector
CP-TW3506
User's Manual (concise)
Thank you for purchasing this projector.
Please read through this manual before using this product, in order to use safely
and utilize well the product.
WARNING
product. See the "Using the CD manual" (
After reading them, store them in a safe place for future reference.
NOTE
manuals" means all the documents provided with this product, and "the product"
means this projector and all the accessories came with the projector.
Contents
............................................ 2
Important safety instruction ..............................2
Regulatory notices .............................. 3
About Electro-Magnetic Interference ................
recycling systems .............................................4
Contents of package........................... 4
Arrangement ....................................... 5
Connecting with your devices ............. 6
Connecting power supply ................... 8
Using the cable cover ......................... 9
Preparing for the remote control ....... 10
Preparing for the interactive pen....... 11
21) to read the manuals in the CD.
Turning on the power ........................ 12
Adjusting the projector's elevator ..... 13
Operation .......................................... 13
Turning off the power ........................ 15
3
Replacing the lamp ........................... 16
and camera lens ............................ 20
Using the CD manual ....................... 21
- Warranty and after-service ........... 23
................................... 22
.. 18
1
Table of Contents

Related Manuals for Hitachi CP-TW3506


Summary of Contents for Hitachi CP-TW3506
-
Page 1: Table Of Contents
LCD Projector CP-TW3506 User's Manual (concise) Thank you for purchasing this projector. Please read through this manual before using this product, in order to use safely and utilize well the product. WARNING 21) to read the manuals in the CD. -
Page 2: Entries And Graphical Symbols Explanation
First of all Entries and graphical symbols explanation The following entries and graphical symbols are used for the manuals and the product as follows, for safety purpose. Please know their meanings beforehand, and heed them. WARNING This entry warns of a risk of serious personal injury or even death. CAUTION This entry warns of a risk of personal injury or physical damage. -
Page 3: Regulatory Notices
Declaration of Conformity Trade name HITACHI Model Number CP-TW3506 Responsible Party Hitachi America, Ltd. Address Telephone Number +1 -800-448-2244 to the following two conditions: (1) This device may not cause harmful interference, and (2) this device must accept any interference received, including interference that may cause undesired operation. -
Page 4: Only For European Union And Countries With Recycling Systems
Regulatory notices (continued) Disposal of Old Equipment and Batteries Only for European Union and countries with recycling systems The above mark is in compliance with the Waste Electrical and Electronic requirement NOT to dispose the equipment including any spent or discarded batteries as unsorted municipal waste, but use the return and collection systems available. -
Page 5: Arrangement
Arrangement Refer to tables T-1 F-1 and F-2 at the end of this manual to determine the screen size and projection distance. The values shown in the table are calculated for a full size screen. Screen size (diagonal) Projection distance (±8%) Screen height (±8%) b1 , b2 22) and service may be required. -
Page 6: Connecting With Your Devices
Arrangement (continued) Connecting with your devices Make sure that all the devices are suitable to be connected with this product, and F-3 to F-6 at the back of this manual. COMPUTER IN1 or COMPUTER IN2 port in COMPUTER IN of the INPUT menu, that port will accept component video signals. LAN port with the computer's LAN port, or with an access point that is connected to the computer with wireless LAN, using a LAN cable. - Page 7 Connecting with your devices (continued) CAUTION is required to use the wireless network function of this projector. off the power of the projector and pull out the power cord’s plug from the outlet. NOTICE ports of the projector are recessed. NOTE microphone away from the speaker.
-
Page 8: Connecting Power Supply
Connecting power supply Put the connector of the power cord into the AC (AC inlet) of the projector. outlet. In a couple of seconds after the power supply connection, the POWER indicator will light up in steady orange. Please remember that when the DIRECT POWER ON function activated, the connection of the power supply make the projector turn on. -
Page 9: Using The Cable Cover
Using the cable cover Utilize the cable cover as the guard and blind for the connecting parts. Insert the three knobs on the cable cover into the knobs Pass the cables through the holes on the bottom of the cable cover. screw CAUTION prevent damage to the cables. -
Page 10: Preparing For The Remote Control
Preparing for the remote control Please insert the batteries into the remote control before using it. If the remote control starts to malfunction, try to replace the batteries. If you will not use the remote control for long period, remove the batteries from the remote control and store them in a safe place. -
Page 11: Preparing For The Interactive Pen
Preparing for the Interactive pen Installing the battery Turn the battery cover of the pen to the left to open it. As illustrated in the diagram, insert the AAA battery into the battery cover with the - end facing the front. (Use the appropriate AAA alkaline batteries (non-rechargeable) in accordance with laws and regulations.) Attach the battery cover by turning it to the right until it is completely closed. -
Page 12: Turning On The Power
Turning on the power STANDBY/ON button POWER indicator and correctly connected to the projector and the outlet. Make sure that the POWER indicator is steady orange. Press the STANDBY/ON button on the INPUT CALIBRATION projector or the remote control. ASPECT AUTO ACCENTUALIZER HDCR FOCUS... -
Page 13: Adjusting The Projector's Elevator
Adjusting the projector's elevator The projector has 2pcs Rear foot for horizontals and inclinations. Spacers on the each elevator foot are installed at the time of shipment, and projector is in a condition to be able to just project. If necessary, detach the spacer, and the elevator feet can be manually twisted to make more precise adjustments. - Page 14 Focusing ASPECT button Use the FOCUS + and FOCUS - buttons on FOCUS - button INPUT CALIBRATION the projector or remote control to adjust the FOCUS + button ASPECT AUTO ACCENTUALIZER HDCR screen focus. D-ZOOM - button D-ZOOM FOCUS PAGE MAGNIFY MYBUTTON VOLUME...
-
Page 15: Turning Off The Power
Operation (continued) NOTE The ASPECT button does not work when no proper signal is inputted. an operation is made. This is not a malfunction. Turning off the power STANDBY/ON button Press the STANDBY/ON button on the POWER indicator projector or the remote control. The message “Power off?”... -
Page 16: Replacing The Lamp
Replacing the lamp the pictures darker or the color tone poor. Note that each lamp has a different lifetime, and some may burst or burn out soon after you start using them. Preparation of a new lamp and early replacement are recommended. To prepare a new lamp, make contact with your dealer and tell the lamp type number. - Page 17 Replacing the lamp (continued) HIGH VOLTAGE HIGH TEMPERATURE HIGH PRESSURE WARNING The projector uses a high-pressure mercury glass lamp. The lamp can break with a loud bang, or burn out, if jolted or scratched, handled while hot, or worn over time. Note that each lamp has a different lifetime, and some may burst or burn out soon after you start using them.
- Page 18 as possible. Type number : UX37191 come together with a replacement lamp for this projector. Turn the projector off, and unplug the power cord. Allow cover. It is recommended to leave the coarse meshed Intake vent or heavily soiled, replace them with new ones. turning its plastic band side up.
-
Page 19: Replacing The Internal Clock Battery
Replacing the internal clock battery Installing the battery is required in some cases. ( Event Scheduling in the User's Manual - Network Guide) A battery is not contained at the time of factory shipment. Please replace a battery according to the following procedure. Turn the projector off, and unplug the power cord. -
Page 20: Caring For The Projection Window And Camera Lens
Caring for the projection window and camera lens of display quality. Please take care of the projection window, being cautious of handling. Turn the projector off and unplug the power cord from the power outlet. And cool the projector down by leaving it for a while as it is. -
Page 21: Using The Cd Manual
Using the CD manual The other manuals for this product are written into the included CD-ROM titled to ensure the proper use. System requirements The system for using the CD-ROM requires the following. Windows ® OS:Microsoft ® Windows ® 7 or later Macintosh ®... - Page 22 Item Product name Liquid crystal projector Liquid Crystal Panel 1,024,000 pixels (1280 horizontal x 800 vertical) Lamp 250W UHP Speaker Power supply Power consumption 0 ~ 40°C (Operating) Temperature range 35 ~ 40°C (The brightness of the lamp is reduced automatically.) 382 (W) x 141 (H) x 362 (D) mm Size 377 (W) x 136 (H) x 360 (D) mm * Not including protruding parts.
-
Page 23: Troubleshooting - Warranty And After-Service
“Operating Guide” and “Network Guide”, and run through the suggested checks. If this does not resolve the problem, please consult your dealer or service company. They will tell you what warranty condition is applied. for this projector. Product http://www.hitachi-america.us/projectors information and Manuals : Production http://www.hitachidigitalmedia.com...