Table of Contents
Quick Links
All about the
Use
of your
WELCOME & CONGRATULATIONS...........................2
IMPORTANT SAFETY INSTRUCTIONS ......................2
PART NAMES ........................................................8
CONTROL PANEL ..................................................9
BEFORE OPERATING ........................................... 10
MANUAL COOKING .............................................. 10
SENSOR COOKING ............................................. 11
www.frigidaire.com USA 1-800-3 7 4-4432
&
Microwave Oven
TA B L E O F C O N T E N T S
www.frigidaire.ca Canada 1-800-265-8352
Care
ONE TOUCH COOK .............................................13
AUTO DEFROST .................................................15
MICROWAVE SETTING.........................................16
CLEANING AND CARE ..........................................18
SERVICE CALL CHECK .........................................22
SPECIFICATIONS.................................................22
WARRANTY .........................................................
23
Table of Contents

Related Manuals for Frigidaire Gallery FGBM19WNVD


Summary of Contents for Frigidaire Gallery FGBM19WNVD
-
Page 1: Table Of Contents
IMPORTANT SAFETY INSTRUCTIONS ......2 MICROWAVE SETTING.........16 PART NAMES ............8 CLEANING AND CARE ..........18 CONTROL PANEL ..........9 BEFORE OPERATING ........... 10 SERVICE CALL CHECK .........22 MANUAL COOKING ..........10 SPECIFICATIONS..........22 SENSOR COOKING ..........11 WARRANTY ............www.frigidaire.com USA 1-800-3 7 4-4432 www.frigidaire.ca Canada 1-800-265-8352... -
Page 2: Welcome & Congratulations
Serial Number: ______________________________________________________________________________ Purchase Date: ______________________________________________________________________________ NEED HELP? Visit the Frigidaire Web Site at: http://www.frigidaire.com Before you call for service, there are a few things you can do to help us serve you better. Read this manual. It contains instructions to help you use and maintain your microwave oven properly. - Page 3 IMPORTANT SAFETY INSTRUCTIONS Defi nitions This is the safety alert symbol. It is used to alert you to potential personal injury hazards. Obey all safety messages that follow this symbol to avoid possible injury or death. WARNING CAUTION WARNING indicates a potentially hazardous situation which, CAUTION indicates a potentially hazardous situation which, if not avoided, could result in death or serious injury.
- Page 4 IMPORTANT SAFETY INSTRUCTIONS • Do not clean with metal scouring pads. Pieces off the pad can touch electrical parts involving risk of electric shock. WARNING Cancel If you see arcing, press the button and correct the problem. ARCING Arcing is the microwave term for sparks in the oven. Arcing is caused by: •...
- Page 5 IMPORTANT SAFETY INSTRUCTIONS UNPACKING AND EXAMINING YOUR Electrical Requirements Check Installation Instructions for proper location for the MICROWAVE OVEN power supply. Open the bottom of the carton, bend the carton fl aps The electrical requirements are a 120 volt 60 Hz, AC back and tilt the microwave oven over to rest on plastic only, 15 amp.
- Page 6 IMPORTANT SAFETY INSTRUCTIONS ABOUT YOUR MICROWAVE OVEN ABOUT MICROWAVE COOKING This Use and Care Manual is valuable: read it carefully and • Arrange food carefully. Place thickest areas towards outside of dish. always save it for reference. • Watch cooking time. Cook for the shortest amount of A good microwave cookbook is a valuable asset.
- Page 7 IMPORTANT SAFETY INSTRUCTIONS ABOUT UTENSILS AND COVERINGS ABOUT CHILDREN AND THE MICROWAVE It is not necessary to buy all new cookware. Many pieces already in your Children below the age of 7 should use the microwave oven with kitchen can be used successfully in your new microwave oven. Make a supervising person very near to them.
-
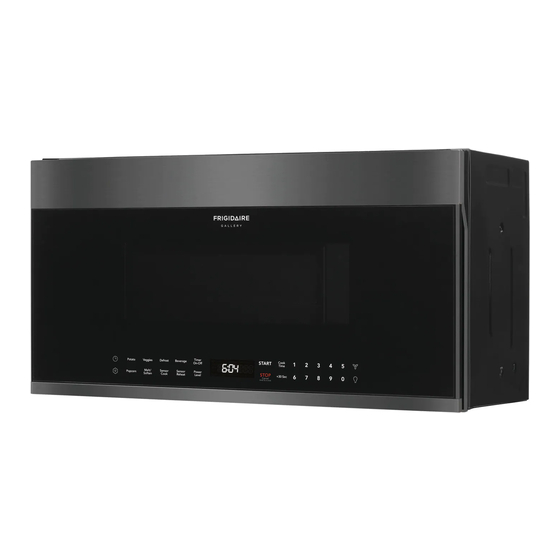
Page 8: Part Names
PART NAMES 1 Microwave oven door with see-through window 2 Door hinges 3 Waveguide cover: DO NOT REMOVE. 4 Turntable motor shaft 5 Microwave oven light It will light when microwave oven is operating or door is open. 6 Safety door latches The microwave oven will not operate unless the door is securely closed. -
Page 9: Control Panel
CONTROL PANEL The 7-digit Interactive Display spells out operating steps and shows cooking hints. Sensor Reheat ( 1 ) Display: Beverage The display includes a clock and indicators that Sensor Cook show the time of day, cooking time settings, cook Defrost powers, sensor, quantities, weights and cooking (6 ) -
Page 10: Before Operating
BEFORE OPERATING Setting the clock 1. Press to set clock. 2. Press numeric key to enter time. 3. Press START to confirm. Setting the timer Timer 1. Press , and then press numeric key to enter timer, the maximum time can be 99 minutes On-Off 99 seconds. -
Page 11: Sensor Cooking
SENSOR COOKING Sensor cooking has an electronic controlled sensor that detects the vapor (moisture and humidity) emitted from the NOTES for SENSOR COOKING food as it heats. The sensor adjusts the cooking times and power level for various foods and quantities automatically. The fi... - Page 12 SENSOR COOKING Sensor Reheat chart Sensor Reheat FOOD AMOUNT • Suppose you want to reheat rolls with sensor reheat. Soup/Sauce 1-2 Cups Touch: Display Shows: Pizza 1-4 Pieces Sensor Reheat Dinner Plate Plate Sensor Reheat Casserole/ 1 Serving Sensor Lasagna Reheat Roll/ Sensor...
-
Page 13: One Touch Cook
ONE TOUCH COOK Veggies There are 2 options ( , Fresh Vegetables Frozen Vegetables under the Veggies. • Suppose you want to cook two cups of frozen veggies. Touch: Display Shows: Veggies Veggies START Potato • Suppose you want to cook 1 to 4 baked Potatoes. NOTES Touch: Display Shows:... - Page 14 ONE TOUCH COOK Setting Melt/Soften The oven uses low power to melt and soften items. See the following table. • Suppose you want to melt 2 sticks of Butter. Touch: Display Shows: Melt/ Soften START START Time counting down MELT TABLE CATEGORY AMOUNT...
-
Page 15: Auto Defrost
AUTO DEFROST Using Auto Defrost Operating Tips For best results, remove fish, shell fish, meat and poultry from its original closed paper or plastic The auto defrost feature provides you with the best package (wrapper). Otherwise, the wrap will hold defrosting method for frozen foods. -
Page 16: Microwave Setting
MICROWAVE SETTING (1) Us ing Vent Fan (4) Setting Turntable ON/OFF a) In standby or microwave working mode, Touch: Display Shows: press to activate High speed, LED display HIGH, Press again to select MED, LOW and OFF. b) The microwave oven will go back to standby mode or previous mode if there’re no opera- tion within 2 seconds. - Page 17 CONVENIENT FEATURES Bottom light (10) Multi Stage Cooking Stage one 5:00 PL -HI , stage two 3:00 PL -80 Touch Display Shows: Touch Display Shows: PRESS START PRESS START Using Add 30 Sec. Suppose you want to cook for one minute. Touch Display Shows: PRESS START...
-
Page 18: Cleaning And Care
CLEANING AND CARE Disconnect the power cord or leave the door open to deactivate the oven during cleaning. Disconnect the power cord before replacing filters and lights. EXTERIOR may overheat and cause smoke or possibly catch fire. DO NOT REMOVE THE WAVEGUIDE COVER. The outside surface is precoated steel and plastic. - Page 19 CLEANING AND CARE Disconnect the power cord or leave the door open to deactivate the oven during cleaning. Disconnect the power cord before replacing filters and lights. Cleaning the exhaust filters Surface light replacement The oven ventilation exhaust filters should be removed and cleaned often;...
- Page 20 CLEANING AND CARE Disconnect the power cord or leave the door open to deactivate the oven during cleaning. Disconnect the power cord before replacing filters and lights. Charcoal filter replacement 5. Slide the top of the new charcoal filter into Charcoal filter part number 5304464577 the top area of the filter cavity.
- Page 21 CLEANING AND CARE Disconnect the power cord or leave the door open to deactivate the oven during cleaning. Disconnect the power cord before replacing filters and lights. Oven light replacement To access the light cover remove the Carbon Filter Re-install LED light to the bracket with mounting screw. per instructions 1- 4 above in the re-placement section.
-
Page 22: Service Call Check
SERVICE CALL CHECK Please check the following before calling for service: Place one cup of water in a glass measuring cup in the microwave oven and close the door securely. Operate the microwave oven for one minute at HIGH 100%. A Does the microwave oven light come on? YES ____ NO ____... -
Page 23: Warranty
MAJOR APPLIANCE WARRANTY INFORMATION Your appliance is covered by a one year limited warranty. For one year from your original date of purchase, Electrolux will pay all costs for repairing or replacing any parts of this appliance that prove to be defective in materials or workmanship when such appliance is installed, used and maintained in accordance with the provided instructions.