
Related Manuals for Thermo Scientific Precision Premium 3050 Series


Summary of Contents for Thermo Scientific Precision Premium 3050 Series
- Page 1 Precision Premium Ovens 3050 Series Operating Manual and Parts List LT2148X2 Rev. 1 _________________________________________________________________________________ Part of Thermo Fisher Scientific...
- Page 2 5 cu ft 120V Forced Air MANUAL NUMBER LT2148X2 (7006947) 1/4/11 Corrected typo page 4-1 (control temperature is being ‘The 3050 Series The’ ) to ‘set’ 4/22/10 Transfer to Marietta (was LT2148X2 2/8/10) ECR/ECN DATE DESCRIPTION Thermo Scientific Precision Premium Oven...
- Page 3 Thermo Fisher Scientific makes no representations or warranties with respect to this manual. In no event shall Thermo be held liable for any damages, direct or incidental, arising out of or related to the use of this manual. ©2010 Thermo Scientific. All rights reserved. Precision Premium Oven Thermo Scientific...
- Page 4 Always use the proper protective equipment (clothing, gloves, goggles, etc.) 4 Always dissipate extreme cold or heat and wear protective clothing. 4 Always follow good hygiene practices. 4 Each individual is responsible for his or her own safety. Thermo Scientific Precision Premium Oven...
- Page 5 We can also provide you with a quotation on our Extended Warranty for your Thermo Scientific products. Whatever Thermo Scientific products you need or use, we will be happy to discuss your applications. If you are experiencing technical problems, working together, we will help you locate the problem and, chances are, correct it yourself...over the telephone without a service...
-
Page 6: Table Of Contents
Schematic ..........8-3 Thermo Scientific... -
Page 8: Introduction
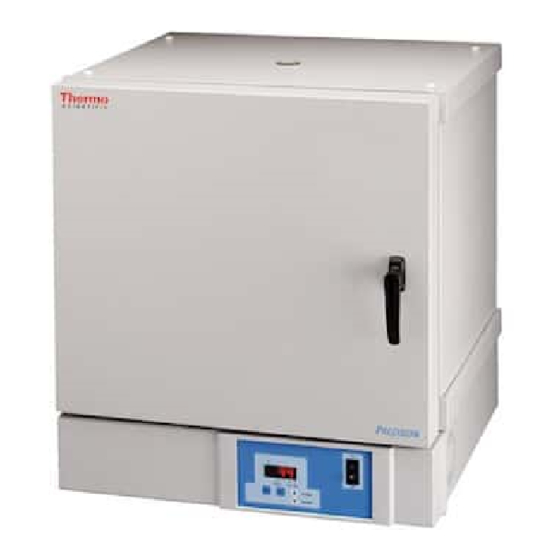
Introduction Section 1 Thermo Scientific Precision 3050 Series premium ovens are available in three sizes: small, medium and large. All ovens provide PID Microprocessor control at operating temperatures ranging from 50°C (122°F) to 275°C (527°F). The forced air models provide improved temperature uniformity and control, as well as faster drying. - Page 9 Braided Gasket Part # Oven (Supplied with Oven) (High Temp Gasket Optional) Small - 40 & 45 SPN 101908 SPN 95782 Medium 50 & 55 SPN 101909 SPN 95783 Large - 60 & 65 SPN 101910 SPN 95784 Precision Premium Oven Thermo Scientific...
-
Page 10: Specifications
PR305065M, -60M & -50MCN ... . .22 PR305065G, -60G & -60GCN ....2 Thermo Scientific Precision Premium Oven... - Page 11 Large - Forced Air PR305065M ..120 V, 15.5A, 1860W, 60 Hz PR305060M ..240 V, 7.8A, 1872W, 50/60 Hz PR305060MCN . . .240 V, 7.8A, 1872W, 50/60 Hz Precision Premium Oven Thermo Scientific...
- Page 12 Altitude Limit: ....2,000 meters. Storage: ..-25°C to 65°C 10% to 85% RH Thermo Scientific Precision Premium Oven...
-
Page 14: Installation
Warning Hot Surface Oven vent and exiting air are hot. Keep hands away. Unpacking Thermo Scientific Precision ovens are shipped in a single carton. After unpacking, locate each item shown in the list below. Report any missing items, by name and part number, to your Thermo distributor. In the event of shipping damage, retain the shipping material and file a claim with the final carrier. -
Page 15: Power Switch
On position. Caution See dataplate on oven for voltage, current and line frequency specifications. Check that the power requirements of the oven will not overload the circuit to which it will be connected. Precision Premium Oven Thermo Scientific... -
Page 16: Controls
Alarm Indicator Lights if the actual oven temperature exceeds the alarm temperature. The alarm temperature is factory-adjusted to be 5°C above the set tempera- ture. Program Indicator Lights when the control temperature is being set. Thermo Scientific Precision Premium Oven... -
Page 17: Keypad
• Pressing SET causes the display to show the set temperature. Used with INCREASE and DECREASE arrows to change the set temperature. With MENU to access entry of a temperature display offset. Precision Premium Oven Thermo Scientific... -
Page 18: Operation
Do not place items on the heater cover. • Wear insulated gloves. • Use tongs. • Never stand in front of an open oven. • Use safety goggles. Thermo Scientific Precision Premium Oven... -
Page 19: Display Offsets
3. To change the display offset, press and hold the SET key. Press INCREASE or DECREASE until the display indicates the desired offset. 4. Release the SET key. 5. Press MENU once to return to normal temperature control. Precision Premium Oven Thermo Scientific... - Page 20 The calibrated thermometer reads 151°C. A display offset of 1 is entered. The immediate display reads 151. The oven cools to 150°C, the display reads 150 and the calibrated thermometer reads 150. Thermo Scientific Precision Premium Oven...
-
Page 22: Service
Caution Only factory authorized components should be used for all repairs. Failure to use factory authorized replacement components will void warranty and could result in unit malfunction and or hazardous operating conditions. Caution Allow oven to cool to ambient temperature before attempting repair. Thermo Scientific Precision Premium Oven... -
Page 23: Replacing The Door Gasket
9. After all four corners are secured, install the remainder of the Phillips head screws. Make sure there is no gap at the gasket joint; stretch the gasket slightly if necessary. 10. Reinstall the door onto the case with hinges. Precision Premium Oven Thermo Scientific... -
Page 24: Adjusting The Door Cam
4. Adjust inside nut, one full turn clockwise draws door 1/16” closer to cabinet when door is closed. 5. Secure cam tongue in place by tightening outside nut. 6. Secure latch cover in place with two screws. Thermo Scientific Precision Premium Oven... -
Page 25: Accessing Electronics Compartment
7. Carefully set the bezel on the bench. Heater Cover Fascia Heater Front Face Electronics Compartment (Open) Bezel Bezel/Control Panel Bottom Screws Figure 6-1. Component Locations Precision Premium Oven Thermo Scientific... -
Page 26: Replace A Cooling Fan
6. Slide the oven back on the table plus a few inches (to set the bezel on the bench) and rotate the bottom of the bezel out from the oven. The top clips will come loose but the wiring will still be connected. 7. Carefully set the bezel on the bench. Thermo Scientific Precision Premium Oven... -
Page 27: Replacing The Circulating Fan Motor
10. Locate the two electrical leads from the fan motor. Remove the leads from the push-on terminal strip located in the front of the oven bezel. 11. Lay the oven on its back with the oven bottom facing forward. Precision Premium Oven Thermo Scientific... -
Page 28: Replacing The Controller
8. Locate terminal blocks on controller, remove all wires connected to controller. Note color and location of wires. 9. Remove four screws that hold controller to bezel, then remove old controller. 10. Install new replacement controller and reattach wires previously removed. Thermo Scientific Precision Premium Oven... -
Page 29: Replacing The Solid State Relay
11. Lift out the solid state relay. Put new solid state relay in place, making certain that the thin, conductive pad remains between the solid state relay and the bezel. 12. Generally reverse the steps above to re-assemble oven. Precision Premium Oven Thermo Scientific... -
Page 30: Replacing The Safety Relay
9. Remove four lead wires from their push-on terminals. 10. Remove two Phillips screws which mount the safety relay to the bezel. 11. Lift out the safety relay. 12. Generally reverse the steps above to install the replacement safety relay and re-assemble oven. Thermo Scientific Precision Premium Oven... -
Page 31: Replacing The Control Thermocouple
14. Consult schematic at end of this manual. Then, generally reverse steps 1 through 10 to complete installation of new thermocouple and reassemble oven. Caution Verify the yellow thermocouple conductor is under the (+) tab and the red thermocouple conductor is under the (-) tab. 6-10 Precision Premium Oven Thermo Scientific... -
Page 32: Troubleshooting
The service discussed below is beyond the scope of most users and should be performed by qualified and trained personnel. In the event service is required beyond that available by the customer, contact the Technical Services department. Thermo Scientific Precision Premium Oven... - Page 33 Replace control thermocouple Check thermocouple connec- Faulty or broken connections tions at rear of temperature controller Temperature different Begin by setting offset to 0. Calibration off set needs adjusted. from independent See Display Offsets. thermometer Precision Premium Oven Thermo Scientific...
-
Page 34: Replacement Parts
Replacement Parts Section 8 Note Only factory authorized components should be used for repair. Replacements for oven parts may be ordered, by part number, from Technical Services. Thermo Scientific Precision Premium Oven... - Page 35 SPN 95770 (K1) 240V units SPN 95787 Circuit Breaker - Single Pole (120V) SPN 95765 (S1) Double Pole (240V) SPN 95786 Door Assembly Small units DR2034X8 Medium units DR2033X8 Large units DR2032X8 Thermal Fuse Assembly FZ2148X2 Precision Premium Oven Thermo Scientific...
-
Page 36: Schematic
Section 8 Schematic Thermo Scientific Precision Premium Oven... - Page 38 Thermo Fisher Scientific 401 Millcreek Road Marietta, Ohio 45750 United States www.thermofisher.com...