
Related Manuals for Sharp 8C-B30A


Summary of Contents for Sharp 8C-B30A
- Page 1 Operating Instruction Manual Please read these instructions carefully before using this product, and save this manual for future use.
-
Page 3: Standard Accessories
Standard Accessories • Camera body • Rechargeable battery pack • Body cap (Attached to the camera) • USB-C connection & charge Cable • Cold shoe cap (Attached to the camera) • Shoulder strap • Operation Manual (this manual) -
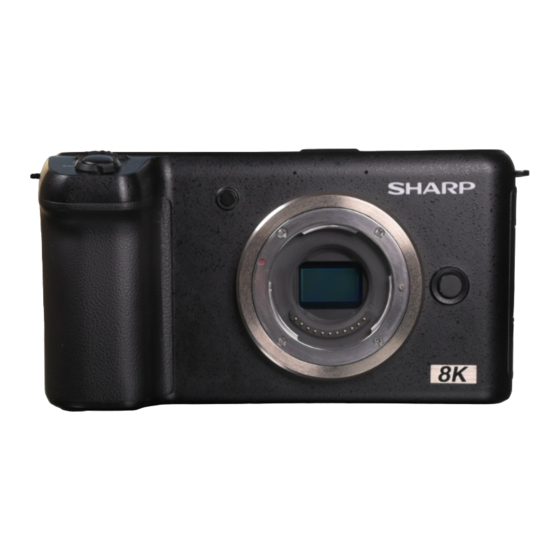
Page 4: Identifying Parts
Identifying parts Camera body 10 11 12 4 5 6 13 14 15 MOVIE button Shutter button/ [Fn2] button ISO button/ [Fn3] button Camera ON/OFF switch Shutter button Dial button Status indicator Stereo microphone Cold shoe (Cold shoe cap) Speaker Sensor position mark Hooks for shoulder strap Headphones jack... - Page 5 Identifying parts 24 25 31 32 33 DISP. button AEL button White balance button/ [Fn1] button Tripod socket hole Touch screen /monitor Battery door Battery door release lever SD card slot Battery insertion slot Battery Release lever...
-
Page 6: Preparations For Shooting
Preparations for shooting 1 Attaching the strap • Pass the end of the • Pass it through the • Pull the strap to take • Lastly, pull the strap strap through the strap’s buckle as show in up and slack. firmly and make sure the camera’s strap mount. -
Page 7: Charging The Battery
Preparations for shooting 4 Charging the battery • Open the camera USB-C • Connect the camera to the AC • The camera charge lamp lights terminals door. Adaptor using the USB-C cable. red while charging is in progress and turns off when charging is complete. -
Page 8: Turning On The Power
Preparations for shooting 7 Turning on the power • Rotate the ON/OFF to the ON position. To turm the camera off, return the switch to the OFF position. 8 Setting the date/time • Date and time information is recorded on the card together with the images. The file name is also included with the date and time information. -
Page 9: Shooting Still Photos
Shooting Shooting still photos Enter the exposure mode set by pressing the left corner [exposure mode] button of the touch screen. Drag and Select the desired exposure mode. The following exposure mode are available . Allows you to shoot with the exposure adjusted automatically (both Program Auto the shutter speed and the aperture value). - Page 10 shooting Press the shutter button halfway down to focus. When the image is in focus, a beep sounds and the indicator lights up. Focus point Press the shutter button all the way (fully) and The camera will release the shutter and take a picture. Touch screen display during shooting still photo Exposure Recording format/...
-
Page 11: Shooting Movies
shooting Shooting movies Press the [Movie] button to begin recording. Movie recording can be started from any shooting mode. 00:00:00 8K 30fps 25Mbps MP4(LPCM) 1335 Press the [Movie] button again to end recording. Touch screen display during shooting movie Record Recording format/ Memory card time... -
Page 12: Viewing Photos
Playback Viewing photos Press the [Playback] to enter playback mode and photos will appear in the screen. You can view other photos by flicking a finger left or right over the touch screen. Pinch to zoom the image. Use this function to check the focus of the image, etc. -
Page 13: Viewing Movies
playback Viewing movies Press the [Playback] to enter playback mode and movies will appear in the screen. Play the [Play] to play back the movie. Tap the screen to active play back menu, you can pause/ fast forword/ fast rewind during the Movie playback. -
Page 14: Index Display
playback Index display • From single photo/movie playback, tap the screen to active menu then press the [Gallery] for index playback. Delete photo/ movie • To delete a single photo/movie, in playback mode, tap the screen to active menu then press the [Delete] to delete and confirm. - Page 15 Menu Basic menu operations • You can change settings related to all the camera operations including shooting, playback, and operating method. You can also execute camera functions from the MENU. Press the [MENU] to display the menu screen. Select a camera setting tab. Drag and select desired item you want to adjust .
- Page 16 Menu List of menu items Shooting Picture Format Audio Settings Ambient Light Intensity Correction Color Space Digital Stabillization Magnification Aberration Correction Record Illuminator Distortion Aberration Correction Silent Photography Video Format Time Stamp Record D-Range Mode Auto ISO Range Display Peaking Center Marker Display Always Display Reflection Histogram display...
- Page 17 List of icons on the screen • Each time you press [Disp.] button, the information display will change. • The display will show only the settings currently applied. 00:02:30 8K 30fps 25Mbps MP4(LPCM) 1335 1000 11000 Symbols Symbols Indication Indication Symbols Indication 25Mbps...
- Page 18 List of icons on the screen Symbols Indication Symbols Indication Metering mode Shooting mode Focus mode White balance Focus Area Picture style Touch Focus Symbols Indication Symbols Indication Exposure compensation Aperture value value Shutter speed sensitivity Exposure compensation Aperture/Shutter ISO control bar control bar 1000 11000...
-
Page 19: Specification
Specification Camera (8C-B30A) Camera type Interchangeable Lens Digital Camera Mount Micro Four Thirds Mount System Image sensor Sharp 4/3 type (21.59mm) 33M Pixel CMOS Image Sensor Sensor size 18.84×10.60 (16:9) Camera effective pixel 33,177,600 pixels Shutter Electronically-controlled Size 5.5” LCD... - Page 20 Specification Camera (8C-B30A) Dimensions Approx. 162 (W) × 86(H) × 68(D) mm Mass Approx. 645 g/1.42 lb (camera body) 0 ~ 40 ℃ Operating temperature Other Operating humidity 0 ~ 90% RH -20 ~ +60 ℃ Storage temperature Storage humidity...
- Page 21 标准配件 • 相机机身 • 可充电电池 • 相机盖 (安装在相机上) • USB-C 连接和充电线 • 冷靴盖 (安装在相机上) • 肩带 • 使用说明书 (本说明书)...
- Page 22 零部件标识 相机机身 10 11 12 1 2 3 4 5 6 13 14 15 录像按钮 快门设置按钮/ [Fn2] 按钮 ISO 设置按钮/ [Fn3] 按钮 相机开关 快门按钮 拨轮 录像/ AF指示灯 立体声麦克风 冷靴 (冷靴盖) 扬声器 图像传感器位置标识 肩带挂钩 耳机接口 镜头安装标识 麦克风接口 充电指示灯 镜头卡口 USB-C 接口 图像传感器...
- Page 23 零部件标识 24 25 31 32 33 DISP. 按钮 AEL 按钮 白平衡设置按钮/ [Fn1] 按钮 三脚架插孔 触摸屏/ 监视器 电池门 电池门释放按钮 SD 卡槽 电池仓 电池释放杆...
- Page 24 拍摄准备 1 系上肩带 • 将皮带的末端穿过相 • 如图所示, 将其穿过皮 • 拉紧皮带以收紧。 • 最后, 拉紧皮带, 并确保 机的皮带安装座。 带扣。 皮带不会从带扣上松开。 2 将电池插入相机 • 滑动电池/存储卡仓盖的锁, 然 • 注意电池的方向, 插入电池。 • 完全插入直到听到锁定声音, 后打开仓盖。 然后检查是否已被操纵杆锁定。 取出电池时, 朝箭头方向推动控制杆, 然 后拉出电池。 3 将卡插入相机 • 滑动电池/插卡舱盖锁, 然后打 • 将卡滑入直至其锁定到位, •...
- Page 25 拍摄准备 4 充电 • 打开相机 USB-C 接口盖。 • 使用USB-C电缆将相机连接至 • 充电过程中, 相机充电指示灯 AC适配器。 呈红色亮起, 充电完成时熄灭。 5 装卸镜头 • 按箭头所示方向转动后镜头盖 • 将相机上的镜头安装标记 (红色) • 顺时针旋转镜头, 直到听到喀 和照相机盖, 以取下它们。 与镜头上的对准标记 (红色) 对齐, 哒声 (箭头指示的方向) 为止。 然后将镜头插入相机的机身。 6 打开显示屏 180° 90° • 翻转屏幕。 •...
- Page 26 拍摄准备 7 开启电源 • 将ON / OFF旋转到ON位置。 要关闭相机, 请将开关返回到OFF位置。 8 设定日期/时间 • 日期和时间信息与图像一起记录在卡上。 文件名也包含在日期和时间信息中。 使用相机之前, 请务必设置正确的日期和时间。 • 选择所需的语言, 然后按[Next]。 • 设置日期和时间, 然后按[Done]保存设 置并退出。...
- Page 27 拍摄 拍摄静态照片 通过按触摸屏的左上角的 [曝光模式]按钮进入设置的 曝光模式。 拖动并选择所需的拍 摄模式。 可以使用以下拍摄模式。 程序自动 使您可以自动调节曝光 (快门速度和光圈值) 进行拍摄。 光圈优先 当您想要模糊背景等时, 可以调节光圈并拍摄。 通过手动调节快门速度, 可以拍摄快速移动的被摄物体等。 快门优先 通过调节曝光 (快门速度和光圈值) , 可以拍摄具有所需曝光的静 手动曝光 止图像。 程序自动 使您可以自动调整曝光来拍摄短片。 (录像) 光圈优先 拍摄短片时可以调节光圈并进行拍摄。 (录像) 快门优先 通过手动调节快门速度, 可以拍摄快速移动的主体等。 (录像) 手动曝光 使您可以通过调节曝光以所需的曝光拍摄静止影像。 (录像)...
- Page 28 拍摄 半按下快门按钮进行对焦。 当图像清晰对焦时, 会发出蜂鸣声并且指示灯 点亮。 Focus point 完全按下快门按钮, 相机将释放快门并拍照。 拍摄静态照片时的触摸屏显示 曝光 照片格式/ 存储卡 模式 照片质量 状态 电池信息 拍摄模式 测光模式 对焦模式 白平衡 对焦区域 图像风格 触摸对焦 快门速度 设置 ISO 设置 光圈大小 相册 设置 EV 大小 对焦点 设置 控制...
- Page 29 拍摄 拍摄视频 按[录像]按钮开始录制。 可以从任何拍摄模式开始视频录制。 00:00:00 8K 30fps 25Mbps MP4(LPCM) 1335 再按一次[录像]按钮结束录制。 拍摄视频期间的触摸屏显示 录像 录像格式 存储卡 时间 录像质量 状态 电池信息 曝光 8K 30fps 25Mbps MP4(LPCM) 模式 测光模式 白平衡 对焦模式 图像风格 对焦区域 触摸对焦 快门速度 设置 ISO 设置 麦克风 光圈大小 回放 设置 放大镜 EV 大小设置...
- Page 30 回放 查看照片 按[回放]进入回放模式, 照片将出现在屏幕中。 您可以通过在触摸屏 上向左或向右滑动来查看 其他照片。 双指缩放以缩放图像。 使 用此功能放大/ 缩小图像。 若要结束播放并返回拍 摄模式, 请点击屏幕进入菜 单, 然后选择[相机]或半按[ 快门]按钮。...
- Page 31 回放 查看视频 按[回放]进入回放模式, 视频将出现在屏幕中。 点击[播放]以播放视频。 点按屏幕以激活播放菜 单, 您可以在视频播放期 间暂停/快速前进/快退。 结束播放并返回拍摄 模式。 暂停播放时, 点击 屏幕进入菜单, 然后选择[ 相机]或半按[快门]按钮。...
- Page 32 回放 相册索引显示 • 在单张照片/视频播放中, 点击屏幕进入菜单, 然后按[相册]进入引索显示。 删除照片/ 视频 • 要删除单张照片/视频, 请在播放模式下, 点击屏幕进入菜单, 然后按[删除]进行删除和确认。 • 要删除多张照片/视频, 在索引显示模式下, 按[选择]选择多张照片/电影, 然后按[删除]删 除并确认。 播放菜单中的触摸屏显示 相机 文件序号 相册 收藏 信息 删除...
- Page 33 菜单 基本菜单操作 • 您可以更改与所有相机操作相关的设置, 包括拍摄, 播放和操作方法。 您也可以从菜单执行相机 功能。 按[MENU]显示菜单页 面。 选择相机设置标签。 拖动并选择要调整的所需 项目。 Back 选择所需的设定值以确认您 的选择。 再次按[返回]退出菜单。...
- Page 34 菜单 菜单列表 拍摄 照片格式 音频设置 暗角校准 色彩空间 数码防抖 紫边校准 静音拍摄 录像指示灯 镜头畸变校准 视频格式 时间码 D-Range 模式 自动ISO范围 显示 峰值 中心点标识 实际预览显示 直方图 高光剪切 网格线 阴影剪切 视频标识线 斑马线 操作 AF辅助照明灯 AF / AE 锁定切换 AF 区域显示 Fn 按钮自定义 对焦环锁定 维持 AF/AE 锁定 常规...
- Page 35 屏幕图标列表 • 每次当您按下 [Disp.] 按钮, 显示信息将发生改变。 • 显示屏将仅显示当前应用的设置。 00:02:30 8K 30fps 25Mbps MP4(LPCM) 1335 1000 11000 图标 表示 图标 表示 Symbols Indication 25Mbps 50Mbps 曝光模式 码率 100Mbps 150Mbps 200Mbps 录像时间 照片文件格式 存储卡状态 JPG &RAW 画面比例 视频文件格式 MP4(AAC) MP4(LPCM) 8K 6K 4K 分辨率...
- Page 36 图标 表示 图标 表示 测光模式 拍摄模式 对焦模式 白平衡 对焦区域 图像风格 触摸对焦 图标 表示 图标 表示 曝光补偿 光圈大小 快门速度 ISO 大小 曝光补偿 光圈/快门 ISO 控制条 控制条 1000 11000 回放 放大镜 设置 麦克风级别 拨轮作用标识 对焦点 直方图 5s 6s 定时时间 9s 10s...
- Page 37 规格 相机 (8C-B30A) 相机类型 可更换镜头数码相机 镜头卡口 M43标准卡口 影像传感器 Sharp 4/3 type (21.59mm) 33M Pixel CMOS Image Sensor 传感器尺寸 18.84×10.60 (16:9) 有效像素 33,177,600 像素 快门 电子快门 尺寸 5.5” LCD 显示屏 类型 触摸屏 (支持多点触控, 至少3点) 分辨率 1080×1920 (约 6,220,800 点) 麦克风 双声道录音...
- Page 38 规格 相机 (8C-B30A) 外观尺寸 约 162 (长) × 86(高) × 68(宽) mm 重量 约 645 g/1.42 lb (机身) 操作温度 0 ~ 40 ℃ 其他 操作湿度 0 ~ 90% RH 存储温度 -20 ~ +60 ℃ 存储湿度 0 ~ 90% RH 电池 (8C-A01B) 电池类型...