
Related Manuals for Emerson MS3100


Summary of Contents for Emerson MS3100
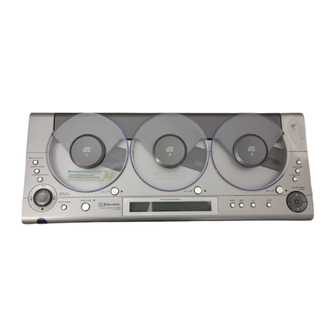
- Page 1 All manuals and user guides at all-guides.com HOME AUDIO SYSTEM with 3 CD CHANGER and DIGITAL AM/FM RECEIVER OWNER'S MANUAL MS3100 Visit our web site at www.emersonradio.com...
-
Page 2: Before We Begin
This product was manufactured using the highest quality components and standards of workmanship. It was tested by Emerson inspectors and found to be in perfect working order before it left our factory. However, there is always the chance that some problem may occur because of rough handling during shipment to the retail store or to the final consumer. -
Page 3: Important Notes
All manuals and user guides at all-guides.com IMPORTANT NOTES CLASS 1 LASER PRODUCT CAUTION CLASS 1 LASER PRODUCT INVISIBLE LASER RADIATION WHEN OPEN AND INTERLOCKS APPAREIL Á LASER DE CLASSE 1 DEFEATED. PRODUCTO LASER DE CLASE 1 AVOID EXPOSURE TO BEAM This product contains a low power Laser Device. -
Page 4: Preparation For Use
All manuals and user guides at all-guides.com PREPARATION FOR USE UNPACKING AND SET-UP Carefully remove the unit from the carton and remove all packing material from the unit. Remove any labels or stickers which may be on the front or top of the set, but do not remove any labels from the back or bottom. -
Page 5: Installation
All manuals and user guides at all-guides.com Installation Installation For shelf mounting, extend the left and right flaps at the back of the unit and place it on a strong flat surface. Note - Leave at least 6 inches (15cm) above the unit for the door to open without being obstructed. -
Page 6: Installing The Remote Control Batteries
All manuals and user guides at all-guides.com Installation FM antenna wire The single trailing wire from the unit is the FM antenna. This should be positioned for best FM reception (do this when you're tuning - in to radio stations–see page 18). Installing the remote control batteries At the back of the remote, press the indented area and slide open the battery... -
Page 7: Cleaning And Maintenance
All manuals and user guides at all-guides.com Installation Ready to switch on Plug the unit into the AC outlet. On the front panel, the light above the POWER button will be red to indicate that the unit is in standby. (Standby means plugged- in but not switched on.) . -
Page 8: Setting The Clock
All manuals and user guides at all-guides.com Setting the clock Setting the clock Press to switch the unit on. 2. Press the AUX button. (Note the time setting appears at the centre of the display.) 3. Press MEMORY so that the hour setting flashes, then immediately press + or - to set the correct hour. -
Page 9: General Use
All manuals and user guides at all-guides.com General use General use All general functions can be operated by the remote. You shouldn't need to lower the front panel flap. Switch the unit on by pressing Selecting the sound source To select the sound source you wish to listen to, press: CD / SELECT to listen to compact disc, or FM / AM to listen to radio, or AUX to listen to auxiliary equipment connected to the AUX jacks. -
Page 10: Graphic Equalizer
All manuals and user guides at all-guides.com General use Headphones For private listening, plug a pair of stereo headphones into the PHONES socket on the lower left side panel. When headphones are plugged in, the speakers are switched off automatically. Graphic equalizer The graphic equaliser (EQ) adjusts the character of the sound. -
Page 11: Loading And Removing Discs
All manuals and user guides at all-guides.com CD operation CD operation All CD functions can be operated by the remote. You shouldn't need to lower the front panel flap. Switch the unit on and press CD / SELECT. Important Never open or close the CD door rapidly by hand - doing so will damage the mechanism. -
Page 12: Selecting Tracks
All manuals and user guides at all-guides.com CD operation To eject, simply open the CD door using remove the disc. Note there's a cutout to the left of each player so that you can place your finger under the edge of the disc to remove it. Playing one disc 1. - Page 13 All manuals and user guides at all-guides.com CD operation Searching tracks To search within tracks while a disc is playing, hold in the button. Pause and stop To pause during play, press (press again to resume play). To stop play, press Repeat play You can repeat all discs, one disc, or just one track.
- Page 14 All manuals and user guides at all-guides.com CD operation Playing all discs 1. Load the discs as shown earlier. Note that discs will be played in order. If you don't want to start with disc press CD / SELECT to select (indicated at the left of the front panel display).
- Page 15 All manuals and user guides at all-guides.com CD operation 4. Press to select the TRACK number on that disc. (To select all tracks on the disc, press so that TRACK AL is displayed.) 5. Repeat steps 2, 3 and 4 for each programmed track. (Note that P - 0 1 advances to P - 0 2, P - 0 3 etc as you program each track.) You can check your program by pressing PROG repeatedly.
-
Page 16: Editing The Program
All manuals and user guides at all-guides.com CD operation Editing the program Before editing, make sure no disc is playing. To change a track, press PROG repeatedly (until the required P - umber is displayed) then press to change the TRACK number. To delete a track, press PROG repeatedly (until the required P - number is displayed) then press to change the TRACK number to - - . - Page 17 All manuals and user guides at all-guides.com CD operation Additional CD functions Track introductions If INTRO is pressed (instead of ) to start play, only the first 10 seconds of each track will be played. This enables you to scan through a CD (or a programmed selection of tracks) automatically.
-
Page 18: Instant Play
All manuals and user guides at all-guides.com CD operation Instant play (Alternatively, press one of the If you are listening to radio or CD buttons on the remote.) auxiliary input, you can instantly play a disc simply by pressing one of the three buttons below the players:... -
Page 19: Radio Operation
All manuals and user guides at all-guides.com Radio operation Radio operation All radio functions can be operated by the remote.You shouldn't need to lower the front panel flap. Tuning-in a new radio station Pressing BAND selects radio operation. The display indicates the tuning frequency, and just to the right of it, the band: FM, or AM. -
Page 20: Time Display
All manuals and user guides at all-guides.com Radio operation 3. Press MEMORY followed by MEMs MEMt so that the memory number flashes to the left of the frequency, for example: MEMORY CH 02 89. 1 MHz FM. After a few seconds the flashing stops and the memory number is set. -
Page 21: Timer Operation
All manuals and user guides at all-guides.com Timer operation Timer operation The timer function allows you to set the unit to switch itself on and off automatically, for example, to wake you up each morning. While setting up the timer, make sure you carry out each step within five seconds, otherwise your entry will not be accepted in the memory and you will have to start again. -
Page 22: Sleep Timer
All manuals and user guides at all-guides.com Timer operation The timer on and off times have now been set. To check them at any time, press MODE repeatedly to step through the TIMER ON and TIMER OFF settings on the display. 8. -
Page 23: Care And Maintenance
NUMBER OF YOUR NEAREST SERVICE CENTER PERMITTED TO PERFORM SERVICE WARRANTY... CALL TOLL FREE: 1-800-695-0098 FOR ADDITIONAL SET-UP OR OPERATING ASSISTANCE PLEASE CALL: 1-800-898-9020 FOR CUSTOMER SERVICE, PLEASE WRITE TO: Emerson Radio Corp. Consumer Affairs Dept. 1901 Diplomat Drive, Farmers Branch, TX 75234. -
Page 24: Wall Mounting Instructions
All manuals and user guides at all-guides.com WALL MOUNTING INSTRUCTIONS If you decide to wall mount your MS3100 audio system, please read and carefully follow these instructions: General Precautions and Recommendations * When choosing a location for wall mounting remember that the main unit must be connected to an AC outlet. - Page 25 All manuals and user guides at all-guides.com If there is no AC outlet directly below the desired mounting location, you may use a UL approved extension cord. In this case you should allow the AC plug of the main unit to reach all the way to the floor and connect the extension cord on the floor, not above the floor.
- Page 26 All manuals and user guides at all-guides.com 5) Before You Drill: Make sure there are no water plpes, gas pipes, electrical wires on other obstructions or hazards behind the wall in your chosen mounting location. If you are not sure about this. and don't know how to check, perhaps you should consider having the system mounted by someone with the necessary experience.
- Page 27 All manuals and user guides at all-guides.com 9) Loosen the screw until there is a gap about 1/8" between the screw head and the wall . 1/8" 10) Position the main unit over the two screw heads so that the heads of the screws fit into bottom of each "Keyhole"...
- Page 28 All manuals and user guides at all-guides.com EMERSON RADIO CORP. LIMITED WARRANTY What does this warranty cover ? Any manufacturing defects in original material, including original parts and workmanship, under normal use and conditions. For how long? For a period of ninety (90) days from the date of original purchase in the U.S.
- Page 29 All manuals and user guides at all-guides.com EMERSON RADIO CORP. EMERSON Part No.: 16-2837 110-01 Printed in China...