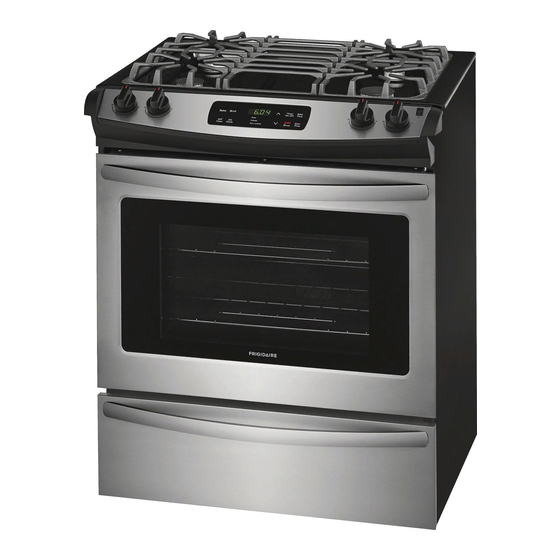
Frigidaire FFGS3026TS Installation Instructions Manual
30" gas slide-in range
Hide thumbs
Also See for FFGS3026TS:
- Use & care manual (40 pages) ,
- Installation instructions manual (44 pages)
Table of Contents
Available languages
Available languages
Quick Links
INSTALLATION INSTRUCTIONS
INSTALLATION AND SERVICE MUST BE PERFORMED BY A QUALIFIED INSTALLER.
IMPORTANT: SAVE FOR LOCAL ELECTRICAL INSPECTOR'S USE.
READ AND SAVE THESE INSTRUCTIONS FOR FUTURE REFERENCE.
United States
Canada
Refer to your serial
plate for applicable
agency certification.
Table of Contents
Important Safety Instructions .......................................... 2
Product & Cabinet Dimensions.................................... 3-4
To Avoid Breakage .......................................................... 5
Before Starting................................................................ 6
Cabinet Construction ................................................... 6-7
Provide an Adequate Gas Supply................................... 7
Seal the Openings .......................................................... 7
Connect the Range to the Gas Supply ........................ 7-8
LP/Propane Gas Conversion .......................................... 8
Electrical Requirements.................................................. 8
Important Notes to the Installer
1. Read all instructions contained in these installation
instructions before installing range.
2. Remove all packing material from the oven and the
drawer compartments before connecting the gas and
electrical supply to the range.
3. Observe all governing codes and ordinances.
4. Be sure to leave these instructions with the consumer.
5. Note: For operation at 2000 ft. elevations above see
level, appliance rating shall be reduced by 4 percent for
each additional 1000 ft.
Important Note to the Consumer
Keep these instructions with your owner's guide for the
local electrical inspector's use and future reference.
P/N 318201697 (1304) Rev. A
English - pages 1-14; Spanish - pages 15-28; French - pages 29-44
30" GAS SLIDE-IN RANGE
If the information in this manual is not followed exactly, a fire
or explosion may result causing property damage, personal injury or death.
FOR YOUR SAFETY:
- Do not store or use gasoline or other flammable vapors and liquids in
the vicinity of this or any other appliance.
- WHAT TO DO IF YOU SMELL GAS:
•
Do not try to light any appliance.
•
Do not touch any electrical switch; do not use any phone in your
building.
•
Immediately call your gas supplier from a neighbor's phone. Follow the
gas supplier's instructions.
•
If you cannot reach your gas supplier, call the fire department.
- Installation and service must be performed by a qualified installer,
service agency or the gas supplier.
Moving the Appliance for servicing and Cleaning ........... 8
Range Installation ........................................................... 9
Leveling the Range....................................................... 10
Decorative Rear Trim Installation ................................. 10
Check Operation...................................................... 11-12
When All Hookups are Complete.................................. 12
Model and Serial Number Location .............................. 12
Before You Call for Service........................................... 12
Anti-Tip Brackets Installation ................................... 13-14
Notes ............................................................................ 44
Appliances Installed in the state of
Massachusetts:
This Appliance can only be installed in the state of
Massachusetts by a Massachusetts licensed plumber or
gasfitter.
This appliance must be installed with a three (3) foot / 36
in. long flexible gas connector.
A"T" handle type manual gas valve must be installed in
the gas supply line to this appliance.
Cold temperature can damage the
electronic control. When using the appliance for the
first time, or when the appliance has not been used
for an extended period, be certain the unit has been
in temperatures above 32°F (0°C) for at least 3 hours
before turning on the power to the appliance.
Printed in United States
Chapters
Table of Contents

Related Manuals for Frigidaire FFGS3026TS


Summary of Contents for Frigidaire FFGS3026TS
-
Page 1: Table Of Contents
INSTALLATION INSTRUCTIONS 30" GAS SLIDE-IN RANGE INSTALLATION AND SERVICE MUST BE PERFORMED BY A QUALIFIED INSTALLER. IMPORTANT: SAVE FOR LOCAL ELECTRICAL INSPECTOR'S USE. READ AND SAVE THESE INSTRUCTIONS FOR FUTURE REFERENCE. United States If the information in this manual is not followed exactly, a fire or explosion may result causing property damage, personal injury or death. -
Page 2: Important Safety Instructions
30" GAS SLIDE-IN RANGE INSTALLATION INSTRUCTIONS (Models with Sealed Top Burners) IMPORTANT SAFETY INSTRUCTIONS This manual contains important safety symbols and instructions. Please pay attention to these symbols and follow all instructions given. This symbol will help alert you to situations that may cause serious bodily harm, death or property damage. -
Page 3: Product & Cabinet Dimensions
30" GAS SLIDE-IN RANGE INSTALLATION INSTRUCTIONS (Models with Sealed Top Burners) Product Dimensions 21¾” (55.25 cm) Do not install the unit in the cabinet before reading next two pages. Door Open (see note 5) Side Panel A. HEIGHT D. TOTAL DEPTH E. - Page 4 30" GAS SLIDE-IN RANGE INSTALLATION INSTRUCTIONS (Models with Sealed Top Burners) Cabinet Dimensions Shave 1 ½" Max. Raised Edge (3,8 cm Max.) to Clear Space for a " min (80 These surfaces should cm) Wide be flat & leveled Cooktop. (hatched area).
-
Page 5: To Avoid Breakage
30" GAS SLIDE-IN RANGE INSTALLATION INSTRUCTIONS (Models with Sealed Top Burners) To avoid breakage: Do NOT handle or manipulate the unit by the cooktop. The counter-top around the cut-out should be flat and leveled (see hatched area on illustration 1). Before installing the unit, measure the heights of the two (2) cabinet sides (H1-4), front and back (see illustration 1) from the floor to the top of the counter. -
Page 6: Before Starting
30" GAS SLIDE-IN RANGE INSTALLATION INSTRUCTIONS (Models with Sealed Top Burners) Before Starting Tools you will need Min. For leveling legs and anti-tip brackets: Cutout ● Adjustable wrench or channel lock pliers Width ● 5/16" Nutdriver or Flat Head Screw Driver ●... -
Page 7: Provide An Adequate Gas Supply
30" GAS SLIDE-IN RANGE INSTALLATION INSTRUCTIONS (Models with Sealed Top Burners) • If you are using a through the floor gas entry, remove Connect the range to the gas the line protector shield from the bottom of the unit to supply allow access for the pipe line (figure 3). -
Page 8: Lp/Propane Gas Conversion
30" GAS SLIDE-IN RANGE INSTALLATION INSTRUCTIONS (Models with Sealed Top Burners) Grounding Instructions Once regulator is in place, open the shutoff valve in the gas supply line. Wait a few minutes for gas to move IMPORTANT Please read carefully. through the gas line. For personal safety, this appliance must be Check for leaks. -
Page 9: Range Installation
30" GAS SLIDE-IN RANGE INSTALLATION INSTRUCTIONS (Models with Sealed Top Burners) Range Installation 8.13 Adjust leveling legs so that the underside of the cooktop is sitting on the countertop. Carefully Important Note: Door removal is not a requirement for screw in (refer to Leveling the range: Models installation of the range, but is an added convenience. -
Page 10: Leveling The Range
30" GAS SLIDE-IN RANGE INSTALLATION INSTRUCTIONS (Models with Sealed Top Burners) Leveling the Range Models Equipped with Leveling Device Level the range after installation in the cutout opening. 1. Open the range drawer. The leveling screws control the height of the rear leg. 2. - Page 11 30" GAS SLIDE-IN RANGE INSTALLATION INSTRUCTIONS (Models with Sealed Top Burners) 11.3 Check the Igniters To prevent flare-ups and avoid Operation of electric igniters should be checked after creation of harmful by-products, do not use the cooktop range and supply line connectors have been carefully without all burner caps properly installed to insure checked for leaks and range has been connected to proper ignition and gas flame size.
-
Page 12: When All Hookups Are Complete
30" GAS SLIDE-IN RANGE INSTALLATION INSTRUCTIONS (Models with Sealed Top Burners) Operation of Oven Burners and Oven oven bottom out of the oven. Remove burner baffle so 11.5 that burner flame can be observed. Adjustments 11.5.1 Electric Ignition Burners If the flame is yellow, increase air shutter opening size Operation of electric igniters should be checked after (see "2"... -
Page 13: Anti-Tip Brackets Installation
30" GAS SLIDE-IN RANGE INSTALLATION INSTRUCTIONS (Models with Sealed Top Burners) Anti-Tip Brackets Installation 1. Draw a center line (CL) on the floor where the range should be installed. Also draw a line on the floor at Instructions the range back position if there is no wall. Models Equipped with Leveling Device 2. - Page 14 30" GAS SLIDE-IN RANGE INSTALLATION INSTRUCTIONS (Models with Sealed Top Burners) C. Level and position the range - Slide range to its 12.2 Models Equipped with Leveling Legs final position. Insert the range leveling leg in the anti-tip bracket. Visually verify if the anti-tip bracket is engaged. To reduce the risk of tipping of the Lower the range by adjusting the 4 leveling legs range, the range must be secured to the floor by the...
- Page 15 INSTRUCCIONES DE INSTALACIÓN DE COCINAS DE GAS DE 30" LA INSTALACIÓN Y EL SERVICIO DEBEN SER EFECTUADOS POR UN INSTALADOR CALIFICADO. IMPORTANTE: GUARDE ESTAS INSTRUCCIONES PARA USO DEL INSPECTOR LOCAL DE ELECTRICIDAD. LEA Y GUARDE ESTAS INSTRUCCIONES PARA REFERENCIA FUTURA. Estados unidos Si la información contenida en este manual no es seguida exactamente, puede ocurrir un incendio o explosión causando daños materiales,...
-
Page 16: Importantes Instrucciones De Seguridad
INSTRUCCIONES DE INSTALACIÓN DE COCINAS DE GAS DE 30" (Modelos con quemadores sellados) IMPORTANTES INSTRUCCIONES DE SEGURIDAD Este manual contiene importantes mensajes de seguridad. Siempre lea y obedezca todo mensaje de seguridad. Indica una situación muy peligrosa, la cual de no ser evitada puede ocasionar graves heridas y hasta la muerte. Indica una situación de peligro inminente, la cual de no ser evitada puede ATENCION ocasionar heridas leves o daños al producto solamente. -
Page 17: Dimensiones De La Unidad & De La Gabinete
INSTRUCCIONES DE INSTALACIÓN DE COCINAS DE GAS DE 30" (Modelos con quemadores sellados) • Nunca use la estufa para calentar el cuarto. • Ajuste todos los controles a la posición El uso prolongado de la estufa sin la adecuada "OFF" (apagada) después de haber hecho una ventilación puede resultar peligroso. operación con tiempo programado. •... - Page 18 INSTRUCCIONES DE INSTALACIÓN DE COCINAS DE GAS DE 30" (Modelos con quemadores sellados) Dimensiones de la Gabinete Acepille el 1 ½" Max. borde subido (3,8 cm Max.) a que deje 30" Min. espacio (76,2 cm Min.) La superficie debe para un estar plana y nivelada borde 31½"...
-
Page 19: Para Evitar Fractura De La Unidad
INSTRUCCIONES DE INSTALACIÓN DE COCINAS DE GAS DE 30" (Modelos con quemadores sellados) Para evitar fractura de la unidad: NO manipule la unidad sosteniendo la cubierta. La cubierta alrededor del espacio donde usted instalara su unidad debe de estar plana y nivelada. (Vea el área sombreada en la ilustración número 1). -
Page 20: Antes De Comenzar
INSTRUCCIONES DE INSTALACIÓN DE COCINAS DE GAS DE 30" (Modelos con quemadores sellados) Antes de comenzar Herramientas que va a necesitar Anchura Para patas de nivelación y montura anti-vuelco: de hueco ● Llave ajustable o alicates mín. ● Llave para apretar tuercas de 5/16" o un Mostrador moldeado o destornillador de cabeza plana enazulejo recortado 3/4"... -
Page 21: Proporcione Un Suministro De Gas Adecuado
INSTRUCCIONES DE INSTALACIÓN DE COCINAS DE GAS DE 30" (Modelos con quemadores sellados) Conecte la estufa al suministro • Si esta usando una salida de piso de gas, remover la protección de la línea de la parte de abajo de la unidad de gas para permitir el acceso para la tubería de gas (Fig 3). -
Page 22: Conversión Para Uso De Propano Liquido
INSTRUCCIONES DE INSTALACIÓN DE COCINAS DE GAS DE 30" (Modelos con quemadores sellados) Requisitos eléctricos Una vez que regulador está en su lugar, abra la válvula en la línea del suministro de gas. Espere algunos 120 voltio, 60 Hertzio, circuito dedicado minutos para que el gas pueda moverse a través de la apropiadamente puestos a tierra protegido por un línea de gas. -
Page 23: Instalación De La Estufa
INSTRUCCIONES DE INSTALACIÓN DE COCINAS DE GAS DE 30" (Modelos con quemadores sellados) el conducto flexible de gas. Asegúrese de no pellizque el 8.12 Nivele la cocina (vea Nivelación de la estufa). El piso conducto flexible de gas detrás de la estufa al reemplazar la donde se instala la cocina debe estar nivelado. -
Page 24: Nivelación De La Estufa
INSTRUCCIONES DE INSTALACIÓN DE COCINAS DE GAS DE 30" (Modelos con quemadores sellados) Nivelación de la estufa Para los modelos equipado con un sistema de dispositivo de nivelación. Nivele la cocina después de haberla instalado en la abertura del mostrador. Abra la gaveta. Las tornillos de nivelación controlar la altura de las patas traseras. Baje el aparato, las patas de nivelación alternamente, hasta que la parte baja de la superficie de cocción Figura 8... - Page 25 INSTRUCCIONES DE INSTALACIÓN DE COCINAS DE GAS DE 30" (Modelos con quemadores sellados) su lugar cuando los quemadores estén en uso. No permita que b. El quemador superior se encenderá cuando el gas llegue se introduzcan en los agujeros de soporte del orificio de los al quemador. Cebe el sistema de las tuberías de suministro quemadores a gas derrames, alimentos, agentes de limpieza dejando la perilla en la posición LITE (encendido) hasta o cualquier otro material.
-
Page 26: Después De Terminar La Instalación
INSTRUCCIONES DE INSTALACIÓN DE COCINAS DE GAS DE 30" (Modelos con quemadores sellados) Operación de Quemadores del Horno y Para retirar el fondo del horno, retire los tornillos de 11.5 ajuste del horno en la parte posterior del fondo del horno. Ajustes de Horno Jale hacia arriba, desenganche el frente del fondo del 11.5.1 Quemadores de ignición eléctrica... - Page 27 INSTRUCCIONES DE INSTALACIÓN DE COCINAS DE GAS DE 30" (Modelos con quemadores sellados) Instrucciones de instalación de la 1. Dibujar una línea central en el piso donde se instalará la cocina. Si no hay pared posterior, dibujar fijación anti-inclinación otra línea en el piso que corresponda a la parte Para los modelos equipado con un 12.1 posterior de la cocina.
-
Page 28: Fijaciones De Anti-Inclinacion
INSTRUCCIONES DE INSTALACIÓN DE COCINAS DE GAS DE 30" (Modelos con quemadores sellados) C. Nivele la cocina y coloque la cocina en su lugar. 10.2 Instrucción para la instalación de las Deslice la estufa a su lugar. Colocar la pata niveladora dentro de la fijaciones de anti-inclinación. - Page 29 INSTRUCTIONS D'INSTALLATION POUR CUISINIÈRE ENCASTRABLE DE 30" À GAZ UN INSTALLATEUR QUALIFIÉ DOIT EFFECTUER L’INSTALLATION ET LE SERVICE IMPORTANT: CONSERVEZ CES INSTRUCTIONS POUR LES INSPECTEURS LOCAUX. LISEZ CES INSTRUCTIONS ET CONSERVEZ‑LES POUR RÉFÉRENCES ULTÉRIEURES. Si les instructions de ce manuel ne sont pas suivies à la let‑ Etats‑Unis tre, il pourrait en résulter un incendie ou une explosion susceptible de causer des dommages matériels, des blessures ou même la mort.
-
Page 30: Instructions De Sécurité Importantes
INSTRUCTIONS D'INSTALLATION POUR CUISINIÈRE ENCASTRABLE DE 30" À GAZ (Modèles avec brûleurs fermés) INSTRUCTIONS DE SÉCURITÉ IMPORTANTES Ce guide contient des instructions et symboles de sécurité importants. Veuillez faire particulièrement attention à ces symboles et suivre les instructions données. Ce symbole vous prévient des situations qui risquent d’entraîner de graves blessures, la mort ou des dommages matériels. -
Page 31: Dimensions Du Produit & Du Comptoir
INSTRUCTIONS D'INSTALLATION POUR CUISINIÈRE ENCASTRABLE DE 30" À GAZ (Modèles avec brûleurs fermés) • N’utilisez jamais votre cuisinière pour réchauffer • Replacez toutes les commandes à la position ou chauffer la pièce. L’utilisation prolongée de arrêt "off" après l’utilisation d’une fonction la cuisinière sans une ventilation adéquate peut programmable chronométrée. s’avérer dangereuse. •... - Page 32 INSTRUCTIONS D'INSTALLATION POUR CUISINIÈRE ENCASTRABLE DE 30" À GAZ (Modèles avec brûleurs fermés) Dimensions de l'armoire Arasez le dessus du comptoir à au moins 31½" (80 1 ½" Max. cm) de largeur (3.8 cm Max.) pour l'appareil 30" Min. (76,2 cm Min.) Ces surfaces doivent être planes et à...
-
Page 33: Pour Éviter Les Bris
INSTRUCTIONS D'INSTALLATION POUR CUISINIÈRE ENCASTRABLE DE 30" À GAZ (Modèles avec brûleurs fermés) Pour éviter les bris: NE déplacez ou manipulez PAS l'appareil par la surface de cuisson. Le comptoir autour de l'ouverture de découpage de la table de cuisson doit être plat et à niveau (voir la partie hachurée sur l'illustration 1). Avant d'installer l'appareil, mesurez la hauteur des deux (2) côtés du comptoir (H1-4), avant et arrière (voir l' illustration 1) du plancher jusqu'au dessus du comptoir. -
Page 34: Avant De Commencer
INSTRUCTIONS D'INSTALLATION POUR CUISINIÈRE ENCASTRABLE DE 30" À GAZ (Modèles avec brûleurs fermés) Avant de commencer • Les dessus de comptoir au rebord avant moulé doivent être aplanis de ¾" (1,9 cm) à chaque coin Outils requis avant de l’ouverture (Figure 1). Pour les pattes de nivellement et le •... -
Page 35: Alimentation En Gaz - Installation
INSTRUCTIONS D'INSTALLATION POUR CUISINIÈRE ENCASTRABLE DE 30" À GAZ (Modèles avec brûleurs fermés) Alimentation en gaz – Installation Cet appareil a été conçu en usine pour fonctionner au gaz naturel avec une pression d’admission de 4" (10,16 cm) de colonne d’eau (1.0 kpa). Un régulateur (76.2) de pression convertible est branché... -
Page 36: Branchez Le Gaz À La Cuisinière
INSTRUCTIONS D'INSTALLATION POUR CUISINIÈRE ENCASTRABLE DE 30" À GAZ (Modèles avec brûleurs fermés) Branchez le gaz à la cuisinière l ’ a Une fois le régulateur en a r e Important: Enlever tout le matériel d’emballage des place, ouvrez le robinet de compartiments du four avant de brancher l’alimentation la ligne d’alimentation en à... -
Page 37: Branchez Le Courant Électrique À La Cuisinière
INSTRUCTIONS D'INSTALLATION POUR CUISINIÈRE ENCASTRABLE DE 30" À GAZ (Modèles avec brûleurs fermés) Branchez le courant électrique à le câble d'alimentation électrique derrière l'appareil. Re-connectez la tuyauterie rigide au régulateur (si la cuisinière applicable) et vérifier qu'il n'y a pas une fuite de gaz du Circuit de dérivation de 120 volt, 60 Hertz, avec mise joint. -
Page 38: Mise À Niveau De La Cuisinière
INSTRUCTIONS D'INSTALLATION POUR CUISINIÈRE ENCASTRABLE DE 30" À GAZ (Modèles avec brûleurs fermés) le comptoir soit plat doivent être faits sinon des SI DES ACCESSOIRES SONT IMPORTANT espaces entre l'appareil et le comptoir peuvent se NÉCESSAIRES produire. Installation avec un dosseret Pour éviter d'endommager Vous pouvez commander un nécessaire de dosseret l'appareil, ne pas le saisir ou le manipuler par la dans un centre de service Sears. -
Page 39: Installation De La Moulure Décorative Arrière (Si Nécessaire)
INSTRUCTIONS D'INSTALLATION POUR CUISINIÈRE ENCASTRABLE DE 30" À GAZ (Modèles avec brûleurs fermés) a. Pour ajuster les vis de nivellement avant, utilisez une clé Moulure décorative à molette, localisez la vis et tournez-la dans le sens anti- horaire pour baisser ou dans le sens horaire pour lever Vis (3) l'appareil. - Page 40 INSTRUCTIONS D'INSTALLATION POUR CUISINIÈRE ENCASTRABLE DE 30" À GAZ (Modèles avec brûleurs fermés) brûleur et donc à niveau (Figure 10). Référez-vous 11.4 Réglez la position "LOW" des robinets aux figures 11 & 12 pour connaître le positionnement des brûleurs de surface (flux linéaire) correct et incorrect des couvercles de brûleurs. Vérifiez si la position LOW doit être ajustée: Une fois en place, vérifiez si les couvercles sont bien a.
-
Page 41: Lorsque Tous Les Raccords Sont Terminés
INSTRUCTIONS D'INSTALLATION POUR CUISINIÈRE ENCASTRABLE DE 30" À GAZ (Modèles avec brûleurs fermés) Pour faire le réglage, desserrez la vis de blocage ("3" à la figure 17), repositionnez le clapet d'air et serrez la vis de blocage. Replacez le fond du fourneau. Brûleur de rôtisserie Déflecteur (Modèles à... -
Page 42: Installation Du Support Anti-Bascule
INSTRUCTIONS D'INSTALLATION POUR CUISINIÈRE ENCASTRABLE DE 30" À GAZ (Modèles avec brûleurs fermés) Instructions d’installation du 1. Dessinez une ligne au sol (à l'avant de l'ouverture) en ligne avec le devant des armoires (et non en support anti‑bascule ligne avec le retour d'armoire). Modèles possédant un dispositif de 12.1 2. - Page 43 INSTRUCTIONS D'INSTALLATION POUR CUISINIÈRE ENCASTRABLE DE 30" À GAZ (Modèles avec brûleurs fermés) C. Mise à niveau et positionnement de la cuisinière. 12.2 Modèles possédant des vis de Glissez la cuisinière à son emplacement final. Insérez nivellement la patte de nivellement de la cuisinière dans le support. La cuisinière doit être fixée au Assurez-vous que la patte de la cuisinière est bien plancher pour éviter qu'elle ne bascule, en installant...
-
Page 44: Notes
NOTES ‑ NOTAS...