Table of Contents
- 1 Table of Contents
- 2 Important Safety Instructions
- 3 Features at a Glance
- 4 Installation
- 5 Door Removal Instructions - Style 1
- 6 Door Removal Instructions - Style 2
- 7 Handle Installation
- 8 Connecting Water Supply
- 9 Controls
- 10 Storage Features
- 11 Automatic Ice & Water Dispenser
- 12 Changing the Filter
- 13 Normal Operating Sounds and Sights
- 14 Care and Cleaning
- 15 Before You Call
- 16 Major Appliance Warranty
All about the
Use
of your
Important Safety Instructions ......................2
Features at a Glance ...................................4
Installation ................................................5
Door Removal Instructions - Style 1 .............7
Door Removal Instructions - Style 2 .............9
Handle Installation ...................................11
Connecting Water Supply ..........................12
Controls ...................................................14
www.frigidaire.com USA 1-800-944-9044
&
Care
Refrigerator
TA B L E O F C O N T E N T S
Storage Features ......................................17
Automatic Ice & Water Dispenser ..............18
Changing the Filter ...................................23
Normal Operating Sounds and Sights .........24
Care and Cleaning ....................................25
Before you Call .........................................27
Major Appliance Warranty .........................30
www.frigidaire.ca Canada 1-800-265-8352
Table of Contents

Related Manuals for Frigidaire LFSS2612TE0


Summary of Contents for Frigidaire LFSS2612TE0
-
Page 1: Table Of Contents
Normal Operating Sounds and Sights ..24 Door Removal Instructions - Style 2 .....9 Care and Cleaning ........25 Handle Installation ........11 Before you Call .........27 Connecting Water Supply ......12 Major Appliance Warranty ......30 Controls ...........14 www.frigidaire.com USA 1-800-944-9044 www.frigidaire.ca Canada 1-800-265-8352... -
Page 2: Important Safety Instructions
IMPORTANT SAFETY INSTRUCTIONS Installation Checklist WARNING Doors lease read all instructions before using this Handles are secure and tight refrigerator. Door seals completely to cabinet on all sides For your Safety Freezer door is level across the top •... - Page 3 IMPORTANT SAFETY INSTRUCTIONS freezer, please follow the instructions below to Avoid connecting refrigerator to a Ground Fault Interrupter (GFI) circuit. Do not use an help prevent accidents. extension cord or adapter plug. Proper Disposal of Refrigerators/Freezers • If the power cord is damaged, it should We strongly encourage responsible appliance be replaced by an authorized service recycling/disposal methods.
-
Page 4: Features At A Glance
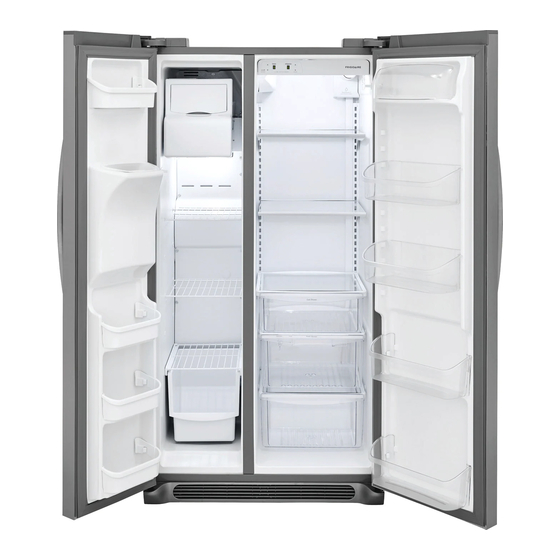
Shelf Glass Shelf Door Bin Deli Drawer Fixed Door Bins Door Bin Crisper Pan and Cover Fixed Door Bin Slide Out Basket Toe Grille IMPORTANT Features not included with your refrigerator can be purchased at www.frigidaire.com or by calling 1-800-944-9044. -
Page 5: Installation
INSTALLATION Toe Grille Installation and This Use & Care Guide provides general operating instructions for your model. Use Removal the refrigerator only as instructed in this Use & Care Guide. Before starting the To install toe grille refrigerator, follow these important first 1 Open both doors. - Page 6 INSTALLATION Door Opening To level the doors using the adjustable lower hinge: NOTE NOTE he refrigerator doors are designed to shut Some models will not have a set screw. For by themselves within a 20 degree opening. those models follow steps 2 through 4. Your refrigerator should be positioned to 1 Before leveling either door, remove set allow easy access to a counter or table when...
-
Page 7: Door Removal Instructions - Style 1
DOOR REMOVAL INSTRUCTIONS - STYLE 1 Getting through narrow spaces If your refrigerator will not fit through an entrance area, you can reduce its size by removing the doors. Check first by measuring the entrance. Tools Necessary: Phillips Head Socket Wrench Set Adjustable Wrench 3/8" Fixed Wrench Top Hinge NOTE Cover Screw Before you begin, turn Freezer and Refrigerator controls to “O” and remove Bottom electrical power cord from wall outlet. - Page 8 DOOR REMOVAL INSTRUCTIONS - STYLE 1 To Remove Freezer Door: 1. Disconnect water line coming from lower hinge of freezer door at connection located under front of freezer: Press outer ring against face of fitting, then pull to remove tube. 2. Remove top hinge cover screw on freezer door and remove cover.
-
Page 9: Door Removal Instructions - Style 2
DOOR REMOVAL INSTRUCTIONS - STYLE 2 grille (as explained in the Installation Tools Necessary: Instructions that came with your appliance). 3 Remove any food from the door shelves. 4 Close the doors. To remove the refrigerator top hinge cover: 1 Remove the three screws from each cover over the top door hinges. - Page 10 DOOR REMOVAL INSTRUCTIONS - STYLE 2 3 Remove the two bottom hinge screws and 3 Detach the water tube from the connector hinge if necessary. located below the freezer door. The connector releases when you press its Door outer sleeve inward. 4 Remove the screws from the top hinge Hinge and pull the multi-wire cable through it.
-
Page 11: Handle Installation
HANDLE INSTALLATION 1 Remove handles from carton and any other protective packaging. CAUTION 2 Position freezer handle end caps over upper and lower pre-installed shoulder Wear gloves and safety goggles and use bolts (A) that are fastened into door, extreme CAUTION when installing these ensuring the holes for the set screws are handles. -
Page 12: Connecting Water Supply
6 ft. Stainless Steel Water Line) and for manufacturer will not be responsible for homes without an existing valve, Frigidaire any damage if plastic tubing is used for recommends its Smart Choice water line ®... - Page 13 CONNECTING THE WATER SUPPLY 5 With steel clamp and screw, secure water Plastic Water Tubing supply line (copper tubing only) to rear Steel to Ice Maker panel of refrigerator as shown. Clamp Fill Tube 6 Coil excess water supply line (copper tubing only), about 2½...
-
Page 14: Controls
CONTROLS Allowing Cooling Time Before Use To ensure safe food storage, allow your refrigerator to operate with the doors closed for at least 8 to 12 hours before placing food inside. During this cooling period, you do not need to adjust the controls, which are preset at the factory. - Page 15 CONTROLS IF TEMPERATURE DISPLAYS FLASH... If ever you see “OP” or “SH” flashing, it may indicate that the control system has detected a performance problem. Call your service representative, who can interpret the flashing message. To maintain temperatures, a fan circulates air in the refrigerator and freezer compartments. For good circulation, do not block cold air vents with food items. Numeric Display Freezer Refrigerator Warmest Factory Setting Coldest ALARMS Power Fail In the event of a power failure, the ‘power fail’...
- Page 16 CONTROLS Turning the Cooling system on and off You can disable the cooling system in your refrigerator by pressing the On/Off button located on the left side of the temperature control panel. To ensure that you do not accidentally turn off the cooling system, the button does not work unless you press and hold it for three seconds.
-
Page 17: Storage Features
STORAGE FEATURES vegetables, and other fresh produce. The fresh CAUTION drawers feature humidity control which allows you to adjust the humidity within the drawer. This can To avoid personal injury or property extend the life of fresh vegetables that keep best damage, handle tempered glass shelves in high humidity. -
Page 18: Automatic Ice & Water Dispenser
AUTOMATIC ICE & WATER DISPENSER NOTE Your refrigerator may have some or all of the features listed below. Become familiar with these features and their use and care. CUBE Press the CUBE Touch Pad to get cubed ice. A green light will appear above the Touch Pad. - Page 19 AUTOMATIC ICE & WATER DISPENSER NOTE Your refrigerator may have some or all of the features listed below. Become familiar with these features and their use and care. Crush Press the Crush Touch Pad to get crushed ice. A red indicator will appear above the Touch Pad.
- Page 20 AUTOMATIC ICE & WATER DISPENSER Priming the Water Supply System Using the Ice Maker after Installation Your refrigerator’s water supply system includes several tubing lines, an advanced water filter, Before making ice for the first time, be sure a distribution valve bank, and a reserve tank to prime the water supply system. Air in new (some models) to ensure ample supply to plumbing lines can result in two or three empty the ice and water dispenser at all times.
- Page 21 AUTOMATIC ICE & WATER DISPENSER IMPORTANT CAUTION Small ice cubes or ice chips jamming in the ice maker may be a sign that your water filter Chemicals from a malfunctioning water needs changing. If you have a side mounted softener can damage the ice maker. If the ice maker you may also experience hollow water supply to your refrigerator is softened, cubes partially frozen cubes with water inside.
- Page 22 AUTOMATIC ICE & WATER DISPENSER IMPORTANT When removing or replacing the ice bin, DO NOT rotate the auger in the ice bin. If the auger is accidentally rotated, you must realign the auger by turning it in 90 degree turns (see below) until the ice bin fits into place with the drive mechanism. If the auger is not properly aligned when replacing the ice bin, the refrigerator will...
-
Page 23: Changing The Filter
4 Unpackage the new filter cartridge. Using To order your replacement filters, please visit our the alignment guide, slide it gently into the online store at www.frigidaire.com/store, by calling filter housing until it stops against the snap-in toll-free at 877-808-4195, or by visiting the dealer connector at the back of the housing. where you purchased your refrigerator. Frigidaire... -
Page 24: Normal Operating Sounds And Sights
NORMAL OPERATING SOUNDS AND SIGHTS Understanding the Sounds you NOTE may Hear Your new, high-efficiency refrigerator may Energy efficient foam in your refrigerator is introduce unfamiliar sounds. These sounds not a sound insulator. normally indicate your refrigerator is operating correctly. Some surfaces on floors, walls, and kitchen cabinets may make these sounds more noticeable. NOTE Following is a list of major components in your refrigerator and the sounds they can cause:... -
Page 25: Care And Cleaning
CARE & CLEANING Protecting your investment Keeping your refrigerator clean maintains appearance and prevents odor build-up. Wipe up any spills immediately and clean the freezer and refrigerator compartments at least twice a year. When cleaning, take the following precautions: • Never use CHLORIDE or cleaners with bleach to clean stainless steel. •... - Page 26 CARE & CLEANING Care & Cleaning Tips Part What To Use Tips and Precautions Interior & Door • Soap and water Use two tablespoons of baking soda in Liners • Baking soda and water one quart of warm water. Be sure to wring excess water out of sponge or cloth before cleaning around controls, light bulb or any electri- cal part.
-
Page 27: Before You Call
BEFORE YOU CALL 1-800-944-9044 (United States) Visit our web site at 1-800-265-8352 (Canada) www.frigidaire.com CONCERN CAUSE SOLUTION AUTOMATIC ICE MAKER Ice maker is • Ice maker wire signal arm is • Move wire signal arm to the “down” or ON not making any in the “up”... - Page 28 BEFORE YOU CALL CONCERN CAUSE SOLUTION DISPENSER (Ice & Water) (Continued) Dispenser will • Dispenser lock out is • Press and hold control lock for three not dispense engaged. seconds. water. • Water filter not seated • Remove and reinstall the water filter. Be properly. sure to push the filter firmly so that you hear it lock solidly into position. •...
- Page 29 DIGITAL TEMPERATURE DISPLAY Digital temper- • Electronic control system • Call your Frigidaire service representative, ature displays has detected a perfor- who can interpret any messages or num- are flashing. mance problem.
-
Page 30: Major Appliance Warranty
Obligations for service and parts under this warranty must be performed by Electrolux or an authorized service company. Product features or specifications as described or illustrated are subject to change without notice. Canada 1.800.944.9044 1.800.265.8352 Frigidaire Electrolux Canada Corp. 10200 David Taylor Drive 5855 Terry Fox Way Charlotte, NC 28262 Mississauga, Ontario, Canada...