
Related Manuals for LG GCF409BSQW

Summary of Contents for LG GCF409BSQW
- Page 1 Please read this manual carefully before operating your set and retain it for future reference. www.lg.com P/NO.:MFL37432267...
- Page 3 (In the UK Only) Important The wires in this mains lead are coloured in accordance with the following code: GREEN AND YELLOW:EARTH BLUE:NEUTRAL BROWN:LIVE This appliance must be earthed As the colours of the wires in the mains lead of this apparatus may not correspond with the coloured markings identifying the terminals in your plug, proceed as follows:...
-
Page 4: Table Of Contents
T able of Contents Introduction Registration Important Safety I nstruction Identification of P arts Installation Installation Starting Temperature Control Operation Function Ice Making Defrosting Water Dispenser Suggestion On Storing Food Food storage Care and General Information Maintenance Lamp Replaceme n t Cleaning T rouble Shooting Trouble Shooting... -
Page 5: Introduction Registration
Introduction Registration Introduction The model and serial number are found on the rear of this unit. This number is unique to this unit and not available to others. You should record requested information here and retain this guide as a permanent record of your purchase. -
Page 6: Important Safety Instruction
Important Safety Instruction To reduce the risk of fire, electric shock, or injury to persons when using your product, basic safety precautions should be followed, including the following. Read all instructions before using this appliance. 1. When connecting the power The dedicated outlet should be used. - Page 7 Introduction Important Safety Instruction Do not pull out the cord or touch the power plug with wet hands. • It may cause electric shock or injury. Remove water or dust from the power plug and insert it with the ends of the pins securely connected.
- Page 8 Important Safety Instruction Water tank can fill with potable water only. Do not install the fridge-freezer in the wet place or the place which water or rain splashes. Deterioration of insulation of electric parts may cause electric leakage. Do not use or store inflammable materials ether, benzene, alcohol, medicine, LP gas, spray or cosmetics near or in the fridge-freezer.
- Page 9 Introduction Important Safety Instruction Avoid the heating devices. It may cause fire. Do not place flower vase, cup, cosmetics, medicine or any container with water on the fridge-freezer. It may cause fire, electric shock or injury by dropping down. Use the submerged fridge-freezer after checking it. It may cause electric shock or fire.
- Page 10 Important Safety Instruction When any strange smell or smoke is detected from the fridge-freezer, disconnect the power plug immediately and contact to the service center. It may cause fire. Do not allow any person except the qualified engineer to disassemble, repair or alter the fridge- freezer.
- Page 11 Introduction Important Safety Instruction Do not insert the hands or the metal stick into the exit of cool air, the cover, the bottom of the fridge- freezer, the heatproof grill (exhaust hole) at the backside. It may cause electric shock or injury. When you want to dispose the fridge-freezer, contact to the down-block office.
- Page 12 Important Safety Instruction Do not install the fridge-freezer in the wet place or the place which water or rain splashes. Deterioration of insulation of electric parts may cause electric leakage. Do not insert the hands into the bottom of the fridge-freezer.
- Page 13 Introduction Important Safety Instruction Precaution • This fridge-freezer must be properly installed and located in accordance with the Installation Instruction before it is used. • Never unplug your fridge-freezer by pulling on the power cord. Always grip plug firmly and pull straight out from the outlet.
- Page 14 Important Safety Instruction • Do not disassemble, repair or alter the appliance. It may cause fire or abnormal operations, which may lead to injury. • Pull the power plug out of the socket before replacing the interior light in the refrigerator. Otherwise, there is a risk of electric shock.
- Page 15 Introduction Important Safety Instruction Keep ventilation openings, in the appliance enclosure or in the built-in structure, clear of obstruction. Do not use mechanical devices or other means to accelerate the defrosting process, other than those recommended by the manufacturer. Do not damage the refrigerant circuit. Do not use electrical appliances inside the food storage compartments of the appliance, unless they are of the type recommended by the manufacturer.
- Page 16 Important Safety Instruction • If the wall socket is loose, do not insert the power plug. It may cause electric shock or fire. • Never unplug your refrigerator by pulling on the power cord. Always grip plug firmly and pull it straight out from the outlet.
-
Page 17: Identification Of Parts
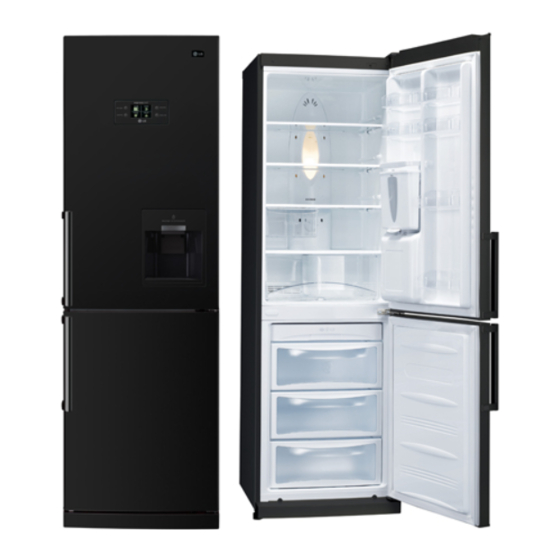
Introduction Multi-air Flow Duct Lamp Removable Glass Shelf (2 or 3) Fresh Drawer (Option) Vegetable Drawer Used to keep fruits and vegetables, etc. fresh and crisp. Ice Cube Tray Freezer Compartment Removable Plinth Note Identification of Parts If you find some parts missing from your unit, they may be parts only used in other models. -
Page 18: Installation Installation
Installation Select a good location. Place your fridge-freezer where it is easy to use. Avoid placing the unit near heat sources, direct sunlight or moisture. There must be proper air circulation around your fridge-freezer to keep it operating efficiently. To avoid vibration, the unit must be leveled. If required, adjust the leveling screws to compensate for the uneven floor. -
Page 19: Operation Temperature Control
Operation Temperature Control Your fridge-freezer has two controls that let you regulate the temperature in the fridge and freezer compartments. Display Panel Display Panel For Temperature Control Temperature Adjustment Button for Freezer Compartment Super Freezer Button Vacation Button FRZ. TEMP. REF. -
Page 20: How To Adjust The Temperature In The
How to adjust • You can now adjust the temperature of the refrigerator and freezer compartment as you want. the temperature in the refrigerator and freezer compartment • When you press the temperature control buttons, the temperature of Refrigerator and Freezer compartment is repeated in the following order. -
Page 21: Function
Operation Function Super Freezer • This function is used when you want to freeze the foods quickly. Press the ‘SUPER FRZ.’ (Super Freezer) button once, and then the quick freeze operation starts with the display light on. • The Super Freeze operation takes about 3 hours. When its operation ends, it automatically returns to the previous temperature setting. -
Page 22: On/Off
On/Off • Pressing this button refrigerator power is ON or OFF. • ON or OFF is repeated whenever pressing the ON/OFF button. (For ON or OFF press the “On/Off” button for 3 secs.) Memory Feature Function to save the set temperature and vacation status and On/Off status. -
Page 23: Water Dispenser
Operation Water Dispenser Features Install • Please assemble the VALVE ASSEMBLY after correctly adjusting it with a DOOR HOLE. - Page 24 Filling of After turning the HANDLE Tank backward with the WATER TANK WATER TANK installed at the DOOR, Open the CAP TANK (SMALL) and then fill water using a kettle etc. * Fill water while watching a sight glass on the front of the WATER TANK.
-
Page 25: Suggestion On Storing Food
Suggestions on food storage Storing Food Note Storing Food • Do not store food which goes bad easily at low temperature, such as banana, and melon. • Allow hot food to cool prior to storing. Placing hot food in the fridge-freezer could spoil other food, and lead to higher electric bills. -
Page 26: General Information
General Information Power Failure • 1~2 hour power failure does no harm to the foods stores. Try to avoid opening and closing the door too frequently. If You Move • Take out foods from the fridge-freezer and firmly fix the loose items with tape. •... -
Page 27: Cleaning
Care and Maintenance Cleaning Before Cleaning Be sure to unplug the power. Exterior Clean the outside of the fridge-freezer with a soft cloth soaked with hot water or liquid detergent. If you use a detergent, be sure to wipe it with a clean wet cloth. Interior As above. - Page 28 DRIP TRAY Exterior Dispenser Wipe moisture etc out outside of Dispenser and on the DISPENSER PAD using a cloth. WATER TANK CAP TANK Clean and fully rinse the CAP TANK (Big & Small) by using neutral cleansing agent. (Big & Small) Especially for the groove part of the CAP TANK, it is convenient to cleanse it by using a small brush.
-
Page 29: T Rouble Shooting Trouble Shooting
Trouble Shooting Trouble Shooting Before calling for service, check this list. It may save you both time and expense. This list includes common occurrences that are not the result of defective workmanship or materials in this appliance. Possible Causes Problem Fridge-Freezer •... -
Page 30: Disposal Of Your Old Appliance
Problem Possible Causes Moisture collects • Too frequent or too long door openings. inside • In humid weather, air carries moisture into fridge when doors are opened. Fridge has odor • Foods with strong odors should be tightly covered or wrapped. -
Page 31: T O Reverse Precaution
To Reverse the Doors Your fridge-freezer is designed with reversible doors,so that they may open from either the left or right hand side to suit your kitchen design. Precaution Before reversing the door, first of all,you should take out food and accessories like shelves or trays which are not fixed in the fridge-freezer. - Page 32 Loosen the bolt of the Hinge Middle Middle , and lift up the freezer door (When separating the refrigerator door, separate the bush together.)Separate the hinge cover and set it on the separated part of middle hinge . After unscrewing the screw connected to the bottom cover connect the cover cap on the right side.
- Page 33 Memo...