Table of Contents
IMPORTANT:
Read Before Using
GRL2000-40H
GRL2000-40HV
RC4
Call Toll Free
for Consumer
Information &
Service Locations
For English Version
1.800.561.8187
Operating /Safety Instructions
Consignes de fonctionnement /sécurité
Instrucciones de funcionamiento y seguridad
Pour obtenir des informations
et les adresses de nos centres
de service après-vente,
appelez ce numéro gratuit
See page 5
www.
IMPORTANT :
Lire avant usage
.com
IMPORTANTE:
Leer antes de usar
Llame gratis para
obtener información
para el consumidor y
ubicaciones de servicio
Table of Contents

Related Manuals for Bosch GRL2000-40HV


Summary of Contents for Bosch GRL2000-40HV
- Page 1 Lire avant usage Leer antes de usar Operating /Safety Instructions Consignes de fonctionnement /sécurité Instrucciones de funcionamiento y seguridad GRL2000-40H GRL2000-40HV Call Toll Free Pour obtenir des informations Llame gratis para for Consumer et les adresses de nos centres obtener información Information &...
- Page 2 GRL2000-40H 1.800.561.8187 [email protected] www. .com...
- Page 3 GRL2000-40HV 1.800.561.8187 [email protected] www. .com...
- Page 4 1.800.561.8187 [email protected] www. .com...
- Page 5 GR13 BT160 s io LR20 1.800.561.8187 [email protected] www. .com...
- Page 6 1.800.561.8187 [email protected] www. .com...
-
Page 7: Safety Symbols
Safety Symbols The definitions below describe the level of severity for each signal word. Please read the manual and pay attention to these symbols. This is the safety alert symbol. It is used to alert you to potential personal injury hazards. Obey all safety messages that follow this symbol to avoid possible injury or death. - Page 8 DO NOT place the laser tool in a position Electrical safety that may cause anyone to stare into the Batteries can explode or laser beam intentionally or unintentionally. leak, cause injury or fire. Serious eye injury could result. To reduce this risk, always follow all instructions ALWAYS position the laser tool securely.
- Page 9 Magnets Maintain tools. Check for misalignment or binding of moving parts, breakage of parts Keep the tool, laser receiver LR20 and any other condition that may affect (23), and laser target plate (29) the operation. If damaged, have the tool away from cardiac pacemakers.
-
Page 10: Fcc Caution
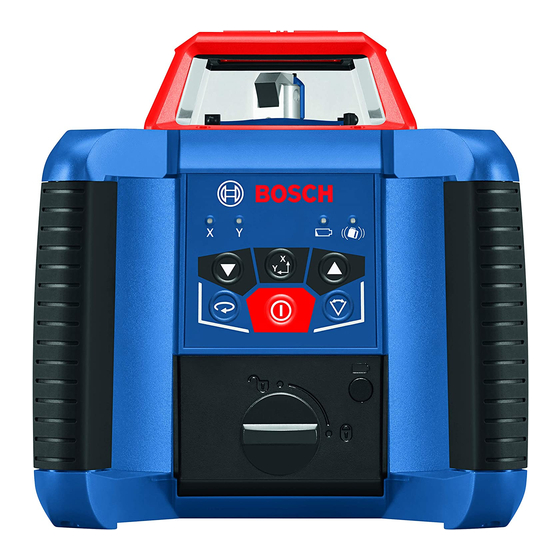
FCC Caution The manufacturer is not respon- that interference will not occur in a particu- sible for radio interference caused lar installation. If this equipment does cause by unauthorized modifications to harmful interference to radio or television re- this equipment. Such modifications could void ception, which can be determined by turning the user’s authority to operate the equipment. - Page 11 21 Tripod* Exit opening for plumb beam 22 Leveling rod* (GRL2000-40HV only) 23 LR20 Laser receiver Plumb beam (GRL2000-40HV only) 24 Laser viewing glasses* Sensor for remote control 25 Wall mount/alignment unit* 10 Low Battery indicator 26 Wall mount fastening screw*...
- Page 12 Rotational Laser Level GRL2000-40H GRL2000-40HV Working range (Diameter) –without laser receiver approx. 200 ft approx. 200 ft (approx. 60 m) (approx. 60 m) –with laser receiver approx. 2000 ft approx. 2000 ft (approx. 600 m) (approx. 600 m) 1) 2) Leveling Accuracy –...
-
Page 13: Rotational Laser Level
Intended Use Rotational Laser Level The use of optical instruments with this product will increase risk of eye injury. The laser tool is intended for determining and Have the laser tool repaired only through checking precise horizontal partitions, vertical qualified specialist using original spare lines, building lines and plumb points. -
Page 14: Initial Operation
15). In this case, the laser tool starts in the set Setting Up the Laser Tool operating mode upon completion of leveling. For GRL2000-40HV in vertical mode the Y leveling indicator LED is off by de fault, unless it has been tilted/moved from its default position. -
Page 15: Operating Modes
R o t a t i o n a l o p e r a t i o n i s Point Operation suitable when using the (GRL2000-40HV) laser receiver. You can select between different rotational To switch to point operation press the speeds. - Page 16 – in the vertical position for the X-axis (the Y-axis cannot be leveled in the vertical posi- tion) (GRL2000-40HV only). 5 seconds after the last adjustment the Y lev- eling indicator LED 5 will light up red continu- The X-axis and Y-axis are marked on top of the ously.
-
Page 17: Automatic Leveling
The rotation stops, the in one of the four measuring procedures, have laser off, the leveling indicator 5 goes out, and it checked by a Bosch customer service center. the shock-warning indicator 11 flashes red. -17- 1.800.561.8187 [email protected]... - Page 18 t h e u s e r ’ s height deviation of the laser tool for the r e s p o n s i b i l i t y measured axis. periodically check the accuracy of the laser Repeat the procedure for the other axis.
- Page 19 LEDs 5 at a rate of 3x per second. Restart the calibration and if the error persists, – Press the button for dual-axis slope operation 2 have the laser tool checked by a Bosch customer to save the calibration. service agent.
-
Page 20: Z-Axis Calibration
3x per second. Restart the calibration and if the 1x per second. error persists, have the laser tool checked by a Bosch customer service agent. – Wait until the tool is leveled - the prism will start rotating. Check the leveling accuracy after calibration. If the deviation is still outside of the maximum per- –... - Page 21 When working on unstable ground, mount the laser tool onto the tripod 21. Activate the shock-warning function in order to avoid errors in case of ground vibrations or shock to the laser tool. GRL2000-40H and GRL2000-40HV LED Indication Battery Status Green Green Battery sufficient for more than 2h operation...
- Page 22 Use with Accessories Laser Viewing Glasses Working with the Tripod (Accessory) (Accessory) DO NOT use the laser The laser tool is equipped with a 5/8” tripod v i e w i n g g l a s s e s a s mount for horizontal operation on a tripod.
-
Page 23: Maintenance And Service
Bosch power tools. Check the tool each time before using. In all correspondence and spare parts orders, please always include the 10-digit... -
Page 24: Rc4 Remote Control
RC4 Remote Control -24- 1.800.561.8187 [email protected] www. .com... - Page 25 12a, pull on the latch Th e re mote co ntrol i s intend e d for 13a and remove the battery lid. Insert the controlling Bosch rotational laser levels with batteries. When inserting, pay attention infra-red receivers, in indoor and outdoor to the correct polarity according to the use.
- Page 26 By pressing the rotation operation button an authorised customer services agent for 9a, you can switch from line to rotation Bosch power tools. Do not open the remote operation and change between 3 different control yourself. speed and spot mode settings. By pressing -26- 1.800.561.8187...
- Page 27 If you are not completely satisfied with the performance of your laser and measuring tools, for any reason, you can return it to your Bosch dealer within 30 days of the date of purchase for a full refund or replacement. To obtain this 30-Day Refund or Replacement, your return must be accompanied by the original receipt for purchase of the laser or optical instrument product.
- Page 28 ST Copyright Notice: COPYRIGHT(C) 2016 STMicroelectronics Redistribution and use in source and binary forms, with or without modification, are permitted provided that the following conditions are met: – Redistributions of source code must retain the above copyright notice, this list of conditions and the following disclaimer.