
Related Manuals for Electrolux DV430FHM-NN1


Summary of Contents for Electrolux DV430FHM-NN1
- Page 1 EWT1474M7SA EWT1574M7SA Top-Load Washing Machine User Manual เครื่่ � อ งซัั ก ผ้้ า - ฝาบน ค่ � มื ่ อ การื่ใช้้ ง าน...
- Page 2 Products must be used, installed and operated in accordance with this manual. You may not be able to claim on the Electrolux manufacturer’s warranty in the event that your product fault is due to failure to adhere to this manual.
-
Page 3: Table Of Contents
ENGLISH CONTENTS 7. CARE AND CLEANING ....25 7.1 What To Do After You Have Finished Your Washing.... 25 SAFETY INFORMATION..4 7.2 Cleaning The Lint Filter ... 25 1.1 Conditions Of Use ..... 4 7.3 Cleaning The Dispenser ..25 1.2 Child Safety ....... -
Page 4: Safety Information
SAFETY INFORMATION 1.1 Conditions Of Use This appliance is intended to be used in household and similar applications such as: staff kitchen areas in shops, offices and other working environtment; farm houses; by clients in hotels, motels, and other residential type environments;... -
Page 5: Child Safety
ENGLISH 1.2 Child Safety This appliance is not intended for use by young children or infirm persons without supervision. Young children should be supervised to ensure that they do not play with the appliance. The packaging components (e.g. plastic film, polystyrene) can be dangerous to children - danger of suffocation! Keep them out of children’s reach. -
Page 6: General Safety
1.3 General Safety It is dangerous to alter the specifica- tions or attempt to modify this product in any way. Do not use your washing machine to wash articles with whale bones, material without hems or torn material. Always unplug the appliance and turn off the water supply after use, clean and maintenance. -
Page 7: Use
ENGLISH Make sure that the drainage is working Never pull the power supply cable to properly. remove the plug from the socket, always take hold of the plug itself. May cause electric shock! if the machine is not connected to an earthed/ground system. -
Page 8: Product Description
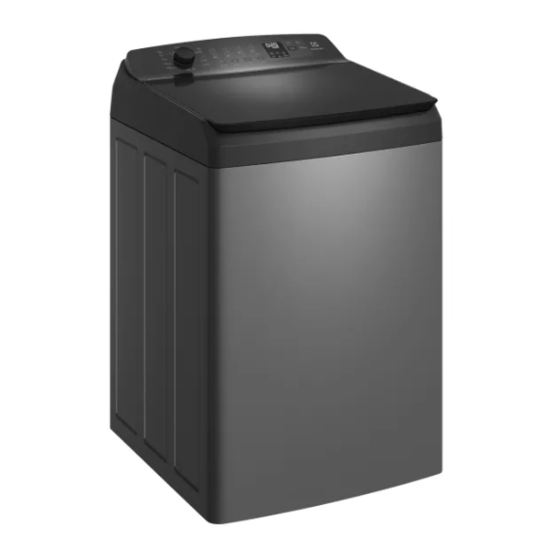
2. PRODUCT DESCRIPTION 2.1 Parts Control Panel Cabinet Front Feet Levelling Adjustable : Right & Left Water Inlet Hose Old inlet hose should be discharged if any and use the inlet hose provided with machine. Mains Cable Outlet Hose/Drain Hose Rear Feet Levelling Adjustable : Right &... - Page 9 ENGLISH Detergent / Bleach Dispenser (See page 17) Softener Dispenser (See page 17) Bleach Dispenser (option) Lint Filter (see page 25) Low Profile Agitator...
-
Page 10: Product Features
2.2 Product Features Auto sensing water level Power Failure Recovery Auto sensing is a feature where the When there is power failure while the machine washer fills automatically with water to is washing or rinsing or spinning. The machine just the right level for your clothes load. -
Page 11: Control Panel
ENGLISH 3. CONTROL PANEL 3.1 Control Panel Description Auto 45 Mins Extra High Power Quick Extended Full 30 Mins Regular Delicates Spin Medium 15 Mins Fast Start / Pause No Soak No Spin Bedding Lock Delay End Delay End Energy Saver Tub Clean Water Level Soak... -
Page 12: Program Chart
3.2 Program Chart Program Max. Load (Dry Clothes) Type of load and soil level Water Level Auto Full EverydayCare Extended 4 kg 2 kg For cotton fabric with heavy soil. 120 Min. 90 Min. 4 kg 2 kg For cotton fabric with moderate soil. -
Page 13: Program Options Compatibility
ENGLISH 3.3 Program Options Compatibility Option Water Level Soak Rinse Spin Delay Program EverydayCare Extended 120 Min. 90 Min. 60 Min. 45 Min. Quick 20 Min. Delicates Bedding Energy Saver Stain Tub Clean Rinse | Spin Spin Remark Default option Available select option... -
Page 14: Options
3.4 Options Water Level Touchpad How does Eco Rinse work ? When Eco rinse is used, rinse water is Choose the water level by pressing the sprayed into the washbowl in pulses. “Water Level” touchpad. After each pulse the washbowl will spin... - Page 15 ENGLISH If you wish to modify or cancel Delay End Spin Touchpad option after starting the program, follow the steps below: Press this touchpad to select the spin speed or no spin, if you want your set the washing machine to PAUSE by laundry to be spun at a speed different pressing “Start/Pause”...
-
Page 16: Settings
3.5 Settings Enabling/Disabling End-Of-Wash Child Safety Lock ( ) Option Buzzer Your appliance is provided with CHILD SAFETY LOCK which permits you to leave This setting permits you to either enable the appliance unsupervised with the door or disable the buzzer at the end of the closed without having to worry that children program. -
Page 17: Daily Use
ENGLISH 4. DAILY USE 4.1 Starting Your Washing 4.3 Add The Detergent/Bleach Machine Powder, Liquid Detergent / Bleach Connect the mains plug to the mains 1. Pull the dispenser drawer forward out socket. from its position. 2. Turn the water tap on. Powder 4.2 Load The Washing Machine... -
Page 18: Add Fabric Softener
4.5 Adding Bleach NOTE: When you use the liquid detergent Bleaching of clothes can help to remove Do not use gelatinous or thick liquid stains, heavy soiling and to kill bacteria. detergents. Oxygen Type This is generally a powder type bleach. -
Page 19: Setting A Program
ENGLISH 4.6 Setting a Program This delay is a drain out period to ensure the bowl is empty of water, which is Press Power ( ) touchpad, turn necessary before spin commences. Even the program selector to the required though you may have only put wet clothes into an empty bowl, the delay before spin program. -
Page 20: At The End Of The Program
4.11 At The End Of The Program The appliance stops automatically. NOTE The display will show “ ” and When indicator “ ” appears and blinks flashing with 3 consecutive long after the appropriate number of wash beeps. cycles are finished, this indicator reminds Press Power touchpad to turn off the you to clean the lint filters. -
Page 21: Washing Hints
ENGLISH 5. WASHING HINTS These Washing Instructions are of a Never wash whites and coloureds general nature and you should get good together. Whites may lose their wash results by following them. “whiteness” in the wash. New coloured items may run in the first However, due to the variables of fabric types, soil levels, detergent types and wash;... -
Page 22: Pre-Treatment Sprays And Stain Removers
5.2 Pre-treatment Sprays And Quantity of detergent to be Stain Removers used The type and quantity of detergent will WARNING! depend on the type of fabric, load size, degree of soiling and hardness of the Pre-treatment sprays and stain remover water used. - Page 23 ENGLISH Mould stains: treat with bleach, rinse well (whites and fast coloureds only). Grass: soap lightly and treat with bleach (whites and fast coloureds only). Ball point pen and glue: moisten with acetone (*), lay the garment on a soft cloth and dab the stain.
-
Page 24: International Wash Code Symbols
ENGLISH 6. INTERNATIONAL WASH CODE SYMBOLS These symbols appear on fabric labels, in order to help you choose the best way to treat your laundry. Energetic Max. wash Max. wash Max. wash Max. wash DO NOT temperature temperature temperature... -
Page 25: Care And Cleaning
ENGLISH 7. CARE AND CLEANING Your washing machine will give you long Unclip the filter as picture. and trouble-free service, if you follow the instructions in this section. These instructions show you how to care for your washing machine. 7.1 What To Do After You Have Finished Your Washing. -
Page 26: Cleaning The Drawer Recess
7.4 Cleaning The Drawer To do this proceed as follows : Recess Remove the dispenser drawer from its places. Having removed the drawer, use a small Pull out the dispenser drawer until it brush to clean the recess, ensuring that... -
Page 27: Cleaning Your Washing Machine
ENGLISH Important: Remove the inlet hose behind the appliance. Never use solvents, alcohol, aerosol cleaners, spray pack cleaners, glass cleaners, metal polishes, caustic materials, scourers or general household cleaners on or near the top panel and lid, control panel or other parts of your washing machine. -
Page 28: Troubleshooting
ENGLISH 8. TROUBLESHOOTING 8.1 Possible Failures You will have to pay even when your washing machine is under warranty. DO NOT call for service until you have Before you call for service, check the checked the points listed below. - Page 29 ENGLISH Problem Display Possible Causes What to do Code Check detergent use and Not enough or no detergent. rewash clothes. Clothes still dirty Remove some clothes and Too many clothes on load. after wash rewash. program. Incorrect wash program. Reselect program and rewash.
-
Page 30: Troubleshooting Fault Displays
8.2 Troubleshooting Fault Displays When the washing machine detects a problem that requires your attention, you will be alerted. The machine will warn you of this problem by displaying a fault code in the digital display, accompanied by “Beeping”. - Page 31 ENGLISH Display Description Possible fault Code Motor system - Motor defective problems - Motor Wiring or Motor Control board defective - Overload condition Heater relay failure - Main board defective Current leakage between heater element and earth Ground current Current leakage between heater element and earth leakage Washing heating...
-
Page 32: Yellowing Or Greying Clothes
8.3 Yellowing Or Greying Clothes Problem Possible causes What to do Incorrect wash times and ONLY use low sudsing, using insufficient detergent front load washer which can cause redeposit- detergent in this machine, ing of detergent on clothes. such as Cold Power for... -
Page 33: Technical Data
ENGLISH 9. TECHNICAL DATA Dimensions (Height / Width / Depth) 1092 x 670 x 720 mm Power supply (Voltage / Frequency) 220 - 240 V~ / 50 Hz Total power consumption 1900 W Water supply pressure (Maximum / Minimum) 0.8 MPa / 0.08 MPa Everyday Care;... -
Page 34: Installation
10. INSTALLATION 10.1 Unpacking Use gloves. Cut and remove two cut out straps as shown. Important: The top polystyrene must be removed LAST, for protecting the washing tub from hiting the cabinet when the machine is tilted. 3. Put one of the polystyrene packaging elements on the floor behind the appliance. -
Page 35: Positioning
ENGLISH 4. Remove the polystyrene base. Open the lid. Remove the polystyrene piece from the top panel and all the items from the washing tub. 5. Insert the Bottom Cover into slot at the bottom of the machine (as shown on picture). -
Page 36: Water Inlet
10.3 Water Inlet Connect the water inlet hose to a tap with 3/4” BSP thread. When installing this washing machine, use the hoses supplied. DO NOT USE OLD HOSES. The inlet hoses have the sealing washer fitted. Connect the inlet hose to the water tab. -
Page 37: Water Drainage
ENGLISH 10.4 Water Drainage Fitting hose former. Please refer to the installation Obtain hose former from inside the instruction sheet, for more washbowl and fit it to the drain hose. information. Pull apart to Hose bend insert hose. Guide hose pull hose Adjust length to suit trough. -
Page 38: Electrical Connection
10.5 Electrical Connection This machine is designed to operate on a CAUTION! 220 - 240 V, single-phase, 50 Hz supply. Connect the machine to an “An incorrect power supply may void earthed socket outlet. your warranty.” The manufacturer declines any... -
Page 39: Environment Concerns
ENGLISH 11. ENVIRONMENT CONCERNS 11.1 Packaging Materials For more detailed information about recycling of this product, please contact The materials marked with the your local city office, your household symbol are recyclable. waste disposal service or the shop where >PE<=polyethylene you purchased the product. - Page 40 PNC,...
- Page 41 ภาษาไทย สารบัั ญ 7. การดู้ แ ลรั ก ษาและทำความูสะอาด้..63 ข้้ อ มูู ล ด้้ า นความูปลอด้ภั ย ..42 1.1 เง่ � อ นไขการื่ใช้้ ง าน ......42 7.1 สิ � ง ทั่ี � ค วรื่ปฏิิ บ ั ติ ิ ห ลั ง จัากซัั ก ผ้้ า เสรื่็ จั เรื่ี...
-
Page 42: ข้้ อ มูู ล ด้้ า นความูปลอด้ภั ย
ข้้ อ มูู ล ด้้ า นความูปลอด้ภั ย 1.1 เง่ � อ นไข้การใช้้ ง าน 1.2 ความูปลอด้ภั ย สำหรั บั เด้็ ก... -
Page 43: ความูปลอด้ภั ย ทั � ว ไป
ภาษาไทย เครื่่ � อ งนี � มื ี ติ ั ว เล่ อ กล็ อ คปุ � มื ป้ อ งกั น เด็ ก ( ) ทั่ี � ช้ � ว ยป้ อ งกั น ไมื� ใ ห้ เ ด็ ก เล�... -
Page 44: การติ ด้ ตั � ง
1.4 การติ ด้ ตั � ง 1.5 การใช้้ ง าน “ ”... - Page 45 ภาษาไทย...
-
Page 46: รายละเอี ย ด้ข้องผลิ ต ภั ณ ฑ
2. รายละเอี ย ด้ข้องผลิ ต ภั ณ ฑ์์ 2.1 ช้ิ � น ส่ ว นข้องเคร่ � อ ง... - Page 47 ภาษาไทย ทั่ี � ก รื่องใยผ้้ า (ด่ รื่ ายละเอี ย ดหน้ า 63)
-
Page 48: คุ ณ สมูบัั ต ิ ข้ องผลิ ต ภั ณ ฑ
2.2 คุ ณ สมูบัั ต ิ ข้ องผลิ ต ภั ณ ฑ์์ การตรวจวั ด้ ระด้ั บั น� ำ อั ต โนมูั ต ิ รื่ะบบติรื่วจัวั ด อั ติ โนมืั ติ ิ น ี � ค ่ อ รื่ะบบทั่ี � เ ครื่่ � อ งจัะเติิ มื... -
Page 49: แผงควบัคุ มู การทำงาน
ภาษาไทย 3. แผงควบัคุ มู การทำงาน 3.1 รายละเอี ย ด้แผงควบัคุ มู Auto 45 Mins Extra High Power Quick Extended Full 30 Mins Regular Delicates Spin Medium 15 Mins Fast Start / Pause No Soak No Spin Bedding Lock Delay End Delay End Energy Saver Tub Clean Water Level... -
Page 50: ตารางโปรแกรม
3.2 ตารางโปรแกรมู EverydayCare – – – – – “ ” – – – – │ : EWT1474M7SA EWT1574M7SA Energy Saver (... -
Page 51: ติั ว เล่ อ กเสรื่ิ มื ทั่ี � ส ามืารื่ถใช้้ รื่ � ว มืกั บ
ภาษาไทย 3.3 ตั ว เล่ อ กเสริ มู ที � ส ามูารถใช้้ ร ่ ว มูกั บั โปรแกรมูได้้ EverydayCare... -
Page 52: ตั ว เล่ อ กเสริ ม
3.4 ตั ว เล่ อ กเสริ มู Fast rinse ( Water Level Eco ( ด่ รื่ ายละเอี ย ดในติารื่างหน้ า 50 รื่ายละเอี ย ดการื่วิ น ิ จั ฉัั ย ปั ญ หาน� ำ ล้ น จัะถ่ ก อธิิ บ ายไว้ ใ นหน้ า 68 คุ ณ ควรื่ศ้ ก ษาข้ อ มื่ ล... - Page 53 ภาษาไทย “Regular” Regular 2.40 3.20 Start/Pause (Delay End) “ / ” – , – “ / ” – – “ / ” Delay End “ ”; “ / ” “ ” “Start/Pause” “Delay End” “Start/Pause” “ ” “Start/Pause” Start/Pause (PAUSE) “...
-
Page 54: การตั � ง ค่ า การทำงาน
3.5 การตั � ง ค่ า การทำงาน “ ” “ ” “ ” “ ” “ ” “ ” “ ”... -
Page 55: การใช้้ ง านประจำวั น
ภาษาไทย 4. การใช้้ ง านประจำวั น 4.1 การเปิ ด้ เคร่ � อ งซัั ก ผ้ า 4.3 การเติ มู สารซัั ก ฟอก/ฟอกข้าว 4.2 ใส่ ผ ้ า ลงในเคร่ � อ งซัั ก ผ้ า... -
Page 56: การเติ มู น� ำ ยาปรั บั ผ้ า นุ ่ ม
4.5 การเติ มู สารฟอกข้าว 4.4 การเติ มู น� ำ ยาปรั บั ผ้ า นุ ่ มู EverydayCare 60 Start/Pause “ ” “ ” – “MAX” – – – –... -
Page 57: การตั � ง โปรแกรมูการซัั ก
ภาษาไทย Start/Pause “Delay End” Rinse l Spin 4.7 การเริ � มู โปรแกรมู Start/Pause Start/Pause 4.6 การตั � ง โปรแกรมูการซัั ก (Rinse l Spin) 4.8 การหยุ ด้ การทำงาน Start/Pause “ / ” “ / ” Start/Pause (Water Level), (Soak), (Rinse) (Spin) 4.9 การเปลี... -
Page 58: การเปลี � ย นค่ า ตั ว เล่ อ ก
4.11 เมู่ � อ สิ � น สุ ด้ โปรแกรมู “ / ” “ ” “ / ” 4.10 การเปลี � ย นค่ า ตั ว เล่ อ ก Start/Pause Start/Pause “ ”... -
Page 59: คำแนะนำในการซัั ก
ภาษาไทย 5. คำแนะนำในการซัั ก “ ” “ ” 5.1 การคั ด้ แยกผ้ า ในการซัั ก แต่ ล ะครั � ง... -
Page 60: สเปรื่ย์ ทั่ ำความืสะอาดก� อ นซัั ก และ
5.2 สเปรย์ ท ำความูสะอาด้ก่ อ น ซัั ก และน� ำ ยาข้จั ด้ คราบั “ ” 5.3 ผงซัั ก ฟอก Cold Power “Matic”... - Page 61 ภาษาไทย 5.4 การข้จั ด้ คราบั...
-
Page 62: สั ญ ลั ก ษณ์ ส ากลสำหรั บั งานซัั ก
6. สั ญ ลั ก ษณ์ ส ากลสำหรั บั งานซัั ก... -
Page 63: การดู้ แ ลรั ก ษาและทำความูสะอาด
ภาษาไทย 7. การดู้ แ ลรั ก ษาและทำความูสะอาด้ 7.1 สิ � ง ที � ค วรปฏิิ บั ั ต ิ ห ลั ง จากซัั ก ผ้ า เสร็ จ เรี ย บัร้ อ ยแล้ ว 7.2 การทำความูสะอาด้ที � ก รองขุ้ ย ผ้... -
Page 64: สารื่ซัั ก ฟอก
7.4 การทำความูสะอาด้ช้่ อ งเก็ บั ถาด้จ่ า ยสารซัั ก ฟอก 7.5 การทำความูสะอาด้ตั ว กรอง ท่ อ น� ำ เข้้ า... -
Page 65: การื่ทั่ำความืสะอาดเครื่่ � อ งซัั ก ผ้้ า
ภาษาไทย 7.7 การทำความูสะอาด้คราบั เป้ � อ นในถั ง ซัั ก 7.6 การทำความูสะอาด้เคร่ � อ ง ซัั ก ผ้ า... -
Page 66: การแก้ ไ ข้ปั ญ หา
8. การแก้ ไ ข้ปั ญ หา 8.1 ปั ญ หาที � อ าจเกิ ด้ ข้้ � น (Start/Pause) (Start/Pause) - Page 67 ภาษาไทย...
-
Page 68: บกพรื่� อ งปรื่ากฏิข้ � น
8.2 การแก้ ไ ข้ปั ญ หาเมู่ � อ มูี ร หั ส ข้้ อ บักพื่ร่ อ งปรากฏิข้้ � น “ ” “ ” “Start/Pause” “Start/Pause” “Start/Pause” “Rinse + Spin” “Start/Pause” “Start/Pause” “Rinse + Spin” “Start/Pause”... - Page 69 ภาษาไทย...
-
Page 70: เส่ � อ ผ้ า หมูองคล� ำ หร่ อ เป็ น สี เ หล่ อ ง
8.3 เส่ � อ ผ้ า หมูองคล� ำ หร่ อ เป็ น สี เ หล่ อ ง... -
Page 71: ข้้ อ มูู ล ทางเทคนิ ค
ภาษาไทย 9. ข้้ อ มูู ล ทางเทคนิ ค ข้นาด้ (สู ง X กว้ า ง X ล้ ก ) 1092 x 670 x 720 มืมื. แหล่ ง จ่ า ยไฟ (แรงด้ั น ไฟฟ้ า / ความูถี � ) 220 - 240 V~ / 50 Hz การใช้้... -
Page 72: การติ ด้ ตั � ง
10. การติ ด้ ตั � ง 10.1 การแกะบัรรจุ ภ ั ณ ฑ์์... -
Page 73: พื่่ � น ที � ก ารติ ด้ ตั � ง
ภาษาไทย 10.2 พื่่ � น ที � ก ารติ ด้ ตั � ง... -
Page 74: การต่ อ น� ำ เข้้ า
10.3 การต่ อ น� ำ เข้้ า “ ”... -
Page 75: การระบัายน� ำ
ภาษาไทย 10.4 การระบัายน� ำ... -
Page 76: การเช้่ � อ มูต่ อ ทางไฟฟ้ า
10.5 การเช้่ � อ มูต่ อ ทางไฟฟ้ า เครื่่ � อ งนี � อ อกแบบมืาให้ ทั่ ำงานด้ ว ยแรื่งดั น ไฟฟ้ า ข้้ อ ควรระวั ง ! โปรด้เช้่ � อ มูต่ อ เคร่ � อ งเข้้ า 220-240 โวลติ์ เฟสเดี � ย ว ความืถี � 50 เฮิิ รื่ ติซั์... -
Page 77: ข้้ อ มูู ล เพื่่ � อ การรั ก ษาสิ � ง แวด้ล้ อ ม
ภาษาไทย 11. ข้้ อ มูู ล เพื่่ � อ การรั ก ษาสิ � ง แวด้ล้ อ มู 11.1 วั ส ดุ้ บั รรจุ ภ ั ณ ฑ์์ >PE<= >PS<= >PP<= 11.3 คำแนะนำด้้ า นระบับั นิ เ วศูน์ 11.2 เคร่ � อ งเก่ า... - Page 78 บั น ทั่้ ก NOTE /...
- Page 79 ภาษาไทย บั น ทั่้ ก NOTE /...
- Page 80 www.electrolux.co.th...