
Related Manuals for Sony HMZ-T1


Summary of Contents for Sony HMZ-T1
- Page 1 Head Mounted Display HMZ-T1 Reference Guide Before Initial Use Refer to the “Startup Guide” for instructions on connecting the system, wearing the unit, and completing initial settings. 4-297-824-61(1)
- Page 2 Never use the plug without the fuse cover. If you should lose the fuse cover, please contact your nearest Sony service station. Notice for customers: the following information is only applicable to equipment sold in countries applying EU directives.
-
Page 3: Health Precautions
• Some people may experience discomfort (such as eye strain, fatigue, nausea, or motion sickness) while watching video images or playing games. Sony recommends that all viewers take regular breaks while watching video images or playing games. The length and frequency of necessary breaks will vary from person to person. -
Page 4: Precautions
Precautions Power Supply Position the system near the mains used. In case of strange noises, fumes, or smoke from the system, immediately unplug the mains lead to turn all power off. Only pressing the power button on the head mounted unit will not turn the system off completely. - Page 5 HDMI Jacks and Connectors Take these precautions to avoid damaging HDMI jacks and connectors. • When inserting cables, note the shape and orientation of the connector and the HDMI jack on the back of the processor unit. HDMI input and output The connector is upside-down HDMI input and output The connector is not straight...
-
Page 6: Table Of Contents
Contents Health Precautions ..........3 Precautions . -
Page 7: Product Highlights
Virtualphones Technology (VPT). Supplied Accessories Make sure the following items are included with the system after purchase. If any items are missing, contact your Sony dealer or a local authorised Sony service centre. • Mains lead (1) • HDMI cable (1) •... - Page 8 • Forehead supporter (3) Type A (thin) Type C (thick) The type B forehead supporter is attached to the head mounted unit at the time of purchase. • Forehead supporter cover (1) • Reference Guide (this guide) (1) • Startup Guide (1) Type B (medium)
-
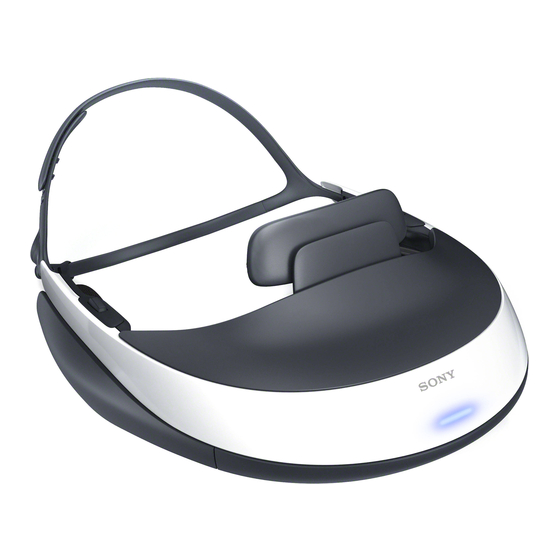
Page 9: Parts And Controls
Parts and Controls Head Mounted Unit Forehead supporter Illumination Lens span adjusters Connecting cord Headband strap release button * The MENU button serves two purposes. Press the MENU button to view setting menus as well as to confirm setting changes (when it functions as an Enter button). - Page 10 Processor Unit (Front) PASS THROUGH indicator Lit in amber when HDMI pass-through is used. Processor Unit (Back) HDMI IN jack (HDMI Input) HMD OUT jack (HMD Output) Insert the connecting cord of the head mounted unit. HDMI OUT jack (HDMI Output) Note •...
-
Page 11: Fitting The Head Mounted Unit
Fitting the Head Mounted Unit The head mounted unit can be adjusted in several ways to ensure a personalised, comfortable fit. For a more comfortable fit, always adjust the head mounted unit before putting it on. Nose pad 1 Adjusting the forehead supporter Forehead supporters in two thicknesses are included. - Page 12 • If external light is still distracting with the light blockers on, dim the room lights or move away from external light. 3 Further headband strap adjustment If necessary, you can tighten the lower headband strap even more by using the supplied clip to shorten it.
- Page 13 • Light blocker (1 each for the left and right) • Connecting cord holder When these consumables break or show signs of wear, consult your nearest Sony dealer or Sony service centre. You can replace the ear pads, the ear cushions, and the nose pad as shown below.
-
Page 14: Confirming Screen Alignment
Confirming Screen Alignment Confirm screen alignment by referring to the confirmation screen displayed initially after lens span adjustment. Screens on the head mounted unit are described below, with an explanation of how to confirm alignment. The display section of the head mounted unit consists of two small screens, on the left and right. - Page 15 If even one of the “I” marks and the horizontal line do not intersect, the head mounted unit may have been bent out of shape, or it may be damaged. If this condition occurs, contact your nearest Sony dealer or local authorised Sony service centre. “I” marks and the horizontal line do not intersect.
-
Page 16: System Settings
System Settings Setting menus can be accessed at any time to change or adjust a variety of system settings, such as video picture quality, audio output format, and 3D display format. To view the menus, press the MENU button on the head mounted unit. Basic Menu Operations Press the MENU button on the head mounted unit. - Page 17 Menus Default settings are underlined. Information Identifies input signals (video and audio signals) from the equipment connected to the processor unit. “Unsupported signal” indicates that the input signal is incompatible with the system, and “No signal” is shown when no signals are input. Lens span adjustment Back Lens span...
- Page 18 3D Display Auto 3D 3D Signal Notification Display Back Picture Mode Manually select the display format for 3D content. Available settings vary depending on whether the source signal includes a 3D format identification signal, as follows. For 3D content without a 3D format identification signal Over-Under: Select for top-and-bottom 3D content, with similar images displayed on top and bottom.
- Page 19 Reset Restores all the values (except for values of “Wide Mode,” “Auto Display Area,” and “Display Area” in “Display”) of the selected mode in the “Picture Mode” menu to the default settings when selecting “Yes.” Picture Adjusts image contrast. Brightness Adjusts the brightness of the image.
- Page 20 Wide Mode Not available during 3D playback. Auto Display Area Not available during 3D playback. Display Area Available only when “Auto Display Area” is set to “Off.” Sound Back Reset Surround Normal: Displays the images at the original 4:3 aspect ratio. Full: Displays 4:3 content in full-screen, stretching the images horizontally.
- Page 21 Treble Adjusts high-frequency audio output. Bass Adjusts low-frequency audio output. General Setup Back Returns to the previous menu. Set password A password can be set to restrict use of the system. Once a password is specified, it must be entered each time the system is The name of this setting turned on.
- Page 22 Power off when unmounted Illumination Language setting Prolonged viewing warning Startup viewer warning Reset to factory settings Guide of HDMI device control Displays the operation guide for head mounted unit buttons that can be used with “Control for HDMI” function (page 21). On: Turns the system off automatically 30 minutes after you take the head mounted unit off.
-
Page 23: Troubleshooting
Troubleshooting If the following symptoms occur when using the system, check the Cause/Action column before requesting service. If the issue persists, contact your Sony dealer or local authorised Sony service centre. Power Supply Symptom The system does not turn The system does not go off Cause/Action p Confirm that the mains lead is fully plugged in. - Page 24 Video Symptom No video, or output video is distorted The screen is dark or blurry Cause/Action p Refer to the “Startup Guide” and confirm that the mains lead, HDMI cable, and connecting cord of the head mounted unit are connected correctly. p Make sure that equipment connected to the HDMI IN jack on the processor unit is on.
- Page 25 Symptom The screens suddenly go Image display dims over time Some pixels on the screens are not lit, or some pixels are always lit Video is not shown in 3D 3D display is not activated automatically Cause/Action p After 3 hours of continuous viewing, the system will display a warning screen and go off after 90 seconds of inactivity.
- Page 26 Audio Symptom There is no sound / There is static / Volume cannot be increased There is no surround- sound effect Cause/Action p Adjust the volume using the VOL +/– buttons. p Refer to the “Startup Guide” and confirm that the mains lead, HDMI cable, and connecting cord of the head mounted unit are connected correctly.
-
Page 27: Other Issues
Cause/Action p If the indicator flashes twice every 3 seconds, the head mounted unit or processor unit may be damaged. Contact your Sony dealer or local authorised Sony service centre. p If the indicator flashes three times every 3 seconds, the processor unit has overheated. - Page 28 Symptom “DEMO” appears in the upper-right corner of the setting menu screen Cause/Action p Contact your Sony dealer or local authorised Sony service centre.
-
Page 29: Specifications
Specifications Power requirements North American model: 120 V AC, 60 Hz UK, Hong Kong, and European models: 220 V – 240 V AC, 50/60 Hz Russian model: 220 V – 240 V AC, 50/60 Hz Taiwan model: 110 V AC, 60 Hz Chinese model: 220 V –... -
Page 30: Licence And Trademark Notice
HDMI Licensing LLC in the United States and other countries. • “PlayStation” is a registered trademark of Sony Computer Entertainment Inc. Also, “PS3” is a trademark of the same company. • VPT, Virtualphones Technology is a registered trademark of Sony Corporation. -
Page 32: 內容 健康注意事項
只要是連接在牆上的電源插座上, 本機都不會中斷與交流電源的連接, 即使本機已經關閉也一樣。 健康注意事項 年齡限制 以本裝置觀賞視頻影像或玩遊 戲可能會影響成長中孩童的健 康。15 歲以及 15 歲以下的孩子 不應該使用本裝置。 請用本裝置的密碼保護功能 (21 頁)限制孩子使用本裝置。 用頭戴式顯示器觀賞視頻 • 有些人在觀賞視頻影像或玩電玩遊 戲時可能會覺得不舒服 (例如眼睛 疲勞、倦怠、噁心或暈眩) 。Sony 建議所有觀眾在觀賞 3D 視頻影像 或玩電玩遊戲時要定時休息。需要 的休息時間和頻率會因人而異。您 必須自行決定怎麼做效果最好。如 果有任何不舒服,您應該停止觀賞 視頻影像或播放遊戲,直到不舒服 的感覺停止為止。如果覺得有必 要,就要看醫生。 • 請避免在您的頭可能會晃動的環境 中、或者在您走動或運動時配戴螢 幕,因為比較有可能會感到不舒 服。 • 您也應該仔細閱讀 (i)以本裝置... -
Page 33: 注意事項
歐洲、俄國與英國的用戶: http://support.sony-europe.com/ 美國的用戶: http://esupport.sony.com/ 加拿大的用戶: http://esupport.sony.com/CA/ 中國的用戶: http://service.sony.com.cn/ index.htm 其他國家 / 地區的用戶: http://www.sony-asia.com/ support/ 正確的使用 • 頭戴式顯示器螢幕的配戴一定要正 確。 – 關於顯示器螢幕的配戴說明,請 參考 “入門指南” 。 – 為了防止以歪斜的畫面觀賞,請 參考初次顯示出來的確認畫面, 以檢查畫面的對齊情形。 – 請注意,掉落顯示器或者粗暴的 操作可能會使得畫面歪斜。 • 頭戴式顯示器螢幕可以在 55 公釐- 72 公釐的範圍內調整,以便與您的 兩眼之間的距離 (瞳孔之間的距 離)配合。如果不能在這個範圍內 使用系統,請不要使用系統。... - Page 34 鏡片的保養 • 對頭戴式顯示器螢幕上的鏡片要小 心,以免弄髒或刮傷。如果鏡片髒 了,請用柔軟的鏡片清潔布輕輕擦 拭。 • 請勿使用鏡片清潔液之類的液體溶 劑、水、或酒精類的清潔液。 清潔系統 請用沾了少許溫和清潔劑的軟布清 潔系統的外部表面。請不要使用可 能會傷害表面的稀釋劑、揮發油或 酒精之類的溶劑。 以大音量長時間聆聽 以大音量長時間聆聽可能會損傷聽 覺。為了保護您的聽覺,請避免以 過大的音量聆聽。 起始音量 為了避免突然發出大音量,請保持 微弱的起始音量。逐漸增加音量, 直到達到您要的音量為止。 包裝材料 請保留原始的盒子和保護櫬墊,以 便萬一將來要搬家或者因為要修理 或其他原因而需要郵寄系統時使用。 HDMI 插孔與接頭 請注意這些事項,以免損及 HDMI 插孔與接頭。 • 插入纜線時,要注意訊號處理器背 後的接頭與 HDMI 插孔的形狀與方 向。 HDMI 輸入與輸出 接頭上下顛倒 HDMI 輸入與輸出...
- Page 35 內容 健康注意事項 ....2 注意事項 ..... 3 產品簡介...
-
Page 36: 產品簡介
配戴頭戴式顯示器,便可以從 連接的 Blu-ray Disc 與遊戲控制台觀賞 3D 影片和玩 3D 遊戲。 產品簡介如下。 • 透過寬闊的 45°水平視野享受 模擬大螢幕劇院觀賞經驗的震 撼視頻。 • 觀賞在頭戴式顯示器螢幕中的 Sony HD OLED (有機發光二極 體)面板所產生的高對比度、 高解析度視頻。 • 將系統連接到 3D 相容設備以享 受逼真的 3D 觀賞經驗。同時顯 示於兩個 OLED 螢幕上可以消除 影像交替出現的舊式系統可能 會有的串擾 (雙重影像) 。 • 聆聽有深度感、能讓人融入其 中的多聲道虛擬環繞音效,這... - Page 37 • 前額支撐墊 (3) A 型 (薄) C 型 (厚) 購買時頭戴式顯示器螢幕上安裝的是 B 型前額支撐墊。 • 前額支撐器蓋 (1) • 參考指南 (本指南) (1) • 入門指南 (1) B 型 (中)...
-
Page 38: 零組件與控制器
零組件與控制器 頭戴式顯示器螢幕 前額支撐墊 照明 鏡片間距 調整器 頭帶釋放按鈕 * MENU 按鈕有兩個用途。 按 MENU 按鈕可以看到設定選單以及確認設 定變更 (作為輸入按鈕使用時) 。 鏡片 鼻墊 連接線 耳機 上頭帶 下頭帶 頭帶釋放按鈕 控制按鈕 (v/V/ b/B,MENU*) VOL +/- 按鈕 1 (電源 / 待機) 按鈕... - Page 39 訊號處理器 (正面) PASS THROUGH 指示燈 使用 HDMI 直通時點亮琥 珀色的燈。 訊號處理器 (背面) HDMI IN 插孔 (HDMI 輸入) HMD OUT 插孔 (HMD 輸出) 插入頭戴式顯示器螢幕的連接纜線。 HDMI OUT 插孔 (HDMI 輸出) 附註 • 啟用 HDMI 直通(22 頁) 並且 關閉頭戴式系統之前,來源 訊號無法通過 HDMI OUT 插 孔。 電源指示燈...
-
Page 40: 配戴頭戴式顯示器螢幕
配戴頭戴式顯示器螢幕 頭戴式顯示器螢幕可以用好幾種方式調整,以確保個人化的舒適配 戴。為了更舒適的配戴,戴上之前一定要調整好頭戴式顯示器螢幕。 1 調整前額支撐墊 隨附的前額支撐墊有兩種厚 度。請根據影像的焦點、鼻子承 受的壓力、眼鏡與鏡片之間的距 離以及其他考慮因素,選擇最適 合您需要的厚度。 上軸 鼻墊 將前額支撐墊從顯示器螢幕上斜向拉 開,便可以將其拆下來,以便安裝您要 的厚度的支撐墊。此外還要選擇最適合 您的前額的支撐墊高度 (在上軸或下 軸) 。若要安裝支撐墊,請將支撐墊凹 槽與兩邊的軸對齊,然後將支撐墊壓入 到卡入定位為止。 視需要安裝前額支撐墊蓋。 凹槽 下軸 耳墊 將隨附的蓋子裝在 前額支撐墊上。... - Page 41 2 遮光器 如果反射在畫面上的外部光線 會令人分心,請裝上遮光器。 遮光器 左邊的遮光器標示為 “L” ,右邊的則標 示為 “R” 。在左右兩邊裝上正確的遮光 器時,要將舌片壓入鏡片部分底部的三 個孔中。 附註 • 配戴某些類型的眼鏡時,有可能無 法裝上遮光器。 • 如果裝上遮光器後外部光線還是會 令人分心,請將室內光線調暗或者 避開外部光線。 3 進一步調整頭帶 如果有必要,可以用隨附的夾 子將下頭帶縮短以便束得更緊一 點。 4 安裝連接線固定器 若要讓頭戴式顯示器螢幕的連 接線不會礙事,可以用隨附的連 接線固定器將連接線固定在下頭 帶上。 頭帶夾 連接線固定器 下頭帶的掛勾 連接纜線的掛勾...
- Page 42 • 護耳襯墊 • 鼻墊 前額支撐墊 • 前額支撐墊 (A 型 (薄) 、B 型 (中)或 C 型 (厚) ) • 前額支撐器蓋 • 頭帶夾 • 遮光器 (左右各 1 個) • 連接線固定器 這些消耗品壞掉或者有磨損的 跡象時,請就近與 Sony 經銷商 或 Sony 服務中心聯繫。 您可以用下述方式更換耳墊、 護耳襯墊以及鼻墊。 取下耳墊,更換護耳襯墊 將耳墊朝邊緣方向從耳機上拉下來。小 心不要太用力拉,以免將耳墊扯破。...
- Page 43 凹槽 護耳襯墊 取下護耳襯墊。 黏膠底板 將新的護耳襯墊從黏膠底板上撕下來。 裝上去時,護耳襯墊的開口要與凹槽對 齊。換上護耳襯墊之後,再將耳墊裝回 去。 更換鼻墊 將鼻墊拉下來。若要安裝新的鼻墊,請 將鼻墊夾推入開口。...
-
Page 44: 確認畫面對齊
確認畫面對齊 請參考調整鏡片間距之後初次顯示出來的確認畫面,以確認畫面的對 齊情形。底下描述頭戴式顯示器螢幕上的畫面,並解釋如何確認對齊 的情形。 頭戴式顯示器螢幕的顯示部分由左右兩個畫面構成。各個畫面上的影 像重疊以形成一個影像。 使用之前一定要參考確認畫面來檢查畫面的對齊情形,以確認畫面有 適當的對齊。 左邊影像 兩眼看到的影像 右邊影像... - Page 45 正確的顯示 若要正確的顯示,請視需要推動鏡片間距調整器,使得三個 “I”符 號全都與水平線相交。 “I”符號不是在畫面中央的位置與水平線相交也可以。 不正確的顯示 即使有一個 “I”符號沒有與水平線相交,頭戴式顯示器螢幕也有可 能變形或者是受損。如果發生這種情況,請就近與 Sony 經銷商或當地 經過授權的 Sony 服務中心聯繫。 “I”符號與水平線沒有 相交。 水平線顯得非常傾斜。 中間的 “I”符號沒有與 水平線相交。...
-
Page 46: 系統設定
系統設定 設定選單隨時都可以用來變更或調整各種系統設定,例如視頻畫質、 音頻輸出格式以及 3D 顯示格式。若要檢視選單,請按頭戴式顯示器螢 幕上的 MENU 按鈕。 基本的選單操作 按頭戴式顯示器螢幕上的 MENU 按鈕。 按 v/V 按鈕選擇需要的設定類 別圖示,然後按 MENU 按鈕。 按 v/V 按鈕選擇需要的選單, 然後按 MENU 按鈕。 按 v/V/b/B 按鈕視需要變更 或調整設定,然後按 MENU 按 鈕輸入您的變更。 A 設定類別圖示 B 類別 C 設定選單 D 各選單中目前的設定 E 所選選單摘要 附註... - Page 47 選單 預設設定會加上底線。 Information 識別從連接到訊號處理器的設備輸入的訊號 (視頻與音頻訊號) 。 “Unsupported signal”表示輸入訊號與系統不相容,而沒有輸入訊號 時則會顯示 “No signal” 。 Lens span adjustment Back Lens span adjustment 3D Settings Back Reset 回到前一個選單。 根據您兩眼之間的距離 (瞳孔間的距離)調整 頭戴式顯示器螢幕的鏡片,以便獲得最佳的觀 賞經驗。請用頭戴式顯示器螢幕上的鏡片間距 調整器進行調整。詳情請參考 “入門指南” 。 附註 • 沒有正確的調整鏡片間距,就不能享受最佳觀賞經 驗。使用前一定要調整鏡片間距。 • 調整時音頻會被靜音。 • 調整時不能變更音量。 回到前一個選單。 將所有...
- Page 48 3D Display Auto 3D 3D Signal Notification 手動選擇 3D 內容的顯示格式。可用的設定會因 為訊源是否包含 3D 格式辨識訊號而異,情況如 下。 沒有 3D 格式辨識訊號的 3D 內容 Over-Under:選擇上下式的 3D 內容,類似的影 像會顯示於上面和下面。 Side-by-Side:選擇並排式的的 3D 內容,類似 的影像會並排顯示。 Off:選擇以 2D 格式顯示內容。 有 3D 格式識別訊號的 3D 內容 On:選擇以 3D 格式顯示內容。 Off:選擇以 2D 格式顯示內容。 附註...
- Page 49 Display Back 回到前一個選單。 Picture Mode Vivid:鮮豔的色彩與銳利的對比,適合演奏 Standard:強調自然的影像。適合各種視頻訊 Cinema:專門針對電影內容設計的畫質。 Custom:將從平坦的原始影像調整得來的偏好 Reset 選擇 “Yes”時,將 “Picture Mode”選單中所 選模式的所有數值 ( “Display”中的 “Wide Mode” 、 “Auto Display Area”以及 “Display Area”的數值除外)恢復為預設的設定。 Picture 調整影像的對比度。 Brightness 調整影像的亮度。 Color 調整影像的色溫。 Temperature Cool:寒冷的藍色調。 Neutral:介於 “Cool”與 “Warm 1/Warm 2” Warm 1/Warm 2:溫暖的紅色調。 “Warm 2”比 Sharpness 強化影像的邊緣讓影像顯得突出,或者平滑邊...
- Page 50 Cinema Conversion 不能用於以 1080/ 24p 圖幀封裝的格 式。 Clear Black Contrast Remaster Wide Mode 當 3D 播放時,不 能使用。 Auto Display Area 當 3D 播放時,不 能使用。 Display Area 只能用於 “Auto Display Area”設 定為 “Off”時。 Auto:系統會自動偵測您是在觀賞視頻內容 (例如,電視劇與動畫)還是影片內容 (電影) ,並切換至相關的轉換方法。 Video:不論是播放視頻還是影片內容,系統都 會以視頻內容的格式顯示。 調整陰暗影像區的外貌。漂亮地再現黑色,而 不會損失整體的明暗度。 自動最佳化黑階與白階,以獲得最佳對比度,...
- Page 51 Sound Back Reset Surround Treble Bass General Setup Back Set password 在您輸入密碼之 後,這個設定項目 的名稱會變成 “Cancel password” 。 回到前一個選單。 將所有 “Sound”設定重設為原始預設值。 Standard:以中等的迴響提供標準的環繞音效。 為一個範圍的內容創造寬闊的音場。 Cinema:強調自然的音場,尤其是對話。音場 足以媲美電影院動人音響效果的環繞音效。 各聲道自然混合,讓人有如身歷其境。是 看電影時的好選擇。 Game:提供精準的聲音定位,可以清楚的感覺 到聲音的來源。以多聲道環繞音效播放遊 戲之類身歷其境內容時的好選擇。 Music:強調訊源音頻的細節與純度。忠實的再 現,類似錄音室中的監聽設備。播放音樂、 體育以及紀錄片時的好選擇。 Off:停用環繞音效。 附註 • 音量可能因為音頻訊源與所選的環繞音效模式而 異。 調整高頻音頻輸出。 調整低頻音頻輸出。 回到前一個選單。 可以設定密碼以限制系統的使用。一旦指定密...
- Page 52 HDMI pass- through Control for HDMI On:用頭戴式顯示器螢幕上的 v/V/b/B 按鈕 Power off when unmounted Illumination Language setting 設定用於選單與其他介面元素的語言。 On:系統處於待機模式時,啟用直通,讓您可 以觀賞或聆聽電視或其他顯示裝置的內容。 詳情請參考 “入門指南” 。 Off:停用這個功能。若要省電,電視或其他顯 示裝置沒有連接訊號處理器時,請選擇 “Off” 。 啟用連接在訊號處理器上的 HDMI CEC (消 費性電子控制)相容設備的控制。 v 按鈕:開始播放。 V 按鈕:暫停播放。 b 按鈕:跳至上一章。按住按鈕快速倒轉。 B 按鈕:跳至下一章。按住按鈕快速前進。 Off:停用這個功能。用外接設備的遙控器加以 控制。...
- Page 53 Prolonged viewing warning Startup viewer warning Reset to factory settings Guide of HDMI device control 顯示可以用 “Control for HDMI”功能 (22 頁)使用的頭戴式顯示 器螢幕按鈕的操作指南。 On:啟用自動顯示是否在連續觀賞 3 小時之後 關閉電源的警告。選擇警告畫面上的 “Yes”會將電源關閉。選擇 “No”會讓電 源在再過 3 小時後,也就是連續觀賞 6 小 時之後關閉。 Off:停用這個功能。 附註 • 觀賞3小時之後出現警告時, 如果沒有在90秒鐘之內 回應,電源就會自動關閉。 •...
-
Page 54: 故障排除
故障排除 使用系統時如果發生下列狀況,請先查看原因 / 行動欄之後再要求維 修。如果問題仍然存在,請聯絡 Sony 經銷商或當地經過授權的 Sony 服務中心。 電源 狀況 系統無法開機 系統不能關機 原因 / 行動 p 確認交流電源線的插頭有完全插入。 p 確認頭戴式顯示器螢幕的連接纜線有完全插入 HMD OUT 插孔中。 p 啟動通常需要幾秒鐘時間。 p 按住 1 (開機 / 待機)按鈕至少 1 秒鐘。... - Page 55 視頻 狀況 沒有視頻,或者輸出的 視頻失真 原因 / 行動 p 請參考 “入門指南”並確認頭戴式顯示器螢幕 的交流電源線、HDMI 纜線以及連接線有正確地 連接。 p 確認連接到訊號處理器上 HDMI IN 插孔的設備有 開機。 p 確認來源訊號受系統支援。關於支援訊號的資 訊,請參閱 “規格” (31 頁)中的 “支援的 HDMI 輸入與輸出訊號:” 。 p 以本系統使用 PlayStation 上的視頻與音頻輸出設定無法與本系統上 ™ 的設定或者與所用的纜線和電視機搭配時,可 能就不會有視頻與音頻輸出。如果發生這種癥 狀,請關閉 PS3 ,然後按住其電源按鈕至少 ™ 5 秒鐘將其再度開啟,直到聽到兩聲嗶聲為止。...
- Page 56 狀況 畫面陰暗或模糊 螢幕突然關閉 影像顯示在一段時間之 後變暗 螢幕上的某些像素沒有 點亮,或者某些像素永 遠亮著 視頻沒有以 3D 顯示 原因 / 行動 p 請參考 “入門指南”並確認頭戴式顯示器螢幕 的交流電源線、HDMI 纜線以及連接線有正確地 連接,而且頭戴式顯示器螢幕的配戴方式也正 確。 p 可能是鏡片的間距調整不正確 (15 頁) 。請用 設定選單 (17 頁)中的 “Lens span adjustment”再次進行調整。 p 如果是頭戴式顯示器螢幕的鏡片髒了,請用柔 軟的乾布將其擦乾淨。 p 連續觀賞 3 個小時之後,系統會顯示一個警告畫 面,然後在沒有採取行動 90 秒鐘之後關閉。如 果清除訊息並繼續觀賞,系統會再等三個小時...
- Page 57 狀況 3D 顯示不會自動啟動 音頻 狀況 沒有聲音 / 有靜電雜訊 / 音量無法增加 原因 / 行動 p 確認 “3D Settings”中的 “Auto 3D”設定是 設定為 “On” (18 頁) 。 p 沒有 3D 格式辨識訊號的 3D 內容不會自動以 3D 顯 示。將 “3D Settings”中的 “3D Display” 設定變更為 “Over-Under”或 “Side-by- Side”...
- Page 58 狀況 沒有環繞音效 HDMI 控制 狀況 外接設備不能以頭戴式 顯示器螢幕上的按鈕控 制 原因 / 行動 p 確認 “Sound”中的 “Surround”設定不是設 定為 “Off” (21 頁) 。 p 聲音的聆聽感受會因人而異。 原因 / 行動 p 請確認外接設備支援 HDMI CEC 功能。 p 請確認外接設備的 “Control for HDMI”設定 已經正確地配置。詳情請參考所用設備的使用 說明書。 p 連接的 AV 擴大機 (收音擴大機)可能與系統的 “Control for HDMI”功能不相容。...
- Page 59 等到頭戴式顯示器螢幕和訊號處理器冷卻而且 停止閃爍為止。 p 確認 HDMI 纜線已經完全連接好。 p 請在 “General Setup”中,將 “HDMI pass- through”設定為 “On” (22 頁) 。 p 將電視機上的輸入來源切換至本系統。 p 檢查播放設備上的 HDMI 輸出設定。 p 請參考電視機隨附的使用說明書,並在電視機 的 “Control for HDMI”設定中將本系統指定 為控制裝置。 p 除非戴在頭上,否則頭戴式顯示器螢幕的按鈕 不會有作用。 p 請聯絡 Sony 經銷商或當地經過授權的 Sony 服務 中心。...
- Page 60 規格 電源需求 北美機型: 120 伏特交流電源,60 Hz 英國、香港以及歐洲機型: 220 伏特- 240 伏特交流電 源,50/60 Hz 俄國機型: 220 伏特- 240 伏特交流電 源,50/60 Hz 台灣機型: 110 伏特交流電源,60 Hz 中國機型: 220 伏特- 240 伏特交流電 源,50/60 Hz 耗電量 15 瓦 (使用時) 0.35 瓦 (待機模式中) 1.6 瓦 (待機模式中使用 HDMI 直通時)...
- Page 61 輸入與輸出 HMD OUT: 專用的 15 針接頭 HDMI IN 和 HDMI OUT HDMI 19 針標準接頭 支援的 HDMI 輸入與輸出訊號: 視頻輸入 (2D 格式) : 480/60p,576/50p,720/ 24p,720/50p,720/60p, 1080/50i,1080/60i, 1080/24p,1080/50p, 1080/60p 視頻輸入 (3D:幀封裝,並排 與上下格式) : 720/50p,720/60p,1080/ 50i,1080/60i,1080/24p 音頻輸入: 最多 5.1 聲道線性 PCM 音 頻格式 (32/44.1/48 kHz, 16/20/24 位元)...
-
Page 62: 授權與商標通知
HDMI、HDMI 標誌和 High- Definition Multimedia Interface 是 HDMI Licensing LLC 在美國和其他國家的商標或 註冊商標。 •“PlayStation”是 Sony Computer Entertainment Inc. 的註冊商標。 “PS3”也是同一 家公司的商標。 • VPT,Virtualphones Technology 是 Sony Corporation 的註冊商標。 • 其他系統和產品名稱通常是製 造廠商的商標或註冊商標。本 文件中不標示 ™ 和 本產品所用軟體的通知與 授權 本產品所用的部分軟體是在 FreeType Project 的授權下使 用。... - Page 64 © 2011 Sony Corporation Printed in Japan 4-297-824-61(1)