Table of Contents
Table of Contents
Troubleshooting

Related Manuals for ABB Totalflow NGC8206


Summary of Contents for ABB Totalflow NGC8206
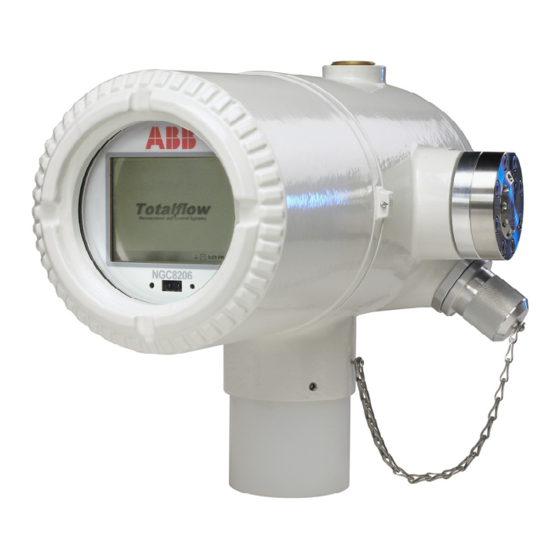
- Page 1 NGC8206 Start-Up Guide MEASUREMENT & CONTROL SYSTEMS...
- Page 2 Translated versions, in any other language, shall be maintained as accurately as possible. Should any discrepancies exist, the US English version will be considered final. ABB is not liable for any errors and omissions in the translated materials.
-
Page 3: Basic Installation
Basic Installation Step 1 Locate Suitable Installation Site The NGC should be located close to the sample probe in an effort to minimize the sample line length. See the table below for transport tubing distances and lag times. 1/8” Transport Tubing Lag Time Considerations Distance Conditioning Module Seconds... - Page 4 OPTIONAL PIPE MOUNTING PIPE SADDLE MOUNTING W/FLANGE PLATE COLD WEATHER ENCLOSURE MOUNTED PIPE RUN MOUNTED WALL SHELF 2" MOUNTING PIPE WALL SHELF MOUNTING STAND-ALONE PIPE MOUNTED Step 3 Install the Sample Conditioning Bracket and Sample Conditioning Modules, and Connect to Feed-Through Assembly IMPORTANT: A particulate filter with a liquid/vapor separator sample conditioning module is strongly recommended.
- Page 5 U-BOLT SAMPLE CONDITIONING SYSTEM MOUNTING BRACKET Mount the sample conditioning module on the sample conditioning bracket. Step 4 Install the Sample Probe(s) Totalflow strongly suggests a temperature compensating pressure regulating sample probe be used. Refer to any manufacturer’s recommendations supplied with the probe. If the sample probe is to be mounted in a section of pipe where cathodic currents exist, the user should install isolators in the sample tubing between the probe and the NGC.
- Page 6 Precautions: • DO NOT use any type of plastic, Teflon or Teflon-lined braided steel tubing. Use only good quality, clean stainless steel chromatographic grade transport tubing for carrier, calibration gas and sample lines. Use of poor quality stainless steel tubing will generate unsatisfactory results. •...
- Page 7 Position the vent tubing in a downward direction so that moisture does not accumulate in the tubing. Units mounted inside a building may require vents to be extended outside. IMPORTANT: Remove plastic caps from the ends of the purge coil on any sample conditioning module(s).
- Page 8 Step 10 Adjust Voltage at Power Source To allow for maximum distance between the NGC and the power source, adjust the no-load output at the power source to 14.5 to 15 VDC for 12 Volt systems and approximately 25 VDC for 24 Volt systems. This assumes one of the below wire sizes is used, and the optional auxiliary heater is not used.
- Page 9 Upon completion, the user is asked if they want to install ActiveSync. If the local connection on the NGC is USB, the user will need ActiveSync. The user may already have ActiveSync installed if they communicate with a PDA device. If the user has ActiveSync and it is an older version, checking the Install ActiveSync box will give them the opportunity later in the install procedure to update their current version.
- Page 10 Step 14 Start PCCU32 Software The user will need to start PCCU32, and move to the initial screen. Initial NGC Screen If a communication error is received, click the Setup icon on the main toolbar, and verify the PCCU com port. Based on the type of connection the user needs, click the corresponding radio button.
- Page 11 an associated Help screen that will automatically display when moving from screen-to-screen. Click on the Help or the Entry screen to bring it to the front, as needed. The initial Help screen includes a Read Me First area at the top of the screen. This should be read thoroughly. As information is entered, the NGC’s oven will warm up, and diagnostics will run.
- Page 12 and all components are correct, modify the Methane (C1) to receive 100%. If changes were made in the Calibration Setup, click the Send button. Afterwards, click the Re-read button to verify changes, and then click the Close button on Calibration Setup. On the Operation screen, the unit will indicate that it is Hold mode.
- Page 13 Step 17 Verify Calibration Data This step assumes that the unit has completed calibration and moved back into Hold mode. The user will need to verify several things before moving into Run mode. Click on the Peak Find icon on the right side of the Operation screen.
- Page 14 peak of C3+. This may or may not be labeled but is not used in calculations. There could be trace amounts of other components in the calibration blend as indicated by gates with no component label. This is shown below between the CO2 and C2 peaks. Place the vertical line of the cursor over the small tick mark on C2, and verify the time in the upper right hand corner of the chrom is approximately 220 seconds.
-
Page 15: Remote Communication
Step 19 Placing the Unit in Run Mode On the Operation screen, click the Run button. The Current and Next Mode indicators for Run will illuminate. The unit will now run the streams as specified by the Stream Sequence screen. The unit will run in this mode until manually placed in a different mode or automatically put into the Calibration mode by the Calibration Schedule. - Page 16 Comm 2 defaults to NGC Interface, communicates via Modbus and functions as a Modbus Slave. Both communication ports (Comm 1 and Comm 2) can function as RS- 232, RS-422 or RS-485. The following table details the connections for remote communications. Comm 1 and Comm 2 Pin-Outs/Terminations RS232 RS485...
-
Page 17: Communication Troubleshooting
DIGITAL I/O POWER ( -) (+) (-) (+) (-) (+) ( -) (+) ( -) PWR IN INPUTS OUTPUTS 5VDC TERM TERM NO TERM NO TERM SERIAL PORT 1 SERIAL PORT 2 1 2 3 4 5 6 7 8 9 1 2 3 4 5 6 7 8 9 ETHERNET SECURITY... -
Page 18: Start-Up Troubleshooting
This section is designed for troubleshooting new installation issues only. Detailed troubleshooting techniques and procedures may be found in the Troubleshooting section of the Totalflow NGC8206 User’s Manual. Following successful completion of any of these troubleshooting techniques, the unit should be calibrated. - Page 19 warning description whether to proceed or stop and take care of the alarm condition. Using Manual Peak Find From the Analyzer Operation screen, click on the Peak Find button, and check the Manual box at the top of the screen. If the Manual check box is grayed out, close the Peak Find screen, click on the View option from the main toolbar and select Expert.
- Page 20 Peak Find Screen for Chrom 2 (Lights) Troubleshooting Clues Clue: Unnormalized total is not 0.5% of 100%. ± • Possibility: Carrier pressure set points are out of range. See Using Peak Find. • Peaks are integrated correctly but not labeled. See Labeling Peaks.
-
Page 21: Troubleshooting Solutions
Clue: Some components are not gated correctly. • Possibility: Carrier Pressure Set Point may be too high or too low. See Carrier Pressure Set Point. • Gate times may be incorrect. See Gating Peaks. Clue: NGC is “processing” unused streams. •... - Page 22 NOTE: In the Manual Peak Find screen, changes to Gate Times and Peak Labeling may be seen immediately by selecting Post Process. All changes in the pressure or times windows at the right of the screen will be reflected following a Run Single Cycle. Gating Peaks Gate On and Gate Off times in the Peak Setup table in the Manual Peak Find screen instructs the process when to start and stop looking for peaks.
- Page 23 Stream Sequencing–Enable or Disable Streams Following the initial setup, if a stream was not connected or connected/disconnected after start-up, the user may be required to manually enable or disable a stream. NOTE: Disable streams that do not have sample gas connected to them. If a stream (typically stream 4) is a dedicated calibration stream, the user may want to disable it, or remove it from the Stream Sequence.
- Page 24 ABB Inc. Totalflow Products 7051 Industrial Blvd. Bartlesville, Oklahoma 74006 Tel: USA (800) 442-3097 International 001-918-338-4880...