Table of Contents
Available languages
Available languages
Quick Links
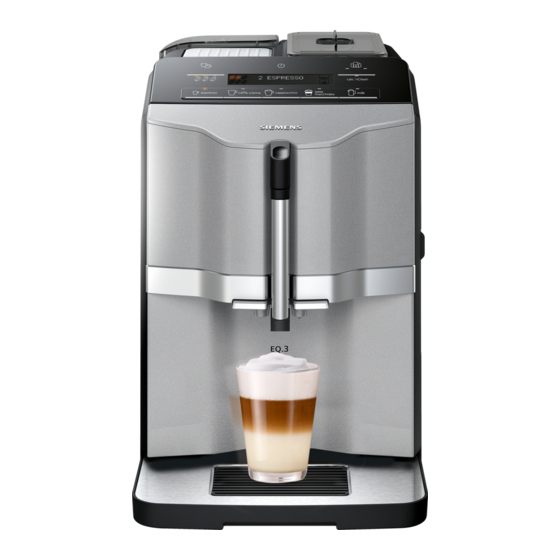
Kaffeevollautomat
Fully automatic espresso machine
Machine à expresso automatique
Macchina automatica per espresso
TI 303, TI 305
de
Gebrauchsanleitung ..................................................................... 5
en
Instruction manual ..................................................................... 29
fr
Mode d'emploi ........................................................................... 52
it
Istruzioni per l'uso ...................................................................... 75
Chapters
Table of Contents

Related Manuals for Siemens TI 303

Summary of Contents for Siemens TI 303
- Page 1 Kaffeevollautomat Fully automatic espresso machine Machine à expresso automatique Macchina automatica per espresso TI 303, TI 305 Gebrauchsanleitung ..............5 Instruction manual ..............29 Mode d’emploi ................52 Istruzioni per l’uso ..............75...
- Page 2 "...
- Page 4 &...
-
Page 5: Table Of Contents
Inhaltsverzeichnis d e G e b r a u c h s a n l e i t u n Bestimmungsgemäßer Tägliche Pflege und Reinigung 19 Gebrauch ....6 Reinigungsmittel . -
Page 6: Gebrauch
de Bestimmungsgemäßer Gebrauch Bestimmungsgemäßer Wichtige Gebrauch Sicherheitshinweise Das Gerät nach dem Die Gebrauchsanleitung bitte G e b r a u c h B e s t i m m u n g s g e m ä ß e r e i t s h i n w e i s e W i c h t i g e S i c h e r h Auspacken prüfen. - Page 7 Wichtige Sicherheitshinweise de Warnung Warnung Stromschlaggefahr! Gefahr durch Magnetismus! Das Gerät darf nur über eine Das Gerät enthält ■ vorschriftsmäßig installierte Permanentmagnete, die Steckdose mit Erdung an ein elektronische Implantate wie Stromnetz mit Wechselstrom z.B. Herzschrittmacher oder angeschlossen werden. Insulinpumpen beeinflussen Stellen Sie sicher, dass das können.
-
Page 8: Umweltschutz
de Umweltschutz Umweltschutz Gerät kennen lernen Energiesparen In diesem Kapitel erhalten Sie einen U m w e l t s c h u t z n e n G e r ä t k e n n e n l e r Überblick über den Lieferumfang, den Wird das Gerät nicht benutzt, das Aufbau und die Bestandteile Ihres... -
Page 9: Aufbau Und Bestandteile
Gerät kennen lernen de Aufbau und Bestandteile X Tropfschale (Kaffeesatzbehälter, Tropfgitter, Tropfblech, ~ Bild " Schwimmer) ` Tür für Brühraum ( Taste ein / aus (Stand-by-Betrieb) h Typenschild 0 Display )" Brüheinheit 8 Bedienfeld )* Aromadeckel @ Griff Milchschäumer )2 Bohnenbehälter H Auslaufsystem für Kaffee, ): Drehwähler für höhenverstellbar... -
Page 10: Zubehör
de Zubehör & Der Kaffeevollautomat verfügt über eine Tassenwärmung, die mit der Taste manuell ein- oder ausgeschaltet werden kann. Ist die Tassenwärmung an, leuchtet die Taste. Warnung Verbrennungsgefahr! Die Tassenwärmung wird sehr heiß! Für eine optimale Erwärmung der Tassen diese mit dem Tassenboden auf Hinweis: die Tassenwärmung stellen. -
Page 11: Vor Dem Ersten Gebrauch
Vor dem ersten Gebrauch de Wassertank füllen Vor dem ersten Wichtig: Den Wassertank täglich mit Gebrauch frischem, kaltem Wasser ohne Kohlensäure befüllen. Vor dem Betrieb prüfen, ob der Wassertank ausreichend In diesem Kapitel erfahren Sie, wie Sie b r a u c h V o r d e m e r s t e n G e gefüllt ist. -
Page 12: Gerät Bedienen
de Gerät bedienen Bei Berührung einer Taste ertönt ein ■ Gerät bedienen Ton, dieser kann ausgeschaltet werden.~ "Einstellungen" In diesem Kapitel erfahren Sie, wie Sie auf Seite 16 G e r ä t b e d i e n e n Kaffee- und Milchgetränke zubereiten. -
Page 13: Getränke Mit Milch Zubereiten
Gerät bedienen de Getränke mit Milch zubereiten Durch wiederholtes Berühren von % die gewünschte Kaffeestärke Dieses Gerät besitzt einen einstellen. Milchschäumer. Sie können Taste cappuccino oder latte Kaffegetränke mit Milch zubereiten oder macchiato berühren. Milch aufschäumen. Zuerst wird Milch in der Tasse oder dem Glas aufgeschäumt. -
Page 14: Getränkeeinstellungen Anpassen
de Gerät bedienen Getränkeeinstellungen Die eingestellte Kaffeestärke Hinweis: ist für alle Getränke mit Kaffee aktiv. anpassen Zwei Tassen auf einmal zubereiten Füllmenge u n g a n p a s s e n G e t r ä n k e e i n s t e l l Bevor Sie ein Getränk beziehen, können Sie können die Füllmenge ihrer Sie den Bezug von zwei Tassen auf... -
Page 15: Wasserfilter
Gerät bedienen de Die Einstellung der Hinweis: Wasserfilter einsetzen oder erneuern Schäumdauer hat keinen Einfluss auf Bevor ein neuer Wasserfilter verwendet die Kaffeemenge. werden kann, muss dieser gespült werden. Mahlgrad einstellen Das Gerät ist eingeschaltet. Der Dieses Gerät besitzt ein einstellbares Wassertank ist gefüllt. -
Page 16: Frostschutz
de Einstellungen Frostschutz Einstellungen Um Schäden durch Frosteinwirkung bei Transport und Lagerung zu vermeiden, Dieses Gerät verfügt über verschiedene E i n s t e l l u n g e n muss das Gerät vorher vollständig Werkseinstellungen. Sie haben die entleert werden. -
Page 17: Signalton Ein-/Ausschalten
Einstellungen de Signalton ein-/ausschalten Wasserhärte einstellen Bei Betätigung einer Taste ertönt ein Die richtige Einstellung der Wasserhärte Signalton. ist wichtig, damit das Gerät rechtzeitig anzeigt, wenn es entkalkt werden muss. Dieser kann ein- oder ausgeschaltet Die voreingestellte Wasserhärte ist werden. Stufe 4. -
Page 18: Factory Reset
de Einstellungen Die Tabelle zeigt die Zuordnung der Stufen zu den unterschiedlichen Wasserhärtegraden: Stufe Wasserhärtegrad Deutsch (°dH) Französisch (°fH) 1-13 8-14 14-25 15-21 26-38 22-30 39-54 Eine nachträgliche Änderung der Wasserhärte ist jederzeit möglich. Bei Einsatz des Wasserfilters Hinweis: (siehe Kapitel “Zubehör”) wie folgt vorgehen, ~ "Wasserfilter"... -
Page 19: Tägliche Pflege Und Reinigung
Tägliche Pflege und Reinigung de Rückstände von Kalk, Kaffee, Milch, ■ Tägliche Pflege und Reinigungs- und Entkalkungslösung immer sofort entfernen. Unter Reinigung solchen Rückständen kann sich Korrosion bilden. Bei sorgfältiger Pflege und Reinigung u n d R e i n i g u n g T ä... -
Page 20: Tropfschale Und Kaffeesatzbehälter Reinigen
de Tägliche Pflege und Reinigung Tropfschale und Milchsystem reinigen Kaffeesatzbehälter reinigen ~ Bild % i g e n M i l c h s y s t e m r e i n Das Milchsystem sollte nach jeder ~ Bild $ Benutzung gereinigt werden, um Rückstände zu entfernen. -
Page 21: Brüheinheit Reinigen
Tägliche Pflege und Reinigung de Brüheinheit reinigen ~ Bild #, ~ Bild $ Zusätzlich zum automatischen Spülvorgang sollte die Brüheinheit regelmäßig zum Reinigen entnommen werden. Achtung! Die Brüheinheit ohne Spülmittel oder essig- bzw. säurehaltige Mittel reinigen und nicht in den Geschirrspüler geben. Brüheinheit herausnehmen: Das Gerät ausschalten. -
Page 22: Service-Programme
de Service-Programme Vor dem Start eines ■ Service-Programme Service-Programms die Brüheinheit entnehmen, reinigen und wieder In gewissen Zeitabständen, je nach einsetzen. Den Milchschäumer S e r v i c e - P r o g r a m m e Wasserhärte und Benutzung des reinigen. -
Page 23: Calc'nclean Starten
Die Brüheinheit entnehmen und Das Programm startet, es reinigt und reinigen. spült das Gerät. calc’nClean pulsiert. Eine Siemens-Reinigungstablette in Dauer ca. 20 Minuten. die Brüheinheit einwerfen und die Symbol ( leuchtet auf. Brüheinheit wieder einsetzen. Die Tropfschale und den Kaffeesatzbehälter entleeren,... -
Page 24: Störungen, Was Tun
de Störungen, was tun? mit Hilfe der Tabelle, die Störung selbst Störungen, was tun? zu beheben. Bitte die Sicherheitshinweise am Anfang Wenn eine Störung auftritt, liegt es oft dieser Anleitung durchlesen. S t ö r u n g e n , w a s t u nur an einer Kleinigkeit. - Page 25 Störungen, was tun? de Der Kaffee schmeckt "ver- Der Mahlgrad ist zu fein einge- Mahlgrad gröber einstellen. brannt". stellt Ungeeignete Kaffeesorte. Kaffeesorte wechseln. Milch/Milchmixgetränke sind Zu wenig Milch im Glas oder Mehr Milch verwenden oder die zu heiß. der Tasse. Schäumdauer anpassen.
- Page 26 de Störungen, was tun? Displayanzeige “Wassertank Wassertank falsch eingesetzt. Wassertank richtig einsetzen. füllen” trotz vollem Wasser- Kohlensäurehaltiges Wasser im Wassertank mit frischem Leitungswas- tank. Wassertank. ser füllen. Schwimmer im Wassertank Wassertank entnehmen und gründlich hängt fest. reinigen. Neuer Wasserfilter nicht nach Wasserfilter nach Anleitung spülen Anleitung gespült.
-
Page 27: Kundendienst
Kundendienst de Kundendienst Technische Daten K u n d e n d i e n s t Elektrischer Anschluss (Spannung – Frequenz) 220–240 V ∼, 50 / 60 Hz Leistung der Heizung 1600 W Maximaler Pumpendruck, statisch 15 bar Maximales Fassungsvermögen Wassertank (ohne Filter) 1,3 l Maximales Fassungsvermögen Bohnenbehälter ≈... - Page 28 de Kundendienst...
- Page 29 Table of contents e n I n s t r u c t i o n m a n u a l Intended use....30 Daily care and cleaning .
-
Page 30: Intended Use
en Intended use Intended use Important safety information Check the appliance for I n t e n d e d u s e damage after unpacking it. Do Please read carefully, follow not connect the appliance if it i n f o r m a t i o n I m p o r t a n t s a f e t y and retain the operating has been damaged in... - Page 31 Important safety information en Warning Warning Danger of electric shock! Hazard due to magnetism! The appliance may only be The appliance contains ■ connected to a power supply permanent magnets which may with alternating current via a affect electronic implants, e.g. correctly installed socket heart pacemakers or insulin with earthing.
-
Page 32: Environmental Protection
en Environmental protection Environmental Getting to know your protection appliance Saving energy This section provides an overview of the t e c t i o n E n v i r o n m e n t a l p r o y o u r a p p l i a n c e G e t t i n g t o k n o w scope of delivery, the assembly and the... -
Page 33: Assembly And Components
Getting to know your appliance en Assembly and components X Drip tray (coffee grounds container, drip grate, drip plate, ~ Fig. " float) ` Door of brewing chamber ( On / off button (stand-by mode) h Rating plate 0 Display )"... -
Page 34: Accessories
en Accessories & The fully automatic coffee machine has a cup warmer that can be switched on or off manually with the button. When the cup warmer is on, the button lights up. Warning Risk of burns! The cup warmer becomes very hot! For optimal cup warming, place them with the base on the cup warmer. -
Page 35: Before Using For The First Time
Before using for the first time en Filling the water tank Before using for the Important: Fill the water tank with fresh, first time cold, still water on a daily basis. Prior to operation, check whether the water tank has been sufficiently filled. In this section, you will learn how to t h e f i r s t t i m e B e f o r e u s i n g f o r... -
Page 36: Operating The Appliance
en Operating the appliance General information Operating the The factory settings of the fully appliance automatic coffee machine are programmed for optimal performance. In this section, you will learn how to The appliance switches off p l i a n c e O p e r a t i n g t h e a p make drinks with coffee and milk.It ■... -
Page 37: Preparing Drinks With Milk
Operating the appliance en Preparing drinks with milk The milk is first frothed up in the cup or glass. The coffee is then brewed and This appliance has a milk frother. You dispensed into the cup or glass. can make drinks of coffee with milk or To stop current dispensing of the Note: froth up milk. -
Page 38: Adjusting Beverage Settings
en Operating the appliance Adjusting beverage settings Filling level You can adjust the filling level of your Preparing two cups at once e s e t t i n g s A d j u s t i n g b e v e r a g drinks. -
Page 39: Water Filter
Operating the appliance en Setting the grinding level Inserting or replacing a water filter This appliance features an adjustable A new water filter must be rinsed before grinder. This enables the grinding level it can be used. of the coffee to be individually changed. The appliance is switched on. -
Page 40: Frost Protection
en Settings Frost protection Settings To prevent frost damage during transportation and storage, the This appliance has different factory S e t t i n g s appliance must be completely emptied settings. You can customise the settings beforehand. on the appliance. Info: The appliance must be ready for If no button is pressed within Note:... -
Page 41: Switching The Audible Signal On/Off
Settings en Switching the audible signal Setting the water hardness on/off It is important to set the water hardness correctly so that the appliance indicates Whenever a button is pressed, an in good time when the descaling audible signal sounds. programme should be run. -
Page 42: Factory Reset
en Settings The table shows the allocation of the levels to the different degrees of water hardness: Level Degree of water hardness German (°dH) French (°fH) 1-13 8-14 14-25 15-21 26-38 22-30 39-54 Subsequent changes to the water hardness can be made at any time. When using the water filter (see Note: section "Accessories"), proceed as... -
Page 43: Daily Care And Cleaning
Daily care and cleaning en Caution! Daily care and Not all of the appliance's components can be cleaned in the dishwasher. cleaning ~ Fig. $ - & With good care and cleaning, your l e a n i n g D a i l y c a r e a n d c appliance will remain fully functioning Not dishwasher-safe:... -
Page 44: Cleaning The Drip Tray And Coffee Grounds Container
en Daily care and cleaning Cleaning the drip tray and Cleaning the milk system coffee grounds container ~ Fig. % k s y s t e m C l e a n i n g t h e m i l The milk system must be cleaned after ~ Fig. -
Page 45: Cleaning The Brewing Unit
Daily care and cleaning en Cleaning the brewing unit ~ Fig. #, ~ Fig. $ In addition to automatic cleaning, the brewing unit should be removed regularly for cleaning. Caution! Clean the brewing unit without detergent or products containing vinegar or acid and do not place in the dishwasher. -
Page 46: Service Programmes
en Service programmes At the end of a service programme, ■ Service programmes wipe down the appliance using a soft, damp cloth to immediately Every so often – with the exact remove any descaler residue. This S e r v i c e p r o g r a m m e s frequency depending on water residue may cause corrosion. -
Page 47: Starting Calc'nclean
( symbol lights up. Remove and clean the brewing unit. Empty, clean and re-insert the drip Place a Siemens cleaning tablet in tray and coffee grounds container. the brewing unit and re-insert the The programme has finished. The unit. -
Page 48: Trouble Shooting
en Trouble shooting please refer to the fault table and Trouble shooting attempt to correct the fault yourself. Please read through the safety Faults often have simple explanations. information at the beginning of these T r o u b l e s h o o t i n g Before calling the customer service, instructions. - Page 49 Trouble shooting en Milk/blended milk drinks too Too little milk in glass or cup. Use more milk or adjust frothing time. hot. Milk froth too thin, loud sucking noise. Milk/blended milk drinks too Too much milk in glass or cup. Use less milk or adjust frothing time. cold.
- Page 50 en Trouble shooting Display shows "Fill water tank" Water tank wrongly inserted. Insert water tank correctly. despite full water tank. Carbonated water in the water Fill the water tank with fresh tap water. tank. Float is stuck in the water tank. Remove the water tank and clean thor- oughly.
-
Page 51: Customer Service
Customer service en Customer service Technical data C u s t o m e r s e r v i c e Electrical connection (voltage – frequency) 220–240 V ∼, 50/60 Hz Heater wattage 1600 W Maximum static pump pressure 15 bar Maximum volume capacity of the water tank (without filter) 1.3 l... - Page 52 Table des matières f r M o d e d ’ e m p l o i Utilisation conforme ..53 Entretien et nettoyage quotidiens ....66 Précautions de sécurité...
-
Page 53: Utilisation Conforme
Utilisation conforme fr Utilisation conforme Précautions de sécurité importantes Contrôler l'état de l'appareil o r m e U t i l i s a t i o n c o n f après l'avoir déballé. Ne pas le Veuillez lire attentivement la raccorder s'il présente des c u r i t é... - Page 54 fr Précautions de sécurité importantes Mise en garde Mise en garde Risque d’électrocution ! Danger par magnétisme ! L'appareil doit être branché L'appareil contient des aimants ■ permanents qui peuvent uniquement sur un réseau à exercer une influence sur les courant alternatif par implants électroniques tels que l'intermédiaire d'une prise...
-
Page 55: Protection De L'environnement
Protection de l'environnement fr Protection de Présentation de l'environnement l'appareil Économie d'énergie Ce chapitre vous offre un aperçu des e n v i r o n n e m e n t P r o t e c t i o n d e l ' l ' a p p a r e i l P r é... -
Page 56: Configuration Et Éléments
fr Présentation de l'appareil Configuration et éléments X Bac d'égouttement (bac à marc de café, grille de l'égouttoir, ~ Figure " égouttoir, flotteur) ` Porte de la chambre de ( Touche Marche / Arrêt (mode percolation Veille) h Plaque signalétique 0 Écran )"... -
Page 57: Accessoires
Accessoires fr & La machine à espresso automatique dispose d'un chauffe-tasse qui peut être activé ou désactivé manuellement avec cette touche. La touche s'illumine lorsque le chauffe-tasse est allumé. Mise en garde Risque de brûlure ! Le chauffe-tasse est très chaud ! Remarque : Pour permettre un chauffage optimal des tasses, les placer à... -
Page 58: Avant La Première Utilisation
fr Avant la première utilisation Vous pouvez laisser le café en ■ Avant la première grains dans le réservoir pour café en grains plusieurs jours sans que le utilisation café ne perde son arôme. Ce chapitre vous explique comment Remplir le réservoir d’eau e u t i l i s a t i o n A v a n t l a p r e m i è... -
Page 59: Utilisation De L'appareil
Utilisation de l’appareil fr Remarques Utilisation de l’appareil La sélection de la langue n'apparaît ■ automatiquement que lors de la Ce chapitre vous permet d'apprendre première mise en marche. l ’ a p p a r e i l U t i l i s a t i o n d e comment préparer des boissons à... -
Page 60: Préparation De Boissons Lactées
fr Utilisation de l’appareil Préparation de boissons Retoucher % permet de régler l'intensité souhaitée pour le café. lactées Effleurer la touche cappuccino ou latte macchiato. Cet appareil est équipé d'un mousseur L'appareil fait tout d'abord mousser le de lait. Vous pouvez préparer des cafés lait dans la tasse ou le verre. -
Page 61: Ajustage Des Réglages Des Boissons
Utilisation de l’appareil fr Ajustage des réglages des L'intensité choisie est Remarque : activée pour toutes les boissons à base boissons de café. Préparation de deux tasses à la fois a g e s d e s b o i s s o n s A j u s t e r l e s r é... -
Page 62: Filtre À Eau
fr Utilisation de l’appareil Filtre à eau Une fois la durée de préparation de la mousse atteinte, effleurer la touche ~ Figure & sélectionnée pour arrêter l'opération. F i l t r e à e a u Un filtre à eau permet de prévenir les Le réglage de la durée de dépôts de tartre, de réduire les Remarque :... -
Page 63: Protection Contre Le Gel
Réglages fr Retrait du filtre à eau Réglages Si le filtre à eau est retiré et qu'aucun nouveau filtre à eau n'est mis en place, Cet appareil fait l'objet de différents merci de procéder au réglage R é g l a g e s réglages en usine. -
Page 64: Activer/Désactiver Le Signal Sonore
fr Réglages Activer/désactiver le signal Réglage de la dureté de l'eau sonore Le réglage correct de la dureté de l’eau est important car il permet à l'appareil Appuyer sur une touche fait retentir un d’indiquer le moment où un détartrage signal sonore. -
Page 65: Factory Reset
Réglages fr Le tableau ci-après présente les équivalences entre les niveaux et les différents degrés de dureté de l'eau : Niveau Degré de dureté de l’eau Allemagne (°dH) France (°fH) 1-13 8-14 14-25 15-21 26-38 22-30 39-54 Une modification ultérieure de la dureté de l'eau est possible à... -
Page 66: Entretien Et Nettoyage Quotidiens
fr Entretien et nettoyage quotidiens Toujours nettoyer immédiatement les ■ Entretien et nettoyage résidus de tartre, de café, de lait, de produit nettoyant ou de solution quotidiens détartrante. Les surfaces situées sous de tels résidus risquent de se Si vous entretenez et nettoyez corroder. -
Page 67: Nettoyage De L'appareil
Entretien et nettoyage quotidiens fr Nettoyage de l'appareil Nettoyage du système à lait ~ Figure % Essuyer le corps de l'appareil avec è m e à l a i t N e t t o y a g e d u s y s t Il est recommandé... -
Page 68: Nettoyer L'unité De Percolation
fr Entretien et nettoyage quotidiens Nettoyer l’unité de percolation ~ Figure #, ~ Figure $ En plus du programme de rinçage automatique, il est recommandé de retirer régulièrement l’unité de percolation pour la nettoyer. Attention ! Nettoyer l’unité de percolation sans produit à... -
Page 69: Programme De Service
Programme de service fr Retirer l'unité de percolation, la ■ Programme de service nettoyer et la remettre en place avant de lancer le programme La touche calc’nClean s'allume à un d'entretien. Nettoyer le mousseur de P r o g r a m m e d e s e r v i intervalle de temps donné, selon la lait. -
Page 70: Démarrer Calc'nclean
Le symbole )s'allume. Verser de l’eau tiède dans le réservoir d’eau vide jusqu’au repère 0,5 l et dissoudre une pastille de détartrage Siemens. Remettre en place le réservoir d'eau et placer un grand récipient (env. 1 litre) sous le système verseur. -
Page 71: Anomalies, Que Faire
Anomalies, que faire ? fr veuillez essayer de remédier par Anomalies, que faire ? vous-même à la panne à l'aide du tableau. Une anomalie de fonctionnement n'est Veuillez lire les consignes de sécurité i r e ? A n o m a l i e s , q u e f a souvent due qu'à... - Page 72 fr Anomalies, que faire ? Le café est trop « amer ». Le degré de mouture est réglé Régler une mouture plus grossière. trop fin. Variété de café inadéquate. Changer de variété de café. Le café a un goût de « brûlé ». Le degré...
- Page 73 Anomalies, que faire ? fr Affichage du message « Vider Lorsque l'appareil est éteint, Une fois l'appareil allumé, retirer le bac les bacs » alors que le bac l'opération de vidange n'est pas d'égouttement et les remettre en place. d'égouttement est vide, que détectée.
-
Page 74: Service Après-Vente
fr Service après-vente Affichage du message Unité de percolation très forte- Mettre l'appareil hors puis sous ten- « Redémarrer l'appareil », des ment encrassée ou impossibi- sion, nettoyer si possible l'unité de per- LED clignotent. lité de la retirer. colation. Affichage du message Défaut de l'appareil. - Page 75 Indice i t I s t r u z i o n i p e r l ’ u s o Conformità d'uso ... . 76 Manutenzione e pulizia quotidiana ....89 Importanti avvertenze di Detergenti .
-
Page 76: Conformità D'uso
it Conformità d'uso Conformità d'uso Importanti avvertenze di sicurezza Controllare l'apparecchio dopo C o n f o r m i t à d ' u s o averlo disimballato. Qualora si Leggere attentamente le fossero verificati danni da e n z e d i s i c u r e z z I m p o r t a n t i a v v e r t istruzioni per l’uso, osservarle e trasporto, non collegare... - Page 77 Importanti avvertenze di sicurezza it Avviso Avviso Pericolo di scarica elettrica! Pericoli dovuti ai campi L'apparecchio può essere magnetici! ■ collegato a una rete a L'apparecchio contiene corrente alternata soltanto magneti permanenti che con una presa con messa a possono interferire con gli terra installata a norma.
-
Page 78: Tutela Dell'ambiente
it Tutela dell'ambiente Tutela dell'ambiente Conoscere l'apparecchio Risparmio energetico e n t e T u t e l a d e l l ' a m b i In questo capitolo sono presentati la Spegnere l'apparecchio quando non ■ e c c h i o C o n o s c e r e l ' a p p a r dotazione, la struttura e i componenti è... -
Page 79: Struttura E Componenti
Conoscere l'apparecchio it Struttura e componenti X Raccogligocce (contenitore per fondi di caffè, griglia di ~ figura " gocciolamento, lamiera raccogligocce, galleggiante) ( Tasto Acceso / Spento (modalità ` Sportello della camera di infusione Stand-by) h Targhetta identificativa 0 Display )"... -
Page 80: Accessori
it Accessori & La macchina da caffè automatica è dotata di scaldatazze che può essere attivato o disattivato manualmente con il tasto. Se lo scaldatazze è attivo, il tasto è acceso. Avviso Pericolo di ustioni! Lo scaldatazze diventa molto caldo! Per un riscaldamento ottimale, disporre le tazze sullo scaldatazze con il Avvertenza: fondo rivolto verso il basso. -
Page 81: Prima Di Utilizzare L'apparecchio Per La Prima Volta
Prima di utilizzare l'apparecchio per la prima volta it Avvertenze Prima di utilizzare I chicchi di caffè vengono macinati ■ freschi per ogni infusione. l'apparecchio per la Conservare i chicchi di caffè in un ■ prima volta contenitore chiuso e al fresco per mantenere al meglio la qualità. -
Page 82: Uso Dell'apparecchio
it Uso dell'apparecchio Avvertenze generali Uso dell'apparecchio La macchina automatica da caffè è programmata già in fabbrica con valori In questo capitolo viene spiegato come standard che garantiscono un c h i o U s o d e l l ' a p p a r e c preparare bevande a base di caffè... -
Page 83: Preparazione Di Bevande Con Latte
Uso dell'apparecchio it Preparazione di bevande con Impostare l'intensità del caffè desiderata toccando ripetutamente latte Toccare il tasto cappuccino o latte Questo apparecchio è dotato di macchiato. schiumatore. Si possono preparare Dapprima viene montato il latte nella bevande a base di caffè con latte tazza o nel bicchiere. -
Page 84: Regolazione Delle Impostazioni Delle Bevande
it Uso dell'apparecchio Regolazione delle L'intensità del caffè Avvertenza: impostata è attiva per tutte le bevande a impostazioni delle bevande base di caffè. Preparazione di due tazze e l l e b e v a n d e e i m p o s t a z i o n i d R e g o l a z i o n e d e l l contemporaneamente Quantità... -
Page 85: Filtro Dell'acqua
Uso dell'apparecchio it Filtro dell'acqua L'impostazione della Avvertenza: durata della montatura non incide sulla ~ figura & quantità di caffè. F i l t r o d e l l ' a c q Un filtro dell'acqua riduce i depositi di calcare e le impurità... -
Page 86: Protezione Antigelo
it Impostazioni Rimozione del filtro dell'acqua Impostazioni Se il filtro dell'acqua viene rimosso e non ne viene montato uno nuovo, Per questo apparecchio sono state impostare la durezza dell'acqua come I m p o s t a z i o n i definite diverse impostazioni in fabbrica, descritto al capitolo "Impostazioni - che l'utente può... -
Page 87: Attivazione E Disattivazione Del Segnale Acustico
Impostazioni it Attivazione e disattivazione Regolare la durezza dell'acqua del segnale acustico L'impostazione corretta della durezza dell’acqua è importante affinché Quando si tocca un tasto viene emesso l’apparecchio possa indicare al un segnale acustico. momento giusto quando è necessario Il segnale acustico può essere attivato o eseguire la decalcificazione. -
Page 88: Ripristino Delle Impostazioni Di Fabbrica
it Impostazioni La tabella mostra i livelli assegnati in base ai diversi gradi di durezza dell'acqua: Livello Grado di durezza dell'acqua Tedesco (°dH) Francese (°fH) 1-13 8-14 14-25 15-21 26-38 22-30 39-54 È possibile modificare la durezza dell'acqua in un secondo momento. Se il filtro dell'acqua è... -
Page 89: Manutenzione E Pulizia Quotidiana
Manutenzione e pulizia quotidiana it Attenzione! Manutenzione e pulizia Non tutti i componenti dell'apparecchio possono essere lavati in lavastoviglie. quotidiana ~ figura $ - & Una cura e manutenzione scrupolosa l i z i a q u o t i d i a n a M a n u t e n z i o n e e p u contribuiscono a mantenere a lungo Non lavabili in lavastoviglie:... -
Page 90: Pulizia Dell'apparecchio
it Manutenzione e pulizia quotidiana Pulizia dell’apparecchio Pulire il sistema latte ~ figura % Pulire l’esterno dell’apparecchio con m a l a t t e P u l i r e i l s i s t e Il sistema per il latte dovrebbe essere un panno morbido umido. -
Page 91: Pulire L'unità Di Infusione
Manutenzione e pulizia quotidiana it Pulire l’unità di infusione ~ figura #, ~ figura $ Oltre al programma di risciacquo automatico, l’unità di infusione dovrebbe essere estratta ad intervalli regolari per essere lavata. Attenzione! Lavare l'unità d'infusione senza usare detersivo né liquidi contenenti aceto o sostanze acide e non metterla in lavastoviglie. -
Page 92: Programmi Di Servizio
it Programmi di servizio Prima di avviare un programma di ■ Programmi di servizio servizio togliere l'unità di infusione, lavarla e reinserirla. Lavare lo A intervalli regolari, a seconda della schiumatore. i z i o P r o g r a m m i d i s e r v durezza dell’acqua e dell’utilizzo Al termine di un programma di ■... -
Page 93: Avvio Di Calc'nclean
Il programma viene avviato; Inserire una pastiglia per il lavaggio l'apparecchio viene lavato e Siemens nell'unità d'infusione e decalcificato. calc’nClean pulsa. reinserire l'unità d'infusione. Durata: ca. 20 minuti. Il simbolo ( si accende. Svuotare il raccogligocce e il contenitore per fondi di caffè, lavarli... -
Page 94: Malfunzionamento, Che Fare
it Malfunzionamento, che fare? assistenza clienti, si prega di tentare di Malfunzionamento, eliminare autonomamente il guasto, basandosi sulle indicazioni fornite nella che fare? tabella. Leggere attentamente le norme di Quando si verificano anomalie, spesso c h e f a r e ? M a l f u n z i o n a m e n t o , sicurezza riportate all'inizio delle si tratta di guasti facilmente risolvibili. - Page 95 Malfunzionamento, che fare? it Il caffè è troppo "acido". Il grado di macinatura è troppo Regolare un grado di macinatura più grosso. fine. Tipo di caffè non adatto. Utilizzare un caffè più tostato. Il caffè è troppo "amaro". Il grado di macinatura è troppo Regolare un grado di macinatura più...
- Page 96 it Malfunzionamento, che fare? Viene visualizzato il messaggio Lo sportello non è chiuso cor- Chiudere bene lo sportello. sul display “Chiudere spor- rettamente. tello” anche se lo sportello è L'apparecchio è troppo caldo. Attendere 1 ora e far raffreddare chiuso. l'apparecchio.
- Page 97 Malfunzionamento, che fare? it Messaggio sul display “Riav- Unità d'infusione molto sporca, Spegnere e riaccendere l'apparecchio, viare l'apparecchio”, i LED lam- oppure non si riesce a estrarre se possibile pulire l'unità d'infusione. peggiano. l'unità d'infusione. Messaggio sul display “Riav- Guasto all'apparecchio. Riavviare l'apparecchio.
-
Page 98: Servizio Assistenza Clienti
it Servizio assistenza clienti Servizio assistenza clienti Dati tecnici n z a c l i e n t i S e r v i z i o a s s i s t e Collegamento elettrico (tensione – frequenza) 220–240 V ∼, 50 / 60 Hz Potenza del riscaldamento 1600 W Pressione massima pompa, statica... - Page 104 *8001050461* 8001050461 960914...