Table of Contents
Quick Links
Table of Contents

Summary of Contents for AEG BS730470MM
- Page 1 BS730470MM USER MANUAL...
-
Page 2: Table Of Contents
16. WARRANTY......................... 53 FOR PERFECT RESULTS Thank you for choosing this AEG product. We have created it to give you impeccable performance for many years, with innovative technologies that help make life simpler features you might not find on ordinary appliances. Please spend a few minutes reading to get the very best from it. -
Page 3: Safety Information
ENGLISH SAFETY INFORMATION Before the installation and use of the appliance, carefully read the supplied instructions. The manufacturer is not responsible for any injuries or damages that are the result of incorrect installation or usage. Always keep the instructions in a safe and accessible location for future reference. -
Page 4: Safety Instructions
Always use oven gloves to remove or put in • accessories or ovenware. Before maintenance cut the power supply. • Ensure that the appliance is switched off before • replacing the lamp to avoid the possibility of electric shock. - Page 5 ENGLISH cable. Should the mains cable need • Do not apply pressure on the open to be replaced, this must be carried door. out by our Authorised Service Centre. • Do not use the appliance as a work • Do not let mains cables touch or surface or as a storage surface.
- Page 6 2.4 Steam Cooking • Do not clean the catalytic enamel (if applicable) with any kind of WARNING! detergent. Risk of burns and damage to 2.6 Internal light the appliance. • The type of light bulb or halogen • Released Steam can cause burns: lamp used for this appliance is only –...
-
Page 7: Product Description
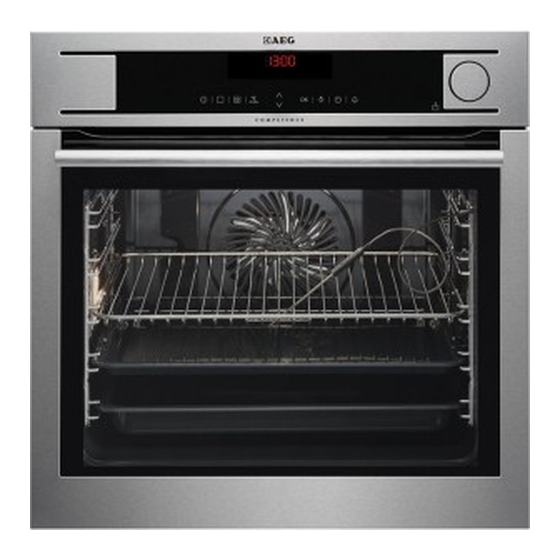
ENGLISH 3. PRODUCT DESCRIPTION 3.1 General overview Control panel Electronic programmer Water drawer Socket for the core temperature sensor Heating element Lamp Descaling pipe outlet Shelf support, removable Shelf positions 3.2 Accessories To bake and roast or as a pan to collect fat. -
Page 8: Control Panel
(e.g. rice, polenta, pasta). 4. CONTROL PANEL 4.1 Electronic programmer Use the sensor fields to operate the appliance. Sensor Function Description Field DISPLAY Shows the current settings of the appliance. ON / OFF To activate and deactivate the appliance. - Page 9 ENGLISH Sensor Function Description Field CLOCK To set the clock functions. MINUTE MINDER To set the Minute Minder. 4.2 Display A. Oven function symbol B. Temperature / time of day display C. Clock / Residual heat display / Minute Minder D.
-
Page 10: Before First Use
4.3 Heat up indicator When the appliance is at the set temperature, the bars go off the display. If you activate an oven function, the bars come on in the display. The bars show that the temperature in the appliance increases or decreases. -
Page 11: Daily Use
ENGLISH 2. Put all the reaction zones of the strip into the water for approximately 1 Test strip Hardness of the second. water Do not put the strip into the running water! 3. Shake the strip to remove the excess of the water. - Page 12 Oven function Application Frozen Foods To make convenience food like e.g. french fries, potato wedges or spring rolls crispy. Turbo Grilling To roast larger meat joints or poultry with bones on one shelf position. Also to make gratins and to brown.
- Page 13 ENGLISH is not available for the set function if The lamp may automatically Faulty tone is activated in the settings deactivate at a temperature menu. Refer to "Using the settings below 140 °F during some menu". oven functions. The Fast heat up function decreases the heat up time.
-
Page 14: Clock Functions
7. Touch to deactivate the acoustic signal and the appliance. 7. CLOCK FUNCTIONS 7.1 Clock functions table Clock function Application COUNT UP TIMER To set the count up, which shows how long the appli- ance operates. This function has no effect on the opera- tion of the appliance. -
Page 15: Automatic Programmes
ENGLISH 3. Use to set the END and 1. Touch to confirm. First you set the and "00" flash in the display. minutes and then the hours. 2. Use to switch between options. When the set time ends, an acoustic First you set the seconds, then the signal sounds for two minutes. - Page 16 8.1 Automatic programmes Programme number Programme name VEGETABLES, TRADITIONAL POTATO GRATIN FARMER BREAD ROLLS FISH POACHED FISH (TROUT) PLUM DUMPLING VEAL KNUCKLE RICE LASAGNE DOUGH PROVING BRAISED MEAT ROAST PORK ROAST VEAL ROAST LAMB ROAST GAME WHOLE CHICKEN PIZZA...
-
Page 17: Using The Accessories
ENGLISH 8.2 Recipes online 4. Touch or the settings save automatically after five seconds. You can find the recipes for The appliance activates. the automatic programmes 5. You can change the default weight specified for this appliance value with . Touch on our website. - Page 18 The core temperature sensor measures You can set the core the core temperature of the meat. When temperature only when the meat is at the set temperature, the flashes. If is in the appliance deactivates. display but does not...
-
Page 19: Additional Functions
ENGLISH Wire shelf and the deep pan together: WARNING! Be careful when you remove Push the deep pan between the guide the core temperature bars of the shelf support and the wire sensor. It is hot. There is a shelf on the guide bars above and make risk of burns. - Page 20 The Function Lock prevents an When the function accidental change of the oven function. operates, you can change the time and 1. To activate the function activate the temperature. appliance. 2. Activate an oven function or setting. • To deactivate the function touch The appliance deactivates your 3.
-
Page 21: Hints And Tips
ENGLISH 10.6 Brightness of the display 5. Touch To exit the Settings menu, touch There are two modes of display brightness: touch and hold • Night brightness - when the appliance 10.5 Automatic Switch-off is deactivated, the brightness of the display is lower between 10 PM and 6 For safety reasons the appliance deactivates automatically after some... - Page 22 Sterilisation • Fill the drawer with the maximum quantity of water and set the time to • With this function you can sterilise 40 minutes. containers (e.g. baby bottles). • Put the clean containers in the middle of the shelf on the first shelf position.
- Page 23 ENGLISH Food Temperature (°F ) Time (min) Shelf position Peeling toma- toes White haricot 25 - 35 beans Savoy cabbage 20 - 25 Courgette, slices 210 15 - 25 Beans, blanched 20 - 25 Vegetables, blanched Dried beans, 55 - 65 soaked (water / beans ratio 2:1) Snow peas (kai-...
- Page 24 Food Temperature (°F ) Time (min) Shelf position Tagliatelle, fresh 15 - 25 Polenta (liquid ra- 40 - 50 tio 3:1) Bulgur (water / 25 - 35 bulgur ratio 1:1) Couscous (water / 15 - 20 couscous ratio 1:1)
- Page 25 ENGLISH Food Temperature (°F ) Time (min) Shelf position Prawns, fresh 20 - 25 Prawns, frozen 30 - 40 Salmon fillets 20 - 30 Salmon trout, ap- 40 - 45 prox. 1000 g Mussels 20 - 30 Flat fish fillet Meat Food Temperature (°F )
- Page 26 • Put the prepared vegetables and to the first position for approximately accompaniments into cookware 15 minutes. correct for an oven procedure and • Start the function Full Steam. Cook it then into the oven with the roast. all together until ready.
- Page 27 ENGLISH 11.5 Quarter Steam + Heat Food Temperature (°F ) Time (min) Shelf position Roast pork 1000 g 320 - 356 90 - 100 Roast beef 1000 g 356 - 392 60 - 90 Roast veal 1000 g 80 - 90 Meat loaf, uncooked, 30 - 40 500 g...
- Page 28 • The manufacturer recommends that the temperature setting. The you use the lower temperature the differences equalize during the first time. baking procedure. • If you cannot find the settings for a • With longer baking times, you can...
- Page 29 ENGLISH 11.9 Baking on one level: Baking in tins Food Function Temperature Time (min) Shelf position (°F ) Ring cake or True Fan Cook- 300 - 320 50 - 70 brioche Madeira cake / True Fan Cook- 280 - 320 70 - 90 fruit cakes Fatless sponge...
- Page 30 Food Function Temperature Time (min) Shelf position (°F ) Bread (rye Top / Bottom 1. 20 1. 450 bread): Heat 2. 30 - 60 2. 320 - 360 1. First part of baking proc- ess. 2. Second part of baking process.
- Page 31 ENGLISH Food Function Temperature Time (min) Shelf position (°F ) Short bread / True Fan Cook- 20 - 35 Short bread / Pastry Stripes Short bread / Top / Bottom 20 - 30 Short bread / Heat Pastry Stripes Biscuits made True Fan Cook- 300 - 320 15 - 20...
- Page 32 Food Function Temperature Time (min) Shelf position (°F ) Vegetables au Turbo Grilling 320 - 340 15 - 30 gratin Baguettes top- True Fan Cook- 320 - 340 15 - 30 ped with melted cheese Sweet bakes Top / Bottom...
- Page 33 ENGLISH Food Temperature Time (min) Shelf position (°F ) 2 positions 3 positions Dry streusel 300 - 320 30 - 45 1 / 4 cake 1) Preheat the oven. Biscuits / small cakes / small cakes / pastries / rolls Food Temperature Time (min)
- Page 34 2. Put the meat together with the hot 4. Select the function Slow Cooking and roasting pan into the oven on the set the correct end core wire shelf. temperature. 3. Put the core temperature sensor into the meat.
- Page 35 ENGLISH • All types of meat that can be browned • Baste large roasts and poultry with or have crackling can be roasted in their juices several times during the roasting tin without the lid. roasting. This gives better roasting •...
- Page 36 Food Quantity Function Temperature Time (min) Shelf posi- (kg) (°F ) tion Knuckle of 1.5 - 2 Turbo Grill- 320 - 360 120 - 150 veal Lamb Food Quantity Function Temperature Time (min) Shelf posi- (kg) (°F ) tion Leg of lamb / 1 - 1.5...
- Page 37 ENGLISH Fish (steamed) Food Quantity Function Temperature Time (min) Shelf posi- (kg) (°F ) tion Whole fish 1 - 1.5 Top / Bottom 410 - 430 40 - 60 Heat 11.17 Grilling • Grill only flat pieces of meat or fish. •...
- Page 38 Food Temperature (°F ) Time (min) Shelf position Pizza American, fro- 380 - 410 20 - 25 Pizza, chilled 410 - 450 13 - 25 Pizza Snacks, frozen 360 - 400 15 - 30 French Fries, thin 400 - 430...
- Page 39 ENGLISH • Put approximately 1/2 litre of water minutes with one-litre jars), stop the into the baking tray to give sufficient oven or decrease the temperature to moisture in the oven. 220 °F (see the table). • When the liquid in the jars starts to simmer (after approximately 35 - 60 Soft fruit Food...
- Page 40 Food Temperature Time (h) Shelf position (°F ) 1 position 2 positions Mushrooms 120 - 140 6 - 8 1 / 4 Herbs 100 - 120 2 - 3 1 / 4 Fruit Food Temperature Time (h) Shelf position (°F )
- Page 41 ENGLISH Pork Food Food core temperature (°F) Shoulder / Ham / Neck joint of pork 175 - 180 Chop (saddle) / Smoked pork loin 170 - 175 Meatloaf 170 - 175 Veal Food Food core temperature (°F) Roast veal 170 - 175 Knuckle of veal 175 - 195 Mutton / lamb...
-
Page 42: Care And Cleaning
You can buy our products at • Clean the appliance interior after www.aeg.com/shop and at the best each use. Fat accumulation or other retailer shops. food remains may result in a fire. The risk is higher for the grill pan. - Page 43 ENGLISH 1. Pull carefully the supports up and out 2. Pull the front end of the shelf support of the front catch. away from the side wall. 3. Pull the supports out of the rear catch. Install the shelf supports in the opposite sequence.
- Page 44 12.9 Steam generation system For a better performance - Descaling - S3 you should start the cleaning function when the appliance When the steam generator operates, is cool. there is an accumulation and deposition of limestone inside because of calcium The specified time is related contents in the water.
- Page 45 ENGLISH Descaling. These reminders activate each time you switch off the appliance. When reminder is active S3 flashes in the display. • The soft reminder reminds and recommends you to perform the descaling cycle. • The hard reminder obligates you to perform the descaling.
-
Page 46: Troubleshooting
12.13 Replacing the lamp 2. Remove the metal ring and clean the glass cover. Put a cloth on the bottom of the interior 3. Replace the lamp with a suitable 570 of the appliance. It prevents damage to °F heat-resistant lamp. - Page 47 ENGLISH Problem Possible cause Remedy The oven does not heat up. The fuse is blown. Make sure that the fuse is the cause of the malfunction. If the fuse is blown again and again, contact a quali- fied electrician. The lamp does not operate. The lamp is defective.
- Page 48 Problem Possible cause Remedy There is dirty water on the The grill- / roasting pan is on Remove the residual water bottom of the cavity after a wrong shelf position. and the descaling agent the descaling cycle. from the bottom of the oven.
-
Page 49: Installation
ENGLISH We recommend that you write the data here: Model (MOD.) ......... Product number (PNC) ......... Serial number (S.N.) ......... 14. INSTALLATION 14.1 Building in WARNING! Refer to Safety chapters. The built-in unit must meet the stability requirements of DIN 68930. min. - Page 50 50 mm min. 550 min. 550 min. 560 min. 560 alternativ 100 max. R1200 mm H05VV-F H05RR-F min. 1600 mm...
-
Page 51: Energy Efficiency
ENGLISH 90° 2x3,5x25 15. ENERGY EFFICIENCY 15.1 Product Fiche and information according to EU 65-66/2014 Supplier's name Model identification BS730470MM Energy Efficiency Index 81.2 Energy efficiency class Energy consumption with a standard load, conven- 0.89 kWh/cycle tional mode... - Page 52 Energy consumption with a standard load, fan-forced 0.69 kWh/cycle mode Number of cavities Heat source Electricity Volume 70 l Type of oven Built-In Oven Mass 42.0 kg EN 60350-1 - Household electric cooking cooking time is longer than 30 minutes,...
- Page 53 ENGLISH...
-
Page 54: Warranty
Guarantee/Customer Service Centres EURO-LINE APPLIANCES LENGTH OF WARRANTY EURO-LINE WILL PAY FOR: Replacement parts and/or labour to TWO YEAR FULL WARRANTY repair defects in materials or from original date of purchase, workmanship. Service must be provided including parts and labour, to the first by an authorized Euro-Line company purchaser of this appliance (unless advised otherwise). - Page 55 In no event, will Euro-Line be responsible for incidental or consequential damages. For warranty service and parts, contact EURO-PARTS. Service will be provided during normal business hours. Should you have a service problem that is not resolved locally, contact: For Service and Parts Contact: EURO-PARTS, CANADA EURO-LINE APPLIANCES EURO-PARTS, USA...
- Page 56 www.aeg.com/shop...