Table of Contents
Table of Contents

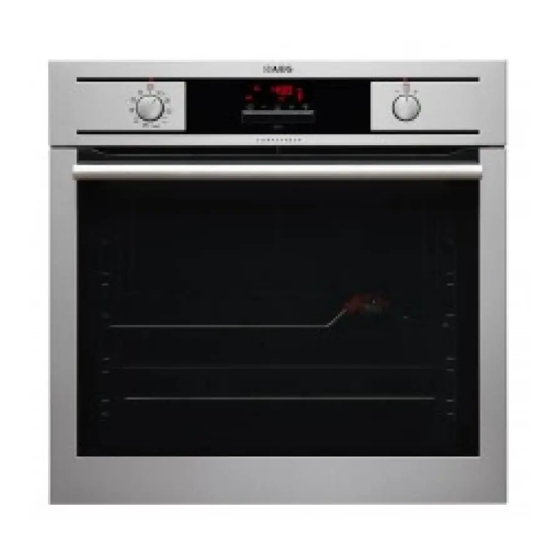
Related Manuals for AEG BP5023001M


Summary of Contents for AEG BP5023001M
- Page 1 User’s Manual BP5023001M 24” Built-in Multi Function Oven - User’s Manual...
- Page 2 FOR PERFECT RESULTS Thank you for choosing this AEG product. We have created it to give you impeccable performance for many years, with innovative technologies that help make life simpler – features you might not find on ordinary appliances. Please spend a few minutes reading to get the very best from it.
-
Page 3: Table Of Contents
Contents CONTENTS 4 Safety information 7 Product description 9 Before first use 10 Daily use 12 Clock functions 13 Using the accessories 15 Additional functions 16 Helpful hints and tips 26 Care and cleaning 30 What to do if… 31 Installation 33 Environment concerns 33 Guarantee/Customer Service Centres... -
Page 4: Safety Information
Safety information SAFETY INFORMATION Before the installation and use, read this manual carefully: • For your personal safety and the safety of your property • For the respect of the environment • For the correct operation of the appliance. Always keep these instructions with the appliance also if you move or sell it. The manufacturer is not responsible if incorrect installation or use results in damage. - Page 5 Safety information • Before the installation, make sure that the kitchen cabinet has the recess dimensions ap- plicable. • Make sure that the appliance is installed below and adjacent safe structures. • Keep the minimum distances to the other appliances and units. •...
- Page 6 Safety information • Always close the appliance door when you cook, even while grilling. Care and cleaning • Before maintenance, switch off the appliance and disconnect the appliance from the power supply. • Before maintenance, make sure that the appliance is cold. There is the risk of burns. There is the risk that the glass panels can break.
-
Page 7: Product Description
Product description Oven lamp • The type of light bulb or halogen lamp used for this appliance is only for household ap- pliances. Do not use it for house lighting. • If it becomes necessary to replace the lamp, use one of the same power and specifically designed for household appliances only. - Page 8 Product description Control knob for oven functions Power lamp/symbol Electronic programmer Control knob for temperature Power lamp Heating element Oven lamp Turnspit hole Rear wall heating element Bottom heat Shelf support, removable Shelf positions Accessories • Wire shelf For cookware, cake tins, roasts. •...
-
Page 9: Before First Use
Before first use • Grill / roasting pan To bake and roast or as pan to collect fat. • Turnspit For roasting larger joints of meat and poul- try. BEFORE FIRST USE WARNING! Refer to "Safety information" chapter. Initial Cleaning •... -
Page 10: Daily Use
Daily use The Temperature/Time display shows new time. Changing the time of day You can change the time of day only if the oven is off. Press . The set time and symbol flash in the display. To set new time use the proce- dure "Setting the time of day". - Page 11 Daily use Oven function Application Fast Grilling To grill flat food in large quantities and to toast. Turbo Grilling To roast larger joints of meat or poultry on one level. Al- so to gratinate and brown. Pyro Cleaning For automatic pyrolytic cleaning of the oven. It burns off residual dirt in the oven.
-
Page 12: Clock Functions
Clock functions Heat-up / Residual heat indicator If you activate an oven function, the bars in the display come on one by one. The bars show that the oven temperature increases or decrease. CLOCK FUNCTIONS SYMBOL FUNCTION DESCRIPTION MINUTE MINDER Use to set a countdown time. -
Page 13: Using The Accessories
Using the accessories Press to set the MINUTE MINDER. At first the time is calculated in minutes and seconds. When the time you set is longer than 60 minutes, the symbol comes on the display. The appliance now calculates the time in hours and minutes. The MINUTE MINDER starts automatically after five seconds. - Page 14 Using the accessories Put the roasting pan on the lowest shelf position. Put the spit frame on the third shelf po- sition from the bottom. Install the first fork on the spit, then put the meat on the turnspit and install the second fork.
-
Page 15: Additional Functions
Additional functions Installing the wire shelf and the deep pan to- gether Put the wire shelf on the deep pan. Push the deep pan between the guide-bars of one of the oven levels. ADDITIONAL FUNCTIONS Child Lock The Child Lock prevents an accidental operation of the appliance. Activating and deactivating the Child Lock function: Do not set an oven function. - Page 16 Helpful hints and tips Residual heat indicator Display shows the residual heat indicator after end of every cooking sessions when the temperature inside oven cavity is more then 100 °F. Use Temperature knob to show the oven temperature on the display. Cooling fan When the appliance operates, the cooling fan activates automatically to keep the surfaces of the appliance cool.
- Page 17 Helpful hints and tips When you use frozen food, the trays in the oven can twist during baking. When the trays get cold again, the distortion will be gone. How to use the Baking Tables • We recommend to use the lower temperature the first time. •...
-
Page 18: Helpful Hints And Tips
Helpful hints and tips Type of baking Oven function Shelf position Temperature °F Time in min. Bread (rye bread): First part of baking proc- Conventional ess. Cooking 30 - 60 320 - 360 Second part of baking process. Cream puffs/ Conventional 20 - 35 380 - 410... - Page 19 Helpful hints and tips Type of baking Oven function Shelf position Temperature °F Time in min. Pastries made with egg white, True Fan Cooking 180 - 210 120 - 150 merungues Macaroons True Fan Cooking 210 - 250 30 - 50 Biscuits made True Fan Cooking 300 - 320...
- Page 20 Helpful hints and tips True Fan Cooking Temperature in Type of baking Shelf position Time in min. °F 2 levels 3 levels Macaroons 210 - 250 40 - 80 Biscuits made 320 - 340 30 - 60 with yeast dough Puff pastries 30 - 50 340 - 360...
- Page 21 Helpful hints and tips Bakes and gratins Dish Oven function Shelf position Temperature °F Time in min. Conventional Pasta bake 360 - 400 45 - 60 Cooking Conventional Lasagne 360 - 400 25 - 40 Cooking Vegetables au Turbo Grilling or 320 - 340 15 - 30 True Fan Cooking...
- Page 22 Helpful hints and tips Pork Oven func- Shelf posi- Temperature Type of meat Quantity Time min. tion tion °F Shoulder, neck, 1-1.5 kg Turbo Grilling 320 - 360 90 - 120 ham joint Chop, spare rib 1-1.5 kg Turbo Grilling 340 - 360 60 - 90 Meat loaf...
- Page 23 Helpful hints and tips Type of meat Quantity Oven func- Shelf position Temperature Time min. tion °F Chicken, pou- 1-1.5 kg Turbo Grilling 380 - 410 50 - 70 lard Duck 1.5-2 kg Turbo Grilling 360 - 400 80 - 100 Goose 3.5-5 kg Turbo Grilling...
- Page 24 Helpful hints and tips Time in min. Food to be grilled Shelf position 1st side 2nd side Pork fillet 10 - 12 6 - 10 Sausages 10 - 12 6 - 8 Fillet steaks, veal steaks 7 - 10 6 - 8 1 - 3 1 - 3 Toast...
- Page 25 Helpful hints and tips Defrosting time Further defrosting Dish Comment in min. time in min. Place the chicken on an up- turned saucer placed on a Chicken, 1000 g 100 - 140 20 - 30 large plate Turn halfway through Meat, 1000 g 100 - 140 20 - 30...
-
Page 26: Care And Cleaning
Care and cleaning Vegetables Cooking time until Continue to cook at Preserve Temperature in °F simmering in min. 220°F in min. 320 - 340 50 - 60 5 - 10 Carrots Cucumbers 320 - 340 50 - 60 Mixed pickels 320 - 340 50 - 60 5 - 10... - Page 27 Care and cleaning Notes on cleaning: • Clean the front of the appliance with a soft cloth with warm water and cleaning agent. • To clean metal surfaces use a usual cleaning agent. • Clean the appliance interior after each use. Then you can remove dirt more easily and it does not burn on.
- Page 28 Care and cleaning Removing the shelf support Pull the front of the shelf support away from the side wall. Pull the shelf support from the back of the side wall to remove it. To install the shelf support follow the proce- dure in reverse.
- Page 29 Care and cleaning Door and glass panels To clean the door, remove it. CAUTION! Be careful when you remove the door from the appliance. The door is heavy! Removing the door Open the door as far as it goes. Fully press clamping levers (A) on the two door hinges.
-
Page 30: What To Do If
What to do if… WHAT TO DO IF… WARNING! Refer to "Safety information" chapter. Problem Possible cause Solution The oven does not heat up The appliance is switched off Switch on the appliance The oven does not heat up The clock is not set Set the clock. -
Page 31: Installation
Installation The necessary data for the service centre is on the rating plate. The rating plate is on the front frame of the appliance cavity. We recommend that you write the data here: Model (MOD.) ......... Product number (PNC) ......... Serial number (S.N.) ......... - Page 32 Installation max. R1200 mm alternativ 100 H05VV-F H05RR-F min. 1600 mm 90 º...
-
Page 33: Environment Concerns
Environment concerns 2x3,5x25 ENVIRONMENT CONCERNS The symbol on the product or on its packaging indicates that this product may not be treated as household waste. Instead it should be taken to the appropriate collection point for the recycling of electrical and electronic equipment. By ensuring this product is disposed of correctly, you will help prevent potential negative consequences for the environment and human health, which could otherwise be caused by inappropriate waste handling of this product. - Page 34 To instruct the use of an appliance. To replace house fuses, re-set circuit breakers or correct house wiring. To correct house plumbing. To clean drains, filters or garbage disposers. To repair an appliance if it fails due to misuse or abuse. EURO-LINE APPLIANCES WILL NOT PAY WHEN THE FOLLOWING OCCURS: Damage resulting from fires, acts of God, alteration, improper installation, or installa- tion not in accordance with local building codes.
- Page 35 Canada Tel 905-829.3980 Fax 905-829.3985 email [email protected] For Service & Spares: EURO-PARTS 1.800.678.8352 Important: Please record details of your purchase below and mail or fax to AEG -----------------------------------------------------------------------------------------cut along line ------------------------------------------------------------------------------------ Name: TEL No Address: City : State: Zip Code:...
- Page 36 AEG appliances are imported and distributed in North America by Euro-Line Appliances Inc. For more information visit www.euro-line-appliances.com / www.elawest.com 871 Cranberry Court 2912 West 4th Ave Oakville, ON L6L 6J7 Vancouver, BC V6K 1R2 Canada Canada Toll Free: 1.800.421.6332 Toll Free: 1.855.352-9378...