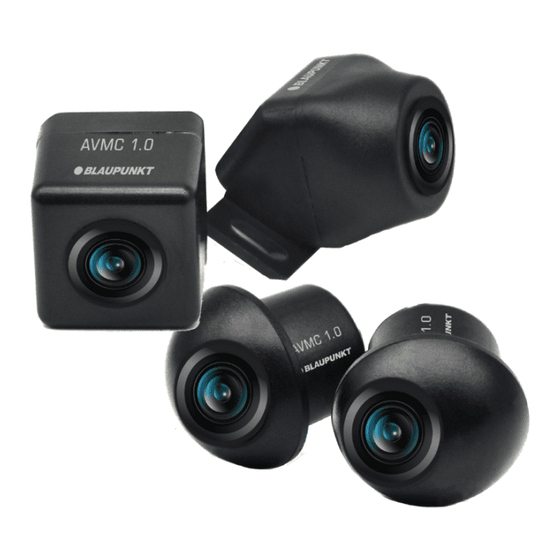
Summary of Contents for Blaupunkt AVMC 1.0
- Page 1 ALL-VIEW-MONITORING CAMERA AVMC 1.0 Enjoy it. Operating and Installation Instructions...
- Page 2 CAUTIONS Safety Notes Disclaimer In no event shall Blaupunkt be liable for any direct, This vehicle security system has been manufactured indirect, punitive, incidental, special consequential according to established safety guidelines. However, damages to property or life and whatsoever arising out dangers may still occur if the safety notes in this manual of or connected with the use or misuse of our products.
-
Page 3: Specification
SPECIFICATION Features Chip Model IMX8307(Camera)+NVP2431(Processing) Camera Specifications 1/3 inch (6mm) Effective Pixels 1297x977=L27MP Image Resolution 1000 TVL Maximum Frame Rate 720p HD 60fps Dynamic Range Support Standard Dynamic Range Sync System Internal Signal Noise Ratio ≥48dB Video Signal 1.0Vp-p at 75ohm Exposure Control Automatic White Balance... -
Page 4: Wiring Diagram
WIRING DIAGRAM HDMI Connect WIFI BLACK BLACK FRONT FRONT CAMERA REAR YELLOW YELLOW REAR CAMERA LEFT LEFT SIDE CAMERA BLUE BLUE RIGHT RIGHT SIDE CAMERA INSTALLATION LOCATION a) Front Camera b) Rear Camera c) Side Camera... - Page 5 FUNCTIONS AVM UI Interface Vehicle Settings Calibration • Select to choose your car model • Key in the password “0000” to access the • Select to choose your car color Calibration Interface • Select to choose your preferred trace • Select to choose your preferred angle mode •...
- Page 6 FUNCTIONS (AUTO SITCHING) 3.1.1 Auto Sitching Calibration Template Option 1 Option 2 Option 3 Option 4 a) Calibration Cloth Size : a) Calibration Cloth Size : a) Calibration Cloth Size : Surrounded by Calibration • Front & Rear : 4.4x1.2m •...
- Page 7 FUNCTIONS (AUTO SITCHING) The front & rear calibration chessboard cloth should be centered and parallel to the front and rear of the car. It is recommended to use a measuring tape to measure. Front Rear Centralize the chessboard cloth Centralize the chessboard cloth The width is the actual width of the car +20cm, and the length of the car is the distance between the front and rear cloth.
-
Page 8: Adjustment Method
FUNCTIONS (AUTO SITCHING) c) When the result of the automatic stitching is not ideal, you can enter the lens correction section, and perform lens correction on the four cameras of the front, rear, left, and right. Sitching Adjustment Use the stitching adjustment and the centre point setting to adjust or calibrate the landmark lines, if the landmark lines are incorrect or staggered. - Page 9 FUNCTIONS (MANUAL SITCHING) 3.1.2 Manual Sitching Calibration Template Option 1 Option 2 a) Calibration Cloth Size : a) Calibration Cloth Size : • Front & Rear : 4.8x1.2m • Front & Rear : 4.8x1.2m b) Square Dimension : 60x60cm b) Square Dimension : 1.0x1.0m The Placement of Calibration Cloth &...
- Page 10 FUNCTIONS • Select the prefered video file to enter the playback interface. There is 4 channels camera field simultaneous playback in default. Press on the play/pause, previous or next icons on the control menu panel (at bottom) and fast forward/rewind by dragging the progress bar. •...
-
Page 11: Image Adjustment
FUNCTIONS Image Adjustment • The image brightness, contrast, colours, saturation, sharpness ratio of front & rear view, left and right view can be adjusted accordingly. System Settings... - Page 12 UI Interface All image are for reference only, actual display mode is subject to the real-time situation 2D Streaming Front View 2D Front Angle View 2D Zoomed In (Front Car Body) 2D Streaming Rear View 2D Front View 2D Zoomed In (Rear Car Body) 2D Horizontal Front, Left &...
- Page 13 UI Interface Left & Right Side View 3D Left Side View 3D Rear View 3D Right Side View 3D All-Around View...
-
Page 14: Troubleshooting
TROUBLESHOOTING If any of the following problem occur, please resort to Troubleshooting for the possible solutions. Consult Blaupunkt authorized dealer if problem persist. Problem Solution Display monitor / car radio does not show surround Restart the display monitor / car radio. - Page 16 Designed and engineered by Blaupunkt Competence Centre 1 321 21 001 20 01...


