Table of Contents
Quick Links
User Manual
FDFE12GFAW6
FDFE12GFAS6
Safety information.......................................2
Safety instructions...................................... 3
Control panel.............................................. 5
Programmes............................................... 6
Settings.......................................................7
Before first use........................................... 9
CONTENTS
Daily use...................................................10
Hints and tips............................................11
Care and cleaning.................................... 13
Troubleshooting........................................15
Technical information............................... 17
www.frigidaire-intl.com
Table of Contents

Related Manuals for Frigidaire FDFE12GFAW6


Summary of Contents for Frigidaire FDFE12GFAW6
-
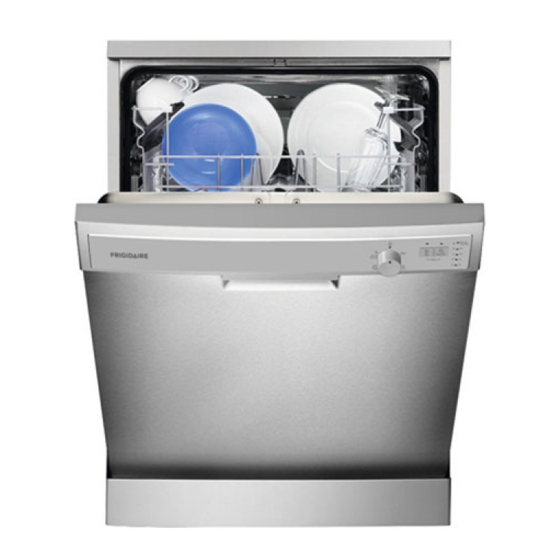
Page 1: Table Of Contents
User Manual FDFE12GFAW6 FDFE12GFAS6 CONTENTS Safety information........2 Daily use...........10 Safety instructions........3 Hints and tips..........11 Control panel..........5 Care and cleaning........13 Programmes..........6 Troubleshooting........15 Settings............7 Technical information....... 17 Before first use........... 9 www.frigidaire-intl.com... - Page 2 SAFETY INFORMATION Before the installation and use of the appliance, carefully read the supplied instructions. The manufacturer is not responsible if an incorrect installation and use causes injuries and damages. Always keep the instructions with the appliance for future reference. General Safety This appliance is intended to be used in household and •...
-
Page 3: Safety Information
SAFETY INFORMATION Children and vulnerable people safety This appliance can be used by children aged from 8 years • and above and persons with reduced physical, sensory or mental capabilities or lack of experience and knowledge if they have been given supervision or instruction concerning use of the appliance in a safe way and understand the hazards involved. -
Page 4: Safety Instructions
SAFETY INSTRUCTIONS • Before you connect the appliance to new Installation pipes or pipes not used for a long time, • Remove all the packaging. let the water flow until it is clean. • Do not install or use a damaged •... - Page 5 SAFETY INSTRUCTIONS • When you contact the Authorised Service Centre, ensure that you have the following information that is available on the rating plate. Model : PNC : Serial Number : Disposal WARNING! Risk of injury or suffocation. • Disconnect the appliance from the mains supply.
-
Page 6: Control Panel
CONTROL PANEL On/off indicator Start button Programme marker Programme knob Indicators Delay button Indicators INDICATOR DESCRIPTION Washing phase. It comes on when the washing phase operates. Drying phase. It comes on when the drying phase operates. End indicator. Salt indicator. It is always off while the programme operates. Rinse aid indicator. -
Page 7: Programmes
PROGRAMMES CONSUMPTION VALUES DEGREE OF SOIL PROGRAMME PROGRAMME DURA- TYPE OF PHASES ENERGY WATER TION LOAD (KWH) (MIN) • Prewash Normal soil 1.039 • Wash 50 °C Crockery • Rinses and cutlery • Dry • Prewash Normal soil 100 - 120 1.2 - 1.5 15 - 17 •... -
Page 8: Settings
SETTINGS Programme selection mode The appliance must be in Programme selection mode to start a programme. If the control panel does not show this condition, do the Reset. Reset With Reset you can cancel the running programme or the delay start. The appliance goes back to the Programme selection mode. - Page 9 BEFORE FIRST USE 1. Turn the knob until the programme marker is aligned with . Make sure that the appliance is in programme selection mode. 2. Press and hold the Delay button until the start indicator and the on/off indicator start to flash.
-
Page 10: Before First Use
BEFORE FIRST USE The rinse aid helps to dry the dishes without streaks and stains. It is automatically released during the hot rinse phase. 1. Open the water tap. • If the rinse aid indicator is on, fill the 2. Set the correct programme for the type rinse aid dispenser. -
Page 11: Daily Use
DAILY USE Option delay 1. Set the programme. 2. Press the Delay button to delay the start of the programme of 3 hours. The delay indicator comes on. 3. Press the Start button to start the countdown. When the countdown is completed, the programme starts. Opening the door while the appliance operates If you open the door while a programme is running, the appliance stops. -
Page 12: Hints And Tips
HINTS AND TIPS General Using salt, rinse aid and detergent The following hints will ensure optimal cleaning and drying results in daily use and • Only use salt, rinse aid and detergent for also help to protect the environment. dishwasher. Other products can cause damage to the appliance. - Page 13 HINTS AND TIPS Loading the baskets • Only use the appliance to wash items At the end of the programme water that are dishwasher-safe. can still remain on the sides and on • Do not put in the appliance items made the door of the appliance.
-
Page 14: Care And Cleaning
CARE AND CLEANING WARNING! Before maintenance, deactivate the Dirty filters and clogged spay arms appliance and disconnect the mains decrease the washing results. Make a plug from the main socket. check regularly and, if necessary, clean them. Cleaning the filters •... - Page 15 CARE AND CLEANING recommend to run long duration programmes at least 2 times per month.
-
Page 16: Troubleshooting
TROUBLESHOOTING If the appliance does not start or it stops With some problems different indicators during operation, before you contact the flash intermittently and/or continuously to Service, check if you can solve the problem show an alarm code. by yourself with the help of the information in the table. - Page 17 TROUBLESHOOTING The washing and drying results are not satisfactory PROBLEM POSSIBLE SOLUTION • The release quantity of rinse aid is too much. Adjust There are whitish streaks or the rinse aid selector to a lower position. bluish layers on glasses and •...
-
Page 18: Technical Information
TECHNICAL INFORMATION Dimensions Width / height / depth 600 / 850 / 625 (mm) Voltage (V) 220 - 240 Electrical connection Frequency (Hz) Water supply pressure Min. / max. bar (MPa) 0.5 (0.05) / 8 (0.8) Water supply max 60 °C Cold water or hot water Capacity Place settings... - Page 19 ENVIRONMENT CONCERNS dispose appliances marked with the symbol Recycle the materials with the symbol with the household waste. Return the Put the packaging in applicable containers product to your local recycling facility or to recycle it. Help protect the environment contact your municipal office.