Table of Contents
Thank you for purchasing a Hitachi air purifier.
This air purifier is for household use only.
Do not use it for any other purpose besides purifying air.
Please read this instruction manual carefully before
using this product to ensure the unit is operated
correctly.
For future reference, keep this manual in an easily
accessible place.
Read "Safety Precautions"
to ensure correct use.
(P.E-8 - E-10)
Instruction Manual
Warranty Attached Separately
Hitachi Air Purifier with
Humidifying Function
Model
EP-A9000
Table of Contents

Related Manuals for Hitachi EP-A9000


Summary of Contents for Hitachi EP-A9000
- Page 1 Hitachi Air Purifier with Humidifying Function Model EP-A9000 Thank you for purchasing a Hitachi air purifier. This air purifier is for household use only. Do not use it for any other purpose besides purifying air. Please read this instruction manual carefully before using this product to ensure the unit is operated correctly.
-
Page 2: Features
Features 1. Wide suction and speedy dust collection in just 7 minutes for a 13m room. Standard applicable floor space - 68m 2. Easy cleaning with the [Stainless Clean System] With the stainless pre-filter, dust is easily removed. Also, stainless steel which demonstrates antibacterial effects has been adopted in parts such as the pre-filter, flap, air outlet, etc. -
Page 3: Table Of Contents
Contents Before Use Cleaning and Maintenance Features ············································ Cleaning ··········································· E-28 Name of Each Component / Accessories ···· When the “Clean Humidifying Filter” Indicator Comes On ··· E-28 Operating the Touch Operation Panel ···· Replacing Humidifying Filter ····················· E-31 Safety Precautions ·························· When the “Water Refi ll”... -
Page 4: Name Of Each Component / Accessories
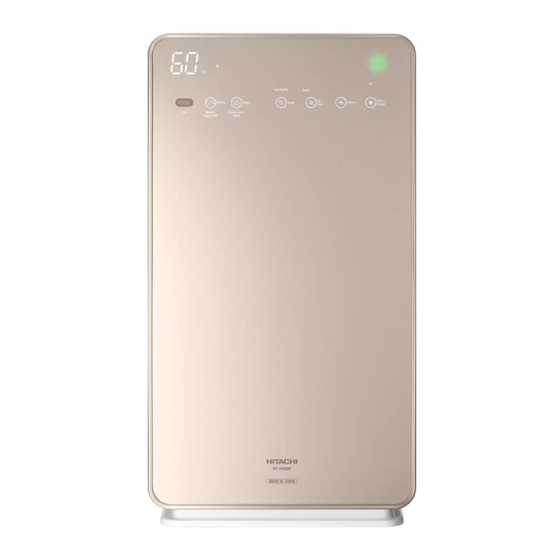
Name of Each Component / Accessories Names of Each Component Flap (stainless steel flap) (P.E-20) The flap controls the wind in vertical direction Air outlet (stainless steel net) according to the operation mode. CAUTION Touch Operation Panel (P.E-6, E-7) Power button Do not hold the flaps when moving the unit. - Page 5 (P.E- ) Numbers are pages containing the main description each parts. Filter Assembly Detection Switch Odor Sensor (P.E-26) Detects if the filter assembly is set. Senses the odor components in the air. CAUTION Do not place tapes or any materi- Temperature Sensor (P.E-26) als to press the filter assembly...
-
Page 6: Operating The Touch Operation Panel
Operating the Touch Operation Panel The air purifying feature works in all operation modes. The touch operation panel is made of glass. If the touch operation panel display disappears, touch to display it again. The touch operation panel display will disappear when is touched again. - Page 7 PM2.5 Sensor (P.E-24) Use this to select PM 2.5 sensing. Airflow (P.E-21) Air Sensor (P.E-26) The level of air contamination detected Use this to switch the by the odor and dust sensors is airflow rate. indicated through different colors. Display Skin Moist Humidify Odor...
-
Page 8: Safety Precautions
Safety Precautions Please read the following safety precautions carefully before using the unit. To prevent injury to the user or other people and property damage, the following instructions must be followed. Also read the precautions appearing in the text carefully to ensure correct use. ... - Page 9 WARNING Before Use Ventilate the room frequently when in use with heating appliances. Otherwise, it may cause carbon monoxide poisoning. This product cannot remove carbon monoxide. Do not block the air outlet or air inlets with laundry, cloth, curtains, etc. Poor ventilation may cause overheating or fi...
- Page 10 Safety Precautions (Continued) WARNING Cleaning Do not use detergents when cleaning. Usage of chlorine-based and acid type detergents will generate toxic gas and can cause a health threat. Also, do not use neutral detergents as it may affect the plastic. ...
- Page 11 WARNING Miscellaneous Do not put your fi nger or any other object (metal, paper, etc.) into the air inlet or outlet. It may cause injury, electric shock and fi re. Do not drink or allow anyone to drink water from the water tank. Do not use for other purposes. It may cause a health threat or accident.
- Page 12 In case of scratches or breakage, stop using and immediately request repairs. Refrain from directly touching the broken glass. Use only a genuine fi lter for the Hitachi Air Purifi er Other fi lters may cause unit failure. This appliance is not intended for use by persons (including children) with reduced...
-
Page 13: Cautions On Use
Cautions on Use Do not operate with the fi lter detached Do not directly fan plants and animals Otherwise, no cleaning effect can be expected. It It may adversely affect them. may also cause unit failure. Refrain from placing any ob- Do not block or touch the odor and ject on the unit and blocking dust sensors... -
Page 14: Preparations For Operation
Do not tip over or tilt the unit. Setting Filter in Unit Setting procedure is the same with fi lter replacement. (Use only genuine Hitachi Air Purifi er fi lters.) Remove rear panel and pre-filter Place the unit on a flat and stable location. - Page 15 Install the filter assembly to the unit CAUTION Do not put excessive force and deform the filter assembly. If the filter assembly is deformed, it will not be detected by the unit. “ ” will be displayed on the temperature / humidity monitor, and the Deodorizing filter unit will not be able to operate.
-
Page 16: Filling Water Tank
Preparations for Operation (Continued) Filling Water Tank (When Running on “Humidify” and “Skin Moisture” Modes) Remove the water tank from the unit Grab the water tank handle, and while slightly lifting it, gently pull the water tank. CAUTION Water tank When removing the water tank from the unit, pull the water tank gently while pressing down the unit since a caster is Handle... -
Page 17: Installation
Install the water tank to the unit Wipe off water drops in the water tank holder (inner part) during installing the water tank. CAUTION Water tank holder Securely install the tank, making sure that it is pressed until the back of the unit. If it is not securely installed, it may cause water leakage during operation. -
Page 18: Operation
Operation Starting Operation Securely insert the power plug to the outlet After all indicators have light up at once, Press the power button “Air Purify” and “Auto” will light up. For the first 3 minutes, the unit will check and store the condition of the room air. -
Page 19: Switching Touch Operation Panel Display
Switching Touch Operation Panel Display Use this to adjust the unit to your preferred setting. Long-press for about 3 seconds and select touch operation panel Display · display Dimmer Type 1/2/Off The touch operation panel display will switch at each press. Display 1 Display 2 (When switching from Off to Display 1, the buzzer will ring twice... -
Page 20: Selecting Operation Mode (Basic Operating Procedure
Operation Selecting Operation Mode (Basic Operations) There are three operation modes to choose from. Use these modes according to your preference. The fan will not stop while the unit is operating in all operation modes. (P.E-27)) (The fan may stop if the unit is set to eco saving operation mode. ... -
Page 21: Switching Airfl Ow Rate
Switching Airfl ow Rate Each time button is pressed while the unit is operating, the mode switches in the following order. flow Operation Mode Airflow Air Purify … Auto Auto “Silent” “Medium” “High” Humidifying Skin Moist E-21... -
Page 22: Useful Features
Useful Features Operating in Option Pollen Once every hour, room air will be forcefully circulated in “High” airfl ow rate. Sensitivity of odor and dust sensors will increase, and depending on the level of air contamination, the unit will operate in either “High” or “Medium” airfl ow rate. -
Page 23: Eco Saving Operation
Eco Saving Operation The unit automatically stops operation when air becomes clean, saving electricity cost. Also, if this status continues for longer than 8 hours, the unit will automatically stop operating. (When in “Humidify” operation mode, the unit will not automatically stop depending on the humidity. (P.E-20)) Normal Auto Operation When the air is clean, the unit will continuously operate in “Silent”... -
Page 24: Operating In Pm2.5 Sensor
Useful Features (Continued) Operating in PM2.5 Sensor Change into a sensor that is suitable for small particles, like PM2.5 (general term for micro particles be- low 2.5µm). The level of contamination in the air will be detected by the dust sensor, and the unit will op- erate automatically between “Medium”... -
Page 25: Lock
Lock Prevents accidental operation by children through restricting the operation. This can be set while the unit is operating. The same process goes for unlocking the unit. Long-press for about 3 seconds · Lock After long-pressing for about 3 seconds, a buzzer will ring once (beep) and the child lock indicator will lit. -
Page 26: Memory Function / Monitor / Sensors / Auto Detection
Memory Function / Monitor / Sensors / Auto Detection Memory Function When power button is turned on, the unit operates the previous operation mode set prior to turning off. Air Sensor The level of air contamination detected by the odor and dust sensors is indicated by different colors. -
Page 27: Vibration Sensor
Vibration Sensor The sensor detects a fall and impact on the unit. (Installed inside the unit) The operation may stop due to tilting of the unit, strong vibrations or impact of a collision. When the operation stops, “ ”... -
Page 28: Cleaning
Cleaning WARNING Do not stop operation by unplugging the power plug. Otherwise, it may cause fi re, electric shock or unit failure. CAUTION Do not splash water on the unit. Doing so may cause a unit failure. Do not use volatile solvents, such as gasoline, thinner, benzene, wax, kerosene, alcohol, etc. or polishing powder, or deter- gent (used for kitchen or laundry). - Page 29 Clean the water tray mounting of the unit Remove the rear panel, pre-filter, and filter assembly/deodorizing filter. Wipe off using a soft cloth. If it is really dirty, clean using an old, soft toothbrush. Water tank holder Using a towel, wipe off water droplets that have fallen inside the water tank holder Water tray mounting (inner side).
- Page 30 Cleaning (Continued) CAUTION When you use the product for a longer period, white or brown water scales may attach to the inner part (Continued) of the water tray or on the surface of the humidifying filter. Water scales are residue minerals from tap-water that have not evaporated. If you continue to use the filter without cleaning the water scale, it will solidify and become difficult to remove, resulting in lower humidifying performance.
-
Page 31: Replacing Humidifying Filter
Close side cover Plug it in the socket, press the power button, Filter Cleaning Timer Water Refill and long-press for about 3 seconds. · Maintenance Reset Make sure that the filter cleaning indicator is not lit. When the child lock has been set, long-press for about 3 seconds after canceling the setting. -
Page 32: Water Tank
Cleaning (Continued) Rinse the water tank and tank cover with water and check the movement of the float switch. Rinse in running water for 2-3 times. Water tank Do not use detergent. Check if the float switch can move up and down. CAUTION Float switch Do not to remove the float switch, or subject it to... -
Page 33: Humidifying Filter
The water tank filter is disposable. Replace the filter when torn, damaged, or when holes form. For replacement, purchase service parts (parts (P.E-42) number EP-A9000-039). Float switch CAUTION Do not to remove the float switch, or subject it to unnecessary force. -
Page 34: Pre-Fi Lter, Filter Assembly / Deodorizing Filter
Attach each filter (P.E-14, E-15) Attach the pre-filter and panel to the unit (P.E-15) The pre-fi lter is disposable. When pre-fi lter needs to be replaced due to damage, purchase the replacement part (Part No. EP-A9000-042). (P.E-42) E-34... -
Page 35: Cleaning The Deodorizing Filter
Cleaning the Deodorizing Filter (Guide for Cleaning: About Once Every 6 Months) If the odor from the air outlet becomes a bother, clean the deodorizing fi lter immediately. Remove dust from the surface Deodorizing filter Remove using a vacuum cleaner. Lightly clean using the nozzle brush of the Nozzle brush vacuum cleaner and vacuum the dust. -
Page 36: Purifi Er
Cleaning (Continued) Purifi er (Guide for Cleaning: About Once a Month) Wipe off dirt on the unit and glass panel, rear panel, and the surface using a soft, damp cloth. Clean adhering chemicals such as oil components and insecticides regularly. ... -
Page 37: Replacing The Filter Assembly / Deodorizing Filter
Replacing the Filter Assembly / Deodorizing Filter Replacement Interval The fi lter is disposable. The standard life of a fi lter assembly and a deodorizing fi lter is approximately 10 years as determined by the Japan Electrical Manufacturers' Association. ... -
Page 38: Deodorizing Filter Handling
(P.E-39) Remove the plastic packaging of the new filter, and attach the filter in the unit CAUTION Use only a genuine filter for the Hitachi Air PurifierOther filters may cause unit to malfunction. Attach the deodorizing filter in the unit. -
Page 39: Troubleshooting Guide
Troubleshooting Guide When a notifi cation is displayed on the temperature/humidity monitor Notifi cation Display and Details Solution Install the fi lter assembly. If the same message appears, the fi lter assembly may be deformed and cannot be used. Replace the fi lter assembly. The fi lter assembly is not set. - Page 40 Troubleshooting Guide (Continued) Symptoms Check Solution Is the unit placed in a location where it cannot be Try moving it to another location. The air sensor reached by odors and dust? display color Clean the dust sensor. Is the dust sensor dirty? does not change (P.E-36) from green...
- Page 41 Symptoms Check Solution Refer to “Pre-filter” in “Cleaning” when cleaning Is the pre-fi lter too dirty? the pre-fi lter. It is hard to (P.E-34) remove Refer to “Replacing the Filter Assembly / Deodor- the smell Is the fi lter dirty? izing Filter”...
-
Page 42: Replacement Parts
Deodorizing fi lter for Hitachi Air Purifi er (Allergen-free, HEPA fi lter) EPF-A9000D EPF-A9000H Pre-fi lter (stainless steel pre-fi lter) Replacement humidifying fi lter for Hitachi Air Purifi er Specify service part EPF-A9000KF EP-A9000-042. Water tank fi lter Specify service part EP-A9000-039. - Page 43 E-43...
- Page 44 E-44...