Table of Contents
Quick Links
Chapters
Table of Contents

Related Manuals for Philips VideoTracer VTR8410


Summary of Contents for Philips VideoTracer VTR8410
- Page 1 VoiceTracer 音视频记录仪 VTR8400 使用手册 User manual...
-
Page 3: Table Of Contents
目录 5 登录执法仪 1 欢迎 6 录像 1.1 产品特点 7 拍照 2 重要须知 2.1 安全 8 录音 2.2 听力保护 2.3 录音的法律限制 2.4 后台数据 9 视频模式 2.5 所用符号标记 9.1 视频播放 3 您的音视频记录仪 10 照片模式 3.1 设备包含 3.2 主机概览 11 语音模式 4 开始使用 12 视频通话功能... - Page 4 13.2 单一对讲 18.8 其他设置 18.9 版本更新 14 GPS 定位 19 背夹的装取 19.1 安装背夹 15 在线翻译 19.2 取下背夹 16 语音转文本 20 背夹的佩戴方式 17 影音设置 21 常见问题 17.1 视频分辨率 21.1 无法启动执法仪 17.2 照片分辨率 21.2 显示时间 / 日期不正确 17.3 文件时长 21.3 拍照 / 录像图像模糊,不清楚 21.4 执法仪无法录音或者录像...
- Page 5 22.4 录音 22.5 运行条件...
-
Page 6: 产品特点
• 一键组群对讲: 仅仅按下 PTT 键可直接进入对组群对讲。 • 真正采用立体声录音的音视频记录仪。 • 采用智能音频编码解码器,双咪头主动降噪,声音更清晰。 欢迎来到飞利浦世界!您能选择和购买飞利浦的产品,我们非 • 160°超大广角镜头,录像无死角。 常高兴。您可在我们的官方网站上获得飞利浦公司的全方位技 • 双滤光片切换器,白天不偏色,夜晚更清晰。 术支持,如:使用手册、软件下载、保修信息等。 • 字符叠加功能,所有视频和照片都附加时间、产品编号、使 www.philips.com 用者编号等信息,无法剪辑,更具法定证据效力。 • 超长文件名,所有录像文件的文件名都包含产品编号、时间、 使用者编号等信息,方便数据存档、检索。 1.1 产品特点 • 录像资料自动分割保存,防止错误操作造成资料丢失。 • 前后摄像头:可切换摄像头录像、拍照。 • 外置存储卡,最大支持 256G。 • 语音操控:语音唤醒录像 / 录音 / 拍照等。 • 高清扬声器:采用高品质振动喇叭,无论播放录音文件或录... -
Page 7: 重要须知
2 重要须知 导致交通意外,且违反相关法律法规。 2.1 安全 2.3 录音的法律限制 • 本设备录音功能的使用可能受限于所在国家法律的限制。录 小心 制他人谈话或者课程时应当尊重他人隐私及第三方人权。 • 特别声明:使用本产品前请仔细阅读本说明书,如因人为 • 请注意,在部分国家,当录制用户与他人通话时,用户应根 操作或不可抗力因素而导致数据丢失,本公司一概不予负 据法律要求通知对方,否则该录音行为将被视为不合法。请 责。特别提醒用户小心操作,注意将资料另外备份。 在录音前通知使用人所在国家该录音数据使用的合法性。 • 显示图像仅作参考。飞利浦保留更改颜色 / 外观 / 设计 / 参数 / 产品功能的权利,硬件、软件、APP 如有更新,恕不 2.4 后台数据 另行通知。 • 自系统激活日起,本公司可以免费提供一年服务,到期如需 继续提供服务,请致电:400-800-7890 2.2 听力保护 • 后台系统仅保存最近 3 天的音视频采集数据 , 请确保有效数 据备份,如因逾期造成的数据丢失,我司不负任何责任。... -
Page 8: 所用符号标记
注意 小心 • 64GB 以上的 TF 卡,初次使用须在本机格式化。 • 此符号标志警告可能发生的设备损坏和数据丢失。操作不 • 格式化之前请确保 TF 卡里的资料已备份。 当,可能导致损坏。 • 卡格式化步骤:在“设置”菜单中连续快速点击“版本更新” 后弹出格式化界面,最后点击“格式化 SD 卡”。 警告 • 格式化完成后,手动重启机器即可使用。 • 此符号标志警告人身伤害危险。操作不当,可能导致人身 伤害或设备损坏。 2.5 所用符号标记 提示 • 此符号标志指明帮助您更加高效简便使用设备的信息。 注意 • 此符号标志指明处理或操作设备时必须遵守的各种注意事 项。... -
Page 9: 您的音视频记录仪
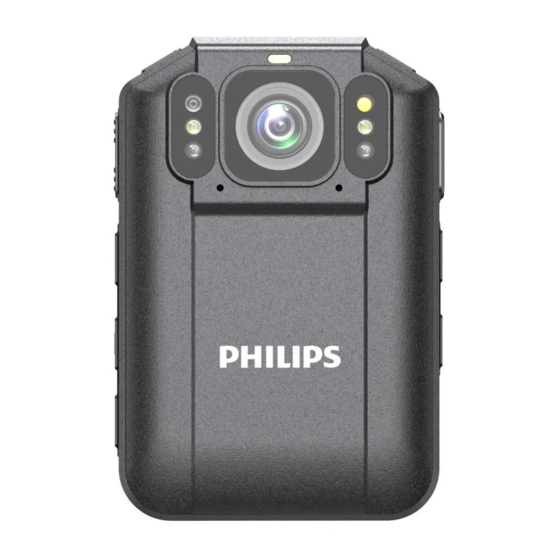
3 您的音视频记录仪 3.2 主机概览 3.1 设备包含 录像键 红外灯 PTT键 录音键 拍照键 USB/SIM/TF卡接口 IR键 SOS键 开关机键 一键回传 光敏电阻 喇叭 红外灯 摄像头 红外灯 白光灯 摄像头 屏幕 工作指示灯 文件夹 白光灯 HOME键 红外灯 返回键... -
Page 10: 开始使用
4 开始使用 4.1 开 / 关机 注意 • 第一次使用机器时,请对该机器在关机状态下使用出厂配 备的充电器充电 3 小时以确保机器有电工作! 按下返回键,返回到主界面,系统主界面如下图所示: 关机状态下,长按开机键,本机自动开机,显示飞利浦图标, 如下图所示: 机器进入预览界面,如下图所示,预览状态下,工作状态指示 灯亮绿灯。点击屏幕“+”或“-”放大与缩小预览界面,实现 数码变焦功能。... -
Page 11: 充电方法
提示 4.3 连接电脑 • 本机使用不可拆卸锂电池供电,如果长时间不使用音视频 音视频记录仪可作为大容量的 USB 存储设备,无须安装软件, 记录仪,请长按“开关机”按键,出现“关机”和“重启” 开机直接连接电脑即可。 选项时,选择“关机”主机会正常关机。 • 如果音视频记录仪无法正常工作,请确认机器是否已没电。 提示 • 机器工作过程中,请勿直接把外置卡拔出,否则会损坏文 • 在文件移入或移出音视频记录仪时,请不要断开音视频记 件或导致机器导常。 录仪与电脑的连接。 • 当电量指示标志为 时,请及时充电。 • USB 连接电脑 : 开机状态下可直接连接 ; 关机状态下则需 长按电源键开机 , 待机器开启后方可连接。 4.2 充电方法 (1) 使用 USB 数据线将本机与 PC 相连接,充电过程中充电指示 灯长亮绿色,充满后熄灭。... -
Page 12: 登录执法仪
5 登录执法仪 当您第一次使用执法仪时,开机后设备会自动进入到账号设置 界面。 您也可以通过点击 “设置” 进入到设置界面, 然后点击 “账 号设置”,进入到账号设置界面。 输入服务器 IP、 端口号、 设备编号和用户编号, 点击 “保存” 按钮, 应用会自动重启然后登陆账号。 服务器 IP 默认为 8.129.0.132,端口默认为 3503。 提示 • 登陆账号前请保证网络连接正常,否则无法正常登陆。... - Page 13 6 录像 录像界面说明 当您初次使用音视频记录仪录像时, 请注意本节中的内容说明! (1) 在摄像预览状态点击“录像”键开始录像,状态指示灯红 灯长亮。 (2) 点击屏幕 “+” 或 “-” 放大与缩小预览界面, 实现数码变焦功能。 (3) 按 “ ” 键切换摄像头, 再按一下 “ ” 键可以切换回来。 (4) 在黑夜或者光线暗的环境下录像时,按下“ ”键,照明 灯将打开,补充光源 , 再按“ ”键关闭白光灯。 (5) 录音和录像可一键切换,同时保存文件。 录像参考界面如下图所示: 录像时间 录像/停止 白光灯 放大 分辨率 切换摄像头 缩小...
- Page 14 注意 • 电池标记符显示空格时, 表明低电。 如果正在录像或者录音, 系统自动保存录音文件后关机。电量不足时,请及时充电。 低电关机时,显示屏也会有相应的提示,显示屏的提示图 标如下所示 提示 • 录像前,请先设置所需的录像参数。...
- Page 15 7 拍照 当您初次使用音视频记录仪拍照时, 请注意本节中的内容说明! 在摄像预览状态下, 直接按拍照键进行拍照, 拍照时会有 “铛铛” 一声,在黑夜或者光线暗的环境下,需要开启机器红外灯或者 补光灯进行拍照,在录像状态下,按下拍照按键可以抓拍照片。...
- Page 16 8 录音 录音界面说明 当您初次使用音视频记录仪录音时, 请注意本节中的内容说明! (1) 按下 “录音键” 或点击屏幕的音频采集图标 “ ” 开始录音; 工作状态指示灯将亮黄灯; 请将内置咪头对准音源。 (2) 按下“录音”键或点击屏幕停止键结束录音同时自动保存 录音文件。 (3) 在录音状态下,按“录像”键结束并保存当前录音,同时 切换到录像,再次短按“录音”键结束并保存当前录像, 同时切换到录音。 录音参考界面如下如所示: 返回 录音时间 录音 \ 停止 录音状态...
- Page 17 提示 • 请先删除一些不必要的文件再录。 • 在录音或者录像过程中禁止直接将卡拔出,否则可能导致 文件损坏。 • 录音或者录像时请勿断电,否则可能会导致音视频记录仪 故障,文件丢失或文件损坏等问题。 • 如果需要长时间使用,请在录音前充电。...
-
Page 18: 视频模式
9 视频模式 点击播放文件,再点击播放键视频播放暂停。 视频播放参考界面如下图所示: 点击主菜单中的文件图标进入回看界面,点击“视频”选项进 入到视频文件回放列表,视频文件列表参考界面如下图所示:... -
Page 19: 视频播放
录像文件播放界面说明: 9.1 视频播放 (1) 点击屏幕“ ”键开始播放。 (2) 播放过程中,点击暂停键暂停播放。 (3) 按“ ”键结束播放,并返回到回放文件列表界面。 (4) 可通过滑动文件播放进度条选择播放时间点。 返回 视频标题 总时长 进度条 当前播放时长 播放 \ 暂停... -
Page 20: 照片模式
10 照片模式 照片浏览界面如下图所示: 点击主菜单中的文件图标进入回看界面,点击“图片”选项进 入到图片文件回放列表,图片文件列表参考界面如下图所示: 点击进入照片浏览状态,左右滑动屏幕切换照片。... -
Page 21: 语音模式
11 语音模式 语音播放列表界面点击播放文件,点击暂停标识暂停播放,按 返回键返回播放列表。 点击主菜单中的文件图标进入回看界面,点击“音频”选项进 语音播放参考界面如下图所示: 入到音频文件回放列表,音频列表参考界面如下图所示:... - Page 22 语音文件播放界面说明: 返回 音频标题 播放时间 文件总时长 播放 / 暂停 播放进度条...
-
Page 23: 视频通话功能
12 视频通话功能 点击主菜单中的视频通话图标进入视频通话界面,视频通话界 面如下图所示: 大窗口显示对方画面,小窗口显示自己的画面,点击“挂断” 按钮则结束本次视频通话。 注意 • 视频通话仅限于一对一视频通话,不支持一对多视频通话。 点击列表中的单个设备会提示是否与该设备进行视频通话,点 • 视频通话列表显示为同一分组中的所有成员。 击“确定”按钮即可对该设备发起视频通话功能,点击“取消” 则回到视频通话列表界面。 视频通话过程中如下图所示:... -
Page 24: 集群对讲功能
13 集群对讲功能 13.1 组群对讲 点击主菜单中的集群对讲图标进入集群对讲界面,默认为组群 对讲,组群对讲界面如下图所示: 点击列表中的单个组群会提示是否呼叫该组群,点击“取消” 则回到组群对讲列表界面,点击“确定”即加入到该组群中, 加入组群后,您可以直接进行说话,此时同在当前组群的 其他设备即可听到您的声音。组群通话界面如下图所示: 点击“>”图标可以查看该组下面的所有成员在线信息,界面如 下图所示:... -
Page 25: 单一对讲
单一对讲过程中如下图所示: 注意 • 组群对讲列表仅显示您当前所加入的组群,如您未加入任 何组群,请联系调度平台管理员进行添加。 • 麦克风关闭之后,组群内的成员无法听到您说话的声音。 13.2 单一对讲 点击主菜单中的集群对讲图标进入集群对讲界面,选择“单一 对讲过程中,点击“挂断”按钮即结束当前对讲。 对讲”切换到单一对讲画面,单一对讲如下图所示: 注意 • 单一对讲仅限于一对一语音对讲,不支持一对多对讲。 • 单一对讲列表显示为同一分组中的所有成员。 点击列表中的单个设备会提示是否呼叫该设备,点击“确定” 按钮即可对该设备发起一对一对讲功能,点击“取消”则回到 单一对讲列表界面。... -
Page 26: Gps 定位
14 GPS 定位 支持 GPS,北斗双模定位,将经纬度显示在显示屏上,并生成 实时位置文档,通过调度台回放轨迹。... -
Page 27: 在线翻译
15 在线翻译 点击主菜单中的在线翻译图标进入在线翻译界面,在线翻译界 面如下图所示: 松开 PTT 按键完成识别界面如下图所示: 支持中英文互译,按住 PTT 按键进行讲话,松开即可完成翻译, 用户可以点击右上角语音播报图标控制是否播报翻译后的内容, 可以点击底部中文或 English 区域完成语言切换。按住 PTT 按 键进行说话界面如下图所示: 在线翻译界面功能说明如下图所示:... - Page 28 返回 播报开关 识别内容 翻译后的内容 英文语言 选择的语言位置 ⑦ 中文语言...
-
Page 29: 语音转文本
16 语音转文本 件转写界面如下图所示: 点击主菜单中的语音转文本图标进入语音转文本界面,默认为 音频文件选项,音频文件界面如下图所示: ①返回 点击已转写文本按钮切换到已转写文本列表界面,如下图所示 : ②文件标题 ③已转写文本内容 ④文件总时长 ⑤保存按钮 ⑥转写状态 ⑦重新转写 ⑧播放 / 暂停 ⑨播放时间 ⑩播放进度条 点击音频文件列表或已转写文本列表进入到文件转写界面,文... -
Page 30: 影音设置
17 影音设置 在主界面点击影音设置功能图标, 系统进入影音设置菜单列表, 包括:视频分辨率,照片分辨率,视频帧率,文件时长等功能。 17.1 视频分辨率 视频分辨率有 640×480、1280×720、1920×1080 三个级别, 多种录像分辨率选择,可满足大部分应用场合,滑动屏幕选择 合适的分辨率。相同数量的视频,分辨率越高的视频所占内存 越大。 17.2 照片分辨率 照片分辨率有 高、中、低选择,滑动屏幕选择合适的分辨率。 分辨率越高的照片所占内存越大。 17.3 文件时长 使用分段录制功能,可以设置每次录制的文件时间间隔,分段 录制设置有 5 分钟、10 分钟、15 分钟、30 分钟四种选择。... -
Page 31: 文件上传
18 设置 在主菜单界面点击屏幕设置功能图标, 系统进入设置菜单列表。 设置菜单列表包括:账号设置,文件上传,WIFI 设置,移动网 络设置,流量使用情况,音量设置,日期设置,显示设置,语 言,蓝牙设置,PTT 设置,其他设置,关于,版本更新等功能, 滑动屏幕选择所需设置的选项,点击进入。 设置界面如下图所示平台设置界面如下图所示: 用户可根据需要选择单个文件进行上传到服务器,点击 “ ”进入到文件上传设置界面,文件上传设置界面如下图 所示: 18.1 文件上传 上传后自动删除本地文件选项打开后,当单个文件上传到服务 在设置界面点击“文件上传”选项进入到文件上传界面,文件 器成功后,会自动删除本地的当前文件。 上传界面如下:... -
Page 32: Wifi 设置
下图所示: 注意 • 上传后自动删除本地文件选项默认为关闭。 18.2 WIFI 设置 点击“WIFI 设置”菜单进入到 WIFI 设置界面。 18.3 移动网络设置 点击“移动网络设置”菜单进入到移动网络设置界面。 18.6 日期设置 点击“日期设置”菜单进入到日期设置界面,用户可以进行时 18.4 流量使用情况 间修改。 点击“流量使用情况”菜单进入到流量使用情况界面,用户可 以查看机器的流量使用情况以及可以对网络进行限制,当后台 18.7 显示设置 流量受到限制时,按流量计费的网络会被视为移动网络。在使 点击“显示设置”菜单进入到显示设置界面,用户可以进行休 用此类网络下载大型文件前,会发出警告。 眠时长和亮度设置,显示设置界面如下图所示: 18.5 音量设置 点击“音量设置”菜单进入到音量设置界面,音量设置界面如... -
Page 33: 其他设置
18.9 版本更新 点击“版本更新”菜单进行检查是否有新版本,有新版本的情 况下会弹出软件更新对话框,没有版本更新的情况下,连续点 击“版本更新”菜单五次,会进入到格式化 SD 卡界面。 18.8 其他设置 点击“其他设置”菜单进入到其他设置界面,其他设置包括夜 视功能和开启语音提示。 夜视功能: 分别有常亮:一直是夜视模式,按键无效化;手动:直接按按 键来调整是否开启夜视模式;自动检测:根据光敏电阻即环境 来调整夜视模式,同样按键无效化。 支持的语音功能词有:开始录像,停止录像,开始录音,停止 录音,开始拍照,打开夜视,关闭夜视,一键报警,返回主界 面,返回上一级,结束录像,结束录音 , 音量增大 , 音量减小 , 查看照片 , 查看视频。 开启语音提示功能打开之后,用户进行录像录音操作会有语音 提示。... -
Page 34: 背夹的装取
19 背夹的装拆 19.2 取下背夹 左图所示,先将背夹的转接支架按图示箭头 1 的方向推,使得 19.1 安装背夹 转接支架上的公扣与主机的相应凹位分开的同时,按箭头 2 的 左图所示,将背夹的转接支架与主机的背夹装配槽位对齐,再 方向拔出背夹转接支架,直至背夹转接支架与主机完全脱离为 按箭头方向插入,直至插到底使得背夹的转接支架上的公扣扣 止(右图所示)。 入主机的相应凹位为止(右图所示)。... -
Page 35: 背夹的佩戴方式
20 背夹的佩戴方式 (1)左图所示,先按图示箭头 1 方向压住背夹的手夹位,使夹 子张口,然后按图示箭头 2 方向朝着肩章两纽扣之间的中部夹 入并跨过肩章的宽度,松开手夹位,使夹钩钩住肩章。 (2) 确认夹子钩住肩章后,调整机器至合适的方位。... -
Page 36: 常见问题
21 常见问题 21.5 执法仪无法播放录音或者录像 电池电量已耗尽,请充电。 此处列举了常见问题的解答,可帮助解决执法仪出现的简单问 题。 如果故障仍无法排除, 请咨询经销商或访问我们的官方网站 : www.philips.com/support 21.6 执法仪死机后如何处理 你有时在操作中会遇到开不了机,黑屏,操作不了等死机现像, 21.1 无法启动执法仪 通常处理方法是,复位一下,复位键位置:打开 USB 防水盖子, USB 座旁边有一小孔,用镊子或尖的东西点按一下小孔即可。 电池电量已耗尽请及时充电。 注:本操作不会造成文件数据丢失或者损坏。 21.2 显示时间 / 日期不正确 执法仪时间不准确,请在菜单上重新设置时间。 21.3 拍照 / 录像图像模糊,不清楚 镜头不干净。请用干净的绒布清洁镜头。 21.4 执法仪无法录音或者录像 执法仪存储空间已满请删除部分文件或将其移至外部存储设备。... -
Page 37: 技术参数
22 技术参数 22.5 运行条件 温度:-30℃ – 55℃ 22.1 存储器 空气湿度:10% – 90%, 不凝结 内置存储器类型:C10 TF 卡 22.2 尺寸和重量 宽 × 高 × 深:83×55×26 (mm) 重量 (含电池): 176g 22.3 系统要求 操作系统:Windows10/8/7, Mac OS 接口:MICRO USB 接口 22.4 录音 长时间... - Page 38 Content 7 Photo 1 Welcome 8 Voice Recording 1.1 Product Features 9 Video Mode 2 Important Notice 9.1 Video Playing 2.1 Safety 2.2 Hearing Protection 2.3 Legal Restriction on Recording 10 Photo Mode 2.4 Background Data 2.5 Icons Used 11 Audio Mode 3 Your Audio/Video Recorder 12 Video Call Function 3.1 What's in the box...
- Page 39 16 Voice to Text 21 FAQ 21.1 Unable to start 21.2 Incorrect time/date 17 Media Setting 21.3 Unclear image/video 17.1 Video Resolution 21.4 Unable to record audio/video 17.2 Photo Resolution 21.5 Unable to play audio or video files 17.3 File Time 21.6 How to respond to dead halt 18 Settings 22 Technical Parameters...
-
Page 40: Welcome
• Quick SOS: Simply press SOS to report the information Welcome to the World of Philips! We feel delighted that you to the dispatching platform (the function is only active choose to buy from Philips. You can always visit our website after you connect to network and login account. - Page 41 to give you a live feel during audio or video play. • Use high-speed USB 2.0 to ensure quick storage of audio/ video files. • Large-volume USB storage device to ensure maximum compatibility.
-
Page 42: Important Notice
• Images are for reference only. Philips reserves the right to respect the privacy and other rights of such persons. change the color/appearance/design/parameters/product •... -
Page 43: Icons Used
• The background system only keeps audio/video data for Notice only 3 days. Please make backup copies to prevent data loss to which the Company shall not be held liable. • This icon gives you various notices on handling or operation of the device. -
Page 44: Your Audio/Video Recorder
3 Your Audio/Video Recorder 3.2 Overview 3.1 What's in the box 1 Video recording button Infrared light 2 PTT button Recording button 3 Photo button USB/SIM/TF card slot 4 I R button SOS button 5 ON/OFF 17 Quick video uploading Photoresistor Speaker Infrared light... -
Page 45: Start To Use
During shutdown mode, long press Turn ON button, and the Press Return button to return to the Main Interface which device will be turned on, showing the Philips logo, as shown shows the following: below: When entering the preview interface as shown below, you... -
Page 46: Charging Methods
Reminder Reminder • The device uses undetachable lithium batteries. If the • The device can be charged either during ON or OFF device is left unused for a long time, please long press mode. Normally, during OFF mode charging, it takes “ON/OFF”... -
Page 47: Log In
5 Log in Reminder • Please ensure that the network connection is normal before logging in , otherwise it will fail to log in. When you use the device for the first time, it will automati- cally enter the “Account Setting” after turning on. Also, you can enter the Settings interface by clicking “Settings”... -
Page 48: Video Recording
6 Video Recording Recording Interface Illustration When you use the recorder for the first time, please pay attention to the requirements in this section! (1)In the preview mode, please click “Video” button to record and the indicator light will show red light. (2)Click “+”... - Page 49 Notice • When the battery icon is showing empty, it means low on battery. If you are recording, the system will automatically save the recorded files. In case of low battery, please charge your device timely. During low battery, the device gives you “Low Battery”...
-
Page 50: Photo
7 Photo When you use the device for photo taking for the first time, please read the instructions in this section! During the video recording mode, press the Photo Taking button and a “ding-ding” sound will occur during photo taking. In dark or dim light, you need to turn on the infrared light for photo taking. -
Page 51: Voice Recording
8 Voice Recording Audio Recording Illustration When you use the device for audio recording for the first time, please read the instructions in this section! (1)Press “Voice Recording Button”or click the audio recording icon “ ” to start recording. The indicator will show yellow light during work mode. - Page 52 Reminder • Please delete some unnecessary files before recording. • Do not pull out the memory card during audio/video recording mode. Otherwise, damage might be caused to the files. • Do not cut off power during audio/video recording mode. Otherwise, damage might be caused to the recorder and the files might be lost or damaged.
-
Page 53: Video Mode
9 Video Mode Click the File icon in the main menu to enter the video resaw file list, as shown below: Recorded File Playing Illustration Click the file you want to play and click again to pause. The video playing interface as shown below:... -
Page 54: Video Playing
Return Video title Total Time Play Progress Bar Current Play Time Play/Pause 9.1 Video Playing (1)Click“ ” button to play video. (2)During playing mode, click “ ” to suspend playing. (3)Press“ ”button to end playing and return to the file menu. -
Page 55: Photo Mode
10 Photo Mode Click the File icon in the main menu to enter the resaw inter- face, and click the “Photo” option to enter photo file resaw list. The photo file list is shown in the following: Click to browse the photos and switch them by sliding the screen left and right. -
Page 56: Audio Mode
11 Audio Mode Click the File icon in the main menu to enter the resaw inter- face, and click “Audio” option to enter audio file resaw list. The audio file list is shown in the following: Audio File Playing Interface Illustration: Click the file for playing in the audio play list interface, click“... - Page 57 Return File name Play time Total time Play/Pause Play progress bar...
-
Page 58: Video Call Function
12 Video Call Function Click the Video call icon in the main menu to enter the video call interface, which is shown in the following: The bigger window displays the picture of the other party, and the smaller window displays your own picture. Click “Hang up”... -
Page 59: Group Chat Function
13 Group Chat Function 13.1 Groups Chat Click the Groups Chat icon in the main menu to enter the group talk interface, as shown in the below: Click a group in the list to prompt “Whether to call the group”, click “Cancel” to return to the group chat list and “OK”... -
Page 60: Single Intercom
Notice Click a device in the list to prompt “Whether to call the de- vice”. Click “OK” button to start single intercom and “Cancel” • VThe group talk list only shows the group you are to return to the single intercom list. currently joining. -
Page 61: Gps Positioning
14 GPS Positioning The device supports GPS function and Beidou dual-mode po- sitioning. The longitude and latitude are shown on the screen to produce a real-time location file. The tracking record can be obtained at the dispatcher. -
Page 62: Online Translation
15 Online Translation Click Translation icon in the main interface to enter the online translation interface, wihch is shown in the following: Release the PTT button to complete recognition, as shown below: The decive supports Chinese-English & English- Chinese translation. Please press and hold PTT to speak and release to complete the translation. - Page 63 Return Broadcast on-off Recognized content Translated content English Language choice ⑦ Chinese...
-
Page 64: Voice To Text
16 Voice to Text Click the voice to text icon in the main menu to enter the voice to text interface, which is the audio file by default. The audio file interface is shown in the following: Click the audio file list or the transferred text list to enter the file transfer interface, as shown in the following: Click “Transferred text”... - Page 65 Return ① File name ② Transferred text ③ Total time ④ Save ⑤ Transcribe complete ⑥ Re-transfer ⑦ Play/Pause ⑧ Time ⑨ Progress bar ⑩...
-
Page 66: Media Setting
17 Media Setting 17.3 File Time You can Use the segment recording function to set the file Click Media setting icon in the main interface to enter the time interval for each recording. There are four options: 5 menu list of media setting, including video resolution, photo minutes, 10 minutes 15 minutes and 30 minutes. -
Page 67: Settings
18 Settings upload interface. The interface is as follows: Click Settings icon in the main menu interface to enter the settings menu. The menu list of settings includes: Account, Upload, WIFI, APN, Folw usage, Voice, Date, Display, Lan- guage, Bluetooth, PTT, Other, About, Version update and other functions. -
Page 68: Wifi Setting
option is turned on, if a file is successfully uploaded to the 18.5 Volume Setting server, the local file will be automatically deleted. Click “Voice” to enter the volume setting interface, which is Notice shown as follows: • The “ Automatically delete local files after uploading” option is off by default. -
Page 69: Other Settings
recording, volume up , volume down, view photos and video. After the voice activation function is turned on, you will have voice prompt for video recording operation. 18.9 Version Update Click “ Version update” menu to check whether there is a new version. -
Page 70: Mounting Of Shoulder Clip
19 Mounting of Shoulder Clip 19.2 Dismounting of clip As shown in the figure on the left, push the adapter bracket 19.1 Mounting of Shoulder Clip in the direction of arrow 1, so that the male thread on the adapter bracket is separated from the corresponding slot of As shown in the figure on the left, align the adapter bracket the device. -
Page 71: Wearing Shoulder Clip
20 Wearing Shoulder Clip (1)As shown in the figure on the left, press the hand clip in the direction of arrow 1 to open the clip, then clamp the middle of the shoulder strap in the direction of arrow 2 and release the hand clip, so that the hook can catch the shoulder strap. -
Page 72: Faq
The battery is used up, please charge your device. If such issues persist, please consult our dealers or visit our official website: www.philips.com/support. 21.6 How to respond to dead halt 21.1 Unable to start... -
Page 73: Technical Parameters
22 Technical Parameters 22.5 Operational Conditions Temperature: -30°–55°C 22.1 Memory Humidity: 10%-90%, uncondensed External Memory Standard Recording Hours (64GB): 217 hours for stereo sound mode Type of Internal Storage: C10 TF card 22.2 Dimensions & Weight Width* Height*Depth: 83×55×26 (mm) Weight (including Battery): 176g 22.3 System Requirements Operating System: Windows10/8/ 7, Mac OS... - Page 74 VTR8410...
- Page 76 © 2021 Speech Processing Solutions GmbH. Register your product and get support at 版权所有文档版本 1.2, 2021/03/15 www.philips.com/welcome...