Paramount Fitness MDX-R3 Owner's Manual And Installation Manual
For non-adjustable concrete pools, submerged suction outlet for multiple drain use for use on floor
Hide thumbs
Also See for MDX-R3:
- Owners and installation manual (12 pages) ,
- Owner's manual and installation manual (12 pages) ,
- Owner's manual (12 pages)
Quick Links
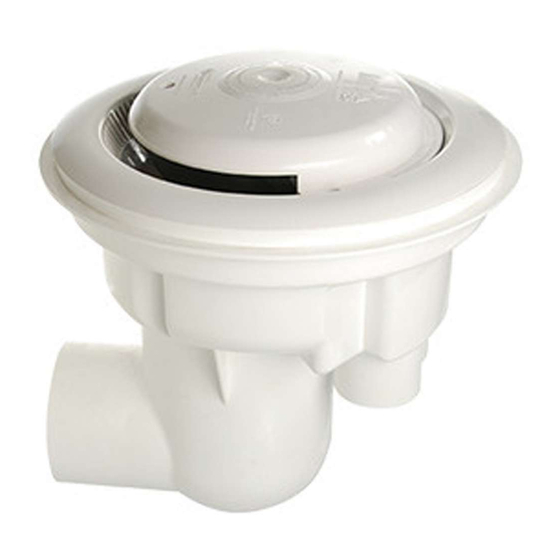
MDX-R3 FOR NON-ADJUSTABLE CONCRETE POOLS
OWNER'S MANUAL AND INSTALLATION GUIDE
VGB Compliant ANSI/APSP/ICC-16 2017 LISTED
NOTICE
IMPORTANT SAFETY INSTRUCTIONS.
TO INSTALLERS: READ, UNDERSTAND,
AND FOLLOW ALL INSTRUCTIONS AND
WARNINGS.
Give these instructions to the facility owner to keep for future reference. Follow all codes and
regulations that apply to the design, installation and use of suction outlet fittings.
WARNING
Any modification that increases the flow rate of the circulation system shall require reevaluation
of the cover/grate and sump to ensure that the flow rating of the Suction Outlet Fitting Assembly
(SOFA) is not exceeded.
https://www.1paramount.com/downloads/manuals/mdxr3/MDXR3CertificateOfConformity.pdf
SAVE THESE INSTRUCTIONS
SEE SPECIAL INSTRUCTIONS FOR CALIFORNIA ON PAGE 7
When installing and using this equipment, basic safety precautions
shall always be followed, including the following:
MDX-R3 and SDX2 must be installed in accordance with Paramount's
written instruction manual, and in conformity with applicable Federal,
State, Local and Swimming pool industry building and safety codes.
Certificate of conformity available at
8175 W. Buckeye Rd., Phoenix, AZ 85043
Toll Free: 1.800.621.5886 • Phone: 480.893.7607 • Fax: 480.753.3397
[email protected] • www.1Paramount.com
US and Foreign patents and patents pending
see www.1paramount.com/support/patent-numbers/
004-027-8810-00 REV04 ECN_1999
SUBMERGED SUCTION OUTLET
FOR MULTIPLE DRAIN USE FOR USE ON FLOOR
PUB 020521 ©2021 Hayward Industries, Inc.

Related Manuals for Paramount Fitness MDX-R3


Summary of Contents for Paramount Fitness MDX-R3
- Page 1 Give these instructions to the facility owner to keep for future reference. Follow all codes and regulations that apply to the design, installation and use of suction outlet fittings. MDX-R3 and SDX2 must be installed in accordance with Paramount’s WARNING written instruction manual, and in conformity with applicable Federal, State, Local and Swimming pool industry building and safety codes.
- Page 2 Signal Words and Symbols Used In This Manual This Owner’s Manual and Installation Guide contains specifi c precautions and symbols to identify safety- related information. You will fi nd DANGER, CAUTION, WARNING and NOTICE symbols which require special attention. Please read them carefully and follow these precautions as indicated! They will explain how to avoid hazards that may endanger you or persons using or maintaining your pool or spa.
- Page 3 Body Suction Entrapment Hazards. Note: your certified builder has many effective options for addressing this hazard; they may include dual-drain systems, like MDX-R3, skimmers, gutters, negative edge features and many more products and piping designs known to professionals.
- Page 4 8175 W. Buckeye Rd., Phoenix, AZ 85043 1-800-621-5886 • 1paramount.com Replace cover assembly within (5) fi ve years. Replace all other components within (25) years. MDX-R3 pool fl oor drain cover part #005-252-8243-XX Maximum GPM = 132 (500 LPM) Circle year and month of installation. Year...
- Page 5 A 3" pipe may be attached to the inside diameter of the enlarged suction element or a 4" x 13" minimum length pipe directly to the drain socket for systems where the flow through the MDX-R3 is intended to exceed 90 GPM.
- Page 6 FLOW HEAD LOSS CURVE HEAD LOSS CURVE MDX-R3 FLOW RATE (GPM) MDX-R3 INSTALLATION METHOD 1 - SINGLE MDX-R3 WITH CANISTER WITHOUT CANISTER MV FUSE DECK SIDE MV FUSE IN CANISTER TO PUMP SDX2 SDX2 MV FUSE IN 2ND SUCTION OUTLET...
- Page 7 *NOTE: Canister requires 1½" equalizer line through pool wall. (Not Shown) NOTE: Drains 3' separation edge to edge with supplied fittings approximately 50" center to center. MDX-R3 two pack drain installations require the use of all plumbing DANGER connections provided to ensure drain is set 3' apart at the inside edge. Do not add or remove any fittings from the assembly before the reduction after the enlarged suction element.
- Page 8 MDX-R3 PLUMBING MDX-R3 Plumbing (Fig. 1) Fig. 1 1. Position the MDX-R3 sump even with the finished depth of the pool, spa or basin (Fig. 1). Orientate the sump so the elbow is FUTURE INTERIOR FINISH perpendicular to inside wall or end wall of pool.
- Page 9 SDX2 CONCRETE INSTALLATION The SDX2 High Flow Safety Drain® installed Fig. 3 2" Deep (typ) in a concrete shell utilizes a small cutout in the concrete to form the sump which is sometimes made of plastic or fiberglass. This concrete sump provides superior shell strength by eliminating the large hole associated with plastic sumps.
- Page 10 2. Pack concrete around and under sump (Fig. 8) to ensure seal and strength of shell 3. Angle shell down to MDX-R3 sump. (Fig. 8) 4. Make cut-out around MDX-R3 sump. 17¼" round by ¾" deep to water stop down . (Fig. 9 & 11) Fig. 7 MDX-R3 DEBRIS REMOVAL SYSTEM STANDARD POOL/SPA/BASIN DESIGN STEEL CAGE 3"...
- Page 11 1¾" CONCRETE SHELL EARTH MDX-R3 WINTERIZATION WITH CANISTER If vacuum relief suction outlets are located below freeze line skip steps 1 and 2. 1. Remove grate from wall drain and install a 13-¾ blow through plug and blow line to achieve airlock.
- Page 12 **Replace cover within 05 installed years. ***Replace all other components within 25 installed years MDX-R3 WITH SDX2 FOR CONCRETE POOLS Item Part Number Description 005-252-2110-XX Cover (XX = Color Code) 005-262-0840-00 Screw Pack (7pcs) 316 SS 005-252-8234-XX Funnel Assembly 005-252-1045-00...