
Summary of Contents for Siemens Fornuis HR745220N
- Page 1 [en] Instruction manual ..3 [nl] Gebruiksaanwijzing ..28 HR745220N Free standing cooker HR745220N Fornuis HR745220N...
-
Page 3: Table Of Contents
Switching off the oven automatically..........13 Additional information on products, accessories, replacement Rapid heating ................... 13 parts and services can be found at www.siemens-home.com Setting the timer ............... 14 and in the online shop www.siemens-eshop.com Care and cleaning ..............14 : Important safety information Read these instructions carefully. - Page 4 manufacturer accepts no liability for Greaseproof paper must not protrude over damage of this kind. The appliance's the accessories. warranty becomes void. Risk o f fire! Combustible objects that are left in the ■ Caution:This appliance is for cooking cooking compartment may ignite. Never purposes only.
- Page 5 compartment or the heating elements. off the gas supply. Contact the after-sales Always allow the appliance to cool down. service. Keep children at a safe distance. Risk of in jury! Faults or damage to the appliance are ■ Risk of burns! Accessories and ovenware become very dangerous.
-
Page 6: Causes Of Damage
electrical appliance cables into contact appliance from the mains or switch off the with hot parts of the appliance. circuit breaker in the fuse box. Ris k of electric s hock! Penetrating moisture may cause an Risk o f electric sho ck! A defective appliance may cause electric ■... -
Page 7: Faults In The Gas Installation/Smell Of Gas
Faults in the gas installation/smell of gas If you notice a smell of gas or faults in the gas installation, you must immediately shut off the gas supply and/or close the gas ■ cylinder valve immediately extinguish all naked flames and cigarettes ■... -
Page 8: Your New Cooker
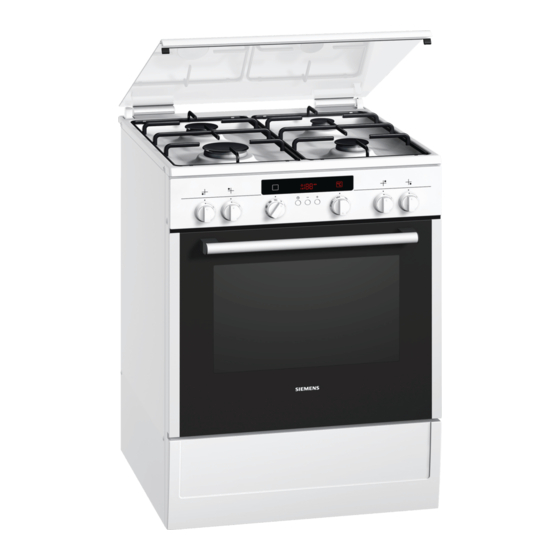
Your new cooker Here you will learn about your new cooker. We will explain the You will find information on the cooking compartment and the control panel, the hob and the individual operating controls. accessories. General information Cooking area The design depends on the respective appliance model. Here is an overview of the control panel. -
Page 9: The Oven
Hotplate controls Temperature selector You can use the four hotplate controls to control the heat Use the temperature selector to set the temperature and the output provided by each hotplate. grill setting. Setting Function/gas burners Settings Function Ú Ú Off position The hotplate is switched off. -
Page 10: Your Accessories
Your accessories The accessories supplied with your appliance are suitable for Note: The accessories may deform when they become hot. making many meals. Ensure that you always insert the Once they cool down again, they regain their original shape. accessories into the cooking compartment the right way round. This does not affect their operation. -
Page 11: After-Sales Service Products
Optional accessories HZ number Function Universal pan HZ332003 For moist cakes, pastries, frozen meals and large roasts. Can also be used under the wire rack to catch fat or meat juices. Place the universal pan in the oven with the sloping edge towards the oven door. -
Page 12: Advance Cleaning Of Burner Cup And Cap
Advance cleaning of burner cup and cap Clean the burner cap (1) and cup (2) with water and washing- up liquid. Dry the individual parts carefully. Place the burner cup and cap back on the burner shell (5). Ensure that the igniter (3) and flame safety pin (4) are not damaged. -
Page 13: Setting The Oven
Setting the oven There are various ways in which you can set your oven. Here Use the + or - button to set the cooking time. we will explain how you can select the desired type of heating + button / default value = 30 minutes and temperature or grill setting. -
Page 14: Setting The Timer
Setting the timer You can use the timer as a kitchen timer. It runs independently A signal sounds. Press the Clock button. The timer display of the oven. The timer has a special signal. This means that you goes out. can tell whether the timer or cooking time has expired. -
Page 15: Detaching And Refitting The Rails
Burners and steel Do not clean in the dishwasher. Remove the wire rack and clean with a sponge, washing-up liquid and grid of the gas burn- some hot water. Remove the burner cup and cap. Clean with a sponge and some hot water and washing-up liquid. -
Page 16: Detaching And Attaching The Oven Door
Detaching and attaching the oven door Fold back both locking levers (figure C). Close the oven door. For cleaning purposes and to remove the door panels, you can detach the oven door. & The oven door hinges each have a locking lever. When the locking levers are closed (figure A), the oven door is secured in place. -
Page 17: Troubleshooting
Refitting Place the cover back in position (Fig. A). First retighten the two screws at the bottom, then the two screws at the top (Fig. B). Fitting the oven door See the section Fitting the oven door. Do not use the oven again until the panels have been correctly fitted. -
Page 18: After-Sales Service
After-sales service Our after-sales service is there for you if your appliance needs After-sales service to be repaired. We will always find the right solution in order to avoid unnecessary visits from a service technician. E number and FD number Please note that there will be a fee for a visit by a service technician in the event of a malfunction, even during the When calling us, please give the product number (E no.) and... -
Page 19: Tested For You In Our Cooking Studio
Tested for you in our cooking studio Here you will find a selection of dishes and the ideal settings for Universal pan: level 3 ■ them. We will show you which type of heating and which Baking tray: level 1 ■... - Page 20 Cakes on trays Accessories Level Type of Temperature Cooking time heating in °C in minutes Sponge mixture or yeast dough with dry Baking tray 170-190 20-30 topping Universal pan + baking 150-170 35-45 tray Sponge mixture or yeast dough with Universal pan 160-180 40-50...
-
Page 21: Baking Tips
Baking tips You wish to bake according to your own Use similar items in the baking tables as a guide. recipe. How to establish whether sponge cake Approximately 10 minutes before the end of the baking time specified in the recipe, stick is baked through. - Page 22 Meat Weight Accessories and Level Type of Temperature Cooking time ovenware heating in °C, grill set- in minutes ting Beef Pot-roasted beef 1.0 kg Covered 200-220 1.5 kg 190-210 2.0 kg 180-200 Fillet of beef, medium 1.0 kg Uncovered 210-230 1.5 kg 200-220 Sirloin, medium...
-
Page 23: Tips For Roasting And Grilling
Fish upwards. Placing half a potato or a small ovenproof container in the belly of the fish will make it more stable. Turn the pieces of fish after of the time. If you are grilling directly on the wire rack, the universal pan Whole fish does not have to be turned. -
Page 24: Preprepared Products
Preprepared products The cooking result greatly depends on the quality of the food. Pre-browning and irregularities can sometimes even be found Observe the instructions on the packaging. on the raw product. If you line the accessories with greaseproof paper, make sure that the paper is suitable for these temperatures. -
Page 25: Special Dishes
Special dishes Preheat the cooking compartment as indicated. Place the cups or jars on the cooking compartment floor and At low temperatures, 3D hot air is equally useful for incubate as indicated. producing creamy yoghurt as it is for proving light yeast dough. First, remove accessories, hook-in racks or telescopic shelves Proving dough from the cooking compartment. -
Page 26: Acrylamide In Foodstuffs
Preserving After 25 to 35 minutes of residual heat, remove the preserving jars from the cooking compartment. If they are allowed to cool Fruit for longer in the cooking compartment, germs could multiply, After approx. 40 to 50 minutes, small bubbles begin to form at promoting acidification of the preserved fruit. -
Page 27: Test Dishes
Test dishes These tables have been produced for test institutes to facilitate the inspection and testing of the various appliances. In accordance with EN 50304/EN 60350 (2009) and IEC 60350. Baking Baking on 2 levels: Always insert the universal pan above the baking tray. Baking on 3 levels: Insert the universal pan in the middle. -
Page 28: Produktinfo
Wijze van verwarmen en temperatuur ......... 38 Oven automatisch uitschakelen............ 39 Meer informatie over producten, accessoires, onderdelen en Snelvoorverwarming................ 39 diensten vindt u op het internet: www.siemens-home.com en in Wekker instellen............... 39 de online-shop: www.siemens-eshop.com : Belangrijke veiligheidsvoorschriften Lees deze gebruiksaanwijzing zorgvuldig Apparaatcategorie: Categorie 1 door. - Page 29 ongelukken en schade aan het toestel. De benodigde oppervlak leggen. Het fabrikant van het apparaat is niet bakpapier mag niet uitsteken over de aansprakelijk voor dergelijke schade. De toebehoren. garantie van het apparaat komt te vervallen. Risico van brand! Brandbare voorwerpen die in de ■...
- Page 30 Ontvlambare en brandbare voorwerpen Geen schraper, scherpe of schurende mogen niet in de ovenlade worden schoonmaakmiddelen gebruiken. opgeborgen. Risico v an letsel! Ondeskundige reparaties zijn gevaarlijk. ■ Reparaties en vervangingen van Risico van verbranding! beschadigde elektriciteits- en gasleidingen Het toestel wordt zeer heet. Nooit de hete ■...
-
Page 31: Oorzaken Van Schade
Kantelgevaar! de meterkast uit. Contact opnemen met de klantenservice. Kan s op een elektris che schok ! De kabelisolatie van hete ■ toestelonderdelen kan smelten. Zorg ervoor dat er nooit aansluitkabels van elektrische toestellen in contact komen met hete onderdelen van het apparaat. Kan s op een elektris che schok !! Binnendringend vocht kan een schok ■... -
Page 32: Opstelling, Gas- En Elektrische Aansluiting
Opstelling, gas- en elektrische aansluiting Gasaansluiting Elektrische aansluiting De installatie mag uitsluitend door een erkende installateur of Attentie! een door de importeur erkende servicemonteur worden Laat het apparaat door een servicedienst plaatsen. Voor de ■ uitgevoerd volgens de "Instructie voor het aansluiten van het aansluiting is een zekering van 16 A nodig. -
Page 33: Plaatsen Van Het Apparaat
Plaatsen van het apparaat Let erop dat het apparaat na de plaatsing niet meer wordt ■ verschoven. De afstand tussen de extra krachtige brander of wokbrander met aangrenzende keukenmeubels resp. de muur moet minstens 50 mm bedragen. Maatregelen tijdens het transport Bevestig alle beweegbare onderdelen in en op het apparaat met plakband, dat zonder sporen verwijderd kan worden. -
Page 34: Kookplaat
Kookplaat Functiekeuzeknop Met de functiekeuzeknop stelt u de verwarmingsmethode voor Hier krijgt u een overzicht van het bedieningspaneel. De de oven in. uitvoering hangt van het type apparaat af. U kunt de functiekeuzeknoppen naar rechts of naar links draaien. Stand Gebruik ý... -
Page 35: De Binnenruimte
Toetsen en display Ovenlamp Met de toetsen kunnen diverse extra functies worden gekozen. Tijdens het gebruik brandt de ovenlamp in de binnenruimte. Op het display kunt u de ingestelde waarde aflezen. Koelventilator Toets Functie De koelventilator wordt zo nodig in- en uitgeschakeld. De warme lucht ontsnapt via de deur. - Page 36 Extra toebehoren HZ-nummer Functie Pizzaplaat HZ317000 Is zeer geschikt voor pizza, diepvriesgerechten en ronde taar- ten. U kunt de pizzaplaat in plaats van de braadslede gebrui- ken. Schuif de plaat boven het rooster erin en houd u aan de gegevens in de tabellen. Inzetrooster HZ324000 Om te braden.
-
Page 37: Klantenserviceartikelen
Klantenserviceartikelen de e-shop de juiste onderhouds en reinigingsmiddelen of andere toebehoren kopen. Geef hiervoor het betreffende Voor uw huishoudelijke apparaten kunt u bij de klantenservice, artikelnummer op. in de vakhandel of via het Internet voor afzonderlijke landen in Schoonmaakdoekjes voor roestvrijstalen Artikelnr. -
Page 38: Tabel - Koken
Als de vlam weer uitgaat, herhaalt u de procedure vanaf stap De gasbrander ontsteekt niet. Bij stroomuitval of bij vochtige bougies kunt u de gasbrander û Voor het uitschakelen van de gasbrander: Draai de met een gasaansteker of lucifer ontsteken. gasbranderschakelaar naar rechts in de stand Uit. -
Page 39: Oven Automatisch Uitschakelen
Oven automatisch uitschakelen De oven start na een paar seconden. In het display verschijnt het symbool bereidingstijd Voer de bereidingstijd voor uw Gerecht in. De bereidingstijd is afgelopen Voorbeeld in afbeelding: Boven-/onderwarmte , 200 °C, bereidingstijd 45 minuten. Er klinkt een signaal. De oven schakelt zichzelf uit. De toets tweemaal indrukken en de functiekeuzeknop uitzetten. -
Page 40: Onderhoud En Reiniging
Onderhoud en reiniging Wanneer u de kookplaat en de oven goed verzorgt en Indien de scharnieren van de afdekking losraken, moet u op de schoonmaakt, blijven ze lang mooi en intact. Hieronder leggen letters op de scharnieren letten. Het scharnier met de letter R wij u uit hoe u beide op de juiste manier verzorgt en moet rechts, het scharnier met de letter L moet links worden schoonmaakt. -
Page 41: Inschuifrails Verwijderen En Bevestigen
Deurglas Dit kan met een glasreiniger worden gereinigd. Gebruik geen agressieve reinigingsmiddelen of schrapers. Deze kunnen het glasoppervlak bekrassen en beschadigen. Dichting Reinig deze met een vochtige doek. Droog met een zachte doek af. Binnenruimte van de Reinig deze met warm water of met azijn verdund water. Wanneer de oven erg vuil is: Gebruik een ovenrei- oven niger. -
Page 42: Glazen Deurplaten Uit- En Inbouwen
Deur inbrengen Verwijder de afdekking (afbeelding C). De ovendeur in de omgekeerde volgorde weer inbrengen. & Let er bij het inbrengen van de ovendeur op dat beide scharnieren recht in de opening worden geleid (Afbeelding A). De keep op het scharnier dient aan beide kanten in te klikken (Afbeelding B). -
Page 43: Wat Te Doen Bij Storingen
Wat te doen bij storingen? Ovenlamp aan het plafond vervangen Storingen worden vaak veroorzaakt door een kleinigheid. Raadpleeg de volgende tabel voordat u contact opneemt met Als de ovenlamp is uitgevallen, moet deze worden vervangen. de servicedienst. Wellicht kunt u zelf de storing verhelpen. Temperatuurbestendige reservelampen, 40 watt, kunt u krijgen bij de klantenservice of uw speciaalzaak. -
Page 44: Energie En Milieutips
Energie en milieutips Energie besparen met de gas-kookplaat Hier krijgt u tips over de manier waarop u bij het bakken en braden in de oven en bij het koken op de kookplaat energie Kies altijd een pan die de juiste grootte heeft voor uw ■... - Page 45 Gebak in vormen Vorm Hoogte Verwar- Temperatuur Tijdsduur mingsme- in °C in minuten thode Cake, eenvoudig Krans/rechthoekige vorm 2 160-180 40-50 3 cakevormen 140-160 60-80 Cake, fijn Krans/rechthoekige vorm 2 150-170 60-70 Taartbodem, roerdeeg Vorm vruchtentaartbodem 2 150-170 20-30 Vruchtentaart fijn, roerdeeg Springvorm/tulbandvorm 160-180 50-60...
-
Page 46: Tips Voor Het Bakken
Klein gebak Toebehoren Hoogte Verwar- Temperatuur Tijdsduur mingsme- in °C in minuten thode Gistdeeggebak Bakplaat 180-200 20-30 Braadslede + bakplaat 170-190 25-35 Brood en broodjes Giet nooit water in de hete oven. Bij het bakken van brood de oven voorverwarmen als er niets Bij het bakken op 2 niveaus de braadslede altijd boven de anders is aangegeven. -
Page 47: Vlees, Gevogelte, Vis
Vlees, gevogelte, vis Grillen Verwarm bij het grillen ca. 3 minuten voor alvorens het gerecht Vormen in de binnenruimte te plaatsen. U kunt alle vormen gebruiken die hittebestendig zijn. Voor grote Gril altijd in een gesloten oven. stukken vlees is ook de braadslede geschikt. Gebruik zoveel mogelijk gelijke stukken om te grillen. -
Page 48: Tips Voor Het Braden En Grillen
Vlees Gewicht Toebehoren en Hoogte Verwar- Temperatuur Tijdsduur vormen mingsme- in °C, grill- in minuten thode stand Gehakt Gehakt van 500 g open 170-190 vlees Worstjes Worstjes Rooster Gevogelte Braadstukken, zoals kalkoenrollade of kalkoenfilet, halverwege de opgegeven tijd keren. Stukken gevogelte na van de tijd De gewichtsgegevens in de tabel hebben betrekking op keren. -
Page 49: Ovenschotels, Gegratineerde Gerechten, Toast
Ovenschotels, gegratineerde gerechten, toast Plaats de vormen altijd op het rooster. De bereidingstoestand van een ovenschotel is afhankelijk van Grilt u direct op het rooster, plaats dan ook de braadslede op de grootte van de vorm en de hoogte van het gerecht. De hoogte 1. -
Page 50: Bijzondere Gerechten
Gerecht Toebehoren Hoogte Verwar- Temperatuur Tijdsduur mingsme- in °C in minuten thode Strudel, diepvries Strudel Braadslede 190-210 30-40 Bijzondere gerechten Den binnenruimte zoals aangegeven voorverwarmen De koppen of potjes vervolgens op de bodem van de Bij lage temperaturen lukt romige yoghurt u met binnenruimte zetten en bereiden zoals aangegeven. -
Page 51: Inmaak
Inmaak Leg op elke pot een natte rubberen ring en een deksel. Sluit de potten af met klemmen. Voor het inmaken moeten de potten en rubberen ringen schoon en in orde zijn. Gebruik zo mogelijk potten van gelijke Plaats niet meer dan zes potten in de ovenruimte. grootte. -
Page 52: Testgerechten
Testgerechten Deze tabellen zijn gemaakt voor onderzoeksinstituten om het controleren en testen van verschillende apparaten te vergemakkelijken. Volgens EN 50304/EN 60350 (2009) resp. IEC 60350. Bakken Bakken op twee niveaus: Braadslede altijd boven de bakplaat plaatsen. Bakken op 3 niveaus: Braadslede in het midden plaatsen. - Page 56 Siemens-Electrogeräte GmbH Carl-Wery-Straße 34 81739 München Germany *9000743261* 9000743261 01 140492...