
Related Manuals for Yamaha DTX-PROX


Summary of Contents for Yamaha DTX-PROX
- Page 1 Drum Trigger Module Owner’s Manual Features of the page 8 DTX-PROX Contents page 9 Specifications page 60...
- Page 2 This product should be used only with the components supplied or; a never mix different types of batteries. Batteries MUST be installed cor- cart, rack, or stand that is recommended by Yamaha. If a cart, etc., is rectly. Mismatches or incorrect installation may result in overheating used, please observe all safety markings and instructions that accom- and battery case rupture.
- Page 3 Yamaha Corporation of America or its subsidiaries. of other electronic devices. Compliance with FCC regulations does * This applies only to products distributed by Yamaha Corporation of America. (class B) DTX-PROX Owner’s Manual...
- Page 4 Protect the power cord from being walked on or pinched particularly at plugs, convenience receptacles, and the point where they exit from the apparatus. WARNING TO REDUCE THE RISK OF FIRE OR ELECTRIC SHOCK, DO NOT EXPOSE THIS APPARATUS TO RAIN OR MOISTURE. (UL60065_03) DTX-PROX Owner’s Manual...
- Page 5 Information on Disposal in other Countries outside the European Union: This symbol is only valid in the European Union. If you wish to discard these items, please contact your local authorities or dealer and ask for the correct method of disposal. (weee_eu_en_02) DTX-PROX Owner’s Manual...
-
Page 6: Precautions
For the AC adaptor WARNING CAUTION • This AC adaptor is designed for use with only Yamaha electronic instruments. • When setting up, make sure that the AC outlet is easily accessible. If some Do not use for any other purpose. - Page 7 Yamaha cannot be held responsible for damage caused by improper use or modifications to the instrument, or data that is lost or destroyed. Always turn the power off when the instrument is not in use.
- Page 8 Manual (PDF)). However, the data saved to the instrument • The names of buttons, terminals, and the like from the DTX-PROX’s may be lost due to some failure, an operation mistake, etc. Save front, rear and top panels are enclosed in [ ] (square brackets).
- Page 9 Hereby, Yamaha Music Europe GmbH declares that the radio equipment type https://europe.yamaha.com/en/support/compliance/doc.html [DTX-PROX] is in compliance with Directive 2014/53/EU. The full text of the EU declaration of conformity is available at the following internet address: VIENKĀRŠOTA ES ATBILSTĪBAS DEKLARĀCIJA https://europe.yamaha.com/en/support/compliance/doc.html...
-
Page 10: Welcome
To get the most out of your DTX-PROX, be sure to read this Owner’s Manual carefully. And after reading through this manual, be sure to store it in a safe place so that you can refer back to it again as needed. -
Page 11: About The Manuals
Describes how to connect smartphones and tablets. The digital format manuals listed above can be obtained from the Yamaha Downloads web page. To do so, go to the web page using the following URL, enter “DTX-PROX” in the “Model Name” field, and then click “Search.”... -
Page 12: Features Of The Dtx-Prox
*1 For more information on the list of compatible drum pads, refer to the Pad Module Compatibility Table. *2 The DTX-PROX is a class compliant USB device. A separate cable is required for connecting to a com- puter or to a smartphone. -
Page 13: Table Of Contents
Using a USB Flash Drive ............21 Using Smart Devices ..............23 Listening to Audio Data from a Smart Device through the DTX-PROX (Bluetooth Audio Function) ....... 24 Basic Guide Structure of the Kit ..............26 Playing the Pads................. 27 Basic Operation of the DTX-PROX.......... -
Page 14: Panel Controls And Functions
Selects the function for assigning to the LED Rotary Faders. (page 34) MIXER INST TUNING MUFFL (Muffling) LED Rotary Faders FX (Effects) Changes the settings of the function selected with the Fader Select knob. Changes in val- CUSTM (Custom) ues are shown in the indicators. DTX-PROX Owner’s Manual... - Page 15 NOTE [CLICK] (click) This button can also be used as a Panic Button to stop the KIT sounds (on top screen for each [OUTPUT] (outputs from the OUTPUT [R]/[L/MONO] jacks) mode). [PHONES] (headphones) DTX-PROX Owner’s Manual...
-
Page 16: Front Panel
Doing so can cause loss of hearing. Stereo mini plug (3.5 mm) [AUX IN] (auxiliary input) jack Connect to the headphone jack on a smart phone or portable music player. DTX-PROX Owner’s Manual... -
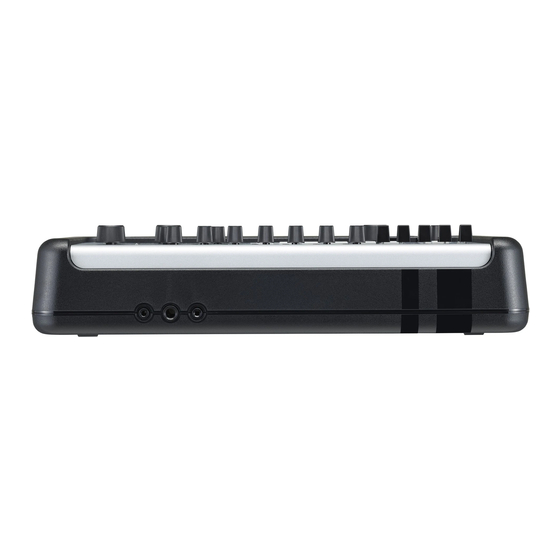
Page 17: Rear Panel
PA sys- sending and receiving MIDI To connect the pads included in tem. The audio signals from the messages with the DTX-PROX. your Drum Kit, refer to the Assem- [AUX IN] jack on the front panel and bly Manual. -
Page 18: Setup Guide
There are three different ways of installation as shown below. Attach the DTX-PROX onto the rack of your drum kit. (For more information, refer to the Assembly Manual.) Use the included module holder (page 6) to attach the standard drum hardware. (See “Integrating Electronic &... - Page 19 This may void the warranty so please take careful note. CAUTION Locate the DTX-PROX close to an AC outlet. If you notice any abnormalities during operation, turn the power off immedi- ately and unplug the AC adaptor. Make sure that the power is turned off (all...
- Page 20 (display is off), electricity is still flowing to the instrument at the minimum level. When you are not using the DTX-PROX for a long period of time, make sure that you unplug the AC adaptor from the wall AC outlet.
-
Page 21: Turning On Or Off
Initial Setup (Trigger Setup Wizard) When you turn on your DTX-PROX for the first time, the Initial Setup page will be displayed. On this page, you will be required to specify the following. When you specify the model number, the DTX-PROX will automati- cally optimize the trigger output levels for all of your pads. - Page 22 Turning Off NOTICE • The DTX-PROX automatically stores settings when the power is turned off, so do not unplug the AC adaptor until the LCD screen is turned off completely. • Any unsaved Kit, Click, Trigger settings, and Live Set data will be lost, so always save (Store) data before turning the power off.
-
Page 23: Changing The Overall Settings
So we recommend that you always turn off the DTX-PROX manually when you are finished using it. • If you expect the DTX-PROX to be inactive for a certain length of time while connected to external audio equipment or a PA, we recommend fully lowering the volume on the external equipment. - Page 24 Changing the Overall Settings Restoring DTX-PROX Settings to the Factory Defaults (Factory Reset) Use the Factory Reset function to restore the DTX-PROX’s settings to their factory defaults, even if you have accidentally overwritten them. NOTICE A factory reset overwrites any settings you have made with the corresponding factory defaults. Save any important user- defined data to a USB flash drive before carrying out a factory reset.
-
Page 25: Using A Usb Flash Drive
Although USB devices 2.0 to 3.0 can be used on the DTX-PROX, the amount of time for saving to or loading from the USB device may differ depending on the type of data or the status of the instrument. - Page 26 To Protect Your Data (Write Protection) To prevent important data from being inadvertently erased, write-protect the USB flash drive. When you are saving data to the USB flash drive, make sure you disable the write-protect first. DTX-PROX Owner’s Manual...
-
Page 27: Using Smart Devices
• Be sure to place your smart device on a stable surface to prevent it from falling over and being damaged. NOTE To eliminate the risk of interference due to noise by your smart device when used in combination with the DTX-PROX, turn on the Airplane Mode and then turn on Wi-Fi. -
Page 28: Listening To Audio Data From A Smart Device Through The Dtx-Prox (Bluetooth Audio Function)
Pairing with the Bluetooth-equipped device To connect the Bluetooth-equipped device for the first time, the Bluetooth-equipped device and the DTX-PROX must be “paired.” Once the device and the DTX-PROX are paired, it is not necessary to pair the two again (unless you’ve disabled pairing). - Page 29 Setup Guide Listening to Audio Data from a Smart Device through the DTX-PROX (Bluetooth Audio Function) Listening to Audio Data from a Smart Device through the DTX-PROX (Bluetooth Audio Function) When the pairing completed, the (Bluetooth) mark appears on top screen for each mode.
-
Page 30: Basic Guide
Each drum or percussion instrument in the drum set is called an instrument or “Inst,” and you can play the Inst sounds by striking drum pads. Example of the Instruments (Inst): Other Snare drum Kick Cymbal Cowbell Tambourine instruments DTX-PROX Owner’s Manual... -
Page 31: Playing The Pads
Playing the Pads Playing the Pads To play the Inst sounds, strike the pads connected to the DTX-PROX. You can play different sounds by striking different sections (or “Zones”) of the pad, depending on the number of zones available on the pad. - Page 32 Press the button below “XSTICK” ([F2]) in the KIT screen to switch between on (for playing the cross-stick sound) or off (for playing the open rim shot sound). Closed rim Single piezo 3-zone pads: Strike the closed rim. DTX-PROX Owner’s Manual...
- Page 33 You can press down the hi-hat pedal to create a foot-close sound without having to strike the hi-hat pad. Hi-hat splash sounds Pressing down the hi-hat pedal and then immediately releasing it produces a hi-hat splash sound. *1 The front side of the pad is indicated by the Yamaha logo. DTX-PROX Owner’s Manual...
- Page 34 Striking the bell (cup) produces a bell shot sound. Choking Grabbing the front side on the outer edge of a cymbal pad immediately after striking it will mute the sound being produced. Front side on the outer edge DTX-PROX Owner’s Manual...
- Page 35 Muting Striking the pad while holding the front side of the outer edge will produce a muted Front side on the sound. outer edge *1 The front side of the pad is indicated by the Yamaha logo. DTX-PROX Owner’s Manual...
-
Page 36: Basic Operation Of The Dtx-Prox
Basic Guide Basic Operation of the DTX-PROX Basic Operation of the DTX-PROX Selecting a Kit Set the Mode Select knob to “KIT.” The KIT screen appears. Kit number Kit name * This screen is shown when multi-piezo pads are connected. - Page 37 Basic Guide Basic Operation of the DTX-PROX Adjusting (Modifying) the Sound Effects Maximum: All lit [AMBIENCE] knob [COMP] knob [EFFECT] knob Minimum: All off Adjusts the amount Adjusts the amount of Adjusts the amount of ambience or the compression or the...
-
Page 38: Changing The Drum Set Sound (Building Your Own Drum Set)
Changing the Drum Set Sound (Building Your Own Drum Set) With the DTX-PROX, you can build your own drum set by changing the drum set sound within the Kit. By changing the settings shown below, you can customize the drum set sound. - Page 39 To adjust the volume of each pad, press the [MENU] button to change the Inst volume settings. To adjust the volume of each section of the pad (Zone), press the [MENU] button to change the Voice volume settings. For more information, refer to the Reference Manual (PDF). Press the button below “OK” (F3). DTX-PROX Owner’s Manual...
- Page 40 The pad name appears on the upper right corner of the screen. NOTE For the TOM, CRASH, and MISC pads, you can use the [PAD SELECT] button to change the pad selection. For more information, refer to the Reference Manual (PDF). DTX-PROX Owner’s Manual...
- Page 41 Press the button below “OK” (F3). Using Imported Sounds (.wav) You can import audio files (.wav) into the DTX-PROX to use as Inst sounds. For more information on importing audio files and settings, refer to the Reference Manual (PDF).
- Page 42 NOTE Hi-Hat Clutch setting is applied to all Kits. Set the fader select knob to “TUNING” or “MUFFL.” The setting screen appears. DTX-PROX Owner’s Manual...
- Page 43 For more information, refer to the Reference Manual (PDF). NOTE • The CUSTM setting is retained after switching to another Kit. • The CUSTM setting is not saved as a Kit setting. DTX-PROX Owner’s Manual...
- Page 44 Character [F3]) to select the character position, then use position (cursor) the [–] [+] controllers to select a letter. A name of up to 12 characters can be set to the Kit. Character you want to enter DTX-PROX Owner’s Manual...
- Page 45 If you do not want to overwrite, press the button below “NO” ([F3]) and return to the previous screen where you can select another Kit number. When the Kit operation is complete, the display returns to the Kit screen. DTX-PROX Owner’s Manual...
-
Page 46: Using The Click (Metronome)
The lamp next to the [CLICK] button flashes in sync with the tempo while the Click sounds. To stop the click, press the [CLICK] button again. Changing the Tempo Turn the [TEMPO] knob. Setting the Click Beat Volume Move the [CLICK] slider. DTX-PROX Owner’s Manual... -
Page 47: Creating Your Own Click (Metronome) Settings
([F1] and [F2]) to move the cursor and use [–][+] to change the volume. The tapped tempo is detected and appears on the Click tempo display. NOTE You can also set the tempo by striking a pad connected to the Trigger Input jacks. DTX-PROX Owner’s Manual... - Page 48 The Click settings you have customized can be saved in the same way as saving a kit. See “Saving a Customized Kit under a New Name” (page 40). Using Saved Click Settings While the CLICK screen is shown on the display, use the [–][+] controllers to select a user click. DTX-PROX Owner’s Manual...
-
Page 49: Changing The Trigger Settings
Changing the Trigger Settings With the Initial setup (Trigger Setup Wizard), the DTX-PROX will automatically optimize the trigger output levels for all pads. You can adjust each of settings later or create a new Trigger setup. Several sets of customized trigger setups can be saved on the DTX-PROX. -
Page 50: Recording Your Performance
Recording Your Performance Recording Your Performance Use the DTX-PROX to record your performance. When a USB flash drive is connected to the DTX-PROX, audio is recorded to the USB flash drive. You can overdub your performance onto an accompaniment song (input via the [AUX IN] jack or Bluetooth) and save your performance combined with the accompaniment song as a single audio file. - Page 51 “ ” ([F2]) to you do not want to save stop playback. the file. NOTE If you want to change the file name, press the button below “NAME” ([F1]) and enter a new name. (page 40) DTX-PROX Owner’s Manual...
- Page 52 NOTE • Some of the audio files may not play back even when the above requirements are met. • The DTX-PROX does not recognize the audio file if it is in a folder. Recording Yourself Playing Along with the Accompaniment Song Use the [–] [+] controllers to select the...
-
Page 53: Connecting A Pa System
Basic Guide Connecting a PA System Connecting a PA System When sending the DTX-PROX sounds to a mixer for live performance or other applications, connect the PA system as fol- lows: Example connection PA mixer INDIVIDUAL OUTPUT DTX-PROX [INDIVIDUAL OUTPUT] jacks (1/2 to 7/8) Output the sound of each instrument, such as snare and kick. -
Page 54: Using Live Sets
Kits in the order of a performance set list when playing live, or arrange a series of audio files in the order of difficulty level for use in your daily practice. With the DTX-PROX, you can save up to 10 Live Sets, and use them anytime during your performance. Live set 1... -
Page 55: Application Guide
Application Guide Connecting Separately Sold Add-ons and External Devices You can connect add-ons (sold separately) and external devices to the DTX-PROX to access more functions of the DTX- PROX. About the Trigger Input Jacks Trigger Input jacks are used for connecting pads. The [qSNARE] to [!4 ] jacks on the rear panel accept up to 14 pads. For more information on the types of pads you can use, see “Playing the Pads”... - Page 56 You can expand your electronic drum kit with various accessories* for an even more enjoyable drumming experience. (*: sold separately) The following describes how to connect a XP125T-X or a PCY95AT. For the information on the compatibility of other pads, refer to the Pad Module compatibility table (PDF). https://download.yamaha.com/ ...
- Page 57 Set the proper Pad Type for the con- bass drum or the snare drum and connect to the [!2 K ICK/ !3 ] jack or the [qSNARE] jack on the DTX-PROX to nected pad (TRIGGER/SETTING/Pad Type). send trigger signals to your drum trigger module whenever ...
- Page 58 Connecting Separately Sold Add-ons and External Devices Connecting a Computer You can connect the DTX-PROX to a computer and use DAW (Digital Audio Workstation) software such as the included Cubase AI to record your performance, edit, or mix audio.
-
Page 59: Reference
File not found. The selected file type was not found. Illegal file. Appears when loading a file and the DTX-PROX cannot handle the target file or does not support the audio file. Incompatible USB device. Appears when an unsupported USB device is connected to the [USB TO DEVICE] terminal. - Page 60 Appears when loading data to the Wave memory has failed. When the Wave data was not saved properly, this message appears the next time the DTX-PROX is turned ON. After this message appears, the recovery process starts automatically. Wave memory full.
-
Page 61: Troubleshooting
Possible cause Solution page No sound No sound The cable is not properly • Ensure that the DTX-PROX is properly page 12 connected connected to headphones or an external page 13 Out of balance audio system, such as an amplifier and/ page 16 or speakers. - Page 62 When it is improper, the cymbal pad Assembly mance may not be fully functional. The DTX-PROX pro- Shaft on the Hi-hat pad is Manual • The shaft on the hi-hat stand may come duces sound but the...
- Page 63 Data cannot be saved on USB 1.1 compatible flash drives cannot Reference a USB flash drive be used on the DTX-PROX. Manual (PDF) • Ensure that the USB flash drive in ques- tion has been formatted using the DTX- PROX.
-
Page 64: Specifications
(*2) May not be included depending on your area. Check with your Yamaha dealer. The contents of this manual apply to the latest specifications as of the publishing date. To obtain the latest manual, access the Yamaha website then download the manual file. -
Page 65: Index
DAW (Digital Audio Workstation) Muffling..........34 software ........54 Multi Piezo ........27 DC IN jack ........13 Y-cable ..........51 Multi-piezo pads ......51 Display ..........10 Muting ........31, 34 Drum set ........26, 34 Zones ..........27 DTX-PROX Owner’s Manual... - Page 66 Owner’s Manual for this product; any shipment of the product (claims must be presented to the carrier); repair or attempted repair by anyone other than YAMAHA or an authorized YAMAHA Service Center;...
- Page 67 DTX-PROX Owner’s Manual...
- Page 68 Niederlassung und bei Yamaha Vertragshändlern in den jeweiligen Bestimmungsländern erhältlich. Pour plus de détails sur les produits, veuillez-vous adresser à Yamaha ou au distributeur le plus proche de vous figurant dans la liste suivante. Para detalles sobre productos, contacte su tienda Yamaha más cercana o el distribuidor autorizado que se lista debajo.