Table of Contents
Quick Links
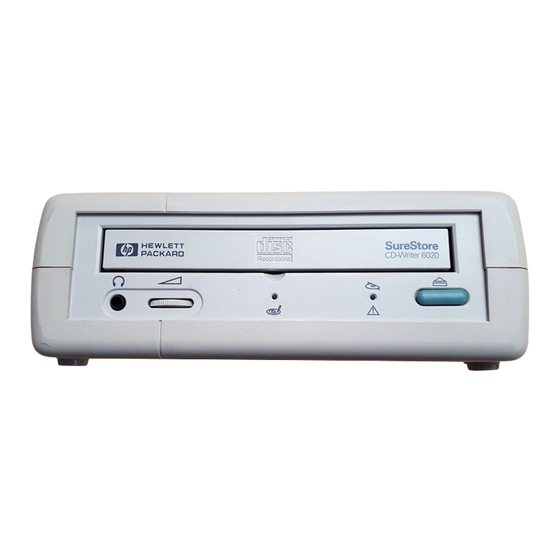
Connecting the
CD-Writer 6020
R
U.S.: Hewlett-Packard Company, 800 S. Taft Ave., Loveland, CO 80537
Europe: Hewlett-Packard Nederland B.V., P.O. Box 58144, 1040 HC Amsterdam, The Netherlands
F1166 Rev. A
Copyright 1996. Hewlett-Packard Company. All rights reserved.
Hewlett-Packard is a registered trademark of the Hewlett-Packard Company. Easy-CD is a registered trademark of Incat
Systems, an Adaptec Company. Microsoft and Windows are U.S. registered trademarks of Microsoft Corporation. Pentium
is a U.S. registered trademark of Intel Corp. Names of products mentioned herein are used for identification purposes only
and may be trademarks and/or registered trademarks of their respective company.
Printed in USA.
Table of Contents

Related Manuals for HP CD-Writer 6020


Summary of Contents for HP CD-Writer 6020
- Page 1 Connecting the CD-Writer 6020 U.S.: Hewlett-Packard Company, 800 S. Taft Ave., Loveland, CO 80537 Europe: Hewlett-Packard Nederland B.V., P.O. Box 58144, 1040 HC Amsterdam, The Netherlands F1166 Rev. A Copyright 1996. Hewlett-Packard Company. All rights reserved. Hewlett-Packard is a registered trademark of the Hewlett-Packard Company. Easy-CD is a registered trademark of Incat Systems, an Adaptec Company.
- Page 2 Laser Safety This unit employs a laser. Do not remove the cover or attempt to service this device when connected due to the possibility of eye damage. Laser-Sicherheit In das Gerät ist ein Laser eingebaut. Nehmen Sie die Abdeckung nicht ab und versuchen Sie nicht, das Gerät zu reparieren, solange es angeschlossen ist.
- Page 3 Laser Type: Semiconductor laser GaAlAs Wave length: 775~795 nm (at 25°C) Output power: 2.5 mW (read), 35 mW (write) Beam divergence: 60 degrees Notice Europe: This drive shall be installed only with an EN60950 (IEC950) approved Power supply. USA/Canada: This drive is for use only with IBM compatible UL listed personal computers.
- Page 4 Reorient or relocate the receiving antenna. Increase the separation between the equipment and receiver. Connect the equipment into an outlet on a circuit different from that to which the receiver is connected. Consult the dealer or an experienced radio/TV technician for help. Information for user: CAUTION: Changes or modifications to this equipment not expressly approved by Hewlett-Packard could result in violation of Part 15 of the FCC rules.
- Page 5 Any claim under this warranty must include a dated proof of purchase or invoice. If HP is unable, within a reasonable time, to repair or replace any product then purchaser shall be entitled to a refund of the purchase price.
- Page 6 THE ENTIRE UNUSED PRODUCT FOR A FULL REFUND. HP SOFTWARE LICENSE TERMS License Grant. HP grants you a license to Use multiple copies of the Software but only for Use in conjuntion with the HP hardware product that accompanied the Software.
- Page 7 "Restricted computer software" as defined in FAR 52.227-19 (Jun 1987)(or any equivalent agency regulation or contract clause), whichever is applicable. You have only those rights provided for such Software and any accompanying documentation by the applicable FAR or DFARS clause or the HP standard software agreement for the product involved.
- Page 8 SCSI adapter cable. The parallel package includes a parallel adapter cable and driver software for this cable. You have purchased the SCSI package. You can easily switch to parallel mode by purchasing a parallel adapter cable and drivers from HP. viii...
-
Page 9: Table Of Contents
Table of Contents Chapter1: Before You Start What’s in Your Package ........1 Minimum System Configuration. - Page 10 Chapter 6: Problem Solving Things to Try First ......... 35 Common Symptoms and Solutions.
-
Page 11: Chapter1: Before You Start
Chapter 1: Before You Start Before you start connecting your CD-Writer, be sure that: 1. You received the entire CD-Writer package. 2. Your system meets certain requirements. 3. Your computer has a SCSI adapter board. What’s in Your Package Make sure you have the items shown below. (Keep your packaging in case you need to return or transport the CD-Writer.) User’s guides Installation guide... -
Page 12: Minimum System Configuration
Minimum System Configuration Minimum System Configuration For the most reliable performance, your computer should meet these requirements: IBM or compatible PC 486/DX33 processor ® ® ® ® Windows NT , Microsoft Windows 95 , Windows 3.1 ® Windows 3.11 MS DOS 6.0 (or later) and MSCDEX 2.23, only if running Windows 3.1 or Windows 3.11 Hard disk with at least 528 MB of storage capacity (that is, with a transfer rate of at least 800 kB/sec and disk access time... -
Page 13: The Scsi Adapter Board
The SCSI Adapter Board Your Hard Disk Drive. The speed at which your hard disk accesses and transfers data (its access time and transfer rate) affects performance. Newer hard disks, those with a storage capacity greater than 528 MB, include Enhanced IDE. These hard disks are fast enough to handle the CD-Writer’s 2x write speed. - Page 14 The SCSI Adapter Board During the write process, a constant stream of data must reach the CD-Writer. If other devices are running on the same board at the same time, this stream could be interrupted. An interruption could cause a buffer underrun, making the current session on the CD unreadable.
-
Page 15: Chapter 2: Connecting The Cd-Writer
Chapter 2: Connecting the CD-Writer This section describes how to connect the CD-Writer to your computer. It shows you: 1. The CD-Writer’s back panel 2. How to prepare for operating in SCSI mode 3. How to connect the CD-Writer to your computer 4. -
Page 16: Cd-Writer Back Panel
CD-Writer Back Panel CD-Writer Back Panel The drawing below illustrates the back panel of the CD-Writer. SCSI ID Power connector Termination switch Audio connector High-density SCSI connectors Preparing to Operate in SCSI Mode The CD-Writer is connected to a SCSI-2 adapter board inside your computer. - Page 17 Preparing to Operate in SCSI Mode To prepare your SCSI adapter board: Make sure that your SCSI adapter board is terminated or unterminated as necessary according to your system’s configuration. (See your SCSI adapter board’s installation guide for information about changing the termination settings.) Make sure that your SCSI adapter board is properly installed according to the directions in its installation guide.
-
Page 18: Connecting The Cd-Writer
Connecting the CD-Writer On the back of the CD-Writer, make sure the termination switch is set correctly for your configuration. On : CD-Writer is at the end of the SCSI chain. CD-Writer is the only device on the SCSI adapter board. No other SCSI device is connected to the back of the CD-Writer. - Page 19 Connecting the CD-Writer High-density SCSI connectors High-density SCSI connector Press clips here Connect the other high-density SCSI connector to the SCSI connector on your computer. (You will need an adapter if your computer has a low-density SCSI connector.). SCSI port High-density SCSI connector (Press clips)
- Page 20 Connecting the CD-Writer The audio cable is used only for listening to music CDs through your computer’s sound system. If you do not have a sound board, you can hear music CDs through speakers or earphones attached to the front of the CD-Writer. NOTE: When the CD-Writer records music or data, it uses the data cable, not the audio cable.
- Page 21 Connecting the CD-Writer Connect the power supply to the power connector on the back of the CD-Writer, with the arrow on the cable end facing up. Power connector To power supply (arrow up) Power connector Connect one end of the power cord into the power supply and the other end to a wall outlet or power strip.
-
Page 22: Identifying The Cd-Writer Drive
Identifying the CD-Writer Drive If you have already installed driver software for your SCSI adapter board, make sure your computer recognizes the CD-Writer driver. (See below.) NOTE: If you have not installed the SCSI driver software, do so now. You will not be able to use the CD-Writer until this software is installed. -
Page 23: Using The Cd-Writer On Other Computers
Using the CD-Writer on Other Computers Are the SCSI drivers installed? See the manual that came with your SCSI adapter board for more information. Do other devices on the SCSI chain have the same SCSI ID number as the CD-Writer? The default SCSI ID number for the CD-Writer is 4. -
Page 24: Moving The Cd-Writer To Other Computers
Using the CD-Writer on Other Computers Moving the CD-Writer to other computers Once the initial installation has been completed on each computer to which you will connect the CD-Writer, follow these steps to move the CD-Writer from one computer to the next. To disconnect the CD-Writer: Unplug the CD-Writer’s power supply from the outlet or power strip. - Page 25 Using the CD-Writer on Other Computers To reconnect the CD-Writer: Connect the data cable to the back of the next computer. Data cable Plug the CD-Writer’s power supply into an outlet or power strip. (Power is supplied to the CD-Writer as soon as you plug it in.) Power supply (The power plug and outlet may look different in your county.) If you are running Windows 3.x, restart your computer.
-
Page 26: Switching From Scsi To Parallel Mode
To operate in parallel mode, your computer will need: a parallel adapter data cable and drivers, which can be ordered from HP (order the Parallel Upgrade Kit, part number C4348A) 486/DX66 processor or better... - Page 27 Switching from SCSI to Parallel Mode Parallel adapter cable Parallel connector High-density SCSI connector Printer pass-through port After confirming that the CD-Writer is working properly, connect the printer (if you have one) to the printer pass-through port on the parallel adapter cable.
- Page 28 Switching from SCSI to Parallel Mode...
-
Page 29: Chapter 3: Installing Software In Windows 3
Chapter 3: Installing Software in Windows 3.x When you have successfully installed the driver software and connected the CD-Writer, you are ready to install the application software. The CD that came with your package includes these applications for Windows 3.x: Easy-CD Easy-CD Audio Alchemy... - Page 30 Check English, if it is not already selected; then click on OK. The HP CD-Writer Setup window appears. Click on Continue. The HP CD-Writer Setup window asks you to choose between a complete or custom installation. Click on the Complete Installation icon to install all the programs, including the 1-Minute Guide.
- Page 31 Installing Software in Windows 3.x Click on the Custom Installation icon to select specific programs or install the programs to a directory other than C:\HPCDR. If you chose Custom Installation, perform these three steps: Type the name of the directory into which you want to install the programs.
- Page 32 When all files are installed, the following message is displayed. Click on OK. A window showing the HP SureStore program group appears. Depending on your configuration, you may be prompted to restart your computer. Remove the Software Installation Disc and store it in a safe place with the Utility Disk.
-
Page 33: Uninstalling The Software Programs
NOTE: If you want to reinstall the CD-Writer software, be sure to remove the original software first. Removing software From the File Manager, display the HP SureStore program group. Highlight the icon of the application you want to remove. Press the delete key or select Delete from the File menu. - Page 34 Installing Software in Windows 3.x...
-
Page 35: Chapter 4: Installing Software In Windows 95
Chapter 4: Installing Software in Windows 95 When you have successfully connected the CD-Writer and installed the driver software for your SCSI adapter board, you are ready to install the application software. The CD that came with your package includes these applications for Windows 95: Easy-CD Pro 95 Alchemy Personal QuickTour multimedia tutorial... - Page 36 Click on OK. The HPCD-Writer Setup welcome window appears. Click on Continue. The HP CD-Writer Setup window asks you to choose between a complete or custom installation. Click on the Complete Installation icon to install all the programs, including the QuickTour tutorial. The system will install the programs as soon as you click on this icon.
- Page 37 Installing Software in Windows 95 Click on the Custom Installation icon to select specific programs or install the programs to a directory other than C:\HPCDR. If you chose Custom Installation, perform these three steps: Type the name of the directory into which you want to install the programs.
- Page 38 Utility Disk. NOTE: You will need the Utility Disk only if you run into certain hardware problems. Customer Support will instruct you to use it. You will see the HP SureStore program group when you select Programs from the Start menu.
-
Page 39: Uninstalling The Software Programs
Installing Software in Windows 95 Uninstalling the Software Programs If you need to remove the CD-Writer application software, use the Add/Remove Programs feature in the Control Panel. You will have to remove all the CD-Writer applications at once, rather than a particular program. After removing the software, complete a custom installation to reinstall the programs you want. - Page 40 Installing Software in Windows 95...
-
Page 41: Chapter 5: Using Cds
Chapter 5: Using CDs This section describes the use of the recordable CD. It explains how to: 1. Insert a CD 2. Remove a CD 3. Purchase new CDs 4. Maintain your CD-Writer NOTE: Make sure you use a separate CD for each program included with the CD-Writer. -
Page 42: Removing A Cd
Press the eject button again or push gently on the front of the tray to shut the front panel. Choosing CDs for Your CD-Writer HP SureStore CD-R media is available from HP or your local vendor. Ask for this HP Recordable CD media: 12 cm (650 MB, 74-minute) 5 pack (C4423B) -
Page 43: Maintenance
Maintenance Maintenance The CD-Writer requires no maintenance or cleaning. If you simply keep your discs clean, you will prevent most problems. CAUTION: Do NOT use the CD-ROM cleaning discs that rely on a small brush to sweep dirt off the laser. Do NOT use high-pressure air to clean the inside of the drive. - Page 44 Where to Go Next...
-
Page 45: Chapter 6: Problem Solving
3. Contacting Customer Support 4. How to return the CD-Writer 5. Technical specifications Review this section first when you run into trouble. Call HP Customer Support if you need further assistance. When you call Support, make sure you have information about your computer ready. -
Page 46: Common Symptoms And Solutions
Common Symptoms and Solutions Make sure that you are using the right type of CD. See Chapter 5, “Using CDs.” If you are operating in SCSI mode, make sure that your SCSI adapter board is firmly seated. If you just installed this board, make sure that all of your expansion boards are firmly seated. - Page 47 Common Symptoms and Solutions System does not recognize the CD-Writer The CD-Writer is not connected, or other devices have the same IRQ, DMA, SCSI ID, or I/O settings as the CD-Writer (hardware conflicts). Try the following: Make sure the CD-Writer is connected. In Windows 95, display the Device Manager and double-click on SCSI Controllers.
- Page 48 Common Symptoms and Solutions Refresh the screen. In Windows 95, select the CD drive you are using in Windows Explorer or My Computer and press F5. In Windows 3.x, select the CD drive in File Manager and press Error message when I double-click on the CD-Writer icon The CD-Writer needs a moment to initialize, there is no CD in the CD-Writer, the CD is in the tray upside-down or a little off-center,...
- Page 49 Common Symptoms and Solutions Check the sound coming from the CD-Writer by plugging earphones or speakers to the front of the CD-Writer. If the sound quality is good, the problem is probably with the sound board or speakers. See the documentation that came with your sound board and speakers for help.
- Page 50 Common Symptoms and Solutions In parallel mode, speed test failures and buffer underruns could also be caused by a slow parallel port. This would be likely if you have an older computer (purchased before January 1995). Try the following: Install new ECP or EPP parallel port card. Write data to the CD at 1x speed.
- Page 51 From the Device Manager, double-click on CDROM, and then double-click on the HP drive. Click on the Settings tab. If Auto insert notification is checked, click on the check to turn it off (so there is no check).
- Page 52 Settings tab. Under Reserved drive letters, select the drive letter after the existing letter (for both start and end drive letter) and click on OK. Then double-click on the HP drive, and then click on the Settings tab. Under Reserved drive letters, select the drive letter before the current one and click on OK.
-
Page 53: Before You Call Customer Support
Before You Call Customer Support Before You Call Customer Support If your own troubleshooting efforts fail, contact Customer Support at one of the numbers in the front of this guide. Before you contact them, have the information below ready. For help finding this information, see page 44. -
Page 54: Where To Find This Information
ASPI driver loads. Example: 1.20 In Windows 95, the drive firmware version appears in the CD- ROM settings. From the Device Manager, double-click on CDROM. Double-click on the HP drive, and then click on the Settings tab. Example: Firmware revision 1.20 Operating system The operating system is displayed as your system boots. - Page 55 Before You Call Customer Support Amount of RAM installed If you are running Windows 3.x, use DOS to find memory information. From the DOS prompt, type msd. This displays the Microsoft Diagnostic window. In the memory section, you will see a figure for XMS (extended memory). This is the amount of memory available to Windows.
- Page 56 SCSI ID 7. Other SCSI devices SCSI devices include items that are connected to a SCSI adapter board, like CD-ROM drive, extra hard drive, tape drive, and so on. Example: NEC CD-ROM, Maxtor 1GB Hard Drive, HP JetStore Tape Drive.
-
Page 57: Returning Your Drive
Returning Your Drive Returning Your Drive In Europe. If your Hewlett-Packard product requires repair or replacement, call Customer Support at the phone number listed on the card insert at the front of this guide to receive instructions. In the USA. If your Hewlett-Packard product requires repair or replacement, follow these instructions: Call the number listed on the Customer Support Services card at the front of this guide. -
Page 58: Technical Specifications
Technical Specifications Technical Specifications Disc data capacity 1 session: 658 MB 5 sessions: 603 MB 10 sessions: 534 MB 30 sessions: 258 MB 48 sessions: 9 MB (maximum) 1 MB is defined as 10 bytes Performance Buffer size: 1 MB Average access time (1/3 stroke): <... - Page 59 40° to 70° C Humidity (no condensation allowed) operating: 15% to 95% RH nonoperating: 5% to 95% RH Shock and vibration HP Corporate Environmental Test Class B1 Power requirements Typical dissipation: 7 W Maximum dissipation: 10 W Product Certifications Safety: UL, cUL, TÜV...
- Page 60 Technical Specifications...
-
Page 61: Index
Index specifications static on audio unable to locate access time unable to read Acer brand computer using with programs acoustic emission CD-Writer Adaptec back panel application software – connecting See also software data transfer rate Windows 3.x dimensions Windows 95 disc data capacity audio cable power switch... - Page 62 I-ii disc image, building DMA channel DMA channel setting maintenance DMA speed memory drive letters memory, low driver software model, identifying parallel viii MSCDEX version SCSI adapter board multisession capabilities eject button operating system environmental specifications compatible error message identifying error rate package contents firmware version...
- Page 63 I-iii specifications – speed test failure system requirements RAM. See memory recording formats refreshing the screen returning the CD-Writer temperature termination transfer rate tray, opening and closing – SCSI adapter board viii – troubleshooting – driver software ID setting models termination SCSI cable viii...
- Page 64 I-iv...
- Page 65 .........
- Page 66 Telephone USA (M-F, 7am-5pm Mountain time) Technical support......970-635-1575 Literature and dealer referral ....970-635-1000 Europe (M-F, 8:30am-6pm Netherlands time) English language support.