Chapters
Table of Contents

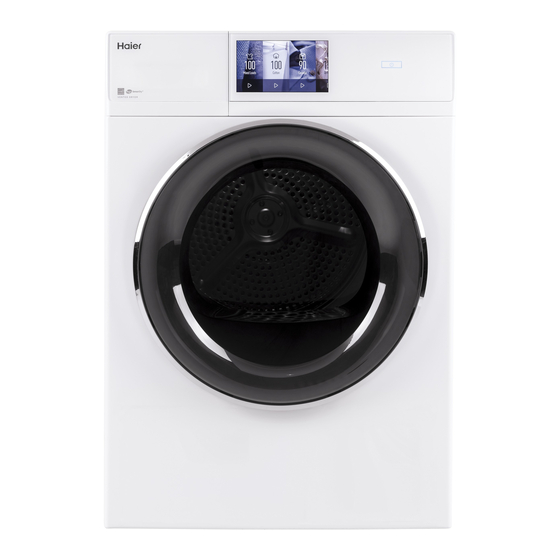
Related Manuals for Haier QFD15 Series


Summary of Contents for Haier QFD15 Series
- Page 1 Owner's Manual & Installation Instructions Manuel d'utilisation et Instruction d'installation Manual del propietario y Instrucciones de instalación QFD15 Series/Séries/Serie Dryers Sécheuses Secadoras 49-3000195 06-19 GEA...
-
Page 2: Table Of Contents
CONSUMER SUPPORT ................... 32 RECORD KEEPING ____________________________________________________ Thank you for purchasing this Haier Appliances product. This Model number Owner's Manual will help you get the best performance from your new dryer. -
Page 3: Safety Information
SAFETY INFORMATION IMPORTANT SAFETY INFORMATION READ ALL INSTRUCTIONS BEFORE USING THE APPLIANCE To reduce the risk of fire, explosion, electric shock, or injury to persons when using your appliance, WARNING follow basic precautions, including the following: Read all instructions before using the appliance. DO NOT dry articles that have been previously cleaned in, washed in, soaked in, or spotted with gasoline, dry-cleaning solvents, or other flammable or explosive substances, as they give off vapors that could ignite or explode. -
Page 4: Using The Dryer
USING THE DRYER To reduce the risk of fire, electric shock, or injury to persons, read the IMPORTANT SAFETY WARNING INFORMATION before operating this appliance. Throughout this manual, features and appearance may vary from your model. Step 1* Step 2* Step 3* Step 4* •... - Page 5 USING THE DRYER Display and Status Lights The display shows the approximate time remaining until the end of the cycle. In addition, this display will show the dryer status: Status Damp Cool Controls lock feature. Clean Filter Time to clean the filter. See the Care and Cleaning section. Damp Alert When Damp Alert option is selected and clothes have dried to a damp dryness level, indicator will appear and dryer will beep.
- Page 6 USING THE DRYER Temp (Temperature) You can change the temperature of your dry cycle. High For regular to heavy cottons. Medium For synthetics, blends and items labeled Permanent Press. For delicates, synthetics and items labeled Tumble Dry Low. No Heat This option may only be used with Air Fluff and Timed Dry, in which items are tumbled without heat.
- Page 7 USING THE DRYER My Cycle My Cycle Set up your favorite combination of settings for each cycle and save them here for one touch recall. These custom settings can be set while a cycle is in progress. NOTE: you can store one My Cycle combination of settings for each cycle.
-
Page 8: Loading
LOADING Always follow fabric manufacturer’s care label when laundering. Fabric Care Labels Below are fabric care label “symbols” that affect the clothing you will be laundering. Dry Labels Tumble Do not dry Normal Permanent Press/ Gentle/ Do not tumble dry (used with wrinkle resistant delicate... -
Page 9: Care And Cleaning
Remove the cleaner residue and then dry with a clean cloth. The stainless steel used to make the dryer drum provides the highest reliability available in a Haier Appliances dryer. If the dryer drum should be scratched or dented during normal use, the drum will not rust or corrode. These surface blemishes will not affect the function or durability of the drum. - Page 10 CARE AND CLEANING Drum Lamp NOTE: The drum lamp is not consumer replaceable on models where there is a flat cover over an LED bulb. If this light should ever stop working, contact us for service. For models that have a domed cover over the bulb secured by a screw: Before replacing the light bulb, be sure to unplug the dryer power cord or disconnect the dryer at the household distribution panel by removing the fuse or switching off the circuit breaker.
-
Page 11: Installation Instructions
DRYER INSTALLATION INSTRUCTIONS If you have questions, visit our website at haierappliances.com or in Canada visit haiercanada.ca. BEFORE YOU BEGIN WARNING Read these instructions completely and carefully. IMPORTANT - Risk of Fire • – Save these instructions for local electrical inspector’s use. •... - Page 12 With leveling legs fully extended: 33-5/8 (85.4 cm) Stacked: 66-1/2” (168.9 cm) ELECTRICAL CONNECTION POWER CORDS DIMENSIONS Haier Appliances strongly recommends the use of factory 20-1/2” specified parts. Select the power cord to fit your installation (52.1 cm) requirements. Part Number...
- Page 13 INSTALLATION INSTRUCTIONS REQUIREMENTS FOR ALCOVE OR MINIMUM CLEARANCE OTHER THAN CLOSET INSTALLATION ALCOVE OR CLOSET INSTALLATION WARNING - Explosion Hazard Minimum clearance to combustible surfaces and for air opening are: 0” both sides, 1” rear and 1” top. Keep flammable materials and vapors, such as gasoline, away from dryer.
- Page 14 INSTALLATION INSTRUCTIONS UNDERCOUNTER INSTALLATION BATHROOM OR BEDROOM INSTALLATION If an undercounter installation is desired: • No special dryer installation kit is required. The installation must conform with local codes or, in the absence of local codes, with the NATIONAL • If the dryer is installed alone, a minimum of 60 ELECTRICAL CODE, ANSI/NFPA NO.
- Page 15 INSTALLATION INSTRUCTIONS CONNECTING AN ELECTRIC DRYER TOOLS YOU WILL NEED Before making the electrical connection, turn off the circuit breaker(s) or remove the dryer’s circuit fuse(s) at Slip-joint pliers Phillips the electrical box. Be sure the dryer cord is unplugged screwdriver from the wall.
- Page 16 INSTALLATION INSTRUCTIONS ELECTRICAL CONNECTION ELECTRICAL CONNECTION INFORMATION FOR ELECTRIC INFORMATION FOR ELECTRIC DRYERS DRYERS For direct wire connections: For electrical connections using a power cord: WARNING - Fire Hazard WARNING - Fire Hazard Use 10 gauge copper wire. Use a new UL-listed 240V 30 amp dryer power supply cord Use a UL-listed strain relief.
- Page 17 INSTALLATION INSTRUCTIONS CONNECTION If required, by local code, install external ground (not provided) to grounded metal, cold water pipe, or other established ground determined by a qualified electrician. NOTE: Since January 1, 1996, the National Electrical Black or Red Wire Code requires that new constructions use a 4-wire connection to an electric dryer.
- Page 18 • If rigid metal cannot be used, then UL-listed flexible duct, or within the dryer. metal clothes dryer transition duct (Haier Appliances DO NOT use flexible metal or metal foil ducting part – PM08X10085) can be used.
- Page 19 INSTALLATION INSTRUCTIONS EXHAUSTING THE DRYER (cont.) • DO use elbows when • DO cut duct as short turns are necessary. as possible and install straight into wall. Elbows • DO NOT bend • DO NOT use • DO NOT • DO NOT or collapse excessive crush duct...
- Page 20 INSTALLATION INSTRUCTIONS EXHAUSTING THE DRYER (cont.) EXHAUST SYSTEM CHECKLIST STANDARD REAR EXHAUST HOOD OR WALL CAP We recommend that you install your dryer before installing your washer. This will permit direct access • Terminate in a manner to prevent back drafts or entry of for easier exhaust connection.
- Page 21 INSTALLATION INSTRUCTIONS EXHAUSTING THE DRYER (cont.) SIDE OR BOTTOM VENTING SIDE OR BOTTOM VENTING (cont.) ADDING A NEW DUCT WARNING - Fire Hazard Portion “A” Fixing hole Disconnect dryer from electrical supply. Wear gloves and arm guards. Right Close the back opening with cover plate (Kit Right or left WE49X22606).
- Page 22 INSTALLATION INSTRUCTIONS EXHAUSTING THE DRYER (cont.) SIDE OR BOTTOM VENTING (cont.) SIDE OR BOTTOM VENTING (cont.) ADDING ELBOW AND DUCT FOR EXHAUST ADDING COVER PLATE TO REAR OF TO LEFT OR RIGHT SIDE OF CABINET (cont.) CABINET • Apply duct tape as shown DUCT on the joint between the TAPE...
- Page 23 INSTALLATION INSTRUCTIONS FINAL SETUP LEVEL THE DRYER DRYER START-UP Press and hold the power button. Stand the dryer upright near the final location and adjust the four leveling legs at the corners to ensure that the dryer is level from side to side and front to rear. NOTE: If the dryer has been exposed to temperatures below freezing for an extended period of time, allow it to warm up before pressing Power.
- Page 24 • Proper installation is the responsibility of the installer. • The rear of the dryer should face a wall. • Consideration must be given to provide adequate HAIER APPLIANCES STACK KIT clearance for installation and service. • Closet doors must be louvered or otherwise Visit our website at haierappliances.com/parts or in...
- Page 25 INSTALLATION INSTRUCTIONS INSTALLING THE STACK BRACKET KIT INSTALL BRACKET TO WASHER INSTALL DRYER AND BRACKET ON DRYER (CONT.) A. Remove washer top cap screw from the rear left. Align left bracket holes with top cap screw hole on C. Tighten the dryer bracket screws; then tighten all rear left of the unit and replace screw.
-
Page 26: Reversing The Door Swing (Optional)
INSTALLATION INSTRUCTIONS REVERSING THE DOOR SWING (Optional) IMPORTANT NOTES • Before you start, unplug the dryer from its electrical • Once you begin, do not move the cabinet until door- outlet. swing reversal is completed. • Handle parts carefully to avoid scratching paint. •... - Page 27 NOTES 49-3000195...
-
Page 28: Troubleshooting Tips
TROUBLESHOOTING TIPS Problem Possible Cause What To Do Dryer shakes or Some shaking/noise is normal. Move dryer to an even floor space, or adjust leveling legs as necessary makes noise Dryer may be sitting unevenly. until even. Clothes take too Improper or obstructed Check the Installation Instructions to make sure the dryer venting is long to dry... - Page 29 TROUBLESHOOTING TIPS Problem Possible Causes What To Do Time Remaining The estimated time may This is normal. jumped to a change when a smaller load lower number than usual is drying Cannot make The dryness Level, Temp or This is normal. a selection and option that you are trying to the dryer beeps...
- Page 30 No fabric softener was used Try a fabric softener. Bounce Fabric Conditioner Dryer Sheets have been approved for ® use in all Haier Appliances dryers when used in accordance with the manufacturer’s instructions. Overdrying Try a fabric softener. Adjust setting to or Damp.
-
Page 31: Limited Warranty
This limited warranty is extended to the original purchaser and any succeeding owner for products purchased for home use within the USA. If the product is located in an area where service by a Haier Appliances Authorized Servicer is not available, you may be responsible for a trip charge or you may be required to bring the product to an Authorized Haier Appliances Service location for service. -
Page 32: Consumer Support
Haier Appliances Website Have a question or need assistance with your appliance? Try the Haier Appliances Website 24 hours a day, any day of the year! You can also shop for more great Haier Appliances products and take advantage of all our on-line support services designed for your convenience. - Page 33 Manuel d'utilisation et Instruction d'installation QFD15 Séries Sécheuses 49-3000195 06-19 GEA...
- Page 34 SERVICE À LA CLIENTÈLE ..................34 DOCUMENTS À CONSERVER ____________________________________________________ Merci d’avoir acheté ce produit Haier Appliances. Ce manuel N° de modèle d’utilisation vous aidera à obtenir la meilleure performance possible de votre nouveau sécheuse.
-
Page 35: Consignes De Sécurité
CONSIGNES DE SÉCURITÉ CONSIGNES DE SÉCURITÉ IMPORTANTES LIRE TOUTES LES CONSIGNES AVANT D’UTILISER L’APPAREIL Pour réduire le risque d’incendie, d’explosion, de choc électrique ou de blessure aux personnes AVERTISSEMENT utilisant cet appareil, observez des précautions élémentaires dont les suivantes : Lisez toutes les instructions avant d’utiliser l’appareil. -
Page 36: Utilisation De La Sécheuse
UTILISATION DE LA SÉCHEUSE Pour réduire le risque d’incendie, de choc électrique ou de blessure, lisez les CONSIGNES AVERTISSEMENT DE SÉCURITÉ IMPORTANTES avant de faire fonctionner cet appareil. Les caractéristiques et l'apparence de la cuisinière montrée dans ce manuel peuvent varier selon le modèle. Étape 1* Étape 2* Étape 3*... - Page 37 UTILISATION DE LA SÉCHEUSE Affichage et voyants d’état L’écran affiche le temps approximatif restant avant la fin du programme. De plus, cet écran affiche l’état de la sécheuse : Etat Humide Refroidissement Fonction de verrouillage des commandes. Clean Filter (Nettoyer le filtre) Il est nécessaire de nettoyer le filtre.
- Page 38 UTILISATION DE LA SÉCHEUSE Temp (Temperature) Vous pouvez modifier la température de votre cycle de séchage. Haute Pour les cotons normaux à lourds. Moyenne Pour les synthétiques, les mélanges et les articles étiquetés sans repassage. Basse Pour les tissus délicats, synthétiques et les articles étiquetés Tumble Dry Low (séchage par culbutage à...
- Page 39 UTILISATION DE LA SÉCHEUSE Favori Favori Choisissez votre combinaison de réglages favoris pour chaque cycle et sauvegardez-les ici pour rappel d’une seule touche. On peut sélectionner ces réglages personnalisés pendant que le cycle est en cours. REMARQUE : Vous pouvez mémoriser une combinaison de réglages Mon cycle pour chaque cycle. Pour mémoriser une combinaison de réglages Mon cycle : 1.
-
Page 40: Chargement
CHARGEMENT Respectez toujours l’étiquette d’entretien du fabricant lors de la lessive. Étiquettes d’entretien de tissu Ci-dessous figurent les « symboles » des étiquettes d’entretien de tissu qui concernent le linge à sécher. Séchage etiquettes Séchage culbutage Ne pas sécher Séchage Normal Tissus à... -
Page 41: Entretien Et Nettoyage
L’acier inoxydable utilisé pour la fabrication du tambour de la sécheuse vous offre la meilleure fiabilité possible dans une sécheuse Haier Appliances. Si le tambour de la sécheuse venait à être marqué ou rayé en cours d’usage normal, il ne rouillerait pas. - Page 42 ENTRETIEN ET NETTOYAGE Éclairage du tambour REMARQUE : La lampe du tambour ne peut pas être remplacée par le consommateur sur les modèles où il y a un couvercle en forme de plat sur une ampoule LED. Si cette lampe venait à cesser de fonctionner, communiquez avec une entreprise de réparation.
- Page 43 SÉCHEUSE INSTRUCTIONS D’INSTALLATION Visitez notre site web à fr.haiercanada.ca AVANT DE COMMENCER AVERTISSEMENT Lisez attentivement ces instructions dans leur intégralité. - Risque d’incendie IMPORTANT • – Gardez ces instructions • L’installation de la sécheuse doit être effectuée par pour l’usage de l’ inspecteur électrique local. un installateur qualifié.
- Page 44 Avec pieds de nivellement complètement sortis : 33-5/8 (85.4 cm) Superposé : 66-1/2” (168.9 cm) DIMENSIONS DE LA CONNEXION CORDONS D’ALIMENTATION ELECTRIQUE Haier Appliances recommande vivement l’utilisation de 20-1/2” (52,1 cm) pièces spécifiées par le fabricant. Choisissez un cordon d’alimentation qui correspond aux exigences de votre installation.
- Page 45 INSTRUCTIONS D’INSTALLATION EXIGENCES RELATIVES À UNE DÉGAGEMENTS MINIMUMS AUTRES INSTALLATION ENCASTRÉE QUE POUR UNE INSTALLATION ENCASTRÉE AVERTISSEMENT - Risque d’explosion Les dégagements minimums par rapport aux surfaces inflammables et pour l’orifice d’aération sont les Gardez les matières et les vapeurs inflammables telles suivants : 0 cm (0 po) des deux côtés, 2,54 cm (1 po) à...
- Page 46 INSTRUCTIONS D’INSTALLATION INSTALLATION DANS UNE SALLE DE INSTALLATION SOUS UN COMPTOIR BAINS OU DANS UNE CHAMBRE Pour une installation sous un comptoir : • Aucun kit d’installation particulier n’est nécessaire. L’installation doit être conforme aux codes locaux ou, en l’absence de codes locaux, à la dernière édition du •...
- Page 47 INSTRUCTIONS D’INSTALLATION RACCORDEMENT D’UNE SÉCHEUSE ÉLECTRIQUE OUTILS NÉCESSAIRES Avant d’effectuer le branchement électrique, déclenchez le disjoncteur ou enlevez le fusible de la sécheuse au Pince à joint Tournevis panneau de distribution électrique. Assurez-vous que le coulissant cruciforme cordon d’alimentation de la sécheuse est débranché de la prise murale.
- Page 48 INSTRUCTIONS D’INSTALLATION RENSEIGNEMENTS SUR LES RENSEIGNEMENTS SUR LES RACCORDS ÉLECTRIQUES POUR RACCORDS ÉLECTRIQUES POUR SÉCHEUSES ÉLECTRIQUES SÉCHEUSES ÉLECTRIQUES Pour les branchements électriques Pour les connexions de fil directes : utilisant un cordon d’alimentation : AVERTISSEMENT - Risque d’incendie AVERTISSEMENT - Risque d’incendie Utilisez un fil de cuivre de calibre 10.
- Page 49 INSTRUCTIONS D’INSTALLATION RACCORDEMENT DE LA SÉCHEUSE À BRANCHEMENT DE LA SÉCHEUSE À L’AIDE D’UN CÂBLE À 3 FILS L’AIDE D’UN CÂBLE À 4 FILS Faites installer, si le code local l’exige, une mise à la terre externe (non fournie) sur un tuyau d’eau froide métallique mis à la terre ou toute autre mise à...
- Page 50 (type en feuille). Le conduit de transition flexible pour sécheuses approuvé par UL (pièce OUTILS ET MATÉRIEL NÉCESSAIRES de Haier Appliances - PM8X73 ou WX8X73) peut être utilisé seulement dans des installations où le conduit en À L’INSTALLATION DU CONDUIT métal rigide où...
- Page 51 INSTRUCTIONS D’INSTALLATION ÉVACUATION DE LA SÉCHEUSE • UTILISEZ des • COUPEZ le conduit coudes lorsque aussi court que des changements possible et installez- de direction sont le droit vers le mur. nécessaires. Coudes • N’ÉCRASEZ • N’UTILISEZ • N’ÉCRASEZ • N’INSTALLEZ PAS ou ne pliez PAS une PAS le...
- Page 52 INSTRUCTIONS D’INSTALLATION ÉVACUATION DE LA SÉCHEUSE (suite) LISTE DE VÉRIFICATION DU SYSTÈME ÉVACUATION ARRIÈRE STANDARD D’ÉVACUATION Nous vous recommandons d’installer votre sécheuse avant d’installer votre laveuse. Cela permettra ÉVENT MURAL un accès direct pour faciliter le raccordement de • Terminez le conduit de façon à éviter les retours d’air ou l’évacuation.
- Page 53 INSTRUCTIONS D’INSTALLATION ÉVACUATION DE LA SÉCHEUSE (suite) ÉVACUATION LATÉRALE OU PAR LE ÉVACUATION LATÉRALE OU PAR LE DESSOUS DESSOUS (suite) AJOUTER UN NOUVEAU CONDUIT AVERTISSEMENT - Risque d’incendie Portion << A >> Trou de fixation Débranchez la sécheuse de l’alimentation électrique.
- Page 54 INSTRUCTIONS D’INSTALLATION ÉVACUATION DE LA SÉCHEUSE (suite) ÉVACUATION LATÉRALE OU PAR LE ÉVACUATION LATÉRALE OU PAR LE DESSOUS (suite) DESSOUS (suite) AJOUTER UN COUDE ET UN CONDUIT POUR AJOUTER UNE PLAQUE D’OBTURATION À L’ÉVACUATION SUR LA GAUCHE ET LA L’ARRIÈRE DE LA CARROSSERIE DROITE DE L’APPAREIL (suite) •...
- Page 55 INSTRUCTIONS D’INSTALLATION INSTALLATION FINALE METTEZ LA SÉCHEUSE DE NIVEAU DÉMARRAGE DE LA SÉCHEUSE Appuyez et maintenez-la enfoncée sur la touche Placez la sécheuse à proximité de l’emplacement final. alimentation. Réglez les quatre pattes de nivellement pour la mettre de niveau de gauche à droite, et de l’avant vers l‘arrière. REMARQUE : Si la sécheuse a été...
-
Page 56: Comment Superposer La Sécheuse À La Laveuse (Optionnel)
Si le placard abrite une laveuse et une sécheuse, les portes doivent disposer de 3 m (120 pouces carrés) au minimum d’espace ouvert. CONTENU DU KIT (HAIER APPLIANCES REMARQUE: SI LE TUYAU D’ÉVACUATION EST SITUÉ NUMÉRO DU KIT GFA24KITL) À L’ARRIÈRE DE LA SÉCHEUSE, LA CONFIGURATION DU TUYAU POURRAIT DEMANDER UNE DÉGAGEMENT EN... - Page 57 INSTRUCTIONS D’INSTALLATION INSTALLATION DU SUPPORT DE SUPERPOSITION INSTALLEZ LE SUPPORT SUR LA COMMENT INSTALLER LA LAVEUSE SÉCHEUSE ET LE SUPPORT SUR LA SÉCHEUSE ( SUITE ) A. Retirez la vis du couvercle de la laveuse du côté gauche. Alignez les trous dans le support gauche B.
-
Page 58: Inversion De L'ouverture De La Porte (Optionnel)
INSTRUCTIONS D’INSTALLATION INVERSION DE L’OUVERTURE DE LA PORTE (Optionnel) REMARQUES IMPORTANTES • Avant de commencer, débranchez la sécheuse de sa • Après avoir commencé, ne déplacez pas la sécheuse prise électrique. avant que l’inversion de l’ouverture de la porte n’ait été... - Page 59 NOTES 49-3000195...
-
Page 60: Conseils De Dépannage
CONSEILS DE DÉPANNAGE Problème Causes possibles Correctifs La sécheuse émet Le bruit/ou les secousses Placez l’appareil sur une surface plane, ou ajustez les pattes au besoin des secousses et sont normaux. La sécheuse jusqu’à ce qu’il soit bien de niveau. des bruits est peut-être placée sur une surface inégale... - Page 61 CONSEILS DE DÉPANNAGE Problème Causes possibles Correctifs Aucun chiffre La sécheuse évalue la quantité C’est normal. Lorsque la sécheuse détectera un faible niveau d’humidité n’apparaît d’humidité du linge dans le linge, elle affichera le temps de séchage restant. pendant le cycle, il ne fait que s’allumer Le temps restant...
- Page 62 Essayez un assouplissant. statique utilisé Les feuilles d’assouplissant textile de marque BounceMD ont été approuvées pour toutes les sécheuses Haier Appliances lorsqu’elles sont utilisées conformément aux instructions du fabricant. Séchage excessif Essayez un assouplissant. Réglez l’option Less Dry (Moins Sec) ou Damp (Humide).
- Page 63 NOTES 49-3000195...
- Page 64 NOTES 49-3000195...
-
Page 65: Garantie Limitée
également à Haier Appliances d’améliorer ses produits en fournissant à ces derniers des informations sur votre appareil. Si vous ne voulez pas que les données de votre appareil soient envoyées à Haier Appliances, veuillez demander à votre technicien de NE PAS soumettre les données à Haier Appliances pendant la réparation. -
Page 66: Service À La Clientèle
Vous avez une question ou vous avez besoin d’aide pour votre appareil électroménager? Visitez le site Web de Haier Appliances 24 heures par jour, tous les jours de l’année! Vous pouvez aussi y trouver d’autres formidables produits Haier Appliances et tirer avantage de tous nos services d’assistance en ligne. - Page 67 Manual del propietario y Instrucciones de instalación QFD15 Serie Secadoras 49-3000195 06-19 GEA...
- Page 68 SOPORTE AL CLIENTE ................... 34 INFORMACIÓN A TENER EN CUENTA ____________________________________________________ Le agradecemos la compra de este producto de marca Haier Nº de Modelo Appliances. Este manual para el usuario le ayudará a obtener el mejor funcionamiento de su nueva secadora.
-
Page 69: Instrucciones De Seguridad
INSTRUCCIONES DE SEGURIDAD INFORMACIÓN IMPORTANTE DE SEGURIDAD LEA TODAS LAS INSTRUCCIONES ANTES DE USAR Para reducir el riesgo de incendio, explosión, descargas eléctricas o lesiones sobre las personas al usar ADVERTENCIA su electrodoméstico, siga las precauciones básicas, incluyendo lo siguiente: Lea todas las instrucciones antes de usar este electrodoméstico. -
Page 70: Usar La Secadora
USAR LA LAVADORA Para reducir el riesgo de incendios, descargas eléctricas o heridas, lea las INFORMACIÓN ADVERTENCIA IMPORTANTE DE SEGURIDAD antes de utilizar este electrodoméstico. Es posible que las funciones y apariencias varíen con relación a su modelo a lo largo del manual. Paso 1* Paso 2* Paso 3*... - Page 71 USAR LA LAVADORA Pantalla y las Luces de Estado La pantalla muestra el tiempo restante aproximado hasta el final del ciclo. Además, esta pantalla mostrará el estado de la secadora: Estado Seco Húmedo Frío Controles bloqueados. Clean Filter (Filtro Limpio) Tiempo de limpiar el filtro. Lea la sección de Cuidado y Limpieza. Damp Alert (Alerta de Indica que Damp Alert (Alerta de Humedad) fue configurado y sonará...
- Page 72 USAR LA LAVADORA Temp (Temperatura) Usted puede cambiar la temperatura de su ciclo de secado. Alto Para algodones normales a pesados. Medio Para sintéticos, mezclas y prendas marcadas como planchado permanente. Bajo Para delicados, sintéticos y prendas marcadas como Tumble Dry Low (secado bajo en secadora). Sin Calor Esta opción sólo puede ser usada con Air Fluff (Secado por Aire) y Timed Dry (Secado temporizado propio), donde las prendas dan vueltas sin calor.
- Page 73 USAR LA LAVADORA Mi ciclo Mi ciclo Establezca sus combinaciones de configuraciones preferidas para cada ciclo, guardes las mismas aquí y recuperarlas con un solo toque. Estas configuraciones a medida se podrán activar cuando un ciclo esté en progreso. NOTA: Puede guardar una combinación de configuraciones de My Cycle (Mi Ciclo) para cada ciclo.
-
Page 74: Carga
CARGA Siempre siga las instrucciones del fabricante de la ropa cuando lave. Etiquetas sobre cuidado de las telas A continuación incluimos los “símbolos” de las etiquetas sobre cuidado de las telas que podrían afectar a las ropas que está lavando. Etiquetas de secado Secado en secadora... -
Page 75: Cuidado Y Limpieza
Quite los restos de limpiador y luego seque con un paño limpio. El acero inoxidable utilizado para fabricar el tambor de la secadora ofrece la mayor confiabilidad de una secadora Haier Appliances. Si el tambor de la secadora se raya o abolla durante un uso normal, éste no se oxidará o corroerá. Estas imperfecciones de la superficie no afectan la función o durabilidad del tambor. - Page 76 CUIDADO Y LIMPIEZA La bombilla del tambor giratorio NOTA: La lámpara del tambor no puede ser reemplazada por el consumidor en los modelos donde hay una cubierta en forma de plana sobre una bombilla LED. Si esta luz dejara de funcionar, comuníquese al servicio técnico.
-
Page 77: Instrucciones De Instalación
SECADORA INSTRUCCIONES DE INSTALACIÓN Visite nuestro sitio web en haierappliances.com. ANTES DE COMENZAR ADVERTENCIA Lea estas instrucciones por completo y con detenimiento. - Riesgo de incendios IMPORTANTE • – Guarde estas • La instalación de la secadora debe efectuarla un instrucciones para el uso de inspectores eléctricos instalador calificado. - Page 78 Con las patas niveladoras completamente extendidas: 33-5/8 (85.4 cm) Apilada: 66-1/2” (168.9 cm) DIMENSIONES DE LA CONEXIÓN CABLES DE CORRIENTE ELÉCTRICA Haier Appliances recomienda enfáticamente el uso de 20-1/2” (52,1 cm) piezas específicas de fábrica. Seleccione el cable de corriente que se adecúe a sus requisitos de instalación.
- Page 79 INSTRUCCIONES DE INSTALACIÓN ESPACIO LIBRE MÍNIMO EN REQUERIMIENTOS PARA OTROS ESPACIOS QUE NO SEAN INSTALACIÓN EN NICHOS O ARMARIOS INSTALACIONES EN NICHOS O ARMARIOS ADVERTENCIA - Riesgo de explosión Los espacios libres mínimos respecto de superficies combustibles y de aberturas de aire son: 0” a ambos Mantenga cualquier material y vapores inflamables, tales lados, 1”...
- Page 80 INSTRUCCIONES DE INSTALACIÓN INSTALACIÓN EN BAÑOS O INSTALACIÓN BAJO EL MOSTRADOR DORMITORIOS DE ENCIMERA Si desea una instalación bajo mostrador de encimera: La instalación debe cumplir con los códigos locales o, si no los hubiera, con el CÓDIGO NACIONAL ELÉTRICO, •...
- Page 81 INSTRUCCIONES DE INSTALACIÓN CÓMO CONECTAR UNA SECADORA ELECTRICA HERRAMIENTAS NECESARIAS Antes de efectuar la conexión eléctrica, desactive los disyuntores o quite los fusibles del circuito de la secadora Pinzas Destornillador de la caja eléctrica. Verifique que el cable de la secadora Phillips esté...
- Page 82 INSTRUCCIONES DE INSTALACIÓN CONEXIÓN ELÉCTRICA INFORMACIÓN CONEXIÓN ELÉCTRICA INFORMACIÓN SOBRE LAS SECADORAS ELÉCTRICAS SOBRE LAS SECADORAS ELÉCTRICAS Para realizar conexiones eléctricas con Para conexiones directas de cables: un cable de corriente: ADVERTENCIA - Riesgo de incendio ADVERTENCIA - Riesgo de incendio Use un cable de cobre con calibre de 10 Use un amortiguador con refuerzo de la lista de UL.
- Page 83 INSTRUCCIONES DE INSTALACIÓN CÓMO CONECTAR LA SECADORA CÓMO CONECTAR LA SECADORA USANDO UNA CONEXIÓN DE 3 CABLES USANDO UNA CONEXIÓN DE 4 CABLES (DEBE UTILIZARSE EN INSTALACIONES DE Si así lo requirieran los códigos locales, instale una conexión CASAS RODANTES) a tierra externa (no provista) a metal con conexión a tierra, tuberías de agua fría con conexión a tierra u otra conexión a NOTA: Desde el 1 de enero de 1996, el Código Eléctrico...
- Page 84 (tipo papel de NECESARIOS PARA INSTALAR UN aluminio). Un conducto universal flexible aprobado CONDUCTO DE SALIDA por UL (Haier Appliances partes - PM8X73 o WX8X73) puede ser utilizado UNICAMENTE en instalaciones Perfore con una Destornillador donde un conductor de metal rígido o flexible no...
- Page 85 INSTRUCCIONES DE INSTALACIÓN SALIDA AL EXTERIOR DE LA SECADORA (cont.) • UTILICE codos • CORTE el conducto cuando hagan falta lo más corto posible curvas. e instálelo derecho en la pared. Coudes • NO doble o • NO utilice • NO •...
- Page 86 INSTRUCCIONES DE INSTALACIÓN SALIDA AL EXTERIOR DE LA SECADORA (cont.) LISTA DE CONTROL DEL SISTEMA DE SALIDA TRASERA ESTÁNDAR SALIDA Recomendamos instalar la secadora antes que la lavadora. Esto permitirá un acceso directo para poder CAMPANA O CUBIERTA DE PARED efectuar la conexión de salida.
- Page 87 INSTRUCCIONES DE INSTALACIÓN SALIDA AL EXTERIOR DE LA SECADORA (cont.) VENTILACIÓN LATERAL O POR LA VENTILACIÓN LATERAL O POR LA PARTE INFERIOR PARTE INFERIOR (cont.) CÓMO AGREGAR UN CONDUCTO NUEVO ADVERTENCIA - Riesgo de incendio Porción “A” Orificio de montaje ESCONECTE LA SECADORA DEL SUMINISTRO ELÉCTRICO SE GUANTES Y PROTECTORES PARA BRAZOS Derecha...
- Page 88 INSTRUCCIONES DE INSTALACIÓN SALIDA AL EXTERIOR DE LA SECADORA (cont.) VENTILACIÓN LATERAL O POR LA VENTILACIÓN LATERAL O POR LA PARTE INFERIOR (cont.) PARTE INFERIOR (cont.) CÓMO AGREGAR LA PLACA DE CUBIERTA A CÓMO AGREGAR CODOS Y CONDUCTOS DE LA PARTE TRASERA DEL GABINETE SALIDA HACIA LA IZQUIERDA O DERECHA DEL GABINETE (cont.) •...
- Page 89 INSTRUCCIONES DE INSTALACIÓN CONFIGURACIÓN FINAL NIVELE LA SECADORA INICIO DE LA SECADORA Coloque la secadora en posición vertical cerca de la Mantenga presionado el botón encendido. ubicación definitiva y ajuste las cuatro patas niveladoras para garantizar que la secadora se encuentre nivelada de lado a lado y del frente a la parte trasera.
-
Page 90: Cómo Apilar La Lavadora Y La Secadora (Opcional)
1” sobre el frente y la parte trasera 1” superior • La parte posterior de la secadora debe mirar hacia una KIT DE APILADO HAIER APPLIANCES: pared. Visitez notre site web à fr.haiercanada.ca/parts. • Se deberá considerar que se debe brindar el despeje adecuado para la instalación y el servicio técnico. - Page 91 INSTRUCCIONES DE INSTALACIÓN CÓMO INSTALAR EL KIT DE SOPORTE DE APILADO CÓMO INSTALAR EL SOPORTE EN CÓMO INSTALAR LA SECADORA LA LAVADORA Y EL SOPORTE EN LA SECADORA (CONT.) A. Quite el tornillo de la tapa superior de la lavadora de la parte trasera izquierda.
-
Page 92: Cambiar El Sentido De Apertura De La Puerta (Opcional)
INSTRUCCIONES DE INSTALACIÓN CÓMO INVERTIR LA APERTURA DE LA PUERTA (Opcional) NOTAS IMPORTANTES • Antes de comenzar, desenchufe la secadora del • Una vez que haya comenzado, no mueva el gabinete tomacorriente. hasta haber finalizado la inversión de la apertura de la puerta. - Page 93 NOTAS 49-3000195...
-
Page 94: Consejos Para La Solución De Problemas
SOLUCIÓN DE PROBLEMAS Problema Causas posibles Solución La secadora se El movimiento/ruido es Desplace la secadora a un lugar nivelado, o ajuste las patas niveladoras mueve o hace normal. La secadora puede según sea necesario. ruido estar colocada en un lugar desnivelado Las prendas Conducto inadecuado u... - Page 95 SOLUCIÓN DE PROBLEMAS Problema Causas posibles Solución No aparecen La secadora monitorea Esto es normal. Cuando la secadora detecta un nivel bajo de números en la constantemente la cantidad de humedad en la carga, la secadora mostrará el tiempo restante de pantalla durante humedad en la ropa secado.
- Page 96 Intente utilizar un suavizador de telas. suavizador de telas Bounce® Fabric Conditioner Dryer Sheets ha sido aprobado para ser usado con todas las Secadoras Haier Appliances y cuando se usen de acuerdo con las instrucciones del fabricante. Sobresecado Intente utilizar un suavizador de telas.
- Page 97 NOTAS 49-3000195...
- Page 98 NOTAS 49-3000195...
-
Page 99: Garantía Limitada
EE.UU. Si el producto está en un área donde no se encuentra disponible un Proveedor Autorizado del Servicio Técnico de Haier Appliances, usted será responsable por el costo de un viaje o se podrá requerir que traiga el producto a una ubicación del Servicio Técnico de Haier Appliances Autorizado para recibir el servicio. -
Page 100: Soporte Al Cliente
En EE.UU.: haierappliances.com/support/register Servicio Programado El servicio de reparación de expertos de Haier Appliances está a sólo un paso de su puerta. Conéctese a través de Internet y programe su servicio a su conveniencia cualquier día del año. En EE.UU.: haierappliances.com/support/schedule-service Conectividad Remota Para solicitar asistencia para la conectividad de red inalámbrica (para modelos con acceso remoto), visite nuestro sitio web en...