Thermon Norseman XB Series Installation, Operation & Maintenance Instructions Manual
Explosion-proof convection panel heater
Hide thumbs
Also See for Norseman XB Series:
Table of Contents
Available languages
Available languages
Quick Links
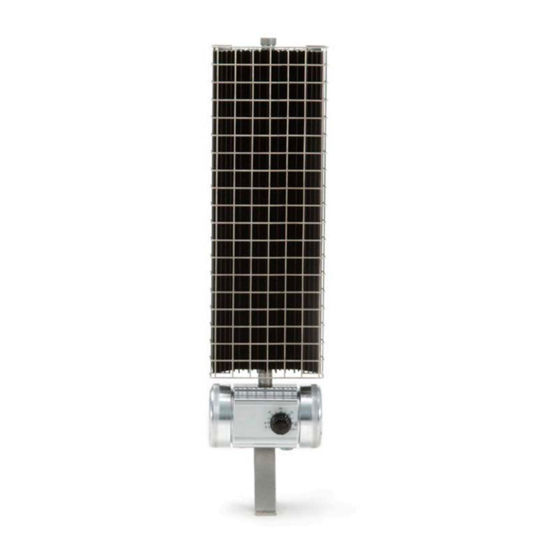
Explosion-proof Convection Panel Heater
XB Series
Installation, Operation, & Maintenance Instructions
ISO 9001
Special Notes
The following special notices highlight important information in the
installation and maintenance sections. Each serves a special purpose and is
displayed in the format shown:
This symbol indicates a potentially hazardous situation, which,
if not avoided, can result in personal injury or damage to the
CAUTION
equipment.
This symbol indicates a potentially hazardous situation, which, if
not avoided, may be a shock hazard.
CAUTION
This symbol indicates an imminently hazardous situation, which, if
not avoided, could result in death or serious injury.
WARNING
Part No. 10457.Rev.2.09 August 2021 Printed in Canada
Chapters
Table of Contents

Related Manuals for Thermon Norseman XB Series


Summary of Contents for Thermon Norseman XB Series
- Page 1 Explosion-proof Convection Panel Heater XB Series Installation, Operation, & Maintenance Instructions ISO 9001 Special Notes The following special notices highlight important information in the installation and maintenance sections. Each serves a special purpose and is displayed in the format shown: This symbol indicates a potentially hazardous situation, which, if not avoided, can result in personal injury or damage to the CAUTION...
-
Page 2: Table Of Contents
TABLE OF CONTENTS A. Product Certification B. Pre-Installation C. Installation General Requirements ......................................4 Reflector Baffles ........................................4 Wall Mounting ...........................................6 Floor Mounting .........................................6 D. Thermostat Installation E. Wiring F. Start-Up G. Maintenance H. Spare Parts... -
Page 3: Product Certification
PRODUCT CERTIFICATION Depending on the particular model ordered, the heater is suitable for the following areas: CSA C/US certified for Class I, Div. 1 and 2, Groups A, B, ࢦ C, and D; Class II, Div. 1 and 2, Groups E, F, and G; Class III, Div. 1 and 2;... -
Page 4: Installation
INSTALLATION Position heater front face down on a flat surface. C.1 General Requirements With the fold in the baffle positioned between the Norseman™ XB heaters are approved for wall or floor keyhole fin and the adjacent short fin, slide reflector mounting with the terminal housing at the bottom. - Page 5 Figure 2 – Dimensions and mounting details Table 2 – Heater Dimensions Unit in (mm) in (mm) in (mm) in (mm) in (mm) in (mm) 10.250 (260) 9.625 (244) 5.125 (130) 17.000 (432) 16.375 (416) 11.875 (300) 7.250 (184) 23.625 (600) 23.000 (584) 18.500 (471) 30.375 (772)
-
Page 6: Wall Mounting
C.3 Wall Mounting C.4 Floor Mounting Install heater with the supplied hardware in accordance with Step 1: Position heater face down on the floor with terminal the figures and instructions below. box towards the wall (Figure 6). Step 1: Secure wall and stabilizing brackets to mounting surface (Figure 3). -
Page 7: Thermostat Installation
THERMOSTAT INSTALLATION Factory Installed - For shipping purposes the thermostat is to be field installed, check to verify that thermostat well (located at back of unit) has not been you have been supplied with the correct thermostat installed. kit. Single phase heaters use a single pole thermostat as supplied in kit number XTKW04481. - Page 8 Table 3 – Wiring Configuration Table 4 – Wiring Configuration (High Ambient) Wiring Diagram (Figure 9) Wiring Diagram (Figure 9) Part No. Part No. 1Ø 3Ø 1Ø 3Ø XB1-1005T6 XB1-1005T4A XB1-1010T4A XB1-1010T3C XB1-1017T4A XB1-1017T3C XB1-1030T3B XB1-1030T3 Fig. 1 XB1-1047T2D XB1-3047T3 XB1-3047T3B XB1-6020T4A Fig. 1 XB1-3075T2D XB1-6045T3C XB1-4100T2D...
-
Page 9: Start-Up
START-UP For heaters with a tamper-proof thermostat, to set Check to ensure that all plugs, screws, and covers are temperature, disconnect the power and remove the securely in place. socket head cap screw. Set the thermostat to the Check associated electrical equipment. desired room temperature with a screw driver and Check that all wall/floor mounting bracket replace cap screw. - Page 10 PLEASE ADHERE TO INSTRUCTIONS IN THIS MANUAL Failure to do so may be dangerous and may void certain provisions of your warranty. For further assistance, please call 24hr hotline: 1.800.661.8529 (U.S.A. and Canada) Please have model and serial numbers available before calling. WARRANTY: No warranty applies to paint fi nishes except for manufacturing Under normal use the Company warrants to defects apparent within 30 days from the date of installation.
- Page 11 Panneaux chauffants à convection antidéflagration Série XB Instructions d’installation, d’utilisation et d’entretien ISO 9001 Avertissements particuliers Les avertissements particuliers précisés dans les sections suivantes relatives à l’installation et à l’entretien visent à fournir des renseignements importants. Chacun répond à une situation particulière et est illustré...
- Page 12 TABLE DES MATIÈRES A. Avant l’installation B. Installation Directives générales ....................................... 13 Fixation au mur ..........................................15 Fixation au sol ..........................................15 C. Installation du thermostat D. Câblage E. Mise en marche F. Entretien G. Pièces de rechange...
-
Page 13: Avant L'installation
CERTIFICATION DU PRODUIT En fonction du modèle particulier commandé, le traceur convient aux zones suivantes : Certifié CSA C/US pour la classe I, Div. 1 et 2, groupes A, B, ࢦ C et D ; Classe II, Div. 1 et 2, groupes E, F et G ; Classe III, Div. 1 et 2 ;... -
Page 14: Installation
INSTALLATION Tableau 1 – Paires de réflecteurs par dissipateur de chaleur C.1 Directives générales Les radiateurs Norseman XB sont homologués Longueur de la pièce pour une fixation au mur ou au sol à l’aide d’un extrudée du dissipateur Grosseur de pairs caisson de borne situé dans la partie inférieure. de chaleur S’assurer que le mur est suffisamment solide pour soutenir le radiateur dont le poids, selon le modèle,... -
Page 15: Fixation Au Mur
3/8"– 2 Réflecteur à égalité avec Diamètres la partie supérieure du des trous dissipateur de chaleur Vue de la flèche ‘X’ 3/8"– 2 Diamètres des trous Sites de fixation Vue de la flèche ‘Y’ Fixation au mur Fixation au sol Figure 2 –... - Page 16 C.3 Fixation au mur C.4 Fixation au sol Installer le radiateur à l’aide de la quincaillerie fournie Étape 1: Placer la partie avant du radiateur sur le sol en conformément aux figures et aux instructions ci-dessous. positionnant le caisson de borne vers le mur (Figure 6).
-
Page 17: Installation Du Thermostat
INSTALLATION DU THERMOSTAT Installation en usine - Pour des raisons de transport, le tête creuse. Lorsqu’un thermostat doit être installé logement du thermostat (situé à l’arrière de l’unité) n’a sur le terrain, s’assurer d’avoir reçu la trousse de pas été installé. thermostat appropriée. Les radiateurs monophasés utilisent un thermostat à... - Page 18 Tableau 3 – Configuration du câblage Tableau 4 – Configuration du câblage (ambience élevée) Schéma du câblage (Figure 9) Schéma du câblage (Figure 9) Part No. Part No. 1Ø 3Ø 1Ø 3Ø XB1-1005T6 XB1-1005T4A XB1-1010T4A XB1-1010T3C XB1-1017T4A XB1-1017T3C XB1-1030T3B XB1-1030T3 Fig. 1 XB1-1047T2D XB1-3047T3 XB1-3047T3B XB1-6020T4A Fig.
-
Page 19: Mise En Marche
MISE EN MARCHE Afin de régler la température des radiateurs munis Vérifier les équipements électriques connexes. d’un thermostat inviolable, débrancher l’alimentation S’assurer que tous les supports de fixation au mur et et retirer la vis hexagonale à tête creuse. Régler la au sol sont bien serrés. - Page 20 VEUILLEZ VOUS CONFORMER AUX INSTRUCTIONS CONTENUES DANS CE MANUEL. Tout manquement à ces dernières pourrait s’avérer dangereux et invalider certaines dispositions de votre garantie. Pour obtenir une aide supplémentaire, veuillez appeler: 1-800-661-8529 (U.S.A. and Canada) Merci de préparervos numéros de modèle et de série avante d’appeler. GARANTIE: Aucune garantie ne s’applique à...