
Related Manuals for Honeywell NEXH Series


Summary of Contents for Honeywell NEXH Series
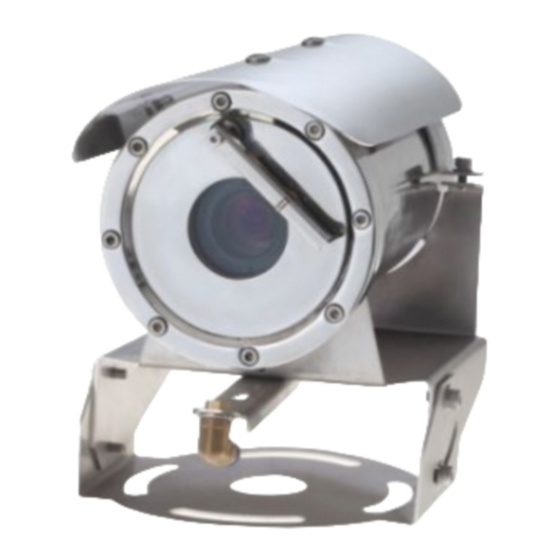
- Page 1 INSTALLATION & OPERATION GUIDE BOOK NEXH Camera Explosion proof Security Camera (Fixed Type) 내압 방폭 카메라 (고정 타입) - 1 -...
- Page 2 - 2 -...
- Page 3 Important Safety Instructions Install and use this system after reading these instruction thoroughly. Keep these instructions. Install in accordance with the manufacture’s instruction. Take care of all Cautions and Warnings. Use stainless steel hardware to fasten the mount to outdoor surfaces. A readily accessible disconnect device shall be incorporated in the building installation wiring.
- Page 4 Methods of Installation This system can be installed in a standard position as below Figure1. And there are options of installation according to the brackets or adaptors. Camera Housing only with Bracket Figure1. Method of Installation WARNING: Gross weight of this system is about 10kg. Use caution when lifting and installing.
- Page 5 Methods of Installation Figure2. Install on the surface or on the wall with Mount bracket To install this product, please refer to Figure2 and do the following steps. 1. Make sure the threads of the product and the threads of the supplied stainless steel bolts (Supplied) are free of dirt and debris.
- Page 6 Methods of Installation PT 3/4”-14 Nipple PT 3/4”-14 Thread PT 3/4 “-14 Explosion proof Seal Fitting Flexible conduit (Not Supplied) (Not Supplied) Sealing Fiber compou Cables Filler Sealing Method Figure3 Install Product to Mounting surface To install this product, please refer to Figure3 and do the following steps. 1.
- Page 7 Camera Setting Rx –Board(Receiver Board) Figure4. Rx Board out of Camera Housing 1. Loosen the 8ea screws and then apart the Camera Housing cover out of the Camera Housing body. Then the showing the above figure4. 2. See the figure5 for Setting of communication with the switch on the RX Board. - 7 -...
-
Page 8
Camera Setting
Figure5. Lottery and Dip Switches 1. ID Setting · · · Default ID 1 and can be set ID 1 to 99 at S2,(default) protocol. Refer to the Figure6 protocol selection table 2. Protocol and Baud rate Setting Baud rate SW3-2 SW3-3... - Page 9 Base Schematic RS 485 RS 485 Pump+ Pump- Pump Motor Check Valve FRONT RS 485 DATA 2 DATA 1 DC 12V SLAVE 1 DOME 2 RS 232C ALARM/DVR REAR POWER AC110 or 220V Input Power DC 12~24V DATA1 DATA2 DC 12V MAIN MONITOR REAR KEYBOARD CONTROLLER...
- Page 10 Cable Configuration Pump POWER (AC 220V or 110V) Control Data+, - 2m ± 0.3m Figure8. Cable configuration Configuration of Wire Harness Wire Color Function Description Brown Power Input Sky Blue (220V or 110V) Washer Pump+ Pump+ Green Washer Pump- Pump- Black Video BNC Cable...
- Page 11 Simple Function Control Guide * This function is specialized to HTX-5000 keyboard. Function Process Results Remarks ① Twist Joystick to the right. ZOOM -ZOOM IN /FOCUS/ ② Twist Joystick to the left. Iris -ZOOM OUT ③ Press button. -Focus is changed to Near or Far Return to Auto Focus mode by ④...
- Page 12 Specifications Model NEXH363NW-1/2 NEXH363PW-1/2 IECEx Certificated Class II2 G, Exd IIC T6 Gb (IECEx, ATEX, KCs) Front window Fully tempered plate glass Construction SUS316 Protection degree IP67 NEXH363NW-1: 110VAC ± 10% NEXH363PW-1: 110VAC ± 10% Input Power NEXH363NW-2: 220VAC ± 10% NEXH363PW-2: 220VAC ±...
- Page 13 Dimensions Unit (mm) - 13 -...
- Page 14 Camera Function 1. Screen Display •FUNCTION •OSD •DESCRIPTION FORMAT ⑧ ① •Focus Mode •Non display •Oneshot Focus Mode ④ ① ② ③ ① ② ③ ④ ⑧ ⑤ ⑤ •MF •Manual Focus Mode ② •Back Light •Non display •Backlight OFF •O •Backlight ON •A...
- Page 15 Camera Function 2. OSD Setup MENU Structure SYNC 80 ~ 255 BURST 80 ~ 255 GENERAL CONTRAST 0 ~ 100 SETUP ZOOM SPEED 1 ~ 10 START ZOOM x1 ~ x24 OFF/ BLC/ABLC/…. LENS MODE BLC MODE MODE END ZOOM X25 ~ x400 E-ZOOM ON/OFF...
- Page 16 Camera Function 3. Display SETUP MENU 5. Exiting from Main-Menu a. Press MENU (95+Preset at Pelco Protocol) so that SETUP a. At Main-menu, move cursor to icon, and press MENU is displayed on the screen. MENU button. ① SAVE AND EXIT : Camera will save the changes ②...
- Page 17 Camera Function 7. CAMERA SETUP MENU << LENS MODE >> a. At main menu, select icon, and press MENU button. ZOOM SPEED START ZOOM END ZOOM << CAMERA SETUP >> AF MODE AUTO LENS MODE O. RESET AE MODE O. AF TIME WB MODE MIN.
- Page 18 Camera Function 7-2. AE MODE << LENS MODE >> ZOOM SPEED ① Exposure Mode START ZOOM : It is composed of five modes according to circumstantial END ZOOM illuminance. AF MODE AUTO O. RESET AUTO O. AF TIME : Exposure is controlled by Shutter Speed,Iris,Gain to MIN.
- Page 19 Camera Function ② SHUTTER Speed : In Shutter Fix and Manual Mode, range is from 1/60(50) sec to 1/100,000 sec. << AE MODE >> MODE AUTO 1/60 → …. → 1/100000 SHUTTER SHUTTER AUTO IRIS AUTO ③ IRIS GAIN AUTO : In Iris Fix, Manual Mode, range is 12 phases from OPEN BRIGHTNESS MAX AGC...
- Page 20 Camera Function 7-4. BLC/BMB Mode ② White Balance Mode Control : It displays and changes White Balance Mode Control ① Backlight Compensation Mode status of Camera. ( According to Mode, it just display the state : It is for preventing the center object getting too dark when and not to adjust.) the excessive light is behind the central object.
-
Page 21: Table Of Contents
Camera Function ⑥ PZM Masking 7-5. PRIVACY ZONE : Choose the Color to mask the PZM zone. 8 color (Black, Gray, Light Gray, White, Red, Blue, Green, Yellow) ① Set Privacy ZONE is available. : PZM(Privacy Zone Mask) is to hide the unwanted view to protect privacy invasion. - Page 22 Camera Function ④ Turnover LEVEL from DAY TO NIGHT : Set the LEVEL to turnover from Day to Night. D→N LEVEL 1 → 2 → 3 ⑤ Turnover LEVEL from NIGHT TO DAY : Set the LEVEL to turnover from Night to Day. N→D LEVEL 3 →...
- Page 23 Camera Function 8-3. QUAD MODE 8. MEMORY FUNTION : QUAD Mode supports 4 split screen display. There are two 8-1. DNR MODE working mode of “manual push” or “sequence switching” : Image noise can be reduced by using the DNR function. for split screen change.
- Page 24 Camera Function Camera Function << SPECIAL SETUP >> ③ Sensitivity SHARPNESS : User can decide sensitivity of motion detection. GAMMA SENSITIVITY LOW → MID → HIGH BAUDRATE 9600 PROTOCOL DEFAULT ④ Output of motion detection LANGUAGE : Motion detection has two output method. One is marking MONO on screen “...
- Page 25 Optional Accessories Note: These Mounting Accessories are not supplied with the NEXH Series units. These are purchasing parts. Models Model Description NEXH-PT PAN TILT ADJUST Bracket, Pan; 60°x4, Tilt; -55°~+20° (Default) NEXH-WL Wall mount bracket - 25 -...
- Page 26 Optional Accessories NEXH-WL Unit (mm) EXWJ400-10 - 26 -...
- Page 27 Honeywell Security Group. Honeywell Co., Ltd. Address : 5F, Sangam IT Tower, B4 - 4block, 1590 Sangam-dong Mapo-gu, Seoul 121-835, Republic of Korea TEL : +82 2 799 6114 / 6395 Printed in Korea FAX : +82 2 792 9011/ 799 6188...
- Page 28 - 28 -...
- Page 29 INSTALLATION & OPERATION GUIDE BOOK NEXH Camera Series 방폭 카메라 (고정형 타입) - 29 -...
- Page 30 - 30 -...
- Page 31 안전상의 주의 사항 본 제품을 사용하시기 전에 “안전상의 주의사항”을 반드시 읽은 후 사용 하십시오. 사용 설명서를 읽은 후 꼭 보관 하시오. 제조사의 지침에 따라서 설치 하시오. 모든 주의 및 경고 문구에 대해서 유의 하십시오. 외부 환경 설치면에 고정시 스텐리스 재질의 기구물을 사용 하시오. 오직...
- Page 32 설치 방법 이 제품은 아래 Fiqure1과 같이 기준 정방향으로 설치 될 수 있습니다. 또한, 제품에 적용되는 브라켓 또는 아답터에 따라 설치 방법을 바뀔 수 있습니다. 벽부형 브라켓에 설치된 모습 그림1. 설치 방법 경고 : 제품의 총 중량이 대략 10kg이므로 제품 설치시 들어올릴 경우 주의를 요하며, 설치...
- Page 33 설치 방법 그 림 2. 표면에 설치 또는 벽부형 브라켓에 설치 그림 2를 참조 하여 다음 단계에 따라 제품을 설치 하시기 바랍니다. 1. 설치에 사용 할 스텐리스 육각 볼트 또는 구멍 붙이 볼트의 나사산이 정상인지 이물질이 없는지 확인 하십 시오. 2.
- Page 34 설치 방법 PT 3/4”-14 Nipple PT 3/4”-14 Thread PT 3/4 “-14 Explosion Seal Fitting proof (not supplied) Flexible conduit (not supplied) Sealing Fiber compou Cables Filler Sealing Method 그 림 3 . 벽부형 브라켓을 이용한 제품 설치 그림 3를 참조 하여 다음 단계에 따라 제품을 설치 하시기 바랍니다. 1.
- Page 35 카메라 설정 Rx –Board(리시버 보드) 그 림 4. 하우징에서 Rx Board 꺼내기 1. 그림 4와같이 카메라 하우징 커버에 있는 8개의 육각구멍붙이볼트 풀고 카메라 하우징 커버를 꺼 냅십시오.(이때 안쪽에 배선되어 있는 전선이 끊어지지 않도록 주의 하십시오) 2. 그림 5 를 참조 하여 RX 보드의 스위치를 조작하여 통신 설정을 하십시오. - 35 -...
-
Page 36
카메라 설정
그 림 5. 로터리 & 딥 스위치 1. ID 설정 · · · ID 기본값은1 이며 ID는 1부터 99까지 지정 될 수 있습니다. 2. 프로토콜, 보레이트 설정 Baud rate SW3-2 SW3-3 2400 4800 9600 SW3-1 Set off Set on SW3-1 off 은... - Page 37 기본 시스템 구성도 RS 485 RS 485 Pump+ Pump- Pump Motor Check Valve FRONT RS 485 DATA 2 DATA 1 DC 12V SLAVE 1 DOME 2 RS 232C ALARM/DVR REAR POWER AC110 or 220V Input Power DC 12~24V DATA1 DATA2 DC 12V MAIN MONITOR REAR...
- Page 38 케이블 구성 Pump POWER (AC 220V or 110V) Control Data+, - 2m ± 0.3m 그림 8. 케이블 구성 케이블 구성 확인 Wire Color Function Description Brown Power Input Sky Blue (220V or 110V) Washer Pump+ Pump+ Green Washer Pump- Pump- Black Video BNC Cable...
- Page 39 간단한 기능 조작 가이드 * This function is specialized to HTX-5000 keyboard. 기능 조작 및 순서 결 과 비고 ① 조이스틱을 오른쪽으로 돌립니다. 배율/초점/ -. 확대 조리개 ② 조이스틱을 오른쪽으로 돌립니다. -. 축소 ③ 버튼으로 조절합니 -.초점 거리가 가깝고 멀게 변경됩니다. 다.
- Page 40 사 양 Model NEXH363NW-1/2 NEXH363PW-1/2 IECEx Certificated Class II2 G, Exd IIC T6 Gb (IECEx, ATEX, KCs) Front window Fully tempered plate glass Construction SUS316 Protection degree IP67 NEXH363NW-1: 110VAC ± 10% NEXH363PW-1: 110VAC ± 10% Input Power NEXH363NW-2: 220VAC ± 10% NEXH363PW-2: 220VAC ±...
- Page 41 치수 Unit (mm) - 41 - 13 -...
- Page 42 카메라 기능 1. OSD표시 •FUNCTION •OSD •DESCRIPTION FORMAT ⑧ ① •Focus Mode •Non display •Oneshot Focus Mode ④ ① ② ③ ⑤ ⑧ ① ② ③ ④ ⑤ •MF •Manual Focus Mode ② •Back Light •Non display •Backlight OFF •O •Backlight ON •A •Auto Backlight ON...
- Page 43 카메라 기능 Camera Function 2. 메뉴 구성도 SYNC 80 ~ 255 BURST 80 ~ 255 GENERAL CONTRAST 0 ~ 100 SETUP ZOOM SPEED 1 ~ 10 START ZOOM x1 ~ x24 OFF/ BLC/ABLC/…. LENS MODE BLC MODE MODE END ZOOM X25 ~ x400 E-ZOOM ON/OFF...
- Page 44 카메라 기능 5. 메뉴 설정에서 나오기 3. SETUP 메뉴 화면 a. 메인 설정메뉴에서 아이콘으로 이동하여 Menu버튼을 a. MENU(단 Pelco protocol로 설정 되어 있다면 95+preset)버 튼을 누르면 메뉴 설정 화면이 나타납니다. 누 른다. ① SAVE AND EXIT : 변경된 모든 데이터를 저장하고 메뉴를 종 료...
- Page 45 카메라 기능 7. 카메라 기능 설정 a. 메인 설정 메뉴에서 아이콘을 선택하여 MENU 버튼 을 누른다 << LENS MODE >> ZOOM SPEED START ZOOM END ZOOM << CAMERA SETUP >> AF MODE AUTO LENS MODE O. RESET AE MODE O. AF TIME WB MODE MIN.
- Page 46 카메라 기능 << LENS MODE >> 7-2. AE 모드 설정 ZOOM SPEED START ZOOM ① 노출 보정 모드 설정 (Exposure Mode) END ZOOM AF MODE AUTO : 외부의 조도 환경에 따라 다음의 5가지 모드가 있습니다. O. RESET O. AF TIME 자동(AUTO) MIN.
- Page 47 카메라 기능 ② 셔터 설정 (SHUTTER) : 셔터고정, 수동 모드에서 셔터를 1/60 ~ 1/100,000초까 << AE MODE >> 지 MODE AUTO 고정이 가능합니다. SHUTTER AUTO SHUTTER 1/60 → 1/100 → ..→ 1/100000 IRIS AUTO GAIN AUTO ③...
- Page 48 카메라 기능 7-4. BLC/BMB 모드 설정 ② 화이트 발란스 제어(White Balance Mode Control) : 화이트 발란스 모드에 따른 카메라의 제어 상태를 ① 역광 보정(Backlight Compensation) 모드 표시하며, : 중심 피사체와 대비하여 주변광이 더 밝은 환경에서는 그 제어가 가능합니다. ( 상태만의 표시가 될 수도 있습니다.) 중심...
-
Page 49: Move Control Color Blue Alpha
카메라 기능 7-5. PRIVACY ZONE 설정 ⑥ PZM 마스크 설정 : 설정된 PZM 영역을 마스크하는 컬러를 설정합니다. ① ZONE 설정 검정,회색, 연한 회색,흰색,빨강,파랑,녹색,노랑의 8가지 :PZM(Privacy Zone Mask)은 감시 영역에서 사생활 침해에 색깔로 설정이 가능합니다. 해당 되는 영역을 마스킹하는 기능으로 줌/PAN/TILT와 연동되는... -
Page 50: N- >D Level
카메라 기능 ④ 나이트(NIGHT) 변환 레벨 설정 : 주간모드에서 나이트모드로 전환되는 어두움의 정도를 설정합니다. D→N LEVEL 1 → 2 → 3 ⑤ 데이(DAY) 변환 레벨 설정 : 나이트모드에서 주간모드로 전환되는 밝기의 정도를 설정합니다. N→D LEVEL 3 → 4 → 5 ⑥... -
Page 51: Return
카메라 기능 8-3. QUAD MODE(4분할 화면) 8. MEMORY FUNTION 메모리 설정 메뉴에서 QUAD MODE를 선택하여 MENU 8-1. DNR MODE 버튼을 누릅니다. QUAD는 4분할된 영역에 각각의 화면을 메모리 설정 메뉴에서 DNR MODE를 선택한다. DNR(Digital 표시하는 기능으로 정지 화면이나 일정 시간 지연된 움직이는 Noise Reduction)은... - Page 52 Camera Function 카메라 기능 << SPECIAL SETUP >> ③ 감도 설정 : 모션 감도를 설정한다. 감도에 따라 미세한 움직임을 감지할 수 있다. SHARPNESS GAMMA SENSITIVITY LOW → MID → HIGH BAUDRATE 9600 PROTOCOL DEFAULT ④ 출력 선택 : 모션 감지 영역 내에서 움직임을 감지하였을 때 LANGUAGE 화면에...
- Page 53 추가 구성품 Note: 이 추가 구성품은 기본 구성물에 포함이 안되어 있으며, 필요시 별도로 구매해 야 하는 품목입니다. Models Model Description NEXH-WL Wall mount bracket Explosion proof Washer Pump, 10m tube 10L water tank, Maximum EXWJ400-10 Pressure 2.0 kgf/cm2 - 53 - 25 -...
- Page 54 추가 구성품 NEXH-WL Unit (mm) EXWJ400-10 - 54 - 26 -...
- Page 55 한국하니웰㈜ 시큐리티 솔루션 사업부 주소 : 서울특별시 마포구 상암동 1590번지 상암IT Tower 5층 TEL : 02-799-6114/6299/6045 FAX : 02-792-9011/ 02-799-6188 Printed in Korea E-mail: [email protected] - 55 -...
- Page 56 - 56 -...
- Page 57 - 57 -...
- Page 58 Honeywell Security Group. Honeywell Co., Ltd. Address : 5F, Sangam IT Tower, B4 - 4block, 1590 Sangam-dong Mapo-gu, Seoul 121-835, Republic of Korea TEL : +82 2 799 6114 / 6395 Printed in Korea FAX : +82 2 792 9011/ 799 6188 D-100105 E-mail: [email protected]...