Table of Contents
Quick Links
STENCILING & MARKING
SYSTEMS
OWNER'S MANUAL
NON-POROUS
MINI-CODER
ALL MODELS
INSTALLATION - OPERATION - MAINTENANCE
UNIVERSAL STENCILING & MARKING SYSTEMS, INC.
P.O. BOX 871 - ST. PETERSBURG, FLORIDA 33731 USA
PH: (727) 894-3027 FAX: (727) 821-7944
E-Mail: [email protected] Website: www.universal-marking.com
NPMC-19197
1
Table of Contents

Related Manuals for Universal MC-10NI Series

Summary of Contents for Universal MC-10NI Series
- Page 1 STENCILING & MARKING SYSTEMS OWNER’S MANUAL NON-POROUS MINI-CODER ALL MODELS INSTALLATION - OPERATION - MAINTENANCE UNIVERSAL STENCILING & MARKING SYSTEMS, INC. P.O. BOX 871 - ST. PETERSBURG, FLORIDA 33731 USA PH: (727) 894-3027 FAX: (727) 821-7944 E-Mail: [email protected] Website: www.universal-marking.com NPMC-19197...
-
Page 2: Table Of Contents
- LIMITED WARRANTY - UNIVERSAL Non-Porous Mini-Coders are guaranteed to be free from defects in materials and workmanship for a period of 90 days from the date of purchase. Components found to be defective during this time will be repaired free of charge if returned to the factory. -
Page 3: Preface
With UNIVERSAL Non-Porous Coders, printing on non-porous materials can be accomplished with the same relative ease as printing on porous materials. This breakthrough in Non-Porous coder design opens up in-plant printing opportunities which previously were re- garded as too costly to consider. -
Page 4: Specifications
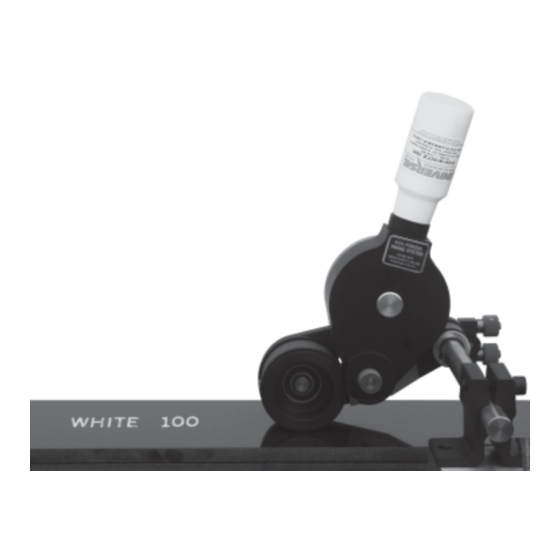
SPECIFICATIONS NON-POROUS MINI-CODER SPECIFICATIONS MC-10NI TOP MOUNT SERIES Model Shown: MC-10NI-NPRT 1.82 (46 mm) 1.18 (30 mm) 2.48 (63 mm) 11.40 (290 mm) 9.89 (251 mm) 2.90 (74 mm) 7.33 (186 mm) 8.69 (221 mm) NET WEIGHT: 4 LBS. - 10 OZ. (2.10 KG.) MAXIMUM DIE SIZE - US STANDARD: 7/8”... -
Page 5: Mc-10 Side Mount Series
SPECIFICATIONS NON-POROUS MINI-CODER SPECIFICATIONS MC-10 SIDE MOUNT SERIES Model Shown: MC-10-NPLS 4.20 107mm 1.18 30 mm 2.60 66 mm 3.98 11.40 101 mm 290 mm 2.90 74 mm 7.33 186 mm 8.69 221 mm NET WEIGHT: 4 LBS. - 5 OZ. (1.96 KG.) MAXIMUM DIE SIZE - US STANDARD: 7/8”... -
Page 6: Indexing & Non-Indexing Models
All references to mounting configuration are made as though you are viewing the production line with the product moving away from you. Universal Mini-Coders are available from the factory in 4 different mounting configurations as shown in Figures 2 and 3. -
Page 7: Printing Dies
CODER MODELS DESIGNED FOR METRIC RIBtype® PRINTING DIES Universal also offers Metric RIBtype® die systems for use in countries where metric character sizes are the standard. The Metric dies are thicker and the rib spacing differs slightly from the standard printing dies therefore the two versions are not compatible. -
Page 8: Ink Rolls
SPECIFICATIONS INK ROLLS Universal offers two ink roll options for the Non-Porous Mini-Coders - each with unique characteristics which will help determine the suitability for a specific printing application. The coders are designed to accommodate both types of ink rolls without modification. A detailed review of your printing requirements will determine the best choice of ink rolls for your particular application. -
Page 9: Quick Start
QUICK START Warning: Non-Porous inks contain flammable solvents. Do not smoke or handle these rolls in the presence of sparks or open flames. Inks will also stain clothing, furniture, carpeting and your hands. Rubber gloves should be worn during the following procedures. The ink roll you install on the coder must be properly pre-inked. - Page 10 QUICK START 4 - Remove the Knurled Drive Wheel “E”. The Knurled Drive Wheel rests on top of the Transfer Roller and is installed over 3 stainless drive pins which protrude through 3 mating holes in the Drive Wheel. This is a close tolerance fit and there will be some resistance from the engagement with the rubber Bearer ring on the Print Drum when this is removed.
- Page 11 QUICK START 8 - Install the ink roll on the Ink Roll Axle “H” by aligning the end of the rod or pencil with the end of the axle and push- ing the roll onto the axle. When this step is complete, remove the rubber gloves to prevent ink contamination with the external parts of the coder.
-
Page 12: Installing The Printing Dies
QUICK START 12 - Replace the Cover Retaining Knob “C” and lightly tighten. Do not over tighten this knob or you may bend the top of the Drive Wheel Cover “B” and cause it to bind against the Knurled Drive Wheel. The Cover Retaining Knob should be just tight enough to keep the Inking System Assembly together and pre- vent the Drive Wheel Cover from rotating out of position. -
Page 13: Adjusting The Ink Roll Eccentric
QUICK START ADJUSTING THE INK ROLL ECCENTRIC With the printing dies installed on the print drum, manu- ally rotate the print drum continuously in one direction while slowly rotating the Ink Roll Eccentric Adjusting Knob “A” from the “MIN” towards the “MAX” position. Turn the Eccentric Knob in small increments and observe the face of the printing dies “I”... -
Page 14: Basic Principals Of Operation
Preventing rapid solvent loss from the inking system, which would cause the coder to stop printing, has tradition- ally been a very difficult task. Universal’s patented Non-Porous Inking System design has overcome this problem by enclosing all of the inking system components in a tightly sealed housing. This unique design offers the capabilities of a flexographic printer without the limitations associated with having an open well of ink. -
Page 15: Selecting An Appropriate Ink
Universal’s Non-Porous Inking System is compatible with a wide range of alcohol base marking inks. Although we offer a variety of inks for specific applications, you are not restricted to using only Universal brand inks. When selecting inks from other manufacturers however, it is your responsibility to make sure the inks are compatible with the coder. -
Page 16: Ink Drying Time Considerations
Although extremely fast drying inks are normally specified by customers in all applica- tions, the ink must be suitable for the specific application or it will not perform properly in the coder. Universal #100 ink is an extremely fast drying formu- lation and is normally recommended for continuous motion web printing applications. -
Page 17: Web Printing
WEB PRINTING This section applies to the installation of the Non-Porous Mini-Coders for printing on continuous web materials such as plastic films, rubber sheeting, metals and other extruded materials. Careful consideration should be given to selecting an appropriate area in the production line for installation of the coder. -
Page 18: Selecting A Place To Mount Your Coder
WEB PRINTING In high speed web applications, the distance the web travels at a given speed in 2-3 seconds can be substantial. It is important to note that when the printed web is tightly rewound, the additional pressure applied to the printed marks can increase the possibility of a ghost image transfer of the ink to the back of the web. -
Page 19: Special Web Printing Applications
PRINTING DIRECTLY ON MASTER ROLLS Universal Non-Porous Mini-Coders can also be mounted on custom designed extension arms which will enable them to print directly on the surface of a master roll of web material as it is unwound. This technique is frequently used when conveniently positioned idler rolls are not available. -
Page 20: Carton Printing
PROPER ALIGNMENT FIGURE 33 Universal Non-Porous Mini-Coders are spring loaded so that the print drums will press against the carton surface on contact. This pressure is necessary to accomplish the friction drive rotation of the print drum and ensure enough printing pressure to give you a sharp impression. The spring tension mechanism on the coder will also compensate for slight variations in the width of the cartons without jamming the conveyor line. - Page 21 CARTON PRINTING Universal Non-Porous Mini-Coders are designed so the frame of the machine will pivot on the mounting column. This allows the print drum to deflect, or swing, on contact with the leading edge of the carton a maximum of 2". It is recommended that cartons be aligned between guide rails with no more than 1/4"...
-
Page 22: Die Positioning For Indexing Applications
CARTON PRINTING Loosen the mounting column clamping bolt (Figure 37) and position the printer to the required height for printing. Swing the printer into position so that the print drum will lightly contact the side of the cartons as they emerge from between the guide rails. - Page 23 CARTON PRINTING Although installing the printing dies in this position restricts how close to the leading edge of the carton you can register the print, it is one of the only ways to ensure a good imprint on every carton. Since the fastest drying non- porous inks will dry in approximately 2 seconds at 75 Degree F.
-
Page 24: Transfer Roll / Print Pressure Readjustment
TRANSFER ROLL / PRINT PRESSURE RE-ADJUSTMENT ADJUSTING TRANSFER ROLL PRESSURE The contact pressure that the transfer roll exerts on the face of the printing die has been adjusted at the factory and should not require further adjustment unless the coder has been disassembled. If the coder has been completely disassembled for any reason, the Transfer Roll contact pressure will need to be readjusted. -
Page 25: Adjusting Printing Pressure
TRANSFER ROLL / PRINT PRESSURE RE-ADJUSTMENT ADJUSTING PRINTING PRESSURE The spring tension assembly shown in Figure 42 is designed to maintain print drum pressure against the surface of the material being printed and is adjusted at the factory for normal applica- tions. -
Page 26: Maintenance
MAINTENANCE PRE-INKING A NEW INK ROLL When you are ready to begin printing, you must first install an ink roll which has been properly pre-inked with the appropriate non-porous ink. Unless you ordered a pre-inked roll with your machine, you will find a dry roll in a plastic container with your coder. -
Page 27: Cleaning The Transfer Roll
MAINTENANCE CLEANING THE TRANSFER ROLL The surface of the transfer roll is made from DuPont Delrin material and the O.D. of the roll is finely engraved which enables it to hold a uniform film of ink. This surface material is very fragile and under no circumstances should you attempt to clean it with anything abrasive. -
Page 28: Cleaning The Printing Dies
MAINTENANCE CLEANING THE PRINTING DIES All inks which are formulated for printing on non-porous surfaces contain a resin binder which bonds the dye or pigment in the ink to the surface of the material being printed. As the ink begins to dry, this binder becomes “tacky”... -
Page 29: Parts List & Diagrams
NON-POROUS MINI-CODER PRINT DRUM MC-10 & MC-10NI SERIES PART NUMBER QTY. REQD. DESCRIPTION KEY NO. PRINT DRUM BEARING CB-04 PRINT DRUM SQUARE BEARER RING MC-01S MC-43 1-1/8” MINI-CODER RIBtype® RING 1-1/8” MINI-CODER RIBtype® RING - METRIC MC-43T 1” PRINT DRUM - NON-INDEXING MC-26NP 1”... - Page 30 NON-POROUS MINI-CODER MC-10 & MC-10NI SERIES...
- Page 31 NON-POROUS MINI-CODER MC-10 & MC-10NI SERIES DESCRIPTION KEY NO. PART NUMBER QTY. REQD. TENSION BLOCK RETAINING KNOB MC-15 NEEDLE BEARING CB-05 PIVOT BLOCK ASSEMBLY “A” MC-103 DELRIN BUSHING MC-19 SET SCREW, 1/4-20 X 1/2” CPS MC-17 MC-06 HEX PIVOT POST MC-02 SCREW, 1/4-20 X 5/8”...
- Page 32 NON-POROUS MINI-CODER MC-10 & MC-10NI SERIES PART NUMBER QTY. REQD. DESCRIPTION KEY NO. NP-01-MLS MC INKING SYSTEM COVER - LEFT HAND SIDE MOUNT ASSEMBLY NP-01-MRS MC INKING SYSTEM COVER - RIGHT HAND SIDE MOUNT ASSEMBLY MC INKING SYSTEM COVER - LEFT HAND TOP MOUNT ASSEMBLY...
- Page 33 NON-POROUS MINI-CODER CE GUARD MC-10 & MC-10NI SERIES DESCRIPTION PART NUMBER QTY. REQD. KEY NO. NP-64 CE GUARD PLATE #1 SCREW, 8-32 X 1/2” SHC MS-36 CE GUARD PLATE #2 NP-65 NP-66 SCREW, 6-32 X 1/4” SOC BHC...