Table of Contents
Quick Links
Table of Contents

Related Manuals for Dantherm HCV300


Summary of Contents for Dantherm HCV300
- Page 1 HCV300 <<<<<<<<< Service Manual Rev. 1.4...
- Page 2 Der tages forbehold for trykfejl og ændringer Dantherm can accept no responsibility for possible errors and changes Irrtümer und Änderungen vorbehalten Dantherm n’assume aucune responsabilité pour erreurs et modifications éventuelles...
-
Page 3: Table Of Contents
Introduction Overview Introduction This is the service manual for the Dantherm Air Handling A/S home ventilation unit type HCV300. Table of contents This manual covers the following topics: Introduction ........................3 Overview ........................ 3 General information ....................4 ... -
Page 4: General Information
Copying this user guide or parts thereof is not permitted without prior written permission from Dantherm Air Handling A/S. Reservations Dantherm Air Handling A/S reserves the right at any time to carry out changes or improvements to the product and user guide without prior warning or obli- gation. -
Page 5: Product Description
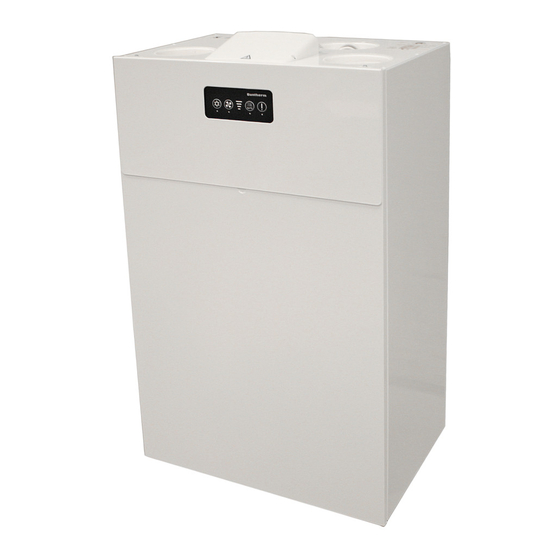
This section provides a description of the unit. HCV300 Summary The HCV300 unit is designed for the ventilation of private homes. The heat energy in the impure evacuated air is reused in the unit's heat exchanger, and heats up fresh air from outside for optimal comfort. - Page 6 General description, continued Illustration Duct 4 Duct 1 Duct 2 Duct 3 Control panel Filter 1 Filter 2 Fan cabinet 1 Bypass Fan cabinet 2 Front Seen from below Duct 2 Duct 4 Mode A Mode B Reverse flow heat exchanger Fig.
- Page 7 General description, continued Air flow paths This illustration shows the two air flow paths through the unit. Air flow can be altered electronically. See page 21. Air flow path 2 Air flow path 1...
-
Page 8: Description Of Parts
Description of parts Introduction This section describes the components in HCV300. Please see the illustration on page 6 for references. Cabinet The external parts of the cabinet are manufactured from powder coated, AZ-coated steel plating. The internal parts of the cabinet are manufactured from expanded polystyrene (EPS). - Page 9 continued Description of parts of parts, Electronic control Detailed description of the electronic controls page 11, and user instructions, page 27 Positioning of parts Fig. 2 Description of Mode A Mode B parts T1 Outside air temperature sensor T3 Extracted air temperature sensor T2 Supply air temperature sensor T4 Exhaust air temperature sensor T4 Exhaust air temperature sensor...
-
Page 10: Description Of Additional Equipment
HAC2. Kit for power outlet The HCV300 unit offers the opportunity to connect a duct for supply air through the at the base of base of the unit. This kit contains an insulated cap, which is necessary to close the vent- the unit hole at the top of the unit if this connection method is selected. -
Page 11: Electronic Control
The control panel with LED displays is placed under the main controls, and connected to main PCB via FFC. System Illustration of the system control architecture: architecture HCV300 unit External connected items HRC 3 wireless Keypad with LED remote T1-T4... - Page 12 Electronic control, continued Illustration This illustration shows the main PCB and control panel without front cover. of the control unit External connections Main PCB USB-B for servicing Internal Control panel with LED connections Illustration External connections: of connections Description External connections: of connections Connection Description...
- Page 13 continued Electronic control, Illustration control panel Description The control panel foil has four buttons with corresponding LED displays. control panel Four blue LED lights in the middle indicate fan speed regardless of which mode the unit is operating in.
-
Page 14: System Operation Strategy
System operation strategy Introduction This section describes the operation strategy under a variety of conditions. See more under user instructions on page 26 Electric preheater If a heating element is mounted it will ensure the heating of fresh outside air while also reducing the need for defrosting. -
Page 15: Installation
The change feature ensures optimal installation conditions no matter where the unit is placed in the building. The HCV300 unit is designed for mounting in dry surroundings at temperatures over 12°C, such as technical rooms or other suitable spaces. Make sure there is plenty of room – especially in front of the unit to ensure it is ... -
Page 16: Wall Mounting
Wall mounting Mounting of wall Mount the wall bracket as follows: bracket. Step Illustration Secure the wall bracket using these measure- ments. Ensure you use suitable screws and rawl- plugs. Mount the two spacers at the bottom of the back of the unit. -
Page 17: Drain
Drain Warning Heat recovery of air with a high moisture content leads to condensation in the heat exchanger. Condensate must be led into a drain, as otherwise it can damage the floor under the unit. Drain Connect a drain hose to the correct drain valve at the base of the unit. The unit is manufactured with blanked drain, see marking at the top of the unit (A/B mode IMPORTANT:... -
Page 18: Duct Positioning
Duct dimensions and sound absorbers must be in accordance with national standards and building regulations. Contact your Dantherm dealer for further information. Noise and vibrations from the unit to the duct system must be minimised. This can be achieved by installing sound absorbers on both the supply and exhaust air sides. - Page 19 Duct connection, continued Insulation Insulate all four ducts with minimum 50 mm insulation...
-
Page 20: External Connections
Introduction Connecting accessories enables you to expand the ventilation system's field of applica- tion. MODBUS Connections for the external connection module, available through your Dantherm dealer. (HAC2) This module can control various inputs/outputs. Wired remote- HCP10 Digital input Digital input is used for different speed settings on the fans. -
Page 21: Changing The Air Flow Path
Changing the air flow path Introduction HCV300 allows the user to electronically swop the air flows through the unit. mode. This section describes the change between A and B Warning The unit must always be disconnected from the power supply before accessing the live wiring and rotating parts and before changing the air flow path on the main control. - Page 22 Changing the air flow path, continued Procedure Step Action Remove the front and remove the two screws as shown Turn the control panel 180° and place it in the service position. mode Find the A/B button on the edge of the PCB and set it to the mode desired.
-
Page 23: Calibration
3. Calibration tool The unit can be calibrated by means of the Dantherm PC tool, or using the keypad on the front. In both options the air flows needs to be measured in order to calibrate the unit to the counter pressure in the ducts connected. -
Page 24: Setting Operating Parameters
Setting operating parameters Introduction HCV300 uses a USB-B connection to adjust the unit's parameters via Dantherm PC-Tool / MS Windows PC. Preparation Check that the unit is working as it should and that 230V can easily be connected and disconnected. -
Page 25: Firmware Update
Switch off the unit if it is on. Turn on the computer Connect the USB cable to the PC and then the HCV300 unit (the USB plug is found behind the top metal cover). Connect the power supply to the ventilation unit. -
Page 26: User's Guide
User's guide Introduction This section describes how the control panel can be used to set different parameters and display the unit's operation. Contents This section covers the following topics: General ventilation functions ................27 Use of control panel..................... 28 ... -
Page 27: General Ventilation Functions
Never turn off the ventilation unit to save energy as this may cause condensation and subsequent leaks from the duct system with the risk of water damage. Manual In manual operation mode the HCV300 will run at the selected ventilation speed until ventilation level this is changed manually. -
Page 28: Use Of Control Panel
Automatic bypass cooling is only possible if the bypass module is installed and enabled. via bypass It is possible to set the parameters for bypass cooling. The following options are availa- ble on HRC3 remote controller and Dantherm PC-tool: Set the minimum outside temperature within the range 8-15°C. ... - Page 29 If the LED is red, the unit is in a alarm state, that needs to be corrected, in order to bring the unit into operation again. Error codes can be read on the remote control if connected, or in the Dantherm PC tool.
-
Page 30: Use Of Lan Interface
Using PC-Tool it is possible to allocate a static IP address to the unit, which is necessary for example in order to perform checks on HCV300 via smartphone app when outside the LAN's range. This will also require setup of the home's WAN address as well as allo-... -
Page 31: Service Guide
Service guide Overview All servicing must be carried out by trained professionals. Serial numbers Requests for information, service or parts must include a serial number. The product model and serial number can be found on the information plate (reduced type plate) which is found behind the front cover. Contents This section covers the following topics: Overview ...................... -
Page 32: Preventative Maintenance
Preventative maintenance Introduction Preventative maintenance is necessary at regular intervals if the unit is to function effi- ciently and optimally, in order to avoid unintended operation stoppages and to ensure the expected lifetime of minimum 10 years. It is important to notice, that intervals between filter maintenance can vary depending on the specific environment, and that moving parts are wearing parts, that needs re- placements when worn down dependent on the specific environment. - Page 33 Preventative maintenance, continued Internal: Follow this procedure to inspect and clean the internal parts: fans, Step Action Illustration air ducts and Remove the two screws on the front panel heating element of the unit and lift off the panel. (2 years) Take out a fan cabinet at random.
- Page 34 Preventative maintenance, continued fans, Step Action Illustration air ducts and Ensure that all gaskets are sealed com- heating element pletely (2 years), continued before replacing the panel. Check that all connections are securely connected to the PCB. Mount the front panel External: Visually inspect: Hoses and...
-
Page 35: Troubleshooting
Troubleshooting reset Introduction Errors are indicated by an LED located under the filter button. If the LED slowly flashes orange, it means you need to replace the air filters. See page 10 LED displays If this LED is red it indicates an operating error. The red LED can indicate three different Software <2.0 errors: LED Red... - Page 36 Troubleshooting, continued Error messages on Errors are displayed on the HRC3 remote control with an "E" + a number. The error can the remote control's then be looked up in the troubleshooting overview and in the control panel's manual for LCD panel rectifying errors.
-
Page 37: Spare Parts List
Spare parts list Introduction Spare parts are ordered through Dantherm dealers. Illustration Spare parts for HCV300: Continued overleaf... - Page 38 Kit, Air valves 081185 Kit, temperature sensors 077243 Heat exchanger 077244 Kit, filters G4+F7 093844 Kit, Filters 2xG4 093845 Kit, cable gaskets 077241 Kit, Filter gaskets 077242 Pre heating element HCV300 081187 Support bracket 045843 Drain hose with clamp (not shown) 086697...
- Page 39 Technical Data HCV300 The table below shows the technical data for HCV300: Specification Unit Data Operating area DIBt* 50 to 140 Operating area Passive* 70 to 140 Efficiency DIBt 84.7 Efficiency passive house Efficiency EN 13141-7 85.5 Sound from cabinet (Passive House) 350 m...
- Page 40 Dimensions HCV300...
-
Page 41: Wiring Diagram
Wiring Diagram Introduction This section shows wiring diagrams for the main components: Illustration Overview: Keypad connector on opposite PCB side... -
Page 43: Contact Dantherm
Contact Dantherm Pluggit Dantherm Air Handling A/S Dantherm AS Dantherm AB Fridhemsvagen 3 Marienlystvej 65 Postboks 4 602 13 Norrkoping 7800 Skive 3101 Tønsberg Sweden Denmark Norway Visiting address: Lokkeasvn. 26 3138 Skallestad, Nøtterøy Phone +45 96 14 37 00... - Page 44 Dantherm Air Handling A/S Marienlystvej 65 7800 Skive Denmark www.dantherm.com [email protected]...