
Related Manuals for Sharp MX-B557P


Summary of Contents for Sharp MX-B557P
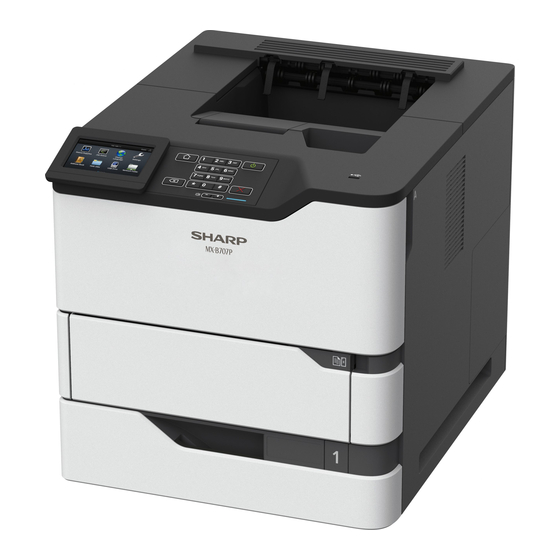
- Page 1 LASER PRINTER MX-B557P/MX-B707P User's Guide Machine type(s): 4064 Models: 295, 695...
-
Page 2: Table Of Contents
Contents Contents Safety information..................5 Conventions................................5 Product statements.............................5 Learning about the printer................8 Selecting a location for the printer........................8 Printer configurations............................9 Attaching cables..............................11 Installing the printer software..........................12 Using the control panel................13 Panel with touch-screen display........................13 Understanding the status of the power button and indicator light............13 Setting up and using the home screen applications......15 Using the home screen.............................15 Customizing the home screen........................16... - Page 3 Contents Printing from a mobile device.........................37 Printing from a flash drive..........................38 Supported flash drives and file types......................39 Configuring confidential jobs.........................40 Printing confidential and other held jobs....................40 Printing a font sample list..........................41 Understanding the printer menus............42 Menu map................................42 Device...................................43 Print..................................51 Paper..................................59 USB Drive................................61 Network/Ports..............................62 Security.................................73...
- Page 4 Contents Clearing jams....................93 Avoiding jams..............................93 Identifying jam locations..........................95 Paper jam in trays..............................97 Paper jam in door A............................97 Paper jam in door C............................100 Paper jam in the standard bin........................101 Paper jam in the multipurpose feeder......................102 Paper jam in the output expander.......................103 Paper jam in the high‑capacity output expander..................103 Paper jam in the 4‑bin mailbox........................104 Paper jam in the staple finisher........................105...
-
Page 5: Safety Information
Safety information Safety information Conventions Note: A note identifies information that could help you. Warning: A warning identifies something that could damage the product hardware or software. CAUTION: A caution indicates a potentially hazardous situation that could injure you. Different types of caution statements include: CAUTION—POTENTIAL INJURY: Indicates a risk of injury. - Page 6 Safety information CAUTION—SHOCK HAZARD: To avoid the risk of electrical shock, make sure that all external connections (such as Ethernet and telephone system connections) are properly installed in their marked plug-in ports. CAUTION—SHOCK HAZARD: To avoid the risk of electrical shock, if you are accessing the controller board or installing optional hardware or memory devices sometime after setting up the printer, then turn the printer off, and unplug the power cord from the electrical outlet before continuing.
- Page 7 Safety information CAUTION—POTENTIAL INJURY: This product uses a laser. Use of controls or adjustments or performance of procedures other than those specified in the User’s Guide may result in hazardous radiation exposure. CAUTION—POTENTIAL INJURY: The lithium battery in this product is not intended to be replaced. There is a danger of explosion if a lithium battery is incorrectly replaced.
-
Page 8: Learning About The Printer
Learning about the printer Learning about the printer Selecting a location for the printer When selecting a location for the printer, leave enough room to open trays, covers, and doors and to install hardware options. • Set up the printer near an electrical outlet. CAUTION—POTENTIAL INJURY: To avoid the risk of fire or electrical shock, connect the power cord to an appropriately rated and properly grounded electrical outlet that is near the product and easily accessible. -
Page 9: Printer Configurations
Learning about the printer Front 406 mm (16 in.) Note: The minimum space needed in front of the printer is 76 mm (3 in.). Left side 152 mm (6 in.) Rear 152 mm (6 in.) Printer configurations CAUTION—TIPPING HAZARD: Installing one or more options on your printer or MFP may require a caster base, furniture, or other feature to prevent instability causing possible injury. - Page 10 Learning about the printer Fully‑configured model Hardware option Alternative hardware option • 4‑bin mailbox Output expander • High‑capacity output • Staple finisher • Staple, hole punch finisher Optional 2100‑sheet tray None Caster base None Optional 550‑sheet tray Optional 250‑sheet tray Staple, hole punch finisher •...
-
Page 11: Attaching Cables
Learning about the printer When using optional trays: • Always use a caster base when the printer is configured with a 2100‑sheet tray. • The 2100‑sheet tray must always be at the bottom of a configuration. • A maximum of four optional trays may be configured with the printer. •... -
Page 12: Installing The Printer Software
Learning about the printer Installing the printer software Obtain a copy of the software installer package. • From our website. • From the place where you purchased the printer. Run the installer, and then follow the instructions. -
Page 13: Using The Control Panel
Using the control panel Using the control panel Panel with touch-screen display Use the Display • View printer messages and supply status. • Set up and operate the printer. Home button Go to the home screen. Numeric keypad Enter numbers or symbols in an input field. Power button Turn on or turn off the printer. - Page 14 Using the control panel Power button light Printer status The printer is off, ready, or processing data. Solid amber The printer is in Sleep mode. Blinking amber The printer is in Hibernate mode.
-
Page 15: Setting Up And Using The Home Screen Applications
Setting up and using the home screen applications Setting up and using the home screen applications Using the home screen Note: Your home screen may vary depending on your home screen customization settings, administrative setup, and active embedded solutions. Touch Status/Supplies •... -
Page 16: Customizing The Home Screen
Setting up and using the home screen applications Customizing the home screen From the control panel, touch Settings > Device > Visible Home Screen Icons. Select the icons that you want to appear on the home screen. Apply the changes. Managing bookmarks Creating bookmarks Use bookmarks to print frequently accessed documents that are stored in servers or on the web. -
Page 17: Managing Contacts
Setting up and using the home screen applications • If you are using a proxy server, then temporarily disable it to load the web page correctly. Click Bookmarks > Add Folder, and then type a folder name. Note: To limit access to the folder, enter a PIN. Click Save. - Page 18 Setting up and using the home screen applications Notes: • View the printer IP address on the printer home screen. The IP address appears as four sets of numbers separated by periods, such as 123.123.123.123. • If you are using a proxy server, then temporarily disable it to load the web page correctly. Click Address Book.
-
Page 19: Loading Paper And Specialty Media
Loading paper and specialty media Loading paper and specialty media Setting the paper size and type From the control panel, navigate to: Settings > Paper > Tray Configuration > Paper Size/Type > select a paper source For non-touch-screen printer models, press to navigate through the settings. - Page 20 Loading paper and specialty media Flex, fan, and align the paper edges before loading. Load the paper stack with the printable side facedown, and then make sure that the side guides fit snugly against the paper.
- Page 21 Loading paper and specialty media • Do not slide paper into the tray. • To avoid paper jams, make sure that the stack height is below the maximum paper fill indicator. • Load letterhead depending on whether an optional staple finisher is installed or not. Without an optional staple finisher With an optional staple finisher One‑sided printing One‑sided printing...
-
Page 22: Loading The 2100-Sheet Tray
Loading paper and specialty media • Load envelopes with the flap side up and against the left side of the tray. Warning—Potential Damage: Do not use envelopes with stamps, clasps, snaps, windows, coated linings, or self‑stick adhesives. Insert the tray. From the control panel, set the paper size and paper type to match the paper loaded. - Page 23 Loading paper and specialty media Squeeze and slide the length guide to the position for A5 until it clicks into place. Remove the A5 length guide from its holder. Insert the guide into its designated slot, and then press until it clicks into place.
- Page 24 Loading paper and specialty media Loading A4‑, letter‑, legal‑, Oficio‑, and folio‑size paper Pull up and slide the width guide to the correct position for the size of the paper being loaded. If the A5 length guide is still attached, then remove it. If the guide is not attached, then proceed to step d on page Place the A5 length guide in its holder.
- Page 25 Loading paper and specialty media Squeeze, and then slide the length guide to the correct position for the size of the paper being loaded. Flex, fan, and align the paper edges before loading. Load the paper stack with the printable side facedown. •...
- Page 26 Loading paper and specialty media Without an optional staple finisher With an optional staple finisher Two‑sided printing Two‑sided printing • When loading prepunched paper, make sure that the holes on the long edge of the paper are against the right side of the tray. One‑sided printing Two‑sided printing Insert the tray.
-
Page 27: Loading The Multipurpose Feeder
Loading paper and specialty media Loading the multipurpose feeder Open the multipurpose feeder. Adjust the guide to match the size of the paper that you are loading. Flex, fan, and align the paper edges before loading. Load paper with the printable side faceup. •... -
Page 28: Linking Trays
Loading paper and specialty media Without an optional staple finisher With an optional staple finisher Two‑sided printing Two‑sided printing • When loading prepunched paper, make sure that the holes on the long edge of the paper are against the right side of the paper guide. One‑sided printing Two‑sided printing •... -
Page 29: Paper Support
Paper support Paper support Supported paper sizes Paper sizes supported by the printer Paper size Standard Optional Multipurpose feeder Two‑sided 550‑sheet tray, 2100‑sheet tray printing optional 250‑ or 550‑sheet tray 210 x 297 mm (8.3 x 11.7 in.) A5 LEF 210 x 148 mm (8.3 x 5.8 in.) A5 SEF 148 x 210 mm (5.8 x 8.3 in.) - Page 30 Paper support Paper size Standard Optional Multipurpose feeder Two‑sided 550‑sheet tray, 2100‑sheet tray printing optional 250‑ or 550‑sheet tray 9 Envelope 98 x 225 mm (3.9 x 8.9 in.) 10 Envelope 105 x 241 mm (4.1 x 9.5 in.) DL Envelope 110 x 220 mm (4.3 x 8.7 in.) C5 Envelope 162 x 229 mm (6.4 x 9 in.)
- Page 31 Paper support Paper size Output 4‑bin mailbox Staple finisher Staple, hole punch finisher expander or Stack Staple Stack Staple Hole high‑capacity punch output expander Oficio (Mexico) 216 x 340 mm (8.5 x 13.4 in.) Statement 140 x 216 mm (5.5 x 8.5 in.) Executive 184 x 267 mm (7.3 x 10.5 in.)
-
Page 32: Supported Paper Types
Paper support Paper size Output 4‑bin mailbox Staple finisher Staple, hole punch finisher expander or Stack Staple Stack Staple Hole high‑capacity punch output expander B5 Envelope 176 x 250 mm (6.9 x 9.8 in.) Other Envelopes 98.4 x 162 mm (3.9 x 6.4 in.) to 176 x 250 mm (6.9 x 9.8 in.) - Page 33 Paper support Paper type Standard Optional Multipurpose feeder Two‑sided printing 550‑sheet tray, 2100‑sheet tray optional 250‑ or 550‑sheet tray Rough/Cotton Custom Type [x] To prevent transparencies from sticking together, print up to 20 pages only. Print the succeeding pages after three minutes.
-
Page 34: Supported Paper Weights
Paper support Supported paper weights Paper weights supported by the printer Paper type and weight Standard Optional Multipurpose feeder Two‑sided printing 550‑sheet 2100‑sheet tray, optional tray 250‑ or 550‑sheet tray Plain paper or Bond ² 60–176 g/m grain long (16–47‑lb bond) Card stock ²... - Page 35 Paper support Paper weights supported by the output options or finishers Paper type and Output 4‑bin Staple finisher Staple, hole punch finisher weight expander or mailbox Stack Staple Stack Staple Hole punch high‑capacity output expander Plain paper or Bond ² 60–176 g/m grain long (16–...
- Page 36 Paper support Paper type and Output 4‑bin Staple finisher Staple, hole punch finisher weight expander or mailbox Stack Staple Stack Staple Hole punch high‑capacity output expander Envelopes ² 60–105 g/m (16–28‑lb bond)
-
Page 37: Printing
Printing Printing Printing from a computer Note: For labels, card stock, and envelopes, set the paper size and type in the printer before printing the document. From the document that you are trying to print, open the Print dialog. If necessary, adjust the settings. Print the document. -
Page 38: Printing From A Flash Drive
Printing Printing from a mobile device using Wi‑Fi Direct® ® Wi‑Fi Direct is a printing service that lets you print to any Wi‑Fi Direct‑ready printer. Note: Make sure that the mobile device is connected to the printer wireless network. For more information, “Connecting a mobile device to the printer wireless network”... -
Page 39: Supported Flash Drives And File Types
Printing Supported flash drives and file types Flash drives Notes: – The printer supports high‑speed USB flash drives with full‑speed standard. – USB flash drives must support the File Allocation Table (FAT) system. Many flash drives are tested and approved for use with the printer. For more information, contact the place where you purchased the printer. -
Page 40: Configuring Confidential Jobs
Printing Configuring confidential jobs From the control panel, navigate to: Settings > Security > Confidential Print Setup For non‑touch‑screen printer models, press to navigate through the settings. Configure the settings. Max Invalid PIN Set the number of times an invalid PIN can be entered. Note: When the limit is reached, the print jobs for that user name are deleted. -
Page 41: Printing A Font Sample List
Printing Printing a font sample list From the control panel, navigate to: Settings > Reports > Print > Print Fonts For non-touch-screen printer models, press to navigate through the settings. Select a font sample. -
Page 42: Understanding The Printer Menus
Understanding the printer menus Understanding the printer menus Menu map Device • • Preferences Accessibility • • Eco‑Mode Restore Factory Defaults • • Remote Operator Panel Maintenance • • Notifications Visible Home Screen Icons • • Power Management About this Printer Print •... -
Page 43: Device
Understanding the printer menus Device Preferences Menu item Description Display Language Set the language of the text that appears on the display. Country/Region Identify the country or region that the printer is configured to operate. Run initial setup Run the setup wizard. Off* Keyboard Select a language as a keyboard type. - Page 44 Understanding the printer menus Menu item Description Screen Timeout Set the idle time before the display shows the home screen or before the printer logs out a user account automatically. 5–300 seconds (60*) Note: An asterisk (*) next to a value indicates the factory default setting. Eco-Mode Menu item Description...
- Page 45 Understanding the printer menus Notifications Menu item Description Error Lighting Set the indicator light to come on when a printer error occurs. Note: This menu item appears only in some printer models. Alarm Control Set the number of times that the alarm sounds when the printer requires user intervention.
- Page 46 Understanding the printer menus Menu item Description Error Prevention • Set the printer to flush blank pages or pages with partial prints automatically after a jammed page has been cleared. Jam Assist (On*) • Auto Continue (On*) Let the printer continue processing or printing a job automatically after clearing certain printer conditions that Auto Reboot require user intervention.
- Page 47 Understanding the printer menus Menu item Description Timeouts Set Hibernate Timeout to turn off the printer while an active Ethernet connection exists. Hibernate Timeout on Connection Hibernate Do Not Hibernate* Schedule Power Modes Schedule the printer when to enter Sleep or Hibernate mode. Schedules Add New Schedule Note: An asterisk (*) next to a value indicates the factory default setting.
- Page 48 Understanding the printer menus Maintenance Configuration Menu Menu item Description USB Configuration Change the USB driver mode of the printer to improve its compatibility with a personal computer. USB PnP USB Configuration Set the USB port to run at full speed and disable its high‑speed capabilities.
- Page 49 Understanding the printer menus Menu item Description Tray Configuration Set the printer to resolve paper- or envelope-related change prompts. Action for Prompts Prompt user* Continue Use current Reports Print reports about printer menu settings, status, and event logs. Menu Settings Page Event Log Event Log Summary HealthCheck Statistics...
- Page 50 Understanding the printer menus Menu item Description Print Configuration Set the fuser behavior when printing on a letter‑size paper. A4 Fuser Compress* Clip Device Operations Set the printer to operate in Quiet Mode. Quiet Mode Note: Enabling this setting slows down the overall Off* performance of the printer.
-
Page 51: Print
Understanding the printer menus Visible Home Screen Icons Menu Description Status/Supplies Specify which icons to show on the home screen. Job Queue Change Language Address Book Bookmarks Held Jobs App Profiles Eco-Settings Forms and Favorites About this Printer Menu item Description Asset Tag Show the serial number of the printer. - Page 52 Understanding the printer menus Menu item Description Separator Sheets Insert blank separator sheets when printing. None* Between Copies Between Jobs Between Pages Separator Sheet Source Specify the paper source for the separator sheet. Tray [x] (1*) Multipurpose Feeder Pages per Side Print multiple page images on one side of a sheet of paper.
- Page 53 Understanding the printer menus Setup Menu item Description Printer Language Set the printer language. PCL Emulation Note: Setting a printer language default does not prevent a software PS Emulation* program from sending print jobs that use another printer language. Job Waiting Preserve print jobs requiring supplies so that jobs not requiring the missing supplies can print.
- Page 54 Understanding the printer menus Menu item Description Pixel Boost Enable more pixels to print in clusters for clarity, in order to enhance text and images. Off* Fonts Horizontally Vertically Both directions Toner Darkness Determine the lightness or darkness of text images. 1 to 10 (8*) Halftone Enhance the printed output to have smoother lines with sharper edges.
- Page 55 Understanding the printer menus Menu item Description Log Action at Near Full Specify how the printer responds when the hard disk is nearly full. None* E‑mail Current Log E‑mail & Delete Current Log E‑mail & Delete Oldest Log Post Current Log Post &...
- Page 56 Understanding the printer menus Menu item Description Scale To Fit Scale the page content to fit the selected paper size. Off* Annotations Specify whether to print annotations in the PDF. Print Do Not Print* Print PDF Error Enable the printing of PDF error. Note: An asterisk (*) next to a value indicates the factory default setting.
- Page 57 Understanding the printer menus Menu item Description Symbol Set Specify the symbol set for each font name. 10U PC‑8* Note: A symbol set is a set of alphabetic and numeric characters, punctuation, and special symbols. Symbol sets support the different languages or specific programs such as math symbols for scientific text.
- Page 58 Understanding the printer menus Menu item Description Print Timeout Set the printer to end a print job after it has been idle for the specified amount of time. On* (90 seconds) Note: An asterisk (*) next to a value indicates the factory default setting. HTML Menu item Description...
-
Page 59: Paper
Understanding the printer menus Menu item Description Orientation Specify the orientation of text and graphics on the page. Portrait* Landscape Reverse Portrait Reverse Landscape Note: An asterisk (*) next to a value indicates the factory default setting. Paper Tray Configuration Menu item Description Default Source... - Page 60 Understanding the printer menus Media Configuration Universal Setup Menu item Description Units of Measure Specify the unit of measurement for the universal paper. Inches Note: Inches is the U.S. factory default setting. Millimeters is the Millimeters international factory default setting. Portrait Width Set the portrait width of the universal paper.
-
Page 61: Usb Drive
Understanding the printer menus USB Drive Flash Drive Print Menu item Description Number of Copies Set the number of copies. 1–9999 (1*) Paper Source Set the paper source for the print job. Tray [x] (1*) Multipurpose Feeder Manual Paper Manual Envelope Collate Keep the pages of a print job stacked in sequence, particularly when printing multiple copies of the job. -
Page 62: Network/Ports
Understanding the printer menus Menu item Description Separator Sheets Insert blank separator sheets when printing. Off* Between Copies Between Jobs Between Pages Separator Sheet Source Specify the paper source for the separator sheet. Tray [x] (1*) Multipurpose Feeder Blank Pages Print blank pages in a print job. - Page 63 Understanding the printer menus Menu item Description Enable Network Connections Enable the printer to connect to a network. Enable LLDP Enable Link Layer Discovery Protocol (LLDP) in the printer. Off* Note: An asterisk (*) next to a value indicates the factory default setting. Wireless Note: This menu is available only in printers connected to a Wi‑Fi network or printers that have a wireless network adapter.
- Page 64 Understanding the printer menus Menu item Description IPv6 Configure the IPv6 settings. Enable IPv6 (On*) Enable DHCPv6 (Off*) Stateless Address Autoconfiguration (On*) DNS Server Address Manually Assigned IPv6 Address Manually Assigned IPv6 Router Address Prefix (64*) All IPv6 Addresses All IPv6 Router Addresses Network Address Specify the network address.
- Page 65 Understanding the printer menus Menu item Description IPv6 Configure the IPv6 settings. Enable IPv6 (On*) Enable DHCPv6 (Off*) Stateless Address Autoconfiguration (On*) DNS Server Address Manually Assigned IPv6 Address Manually Assigned IPv6 Router Address Prefix (64*) All IPv6 Addresses All IPv6 Router Addresses Network Address Specify the network address.
- Page 66 Understanding the printer menus Menu item Description Set Hostname Set the current TCP/IP host name. Domain Name Set the domain name. Allow DHCP/BOOTP to update Allow the DHCP and BOOTP clients to update the NTP settings of the printer. NTP server Zero Configuration Name Specify a service name for the zero configuration network.
- Page 67 Understanding the printer menus Menu item Description Restricted Server List Options Specify the access option for IP addresses that are not in the list. Block All Ports* Block Printing Only Block Printing and HTTP Only Specify a maximum transmission unit (MTU) parameter for the TCP connections. 256–1500 Ethernet (1500*) Raw Print Port Specify a raw port number for printers connected on a network.
- Page 68 Understanding the printer menus Menu item Description SNMP Version 3 Configure SNMP version 3 to install and update the printer security. Enabled Set Read/Write Credentials User Name Password Set Read‑only Credentials User Name Password Authentication Hash SHA1* Minimum Authentication Level No Authentication, No Privacy Authentication, No Privacy Authentication, Privacy*...
- Page 69 Understanding the printer menus Menu item Description Proposed Authentication Method Set the authentication method. SHA1 Note: This menu item appears only when Base Configuration is set SHA256* to Compatibility. SHA512 IKE SA Lifetime (Hours) Specify the IKE SA expiry period. Note: This menu item appears only when Base Configuration is set to Secure.
- Page 70 Understanding the printer menus Menu item Description LPD Banner Page Print a banner page for all LPD print jobs. Off* Note: A banner page is the first page of a print job used as a separator of print jobs and to identify the originator of the print job request.
- Page 71 Understanding the printer menus ThinPrint Menu item Description Enable ThinPrint Print using ThinPrint. Off* Port Number Set the port number for the ThinPrint server. 4000–4999 (4000*) Bandwidth (bits/sec) Set the speed to transmit data in a ThinPrint environment. 100–1000000 (0*) Packet Size (kbytes) Set the packet size for data transmission.
- Page 72 Understanding the printer menus Restrict external network access Menu item Description Restrict external network Restrict access to network sites. access Off* External network address Specify the network addresses with restricted access. E‑mail address for notification Specify an e‑mail address to send a notification of logged events. Ping frequency Specify the network query interval in seconds.
-
Page 73: Security
Understanding the printer menus Menu item Description SSID Specify the service set identifier (SSID) of the Wi‑Fi network. Preferred Channel Number Show the PSK on the Network Setup Page. Auto 1–11 (6*) Set PSK Set the preshared key (PSK) to authenticate and validate users on a Wi‑Fi connection. - Page 74 Understanding the printer menus Menu item Description Administrative Menus Control access to the printer menu settings. Security Menu Network/Ports Menu Paper Menu Reports Menu Function Configuration Menus Supplies Menu Option Card Menu SE Menu Device Menu Device Management Control access to the printer management options. Remote Management Firmware Updates Apps Configuration...
- Page 75 Understanding the printer menus Menu item Description Browser Specify the default login method to access the browser. User Name/Password User Name Password Schedule USB Devices Menu item Description Schedules Schedule access to the front USB port. Add New Schedule Security Audit Log Menu item Description Enable Audit...
- Page 76 Understanding the printer menus Menu item Description Remote Syslog Facility Specify a facility code that the printer uses when sending log events to a remote server. 0 ‑ Kernel Messages 1 ‑ User‑Level Messages 2 ‑ Mail System 3 ‑ System Daemons 4 ‑...
- Page 77 Understanding the printer menus Menu item Description E‑mail Log Cleared Alert Send e‑mail notification to the administrator when a log entry is deleted. Off* E‑mail Log Wrapped Alert Send e‑mail notification to the administrator when the log becomes full and begins to overwrite the oldest entries.
- Page 78 Understanding the printer menus Login Restrictions Menu item Description Login failures Specify the number of failed login attempts before the user gets locked out. 1–10 (3*) Failure time frame Specify the time frame between failed login attempts before the user gets locked out. 1–60 minutes (5*) Lockout time Specify the lockout duration.
- Page 79 Understanding the printer menus Menu item Description Reserve Job Expiration Set the expiration time that the printer stores print jobs for printing later. Off* 1 Hour 4 Hours 24 Hours 1 Week Require All Jobs to be Held Set the printer to hold all print jobs. Off* Keep duplicate documents Set the printer to print other documents with the same file name without overwriting...
-
Page 80: Reports
Understanding the printer menus Solutions LDAP Settings Menu item Description Follow LDAP Referrals Search the different servers in the domain for the logged-in user account. Off* LDAP Certificate Verification Enable verification of LDAP certificates. Miscellaneous Menu item Description Protected Features Show all the features that Function Access Control (FAC) protects regardless of the security permission that the user has. -
Page 81: Help
Understanding the printer menus Device Menu item Description Device Information Print a report that contains information about the printer. Device Statistics Print a report about printer usage and supply status. Profile List Print a list of profiles that are stored in the printer. Asset Report Print a report that contains the printer serial number and model name. -
Page 82: Troubleshooting
Understanding the printer menus Troubleshooting Menu item Description Print Quality Test Pages Print sample pages to identify and correct print quality defects. Printing the Menu Settings Page From the control panel, navigate to: Settings > Reports > Menu Settings Page For non‑touch‑screen printer models, press to navigate through the settings. -
Page 83: Securing The Printer
Securing the printer Securing the printer Note: The hard disk is supported only in some printer models. Locating the security slot The printer is equipped with a security lock feature. Attach a security lock compatible with most laptop computers in the location shown to secure the printer in place. Erasing printer memory To erase volatile memory or buffered data in your printer, turn off the printer. -
Page 84: Encrypting The Printer Hard Disk
Securing the printer Encrypting the printer hard disk This process erases all contents in the hard disk. If necessary, back up important data from the printer before starting the encryption. From the control panel, navigate to: Settings > Security > Disk Encryption > Start encryption For non-touch-screen printer models, press to navigate through the settings. - Page 85 Securing the printer Erase the content of any installed printer memory in the following circumstances: • The printer is decommissioned. • The printer hard disk is replaced. • The printer is moved to a different department or location. • The printer is serviced by someone from outside your organization. •...
-
Page 86: Maintaining The Printer
Maintaining the printer Maintaining the printer Warning—Potential Damage: Failure to maintain optimum printer performance, or to replace parts and supplies, may cause damage to your printer. Adjusting the speaker volume Adjusting the default internal speaker volume The speaker volume will reset to default value after the session is logged out, when the printer wakes from Sleep or Hibernate mode, or after a power‑on reset. - Page 87 Maintaining the printer Using the personal identification number (PIN) method From the control panel, navigate to: Settings > Network/Ports > Wireless > Wi‑Fi Protected Setup > Start PIN Method Copy the eight‑digit WPS PIN. Open a Web browser, and then type the IP address of your access point in the address field. Notes: •...
-
Page 88: Cleaning The Printer
Maintaining the printer Cleaning the printer CAUTION—SHOCK HAZARD: To avoid the risk of electrical shock when cleaning the exterior of the printer, unplug the power cord from the electrical outlet and disconnect all cables from the printer before proceeding. Notes: •... -
Page 89: Replacing Parts And Supplies
Maintaining the printer Configuring supply notifications Open a web browser, and then type the printer IP address in the address field. Notes: • View the printer IP address on the printer home screen. The IP address appears as four sets of numbers separated by periods, such as 123.123.123.123. -
Page 90: Moving The Printer
Maintaining the printer Unpack the new toner cartridge, and then shake it to redistribute the toner. Insert the new toner cartridge. Close the door. Moving the printer Moving the printer to another location CAUTION—POTENTIAL INJURY: If the printer weight is greater than 20 kg (44 lb), then it may require two or more people to lift it safely. -
Page 91: Saving Energy And Paper
Maintaining the printer • If the printer does not have a caster base but is configured with optional trays or output options, then remove the output options and lift the printer off the trays. Do not try to lift the printer and any options at the same time. - Page 92 Maintaining the printer Conserving supplies • Print on both sides of the paper. Note: Two-sided printing is the default setting in the print driver. • Print multiple pages on a single sheet of paper. • Use the preview feature to see how the document looks like before printing it. •...
-
Page 93: Clearing Jams
Clearing jams Clearing jams Avoiding jams Load paper properly • Make sure paper lies flat in the tray. Correct loading of paper Incorrect loading of paper • Do not remove a tray while the printer is printing. • Do not load a tray while the printer is printing. Load it before printing, or wait for a prompt to load it. •... - Page 94 Clearing jams • Push the tray firmly into the printer after loading paper. • If you are loading prepunched paper for use with the staple finisher, then make sure the holes on the long edge of the paper are on the right side of the tray. For more information, see the “Loading paper and specialty media”...
-
Page 95: Identifying Jam Locations
Clearing jams • Flex, fan, and straighten paper or specialty media before loading it. • Do not use paper that has been cut or trimmed by hand. • Do not mix paper sizes, weights, or types in the same tray. •... - Page 96 Clearing jams Jam locations Finisher or output option bin Standard bin Door A Multipurpose feeder Trays Finisher or output option rear door • Door H • Door K • Door L • Door N • Door P Door C Stapler door •...
-
Page 97: Paper Jam In Trays
Clearing jams Paper jam in trays Remove the tray. Remove the jammed paper. Note: Make sure that all paper fragments are removed. Insert the tray. Paper jam in door A Open door A. Warning—Potential Damage: To prevent damage from electrostatic discharge, touch any exposed metal frame of the printer before accessing or touching interior areas of the printer. - Page 98 Clearing jams Remove the toner cartridge. Remove the imaging unit. Warning—Potential Damage: Do not expose the imaging unit to direct light for more than 10 minutes. Extended exposure to light may cause print quality problems. Warning—Potential Damage: Do not touch the photoconductor drum. Doing so may affect the quality of future print jobs.
- Page 99 Clearing jams Pull out the duplex unit. Remove the jammed paper. Note: Make sure that all paper fragments are removed. Insert the duplex unit. Insert the imaging unit.
-
Page 100: Paper Jam In Door C
Clearing jams Insert the toner cartridge. Close the door. Paper jam in door C Open door C. CAUTION—HOT SURFACE: The inside of the printer might be hot. To reduce the risk of injury from a hot component, allow the surface to cool before touching it. Warning—Potential Damage: To prevent damage from electrostatic discharge, touch any exposed metal frame of the printer before accessing or touching interior areas of the printer. -
Page 101: Paper Jam In The Standard Bin
Clearing jams • Fuser area • Below the fuser area • Duplex area Close the door. Paper jam in the standard bin Remove the jammed paper. Note: Make sure that all paper fragments are removed. -
Page 102: Paper Jam In The Multipurpose Feeder
Clearing jams Paper jam in the multipurpose feeder Remove paper from the multipurpose feeder. Remove the jammed paper. Note: Make sure that all paper fragments are removed. Flex, fan, and align the paper edges before loading. Reload paper. -
Page 103: Paper Jam In The Output Expander
Clearing jams Paper jam in the output expander Open door K. Remove the jammed paper. Note: Make sure that all paper fragments are removed. Close the door. Paper jam in the high‑capacity output expander Open door L. Remove the jammed paper. Note: Make sure that all paper fragments are removed. -
Page 104: Paper Jam In The 4-Bin Mailbox
Clearing jams Close the door. Paper jam in the 4‑bin mailbox Paper jam in door N Open door N. Remove the jammed paper. Note: Make sure that all paper fragments are removed. -
Page 105: Paper Jam In The Staple Finisher
Clearing jams Close the door. Paper jam in the mailbox bin Remove the jammed paper. Note: Make sure that all paper fragments are removed. Paper jam in the staple finisher Paper jam in door H Open door H. Remove the jammed paper. Note: Make sure that all paper fragments are removed. -
Page 106: Paper Jam In The Staple, Hole Punch Finisher
Clearing jams Close the door. Paper jam in the staple finisher bin Remove the jammed paper. Note: Make sure that all paper fragments are removed. Paper jam in the staple, hole punch finisher Paper jam in door P Open door P. Remove the jammed paper. -
Page 107: Staple Jam In The Staple Finisher
Clearing jams Close the door. Paper jam in the staple, hole punch finisher bin Remove the jammed paper. Note: Make sure that all paper fragments are removed. Staple jam in the staple finisher Open door F. - Page 108 Clearing jams Remove the staple cartridge holder. Remove the loose staples.
- Page 109 Clearing jams Press the staples against the metal bracket. Note: If the staples are at the rear of the cartridge, then shake the cartridge downward to bring the staples near the metal bracket. Insert the staple cartridge holder until it clicks into place. Close the door.
-
Page 110: Staple Jam In The Staple, Hole Punch Finisher
Clearing jams Staple jam in the staple, hole punch finisher Depending on the staple jam location, open either door F or door G. Remove the staple cartridge holder. - Page 111 Clearing jams Remove the loose staples. Press the staples against the metal bracket. Note: If the staples are at the rear of the cartridge, then shake the cartridge downward to bring the staples near the metal bracket.
- Page 112 Clearing jams Insert the staple cartridge holder until it clicks into place. Close the door.
-
Page 113: Troubleshooting
Troubleshooting Troubleshooting Configuring the SMTP server Note: In some printer models, this setting can be configured only from the Embedded Web Server. From the control panel From the control panel, navigate to: Settings > Device > Notifications > E‑mail Alerts Setup > E‑mail Setup Configure the settings. - Page 114 Troubleshooting Action Step 3 Go to step 4. Install a supported browser. Check if you are using a supported browser: • Internet Explorer version 11 or later • Microsoft Edge • Safari version 6 or later • Google Chrome version 32 or later •...
-
Page 115: Hardware Options Problems
Troubleshooting Action Step 3 Go to step 4. Insert a supported flash drive. Check if the flash drive is supported. For more information, see “Supported flash drives and file types” on page Is the flash drive supported? Step 4 The problem is Contact your dealer. -
Page 116: Issues With Supplies
Troubleshooting Unformatted flash detected Try one or more of the following: • From the control panel, select Continue to stop the defragmentation and continue printing. • Format the flash memory. Note: If the error message remains, then the flash memory may be defective and needs to be replaced. -
Page 117: Paper Feed Problems
Troubleshooting Paper feed problems Envelope seals when printing Action Step 1 Go to step 2. The problem is solved. Use an envelope that has been stored in a dry environment. Note: Printing on envelopes with high moisture content can seal the flaps. Send the print job. - Page 118 Troubleshooting Tray linking does not work Action Step 1 The problem is Go to step 2. solved. Check if the trays contain the same paper size and paper type. Check if the paper guides are positioned correctly. Print the document. Do the trays link correctly? Step 2 The problem is...
- Page 119 Troubleshooting Action Step 2 Go to step 3. The problem is solved. From the control panel, navigate to: Settings > Paper > Tray Configuration > Paper Size/Type For non‑touch‑screen printer models, press to navigate through the settings. Set the correct paper size and type. Print the document.
-
Page 120: Printing Problems
Troubleshooting Printing problems Print quality is poor Blank or white pages Contact your dealer. Dark print Note: Before solving the problem, print the Print Quality Test Pages. From the control panel, navigate to Settings > Troubleshooting > Print Quality Test Pages. For non‑touch‑screen printer models, press navigate through the settings. - Page 121 Troubleshooting Action Step 2 Go to step 3. The problem is solved. Turn off the printer, wait for about 10 seconds, and then turn on the printer. Reduce toner darkness. From the control panel, navigate to: Settings > Print > Quality > Toner Darkness Print the document.
- Page 122 Troubleshooting Fine lines are not printed correctly Note: Before solving the problem, print the Print Quality Test Pages. From the control panel, navigate to Settings > Troubleshooting > Print Quality Test Pages. For non‑touch‑screen printer models, press navigate through the settings. Action Step 1 Go to step 2.
- Page 123 Troubleshooting Action Step 1 Go to step 2. The problem is solved. Check if the printer is using a genuine and supported toner cartridge. Note: If the cartridge is not supported, then install a supported one. Print the document. Is the paper folded or wrinkled? Step 2 Go to step 3.
- Page 124 Troubleshooting Action Step 1 Go to step 2. The problem is solved. Turn off the printer, wait for 10 seconds, and then turn on the printer. Decrease toner darkness. From the control panel, navigate to: Settings > Print > Quality > Toner Darkness Print the document.
- Page 125 Troubleshooting Action Step 1 The problem is Go to step 2. solved. Adjust the paper guides to the correct position for the paper loaded. Print the document. Are the margins correct? Step 2 The problem is Contact your dealer. solved. Depending on your operating system, specify the paper size from the Printing Preferences or Print dialog.
- Page 126 Troubleshooting Action Step 2 Go to step 3. The problem is solved. Turn off the printer, wait for about 10 seconds, and then turn on the printer. Increase toner darkness. From the control panel, navigate to: Settings > Print > Quality > Toner Darkness Print the document.
- Page 127 Troubleshooting Note: Before solving the problem, print the Print Quality Test Pages. From the control panel, navigate to Settings > Troubleshooting > Print Quality Test Pages. For non‑touch‑screen printer models, press navigate through the settings. Action Step 1 Go to step 2. The problem is solved.
- Page 128 Troubleshooting Action Step 2 Go to step 3. The problem is solved. Depending on your operating system, specify the paper type from the Printing Preferences or Print dialog. Notes: • Make sure that the setting matches the paper loaded. • You can also change the setting on the printer control panel.
- Page 129 Troubleshooting Action Step 1 Go to step 2. The problem is solved. Adjust the guides in the tray to the correct position for the paper loaded. Print the document. Is the print crooked or skewed? Step 2 Contact your dealer. The problem is solved.
- Page 130 Troubleshooting Text or images cut off Note: Before solving the problem, print the Print Quality Test Pages. From the control panel, navigate to Settings > Troubleshooting > Print Quality Test Pages. For non‑touch‑screen printer models, press navigate through the settings. Action Contact your dealer.
- Page 131 Troubleshooting Action Step 2 Contact your dealer. The problem is solved. Depending on your operating system, specify the paper type from the Printing Preferences or Print dialog. Notes: • Make sure that the setting matches the paper loaded. • You can also change the setting on the printer control panel.
- Page 132 Troubleshooting Vertical light bands Note: Before solving the problem, print the Print Quality Test Pages. From the control panel, navigate to Settings > Troubleshooting > Print Quality Test Pages. For non‑touch‑screen printer models, press navigate through the settings. Action Contact your dealer. The problem is Check if the printer is using a genuine and supported toner solved.
- Page 133 Troubleshooting Action Step 2 Contact your dealer. The problem is solved. Fix slow printing problems. For more information, see “Slow printing” on page 135. Do vertical white lines appear on prints? Vertical dark bands Note: Before solving the problem, print the Print Quality Test Pages. From the control panel, navigate to Settings >...
- Page 134 Troubleshooting Action Contact your dealer. The problem is Check if the printer is using a genuine and supported toner solved. cartridge. Note: If the toner cartridge is not supported, then install a supported one. Print the document. Do vertical dark lines or streaks appear on prints? Vertical dark streaks with print missing Contact your dealer.
- Page 135 Troubleshooting Action Step 2 The problem is Go to step 3. solved. The print job may contain a formatting error or invalid data. • Delete the print job, and then send it again. • For PDF files, generate a new file, and then print the documents.
- Page 136 Troubleshooting Action Step 3 Go to step 4. The problem is solved. Depending on your operating system, specify the print resolution from the Printing Preferences or Print dialog. Set the resolution to 600 dpi. Print the document. Is the printer printing slow? Step 4 Go to step 5.
- Page 137 Troubleshooting Action Step 6 Go to step 7. The problem is solved. Make sure that the printer settings for Media Texture and Media Weight match the paper being loaded. From the control panel, navigate to: Settings > Paper > Media Configuration > Media Types For non‑touch‑screen printer models, press to navigate through the settings.
- Page 138 Troubleshooting Action Step 3 The problem is Go to step 4. solved. Check if the ports are working and if the cables are securely connected to the computer and the printer. For more information, see the setup documentation that came with the printer.
- Page 139 Troubleshooting Action Step 5 Go to step 6. Insert the cables to the correct ports. Check if the cables connecting the printer and the computer are inserted to the correct ports. Are the cables inserted to the correct ports? Step 6 The problem is Go to step 7.
-
Page 140: Contacting Your Dealer
Troubleshooting Action Step 2 The problem is Go to step 3. solved. Depending on your operating system, specify the paper size and paper type from the Printing Preferences or Print dialog. Note: You can also change the settings on the printer control panel. -
Page 141: Notices
Supplies Standard supplies for this product that can be replaced by the user include toner cartridges. Be sure to use only SHARP-specified products for the toner cartridges. - Page 142 Notices For best copying results, be sure to use only Sharp Genuine Supplies which are designed, engineered, and tested to maximize the life and performance of Sharp products. Look for the Genuine Supplies label on the toner package. GENUINE SUPPLIES Hot surface notice 此符號表示該表面或元件會發熱。...
- Page 143 Notices The WEEE logo signifies specific recycling programs and procedures for electronic products in countries of the European Union. We encourage the recycling of our products. If you have further questions about recycling options, contact your local sales office. India E-Waste notice This product complies with the India E-Waste (Management and Handling) Rules, 2011, which prohibit use of lead, mercury, hexavalent chromium, polybrominated biphenyls, or polybrominated diphenyl ethers in concentrations exceeding 0.1%...
- Page 144 Notices BSMI battery notice Taiwan RoHS information 限用物質含有情況標示 適用於印表機、雷射印表機、多功能複合機或多功能印表機。 Applies to Printer, Laser Printer, Multifunction Machine, or Multifunction Printer. 型號(型式):請參閱「注意事項」章節或「控管資訊」章節。 Type designation (Type): Please see the “Notices” section or the “Regulatory information” section. 單元 限用物質及其化學符號 Unit Restricted substances and their chemical symbols 鉛...
- Page 145 Notices 單元 限用物質及其化學符號 Unit Restricted substances and their chemical symbols 鉛 汞 鎘 六價鉻 多溴聯苯 多溴二苯醚 Lead Mercury Cadmium Hexavalent Polybrominated Polybrominated (Pb) (Hg) (Cd) chromium biphenyl (PBB) diphenylether (PBDE) 液晶/LED 顯示 面板 LCD/LED display 備考 1.〝 〞係指該項限用物質之百分比含量未超出百分比含量基準值。 Note 1: “ ”...
- Page 146 Notices Temperature information Operating temperature and relative humidity 15.3 to 32.2°C (60 to 90°F) and 8 to 80% RH 1.1 to 35°C (34 to 95°F) and 8 to 80% RH Printer / cartridge / imaging unit long- Maximum wet-bulb temperature : 22.8°C (73°F) term storage Non-condensing environment...
- Page 147 Notices Mode Description Power consumption (Watts) Printing The product is generating hard‑copy output from electronic One-sided: 670 (4064-295); 830 inputs. (4064-695) Two-sided: 485 (4064-295); 640 (4064-695) Copy The product is generating hard‑copy output from hard‑copy original documents. Scan The product is scanning hard‑copy documents. Ready The product is waiting for a print job.
- Page 148 Notices Off mode If this product has an off mode which still consumes a small amount of power, then to completely stop product power consumption, disconnect the power supply cord from the electrical outlet. Total energy usage It is sometimes helpful to estimate the total product energy usage. Since power consumption claims are provided in power units of Watts, the power consumption should be multiplied by the time the product spends in each mode in order to calculate energy usage.
- Page 149 Notices Industry Canada (Canada) Under Industry Canada regulations, this radio transmitter may only operate using an antenna of a type and maximum (or lesser) gain approved for the transmitter by Industry Canada. To reduce potential radio interference to other users, the antenna type and its gain should be so chosen that the equivalent isotropically radiated power (EIRP) is not more than that necessary for successful communication.
- Page 150 Notices Mechanical assemblies— motors Mechanical assemblies— other Scanner assembly, for multifunction device only LCD/LED display X This table is based on SJ/T 11364 regulations. O: Indicates that the content of the toxic and hazardous substance in all the homogenous materials of the part is below the concentration limit requirement as described in GB/T 26572.
- Page 151 Notices EU statement of radio transmitter operational frequency bands and maximum RF power This radio product transmits in either the 2.4GHz (2.412–2.472 GHz in the EU) or 5GHz (5.15–5.35, 5.47–5.725 in the EU) bands. The maximum transmitter EIRP power output, including antenna gain, is ≤ 20dBm for both bands.
- Page 152 Notices The manufacturer is not responsible for any radio or television interference caused by using other than recommended cables or by unauthorized changes or modifications to this equipment. Unauthorized changes or modifications could void the user's authority to operate this equipment. Note: To assure compliance with FCC regulations on electromagnetic interference for a Class A computing device, use a properly shielded and grounded cable such as Lexmark part number 1021231 for parallel attach or 1021294 for USB attach.
- Page 153 Notices Japanese VCCI notice Korean KC statement Notice to users of Class A products in Brazil Este produto não é apropriado para uso em ambientes domésticos, pois poderá causar interferências eletromagnéticas que obrigam o usuário a tomar medidas necessárias para minimizar estas interferências. European Community (EC) directives conformity This product is in conformity with the protection requirements of EC Council directives 2014/30/EU, 2014/35/EU, and 2011/65/EU on the approximation and harmonization of the laws of the Member States relating to...
- Page 154 Notices This is a product that complies with the emission requirements of EN55022 and EN55032 Class A limits and immunity requirements of EN55024. This product is not intended to be used in residential/domestic environments. This is a Class A product. In a domestic environment, this product may cause radio interference, in which case the user may be required to take adequate measures.
-
Page 155: Index
Index Index Numerics in the staple finisher bin 105 documents, printing in the staple, hole punch from a computer 37 2100‑sheet tray finisher 106 from a mobile device 37 loading 22 in the staple, hole punch finisher bin 106 in trays 97 editing contacts 17 adding contacts 17 clearing staple jam... - Page 156 Index Disk Encryption 79 Menu Settings Page Eco‑Mode 44 printing 82 held jobs 40 Erase Temporary Data Files 79 mobile device printing 40 Ethernet 64 printing from 37, 38 Hibernate mode Flash Drive Print 61 moving the printer 8, 90 configuring 91 Google Cloud Print 72 multipurpose feeder...
- Page 157 Index power save modes selecting a location 8 in the duplex unit 100 configuring 91 shipping 91 in the fuser 100 prepunched paper printer configurations 9 in the multipurpose feeder 102 loading 27 printer connectivity in the output expander 103 print jobs not printed 137 checking 115 in the staple finisher bin 105...
- Page 158 Index supported flash drives 39 toner easily rubs off 130 supported paper sizes 29 vertical dark bands 133 supported paper types 32 vertical dark lines or supported paper weights 34 streaks 133 vertical dark streaks with print missing 134 vertical light bands 132 temperature around the vertical white lines 132 printer 146...