Palram Arcadia 5000 Assembly Instructions Manual
Carport
Hide thumbs
Also See for Arcadia 5000:
- Assembly instructions manual (37 pages) ,
- Assembly manual (86 pages) ,
- Assembly instructions manual (41 pages)
Quick Links
A
ssembly Instructions
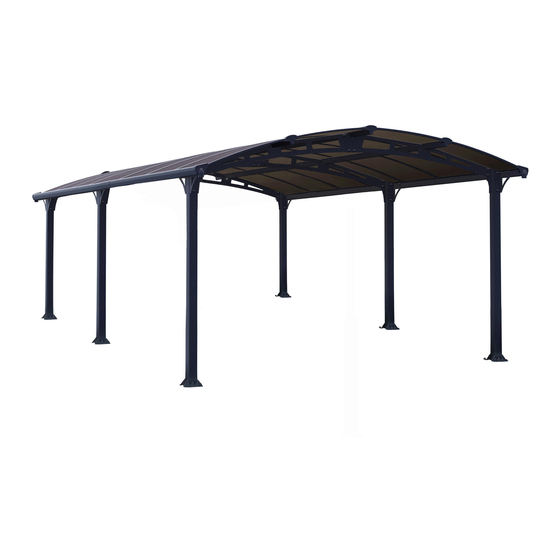
Arcadia 5000 - Carport
Approx. Dim.
502L x 362W x 242H cm / 197.6"L x 142.5"W x 95.3"H
USA
877-627-8476
Canada
1 800-866-5749
After Sale Service
Email: [email protected]
England 01302-380775
Germany 0180-522-8778
www.palramapplications.com
France
0169-791-094
International +972 4-848-6942

Related Manuals for Palram Arcadia 5000


Summary of Contents for Palram Arcadia 5000
- Page 1 Instructions Arcadia 5000 - Carport Approx. Dim. 502L x 362W x 242H cm / 197.6"L x 142.5"W x 95.3"H After Sale Service Email: [email protected] 877-627-8476 England 01302-380775 France 0169-791-094 Canada 1 800-866-5749 Germany 0180-522-8778 International +972 4-848-6942 www.palramapplications.com...
-
Page 2: Cleaning Instructions
» Notes (by steps) IMPORTANT Please read these instructions carefully before you start to assemble this greenhouse. Please carry out the steps in the order set out in these instructions. Step 7: Screw 4000 intended to keep the parts (gable) stable Keep these instructions in a safe place for future reference. - Page 3 WICHTIG Bitte lessen Sie diese Anweisung sorgfältig durch, bevor Sie mit dem Aufbau des Carports beginnen. Bitte führen Sie die Schritte in der Reihenfolge aus, in der sie in der Anweisung aufgeführt sind. Heben Sie diese Anweisung an einem sicheren Ort für zukünftige Verwendung auf. a Hinweise (nach Schritten) a Pflege- und Sicherheitshinweise Schritt 7: Schraube Nr.
-
Page 4: Consignes De Sécurité
IMPORTANT » Remarques (à la procédure par étapes) Veuillez lire attentivement ces instructions avant de commencer le montage de votre abri de voiture. Veillez à réaliser les différentes étapes dans l'ordre indiqué par ce guide d'assemblage. Etape 7: La vis 4000 est destinée à stabiliser les pièces (pignons) Gardez ce guide d'assemblage en lieu sûr pour pouvoir vous y référer ultérieurement. -
Page 5: Instrucciones De Limpieza
IMPORTANTE » Notas (por pasos) Antes de proceder al montaje del cobertizo lean atentamente estas instrucciones. Les recomendamos que sigan los pasos en el orden indicado en estas instrucciones. Paso 7: Fijar con tornillos tipo 4000 solamente para mantener las partes Guarden estas instrucciones en un lugar seguro para consultas futuras. - Page 6 This carport should be assembled on a solid Dieser Carport sollte auf einem festen Le montage de cet abri de voiture doit être Esta marquesina debe ser montado sobre una base (such as concrete). Without solid base, Untergrund (wie zum Beispiel einer réalisé...
- Page 7 Contents 1035 1036 1031 1032 1033 1034 1039 1040 221R 221R 1037 1038...
- Page 8 Co ntents Item cm/Inc Qty. Item cm/Inc Qty. Package Package 221R 221L 1033 1032 1036 1031 1034 1035...
- Page 9 Contents Item cm/Inc Qty. Item cm/Inc Qty. Item cm/Inc Qty. Item cm/Inc Qty. Item Qty. Package Package Kit no. Kit no. Kit no. Kit no. T001 M8 100mm / 4” spare 1037 20 / 7 4038 35 mm 1038 M8 25mm / 1” ”...
- Page 11 221L 1037 1038 221R 221R 221R 1037 1038 221L 1038 221R 1038...
- Page 12 35 mm ”...
- Page 14 4039 4040 4041 4039 4040 4040 4041...
- Page 15 4038 4038...
- Page 16 5000 4010 4000 10 mm 3/8” 5000 4000 4010...
- Page 18 4038 4038...
- Page 19 1035 1035 1035...
- Page 20 1036 1039 1036 1039 1036 1039 1036 1036 1039 1036...
- Page 23 1034 1034 1034...
- Page 24 1033 1040 1033 1040 1033 1040 1033 1033 1040 1033...
- Page 27 1031 1031 1031 1031 1031 1031...
- Page 28 1032 1031 1032 1032 1032...
- Page 31 THIS SIDE OUT THIS SIDE OUT THIS SIDE OUT THIS SIDE OUT...
- Page 32 1032 1032...
- Page 33 1032 1031...
- Page 37 1031...
- Page 38 1031...
- Page 39 4000 4010 5000 10 mm 3/8” 10 mm 3/8” 10 mm 3/8” 5000 4000 4010...
- Page 40 1/8”...
- Page 41 OPTION CAULK / SILICON...