Table of Contents
ARUL7TLAV2
ARUL9TLAV2
ARUL12TLAV2
ARUL14TLAV2
ARUL18TLAV2
TM
INSTALLATION MANUAL
MANUEL D'INSTALLATION
MANUAL DE INSTALACIÓN
Únicamente para personal de servicio autorizado.
INDOOR UNIT (Duct type)
For authorized service personnel only.
UNITÉ INTÉRIEURE (type conduit)
Pour le personnel agréé uniquement.
UNIDAD INTERIOR (Tipo conducto)
PART No. 9374342556-02
Table of Contents

Related Manuals for Fujitsu Airstage ARUL7TLAV2


Summary of Contents for Fujitsu Airstage ARUL7TLAV2
- Page 1 INSTALLATION MANUAL INDOOR UNIT (Duct type) For authorized service personnel only. MANUEL D’INSTALLATION UNITÉ INTÉRIEURE (type conduit) Pour le personnel agréé uniquement. MANUAL DE INSTALACIÓN UNIDAD INTERIOR (Tipo conducto) Únicamente para personal de servicio autorizado. ARUL7TLAV2 ARUL9TLAV2 ARUL12TLAV2 ARUL14TLAV2 ARUL18TLAV2 PART No.
-
Page 2: Table Of Contents
INSTALLATION MANUAL If Necessary, Get Help PART No. 9374342556-02 These instructions are all you need for most installation sites and maintenance conditions. VRF system indoor unit (Duct type) If you require help for a special problem, contact our sales/service outlet or your certified dealer for additional instructions. -
Page 3: About This Product
WARNING Name and Shape Q’ty Application Except for EMERGENCY, never turn off main as well as sub breaker of the indoor units Installation For positioning the indoor unit during operation. It will cause compressor failure as well as water leakage. template First, stop the indoor unit by operating the control unit, converter or external input de- vice and then cut the breaker. -
Page 4: Installation Work
12 (300) or more 3. INSTALLATION WORK 1 (20) or more 3.1. Selecting an installation location Correct initial installation location is important because it is difficult to move unit after it is installed. WARNING 1 (20) or more Select installation locations that can properly support the weight of the indoor. Install the units securely so that they do not topple or fall. -
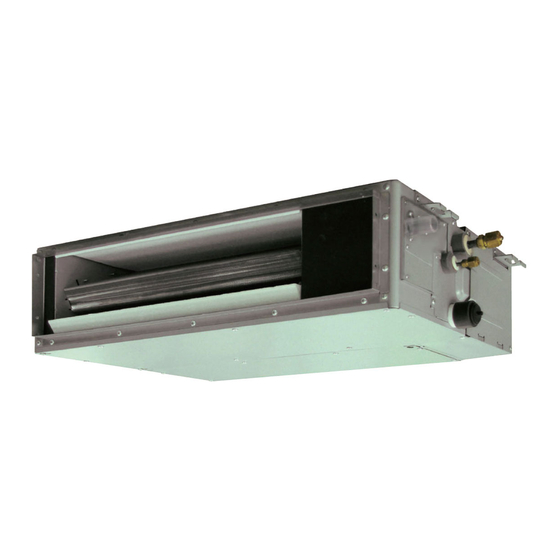
Page 5: Installing The Unit (Ceiling Concealed Type)
Side Inlet - Side Outlet (Duct) 3.4. Installing the unit (ceiling concealed type) Flange (locally purchased) Insulation material (locally purchased) Aluminum tape WARNING Aluminum tape Tapping screw for flange Flange (locally purchased) connection (M4 x 10mm/ Install the air conditioner in a location which can withstand a load of at least 5 times the locally purchased) weight of the main unit and which will not amplify sound or vibration. -
Page 6: Installing The Unit (Wall Mounted Type/Floor Standing Concealed Type)
3.4.2. Install the filters (2) Leveling Base horizontal direction leveling on top of the unit. • Install the filters to the unit. Ceiling Level PROHIBITED GOOD Filter (accessories) 3/8 (10) or less Level Unit Filter PROHIBITED GOOD 3/8 (10) or less 3.4.3. -
Page 7: Pipe Installation
• Remove the screws, and Level then remove cover and fan guard. • Install the cover with the screws as shown in the screw following figure. Model Screw AR7/9/12/14 AR18 GOOD PROHIBITED Cover Fan guard 3.5.2. Install the filter • Install the filters (accessories) to the unit. 3/8 (10) or less Unit: in (mm) CAUTION... -
Page 8: Pipe Requirement
4.3.3. Pipe connection 4.2. Pipe requirement CAUTION CAUTION Be sure to install the pipe against the port on the indoor unit correctly. If the centering is improper, the flare nut cannot tighten smoothly. If the flare nut is forced to turn, the Refer to the Installation Manual of the outdoor unit for description of the length of con- threads will be damaged. -
Page 9: When Drain Pump Is Used
(1) Ceiling concealed type 5.1. When drain pump is used Gap of 60 to 78 in (1.5 to 2 m) GOOD • Use general hard polyvinyl chloride pipe ø 3/4 in (19 mm) [I.D.], ø 1-1/16 in (27 mm) Downward gradient [O.D.] . -
Page 10: Install The Drain Pipe
• STEP1 - STEP3 5.3. Install the drain pipe Butt the insulation against the unit. (1) Be sure to use supplied Drain hose ① and Hose band ②. Unit ② Hose band (accessories) ① Drain hose (accessories) Slit Hard PVC side Drain hole Hose band... -
Page 11: Electrical Wiring
A. Current breaker requirements 6. ELECTRICAL WIRING MCA: Minimum Circuit Ampacity MAX. CKT. BKR Model MAX. CKT. BKR: Maximum Circuit (Fuse capacity) WARNING Breaker ARUL7TLAV2 0.71 A Electrical work must be performed in accordance with this Manual by a person certified When the power crossover wiring is ARUL9TLAV2 0.71 A... -
Page 12: Unit Wiring
6.3.2. Transmission and Remote controller cable 6.3. Unit wiring Transmission cable Remote controller cable Before attaching the cable to terminal block. 1 in (25 mm) 13/16 in (20 mm) 6.3.1. Power supply cable Shield Adjust the length of power supply cable to avoid excessive tension with referring figure cable below. -
Page 13: Optional Parts Wiring
6.5.3. Connection methods Wire modification for External IMPORTANT: input/output wire Be sure to insulate the connection between the (1) Remove insulation from wire at- wires. tached to wire kit connector. Locally Wire kit connector Cable tie (medium) (2) Remove insulation from field purchased (optional parts) (accessories) -
Page 14: External Input And External Output (Optional Parts)
When connected to Dry contact terminals of multiple indoor units with a connected unit, 6.6. External input and external output (optional parts) insulate each indoor unit with relay, etc. as shown on below example. 6.6.1. External input P.C.B • Indoor unit can be Operation/Stop, Emergency stop or Forced stop by using indoor unit PCB CNA01 or CNA02. -
Page 15: Remote Sensor (Optional Parts)
Output select 7. FIELD SETTING ● When indicator etc. are connected directly P.C.B There are 3 methods for address setting by FIELD SETTING as follows. Set by either of the methods. Indicator 1 Each setting method is described (1) to (3) below. (1) IU AD, REF AD SW settings: This section (7.1. -
Page 16: Custom Code Setting
7.5. Switching of airflow direction louver function 7.2. Custom code setting Selecting the custom code prevents the indoor unit mix-up. When auto louver grille (optional parts) is attached, set the airflow direction louver function (Up to 4 codes can be set.) “Valid”. - Page 17 Function Function Function Setting number Default Details Function Setting number Default Details number number 00 All (Forbidden) Change the target for reporting er- Display only 00 Disable Error report rors. Errors can either be reported Standby on central 01 1 minutes Sets the standby time until the target in all locations, or only on the...
-
Page 18: Test Run
8. TEST RUN 10. ERROR CODES If you use a wired type remote controller, error codes will appear on the remote controller 8.1. Test run using Outdoor unit (PCB) display. If you use a wireless remote controller, the lamp on the photodetector unit will output error codes by way of blinking patterns.