
Related Manuals for Yamaha N-100


Summary of Contents for Yamaha N-100
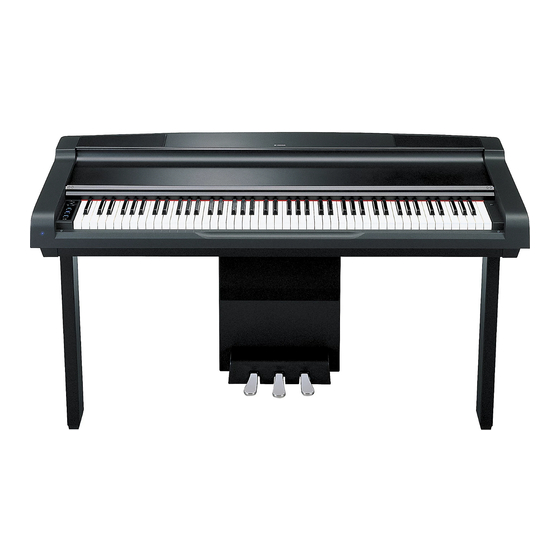
- Page 1 Digital Piano N-100 Owner’s Manual Bedienungsanleitung Mode d’emploi Manual de instrucciones...
-
Page 2: Special Message Section
SPECIFICATIONS SUBJECT TO CHANGE: The information contained in this manual is believed to be cor- rect at the time of printing. However, Yamaha reserves the right to change or modify any of the specifications without notice or obligation to update existing units. -
Page 3: Important Safety Instructions
Do NOT connect this type of product to any power supply or adapter other than one described in the owners manual, on the name plate, or specifically recommended by Yamaha. WARNING: Do not place this product or any other... - Page 4 The instrument contains no user-serviceable parts. If it should appear to be malfunctioning, discontinue use immediately and have it inspected by qualified Yamaha service personnel. CAUTION Always follow the basic precautions listed below to avoid the possibility of physical injury to you or others, or damage to the instrument or other property.
- Page 5 Do not use paint thinners, solvents, cleaning fluids, or chemical-impregnated wiping cloths. Yamaha cannot be held responsible for damage caused by improper use or modifications to the instrument, or data that is lost or destroyed. Always turn the power off when the instrument is not in use.
-
Page 6: Introduction
Keyoff Samples that add the subtle sound produced when the keys are released. The N-100 comes much closer to the sound of a true acoustic piano. -
Page 7: About This Owner's Manual
This product incorporates and bundles computer programs and contents in which Yamaha owns copyrights or with respect to which it has license to use others’ copyrights. Such copyrighted materials include, without limitation, all computer software, style files, MIDI files, WAVE data, musical scores and sound recordings. -
Page 8: Table Of Contents
Local Control ON/OFF ... 23 Program Change ON/OFF ... 24 Control Change ON/OFF ... 24 Troubleshooting...25 Optional Equipment...25 Keyboard Stand Assembly ...26 Index...31 Appendix Preset Song List ...32 MIDI Data Format ...33 MIDI Implementation Chart ...37 Specifications ...38 N-100 Owner’s Manual... -
Page 9: Application Index
Changing the key of the N-100 to facilitate playing in difficult/unfamiliar key signatures ... Transposition → (page 19) Fine tuning the pitch of the entire instrument when you play the N-100 along with other instruments or CD music ...Fine tuning of the Pitch → (page 19) Selecting a touch sensitivity type...Touch Sensitivity →... -
Page 10: Panel Controls And Terminals
N-100 Owner’s Manual 7 AUX OUT [L] [R](LEVEL FIXED) jacks ...page 21 For outputting the sound of the N-100 to an external audio system, or connecting it to another device (MD recorder, etc.) to record your performance. 8 [PHONES] jack...page 12 For connecting a set of standard stereo headphones, allowing private practice. -
Page 11: Before Using The Digital Piano
WARNING Make sure your N-100 is rated for the AC voltage supplied in the area in which it is to be used (voltage rating appears on the name plate on the bottom panel). In some areas, a voltage selector may be provided on the bottom panel of the main keyboard unit near the power cord. -
Page 12: Setting The Volume
The volume level of the entire keyboard sound CAUTION Do not use the N-100 at a high volume level for a long period of time, or your hearing may be damaged. Using Headphones Connect a set of headphones to one of the jacks are provided. -
Page 13: Reference
Listening to the Demo Songs and the 50 Piano Preset Songs The N-100 contains Demo songs that effectively showcase the voices of the instrument, and includes performance data of 50 different popular piano songs for your listening enjoyment. Press the [POWER] switch to turn the power on. - Page 14 (C#6) TERMINOLOGY Song: On the N-100, performance data is called a “Song.” This includes the demonstration song and piano preset song. Preset: Preset Data supplied with the 50th internal memory of the N-100 shipped from the factory.
-
Page 15: Selecting & Playing Voices
(page 13). TERMINOLOGY Voice: On the N-100, the term “voice” means “instrument sound.” NOTE When you select a voice, an appropriate reverb type will be selected automatically (page 18). -
Page 16: Using The Pedals
Selecting & Playing Voices Using the Pedals The N-100 has three foot pedals: damper pedal (right), sostenuto pedal (center), and soft pedal (left) that pro- duce a range of expressive effects similar to those pro- duced by the pedals on an acoustic piano. -
Page 17: Combining Voices (Dual)
Selecting & Playing Voices NOTE Reverb in Dual The reverb type assigned to Voice 1 will take priority. If the reverb assigned to Voice 1 is set to OFF, the reverb assigned to Voice 2 will be in effect. N-100 Owner’s Manual... -
Page 18: Adding Variations To The Sound-Reverb
While holding down the reverb to the depth most suitable for the selected voice. N-100 Owner’s Manual Description This setting adds a continuous reverb effect to the sound, similar to the acoustic reverberation you would hear in a room. -
Page 19: Transposition
“+5,” playing key C produces pitch F. In this way, you can play a song as though it were in C major, and the N-100 will transpose it to the key of F. Setting the amount of transposition... -
Page 20: Touch Sensitivity
HARD Setting the Touch Sensitivity Type While holding down the to select the desired touch sensitivity. N-100 Owner’s Manual Description The volume level does not change at all regardless of whether you play the keyboard soft or hard. The volume level does not change much when you play the keyboard soft or hard. -
Page 21: Connections
MIDI device or computer. 2 AUX OUT [L] [R](LEVEL FIXED) jacks You can connect these jacks to a stereo system to amplify the N-100 or to a cassette tape recorder to record your performance. Refer to the diagram below and use audio cables to make the connections. -
Page 22: Connecting Midi Instruments
MIDI. CAUTION When connecting the N-100 to a computer, first turn off the power to both the N-100 and the computer before connecting any cables. After making connections, turn on the power of the com- puter first, then that of the N-100. -
Page 23: Midi Functions
Control On,” since the internal tone generator is controlled locally by its own keyboard. Local control can be turned OFF, however, so that the N-100 keyboard does not play the internal voices, but the appropriate MIDI information is still transmitted via the MIDI OUT terminal when notes are played on the keyboard. -
Page 24: Program Change On/Off
MIDI device, causing the same numbered voice to be selected on the corresponding channel (the keyboard voice does not change). The N-100 will normally also send a MIDI program change number whenever one of its voices is selected, causing the same numbered voice or pro- gram to be selected on the external MIDI device if the device is set up to receive and respond to MIDI program change numbers. -
Page 25: Troubleshooting
N-100, and the male plug into a proper AC outlet (page 11). The noise may be due to interference caused by the use of a mobile phone in close proximity to the N-100. Turn off the mobile phone, or use it further away from the N- 100. -
Page 26: Keyboard Stand Assembly
• Before starting installation, remove the vinyl ties that bundle the pedal cord and AC power cord. Lean A against the wall. Spread a large soft cloth such as a blanket on the floor in front of the wall. N-100 Owner’s Manual Pedal cord Pedal box Speaker box... - Page 27 Attach C to B. CAUTION Please do not touch the speaker net (cloth cover) or the speaker underneath it. Remove the plastic groove cover from B. Stand B upside down on the floor and support it with your hands. N-100 Owner’s Manual...
- Page 28 B by 20cm or more (roughly half the length of B). At least 20cm 20cm N-100 Owner’s Manual Replace the plastic cover onto the groove of B. Do not insert the feet of the groove cover between the groove socket and groove wall.
- Page 29 If the screw holes do not align, loose the other screws and adjust the position of D. Raise A. Use B as support to raise A. Connect the AC power cord. Insert the AC power cord plug into the AC INLET. Keyboard Stand Assembly N-100 Owner’s Manual...
-
Page 30: Connect The Pedal Cord
Improper handling can result in damage to the instrument or personal injury. Hold here. Place the N-100 so that its rear panel is at least 10 cm away from the wall. Do not hold here. -
Page 31: Index
Specifications... 38 Start/stop playback... 13 50 Piano Preset Song... 13 Demo songs ... 13 Sustain pedal ... 16 Touch sensitivity ... 20 Transposition ... 19 Troubleshooting... 25 Tuning ➝Fine tuning of the Pitch... 19 Voice ... 15 N-100 Index Owner’s Manual... -
Page 32: Appendix
Tango (España) The Entertainer Maple Leaf Rag La Fille aux Cheveux de Lin Arabesque 1 Clair de lune Rêverie Golliwog’s Cakewalk N-100 Owner’s Manual / Bedienungsanleitung / Mode d’emploi / Manual de instrucciones Title J.S.Bach J.S.Bach J.S.Bach J.S.Bach No.1) J.S.Bach L-C.Daquin... -
Page 33: Midi Data Format
Si vous êtes très familier avec l’interface MIDI ou si vous utilisez un ordinateur pour commander votre matériel de musique au moyen de messages MIDI générés par ordinateur, les données suivantes vous seront utiles et vous aideront à commander le N-100. - Page 34 • If an error occurs during MIDI reception, the Sustain, Soste- nuto, and Soft effects for all channels are turned off and an All Note Off occurs. N-100 Owner’s Manual / Bedienungsanleitung / Mode d’emploi / Manual de instrucciones 7. SYSTEM EXCLUSIVE MESSAGES (Universal System Exclusive) (1) Universal Realtime Message Data format: [F0H] ->...
- Page 35 Internal MIDI clock External MIDI clock F7H = End of Exclusive N-100 Owner’s Manual / Bedienungsanleitung / Mode d’emploi / Manual de instrucciones 10. SYSTEM EXCLUSIVE MESSAGES (Special Control) Data format: [F0H] -> [43H] -> [73H] -> [7FH] -> [4H]B ->...
- Page 36 ROOM HALL 1 HALL 2 STAGE EFFECT CHORUS PHASER TREMOLO ROTARY SP N-100 Owner’s Manual / Bedienungsanleitung / Mode d’emploi / Manual de instrucciones Data (H) Parameter 020C–05F4(*1) MASTER TUNE 00–7F MASTER VOLUME XG SYSTEM ON RESET ALL PARAMETERS Data (H) Parameter 00–7F...
-
Page 37: Midi Implementation Chart
Active Sense : Reset Notes: Mode 1 : OMNI ON , POLY Mode 3 : OMNI OFF, POLY N-100 Owner’s Manual / Bedienungsanleitung / Mode d’emploi / Manual de instrucciones Transmitted Recognized 1 - 16 1 - 16 1 - 16... -
Page 38: Specifications
Gerät selbst oder Sonderzubehör nicht in jedem Land gleich sind, setzen Sie sich im Zweifel bitte mit Ihrem Yamaha-Händler in Verbindung. * Les caractéristiques techniques et les descriptions du mode d’emploi ne sont données que pour information. Yamaha Corp. se réserve le droit de changer ou modifier les produits et leurs caractéristiques techniques à... - Page 39 MEMO N-100 Owner’s Manual / Bedienungsanleitung / Mode d’emploi / Manual de instrucciones...
- Page 40 * This applies only to products distributed by YAMAHA CORPORATION OF AMERICA. IMPORTANT NOTICE FOR THE UNITED KINGDOM Connecting the Plug and Cord IMPORTANT.
- Page 41 For details of products, please contact your nearest Yamaha representative or the authorized distributor listed below. Pour plus de détails sur les produits, veuillez-vous adresser à Yamaha ou au distributeur le plus proche de vous figurant dans la liste suivante.
- Page 42 Este documento se ha impreso en papel sin cloro alguno, con tinta de soja. Clavinova Web site http://music.yamaha.com/homekeyboard Yamaha Manual Library http://www.yamaha.co.jp/manual/ U.R.G., Pro Audio & Digital Musical Instrument Division, Yamaha Corporation © 2006 Yamaha Corporation WG12460 602PODH5.2-01A0 Printed in Japan...