Table of Contents
Quick Links
Table of Contents

Related Manuals for Yamaha Electone EL-87


Summary of Contents for Yamaha Electone EL-87
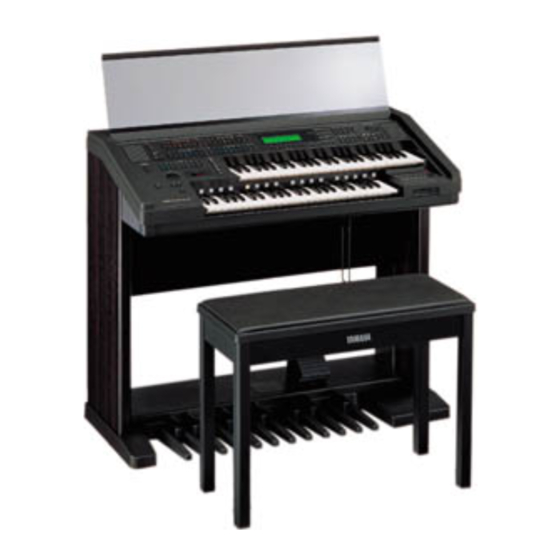
- Page 4 You are the proud owner of a fine electronic organ, Electone EL-87. The Yamaha EL-87 Electone combines the most advanced AWM tone generation technology with state-of-the-art digital electronics and features to give you stunning sound quality with maximum musical enjoyment. A large Liquid Crystal Display and sophisticated yet easy-to-use interface also greatly enhance the operability of this advanced instrument.
-
Page 5: Table Of Contents
Table of Contents Panel Layout...2 Main Features...5 1 Quick Introductory Guide...6 1 Getting Started... 6 2 Basic Registrations ... 7 3 Registration Menu Disk... 8 4 Basic Operation ... 15 5 Using the LCD Display ... 16 6 Voice List... 20 2 Voice Sections ...22 1 Selecting Voices from the Panel ... -
Page 6: Panel Layout
Panel Layout Front Panel... - Page 8 LCD/Display Select Others...
-
Page 9: Main Features
Main Features Your Yamaha Electone is packed with many sophisticated functions. Yet is amazingly easy to use. The main features are briefly described here so that you can quickly understand the capabilities of your Electone. Included among the main features are:... -
Page 10: Quick Introductory Guide
Electone. The basic operations and functions that you learn in this section will also be important when you later use the Electone's more advanced features. Yamaha products are manufactured specifically for the supply voltage in the area where they are to be sold. If you... -
Page 11: Basic Registrations
Set the MASTER VOLUME control. The MASTER VOLUME control is an overall control which affects the volume of the entire instrument. Press the Expression pedal down with your foot. Once you have set the MASTER VOLUME control to a suitable level, you can use the Expression pedal to change the volume with your foot as you play. -
Page 12: Registration Menu Disk
N O T E : See page 68 for more information on the Music Disk Recorder. N O T E : See page 10 for the complete list of the Registration Menus. N O T E : While you are in the Voice Edit mode or Rhythm Pattern/Sequence Program mode, the Registration Menus cannot be displayed on the LCD. - Page 13 Select one of the registrations shown on the LCD by pressing the appropriate Data Control button. Up to 16 registration selections are shown on the LCD, and the 16 Data Control buttons correspond to those selections. The Data Control buttons are used to select voices, rhythms and various functions.
-
Page 14: Registration Menu List
Registration Menu List Page 1: Strings String Orchestra Mellow Orchestra 1 Small Strings Fidle Mellow Classic 1 Pizzicato Strings Tremolo Strings Mellow Classic Strings Quartet Mellow Orchestra 2 Pops Classic Unison Strings Mellow Classic 2 Pizzicato Unison Dynamic Musical Dynamic Orchestra The numbers in the parentheses indicate that the "feet"... - Page 15 Page 2: Brass Marching Band 1 Fanfare Big Band 1 (Dynamic) Big Band 3 (Trombone Ensemble) Big Band 5 (Super Saxophones) Jazz Trumpet 1 Dixieland 1 Sax Fusion 1 Marching Band 2 Classic Horn Big Band 2 (Mellow) Big Band 4 (Mute) Big Band 6 (Mellow Sax)
- Page 16 Page 3: Lead Woodwind Ensemble 1 Classical Flute Classic Oboe Classic Clarinet Folklore Kena Western Harmonica Continental Tango Jazz Organ 1 Piccolo Cute Mellow Flute Mellow Oboe Jazz Clarinet Mellow Whistle Jazz Harmonica Chanson Accordion Jazz Organ 2 Clarinet 1 Bassoon 2 Harp Tremolo Strings...
- Page 17 Page 4: Decay Classic Piano Electric Piano 1 Honky Tonk Jazz Guitar Latin Mrimba Romantic Music Box Guitar, Oldies Steel Drum European Mellow Piano Electric Piano 2 Western Guitar Classic Guitar Canzone Mandolin Xmas Chime Heavy Metal Japanese Tradition 1: UPPER KEYBOARD VOICE 1 2: UPPER KEYBOARD VOICE 2 3: LEAD VOICE 5: LOWER KEYBOARD VOICE 1 6: LOWER KEYBOARD VOICE 2 7: PEDAL VOICE 1 Piano 1 Piano 1...
- Page 18 Page 5: Synth Contemporary 1 (Fusion 1) Contemporary 3 (Dance Beat 1) Contemporary 5 (Japanese New Music 1) Contemporary 7 (Dance Beat 3) Contemporary 9 (Fusion 3) Synth Classic 1 Contemporary 11 (Dance Beat 4) Synth Brass Orchestra 1 Contemporary 2 (Fusion 2) Contemporary 4 (Dance Beat 2)
-
Page 19: Basic Operation
Basic Operation... -
Page 20: Using The Lcd Display
Using the LCD Display This section introduces you the convenient control functions of the LCD display. The LCD display lets you see at a glance the current settings and provides easy-to-understand graphic representation of all parameters. Selecting a voice/rhythm Press the panel voice/rhythm button which you want to use (For example, press the STRINGS button in the Upper Keyboard Voice 1 section). - Page 21 Data Control Buttons The Data Control buttons are used to select 1 a voice/rhythm or function shown on the display. Press the STRINGS button in the Upper Keyboard Voice 1 section once again. This LCD changes to show some of the other ways in which the Data Control buttons are used to control Electone functions.
- Page 22 The Summary of the LCD Operation...
- Page 23 Hold This button allows you to keep the LCD display at the current function. Normally, if the buttons of other functions are pressed, the LCD will switch to those functions. To keep this from happening, press the Hold button; the button's LED will remain lit as long as Hold is in effect.
-
Page 26: Voice Sections
Voice Sections The EL-87 features 131 different high quality AWM voices, each of them can be used on the Upper keyboard, Lower keyboard and Pedalboard. There are four voice sections for the Upper keyboard (including the Upper Flute Voice section), three voice sections for the Lower keyboard (including the Lower Flute Voice section), and two voice sections for the Pedalboard. - Page 27 Press one of the Data Control buttons that corresponds to voice you wish to select. The selected voice will be shown at the upper row of the LCD. In this case, Pop Organ 1 appears. If you wish to, you can select voices from the other Upper Keyboard Voice sections (Upper Voices 2 and Lead Voices), following steps #1 and #2 above.
- Page 28 N O T E : The Lead and Pedal Voices sound one note at a time; when you simultaneously press two or more keys, only the highest note will sound. When the TO LOWER button is turned on, the Lead voices and Pedal voices cannot be played on the Upper keyboard and Pedalboard, respectively.
-
Page 29: Selecting Voices From The Dotted Buttons
Selecting Voices from the Dotted Buttons —Dotted Buttons and User Voices— The EL-87 has a wide variety of voices from which you can choose- far greater than what is immediately apparent from the front panel controls. You've already learned in the section above how to select the different voices that are available in the Voice Menu display of each panel voice. - Page 30 N O T E : You can directly view and select Voice Menu pages by holding down one of the Dotted buttons and simultaneously pressing the desired voice buttons in succession. To select voices from the dotted buttons: Press one of the dotted buttons in any of the voice sections. Select one of the pages with the Page buttons, and choose a Voice Menu (PIANO, for example).
-
Page 31: Voice Menus
To select User voices: Select the USER page when you wish to play voices that you've created in Voice Edit (see page 88.) or voices from a Voice Disk (see page 95.) Voice Menus The following chart lists the voices available and their button/page assignment. -
Page 34: Details On Each Voice
Details on Each Voice Page/Section Voice Name 1. Upper/Lower Strings 1 STRINGS Strings 2 Strings 3 Strings 4 Strings 5 Pizz. Strings Trem. Strings Synth. Strings 1 Synth. Strings 2 2. Lead Violin 1 VIOLIN Violin 2 Violin 3 Violin 4 Pizz. - Page 35 Page/Section Voice Name 13. Upper/Lower Chorus 1 CHORUS Chorus 2 Chorus 3 Vocal 14. Upper Harmonica 1 HARMONICA Harmonica 2 15. Upper/Lower Organ 1 ORGAN Organ 2 Organ 3 Organ 4 Jazz Organ 1 Jazz Organ 2 Jazz Organ 3 Pop Organ 1 Pop Organ 2 Theat.
-
Page 36: Flute Voices (Organ Sounds)
Å@Flute Voices (Organ Sounds) The Flute Voice feature allows you to create your own organ voices, giving you access to an unlimited combination of organ sounds. With this function, you can recreate all of the classic organ sounds by adjusting the flute footage levels and the percussive sounds, just like on conventional organs. There are eight flute footage settings, with three additional footage settings for the attack sound. - Page 37 Press the Page buttons to select the various pages for the other Flute Voice functions. ATTACK Page Attack Footages Determines the level of each volume in the percussive portion of the voice. Footage settings are 4', 2-2/3' and 2'. Attack Length Determines the duration of the attack sound.
-
Page 38: Save To User Flute Voice
NOTE: All settings in the Footage, Attack and Volume pages can be saved to the Save page, except for the following: Attack Mode, Tremolo On/Off, and Volume. Save to User Flute Voice Saves the currently created Flute Voice to the selected User Flute Voice memory space. -
Page 39: Using Preset And User Voices
Using Preset and User Voices To call up the Preset Voices and User Voices: Press the Page buttons to select the MENU page. Select Preset or User Flute Voices. Eight factory-preset voices (four Jazz Organ and four Pop Organ voices) are set to the upper row, and the eight User voices in the bottom row are for selecting voices you created and stored with the SAVE page. -
Page 40: Voice Controls And Effects
Voice Controls and Effects The Electone is equipped with two general kinds of functions that can be used to change the sound of the voices: Voice Controls and Effects. Voice controls are used to change various aspects of the voices, such as the touch sensitivity, volume, octave (footage), vibrato, pan setting and brilliance. -
Page 41: Selecting From Voice Condition
Selecting from Voice Condition Pages To call up the Voice Condition page: Choose a voice on the panel, then press that voice’s panel button again (or again press the Data Control button corresponding to the selected voice). The Voice Condition display pages of the various voice sections have slight differences in their functions. -
Page 42: Feet
N O T E : Each effect may not be noticeable even though you select the effect here, if the corresponding settings on the Effect Set page (See pages 40 and 41) are not appropriate. N O T E : The Pan effect is displayed and active only when other effects are set to OFF (in the EFFECT parameter above). -
Page 43: Page 2]
Voice Condition [PAGE 2] Press Page buttons to select PAGE 2. The Pedal voice sections have PAGE 1 settings only (no PAGE 2). The Lead Slide and Lead Tune functions are only available with the Lead voice section. 1 VIBRATO PRESET/USER Selects Preset, which calls up the original (factory) vibrato settings for the voice, or User, which lets you adjust the vibrato... -
Page 44: Selecting From Effect Set
Selecting from Effect Set Pages You must first "turn on" the desired effect on the Voice Condition Page 1 before working on the Effect Set page. 1. Call up a Voice Condition page by pressing the desired voice button on the panel twice. 2. -
Page 45: Delay
DELAY & FLANGER Page Press Page buttons to select Delay and Flanger pages, for Lead, Upper, Lower or Pedal. 3 DELAY Delay is a pronounced echo effect, with distinct delayed repeats of the original sound. SPEED Determines the time between delayed repeats. Range: 0-100 F.B. -
Page 46: Selecting From The Panel
N O T E : When this parameter or the panel REVERB control is set to the minimum, the settings in the pages that follow have no effect. Selecting from the Panel Reverb, Sustain and Tremolo/Chorus pages are called up by pressing the respective panel buttons. - Page 47 REVERB Page 2 UPPER 1, 2, FLUTE Sections Determines the amount of reverb applied to each voice section. Range: 0-24 LOWER 1, 2, FLUTE Sections Determines the amount of reverb applied to each voice section. Range: 0-24 LEAD Section Determines the amount of reverb applied to the Lead Voice section.
- Page 48 REVERB Page 4 TREM. (Tremolo) Determines the amount of reverb applied to the sound of the Tremolo/Chorus effect. Range: 0-24 SYMP. (Symphonic) Determines the amount of reverb applied to the sound of the Symphonic effect. Range: 0-24 DELAY Determines the amount of reverb applied to the sound of the Delay effect;...
-
Page 49: Sustain
(2) Sustain The Sustain effect, selectable for the Upper, Lower and Pedal voices, causes voices to gradually fade out when the keys are released. The sustain on/off and sustain length settings are independent for each keyboard, providing maximum expressive control. To add sustain to the voices and call up the Sustain Length page: Press one of the SUSTAIN buttons in the SUSTAIN section. -
Page 50: Tremolo/Chorus
(3) Tremolo/Chorus Tremolo recreates the rich, swirling sound of the popular rotating speaker effect. Just as with a conventional rotating speaker, you can switch between slow and fast speeds. And like a motor-driven speaker, the characteristic tremolo effect gradually changes speed after it is switched. You can also adjust the maximum speed of the effect to suit your playing style. - Page 51 (1) Turning on the Tremolo effect (set to standby): Before you can switch Tremolo on and off in real time, you must first turn the effect on in the various voice sections. This doesn’t actually start the effect, but merely puts Tremolo in a “standby” condition. Tremolo can be applied selectively to the voice sections;...
- Page 52 N O T E : The EL-87’s various effects include Glide effect. See page 131 for the information on Glide. (2) Setting the Tremolo effect Tremolo setting made here are global; in other words , they are applied the same to all voices for which Tremolo has been turned on (set to standby).
-
Page 53: Rhythm And Accompaniment
Rhythm and Accompaniment The Rhythm features of the Electone use actual drum and percussion sampled sounds to automatically play various rhythms. Automatic Accompainment functions are used with the rhythms, providing appropriate and completely automatic accompaniment to match the style of the rhythm selected. Moreover, the Electone has a Keyboard Percussion feature that allows you to play drum and percussion sounds from the Lower keyboard and Pedalboard. - Page 54 N O T E : The left footswitch can also be used to turn the rhythm off and on in the middle of song. However, it cannot be used to start the rhythm at the beginning of a song. (To assign the footswitch for rhythm control, see page 131.) N O T E : ABOUT SYNCHRO START:...
- Page 55 Set the tempo. TEMPO Dial For adjusting the speed of the rhythm. Turn the dial clockwise to increase the tempo, and counter-clock wise to decrease it. TEMPO Display (BAR/BEAT Indicator) Shows the current tempo. (Displayed values are given in beats per minute, just as on a conventional metronome.) The tempo range is 40 to 240 beats per minute.
-
Page 56: Rhythm Condition Page
N O T E : See page 56 for the information on A.B.C. N O T E : The Auto Variation function is not applied to some of the rhythms. Rhythm Condition Page The Rhythm Condition page includes Auto Variation, Percussion, and Accompaniment Volume Controls. -
Page 57: Dotted Buttons And User Rhythms
Dotted Buttons and User Rhythms The Rhythm section also has, like the voice sections, dotted buttons from which rhythms can be selected. These dotted buttons function as "wild card" rhythm selectors; any of the rhythms available from the panel buttons, the Rhythm Menus or User rhythms can be selected from these buttons. -
Page 58: Rhythm Menus
(2) To call up the User rhythms: You can select the User page and rhythm when you wish to play rhythms you've created with the Rhythm Pattern Programmer function. (See page 122.) Press Page buttons to select the USER page. Press to select the User rhythm number and its Type. - Page 59 N O T E : The Baroque on the March page is configured with accompaniment only; it does not contain any drum or percussion.
-
Page 60: Automatic Accompaniment-Auto Bass Chord (A.b.c.)
Automatic Accompaniment - Auto Bass Chord (A.B.C.) The Auto Bass Chord (A.B.C.) function works with the Rhythm section of the Electone to automatically produce chord and bass accompaniment as you play. It adds a entirely new dimension to your performance by effectively putting a full backing band at your disposal. - Page 61 (2) To select the A.B.C. function, call up the A.B.C./M.O.C. page: The Auto Bass Chord page can be called up by pressing the A.B.C./ M.O.C. button in the DISPLAY SELECT section. The A.B.C. section on this page are the same as the one found in the Rhythm Condition page.
-
Page 62: Accompaniment Controls
N O T E : To turn the Accompaniment function off, press the Data Control button corresponding to the currently selected type. (When off, all types should appear in normal display.) N O T E : Even if the Accompaniment Type is changed, the Intro/Ending and Fill In patterns remain the same. -
Page 63: Keyboard Percussion
Keyboard Percussion The various drum and percussion sounds (a total of 43 are available) have been assigned to the Lower keyboard and Pedalboard for you to play. To play the Keyboard Percussion sounds: Turn off all the lower and Pedal voices by setting each voice's volume to minimum. - Page 64 Keyboard Percussion Percussion Assignments for the Lower Keyboard Percussion Assignments for the Pedalboard...
-
Page 65: Melody On Chord (M.o.c.)
Melody On Chord ( M.O.C ) The Melody On Chord (M.O.C.) feature automatically adds a harmony part to the melodies you play on the Upper keyboard. The harmony is derived from the chords you play on the Lower keyboard-or from the chords that are played for you, if you use Automatic Accompaniment. -
Page 66: Registration Memory
Registration Memory Registration Memory allows you to store virtually all the settings you make on the panel and LCD, providing a convenient way to instantly change all voice settings and rhythms while you're playing, with the simple touch of a single button on the Registration Memory panel. The buttons are conveniently located between the Upper and Lower keyboards for easy access while playing. -
Page 67: Saving The Registration Data To Disk
Saving the Registration Data to Disk Insert a formatted disk into the disk slot under the Music Disk Recorder (M.D.R.). Make certain that the disk is either blank or has data you can erase. If the disk is new and unformatted, you will have to format it. -
Page 68: Registration Shift
Registration Shift The Registration Shift function allows you to change registrations, all the settings you make on the panel and LCD, without taking your hands from the keyboards. By using the right footswitch on the expression pedal, you can "jump" to a specified registration or step through the panel registrations in sequence, either in numeric order or in any order you specify. - Page 69 USER Selects the User mode. In the User mode, each press of the right footswitch selects registrations according to the order you specify. To set the User mode function: 1. Select USER in the Registration Shift page. The page information, indicating that the Edit page is available, appears at the top right section of the LCD.
- Page 70 DATA (Data Controls) The data controls are used to enter and delete registration numbers in the registration row. Move the cursor to the desired position and edit the registration data. For initially entering a registration number to a blank space in the registration row, or for replacing a number at the current cursor position.
- Page 71 Registration numbers cannot be entered beyond the the Registration Shift function's capacity of 80. The following message momentarily appears when the 80 spaces have been filled: First delete unnecessary registrations, then perform the operation again. Resetting the Electone to the Factory Preset (Power On Reset) All current settings including Registration Memories, User voices and User rhythms can be deleted at once by using the Power On Reset function.
-
Page 72: Music Disk Recorder
N O T E : When the EL-87 is turned on, the LED below the floppy disk slot will be lit indicating that the M.D.R. is ready to use. - Page 73 To maintain the disk drive in optimum working order Yamaha recommends that you use a commercially-available dry-type head cleaning disk to clean the head about once a month. Ask your Yamaha dealer about the availability of proper head-cleaning disks.
-
Page 74: Formatting A Disk
Formatting a Disk Before recording a performance to your blank disk, the disk must first be formatted. To format a disk: Put the disk, label facing up, into the disk drive (insertion slot). “Fort” will appear on the LED display indicating that the inserted disk requires to be formatted. -
Page 75: Recording
Recording (1) To record a song: Set the desired registrations on the Electone. Make all the Electone settings necessary for the song you will record. This means entering the all registrations you will need for the entire performance in the Registration Memory. Make sure also to select the registration that you will use at the beginning of the song. - Page 76 If you make a mistake during recording: 1. Press the PLAY button while the M.D.R. is still running. This stops the recording and returns you to the starting point of the song. The letters “rE” (retry) appear on the left side of the LED display and the PLAY and CUSTOM PLAY LEDs start flashing, indicating that you can re-record the song.
- Page 77 Outline of M.D.R. Operation Though the M.D.R. is as easy to operate as a cassette tape recorder, it is far move versatil. Since it records all Electone settings and control movements as well as the notes you play as digital data, it allows you much more flexibility and control than even the most sophisticated tape recorder.
- Page 78 (2) To record each part separately: You can also record the parts of your performance independently; for example, first recording the chords and bass to the song (using the Lower and Pedalboard), and after that recording the melody. This function also lets you record keyboard percussion and performance control data, such as registration changes and expression pedal operation, separately from the other parts of the song.
- Page 79 Separate recording for Lead and/or Keyboard Percussion parts: Hold down the SHIFT button and simultaneously press the appropriate button in the top row in the procedure #2. above. The two buttons (indicated in the illustration at the right) function as Lead and Keyboard Percussion selectors in the record mode.
- Page 80 Press the CUSTOMPLAY button to start recording of the new part or parts. (Upper part.) Playback of the previously recorded parts starts immediately. The CUSTOM PLAY button is used here to record only the parts that have been selected for recording, and play back only those parts that have been selected for playback.
-
Page 81: Recording Registrations (And Bulk Data)
Recording Registrations (and Bulk Data) You can also record registrations by themselves, without recording a performance. Bulk data, including Registration Memory and Registration Shift settings, Rhythm Pattern (User rhythms) and Rhythm Sequence data, and User voices, is also saved in the operation. There are two ways to record the registrations and bulk data: [1] To record only the registrations and bulk data:... -
Page 82: Recalling Recorded Registrations (And Bulkdata)
Recalling Recorded Registrations (and Bulk Data) The registrations (and bulk data) recorded to song numbers in the above operation can be loaded back to the Electone by simply selecting the appropriate song number and pressing the PLAY button. When the operation has been completed, the M.D.R. -
Page 83: Playback
Playback You can play back your recorded performance by simply pressing the PLAY button. Registrations and other data will be recalled to the Electone. (1) To play back a song: Select the number of the song you wish to play back by using the SONG SELECT buttons. - Page 84 (3) To repeat playback of a song or songs: This feature allows you to repeatedly play back either all songs on a disk or only one specific song. Select the song number you wish to play back. If you wish to play back all songs on a disk, select the first song that will be played back.
-
Page 85: Other Functions
Other Functions (1) Custom Play If you want to play back the song without resetting the registrations and other data, press the CUSTOM PLAY button. This displays the song time and starts playback immediately. (2) Pause If you want to temporarily stop playback of the song or songs, press the PAUSE button. - Page 86 (4) Changing the Tempo You can change the tempo of the song as the song is playing on the M.D.R. by holding down the SHIFT button and pressing the TEMPO + or TEMPO - button. (The Tempo dial on the Electone panel cannot be used to change the tempo on the Music Disk Recorder.) Each press of the button slows down or speeds up the tempo by a small amount.
- Page 87 (5) Song Copy This function lets you copy the data recorded at one song number to another song number. To use the Song Copy function: Select the song number to be copied with the SONG SELECT buttons. While holding down the SHIFT button, press the SONG COPY FROM button.
- Page 88 (7) Disk Copy You can duplicate a floppy disk by copying the contents. Yamaha recommends that you keep two copies of important data on separate floppy disks by using this function. Prepare the source disk and the formatted blank disk to be copied.
- Page 89 Insert the source disk into the disk slot. The M.D.R. starts reading the data in the source disk. "out 1" appears on the LED display. Press the eject button to take out the source disk. "In 2" appears on the LED display to urge you to insert the destination disk.
- Page 90 (8) Checking the Remaining Memory While plaback is stopped, you can check the amount of memory available for additional recording. To do this, simultaneously hold down the SHIFT button and the PAUSE button (indicated in the illustration at right as REM. MEM.: Remaining Memory).
- Page 91 Messages on the M.D.R. LED Display Display Description of the Messages No disk is installed. Install a disk. 1) The installed disk is write-protected, so the Record, Song Copy, and Song Delete jobs cannot be performed. Set the disk's Write-protect tab to OFF. (see page 69.) 2) If you are using a copy-protected playback-only disk, this message may appear when you attempt the Record, Song Copy, or Song Delete operations.
-
Page 92: Voice Edit
Voice Edit In addition to the versatile Flute Voices section, the EL-87 Electone has a Voice Edit feature that allows you to create your own voices. The Voice Edit uses sophisticated sound shaping tools that make it possible to craft just about any kind of sound—from authentic recreations of acoustic instruments to wild electronic voices and special effects. - Page 93 EDIT Page At the left side of the display is the Algorithm used for this voice. An algorithm is a kind of "map" that shows how the sound components of the voice are related to each other. Each voice has five separate sound components and they are called "Operators."...
- Page 94 N O T E : The parameter value can be changed quickly when you press the Data Control button with the COARSE button held. (2) To edit the FM Operators: Adjust the Envelope Parameters of Operator 1 (after turning off the other Operators).
- Page 95 Adjust the RR (Release Rate) parameter. Play a note on the keyboard and then release it. Notice how the changes affect the tail end of the sound, just after you release the key. By changing this parameter, you can make the sound sustain beyond the release point (lower settings).
- Page 96 N O T E : The resonance setting may depend on the frequency cut-off point you set. Stressing the resonance after lowering the cut-off point can produce a remarkable effect. Stressing the resonance may cause a noise. N O T E : The Operator on/off settings you made here are temporary.
-
Page 97: Saving Your New Voice
Saving Your New Voice Once you have created a sound you are satisfied with, you'll want to save that sound for future use. To save your newly created voice: Use the Page buttons to select the SAVE page. The following display appears. SAVE Page Press the Data Control button that corresponds to the User voice number you wish to save to. -
Page 98: Quitting Voice Edit
Quitting Voice Edit You can quit the Voice Edit function from any of its display pages. To quit: Press the VOICE EDIT button in the DISPLAY SELECT section once again. The following display will appear, prompting confirmation of the operation. Select "OK"... -
Page 99: Selecting Voices From A Voice Disk (Optional)
Selecting Voices From a Voice Disk (Optional) You can also load voices from optional Voice Disks to the 16 User voices in the Voice Menu. To do this: Hold down the VOICE EDIT button in the DISPLAY SELECT section and simultaneously press any one of the panel voice buttons. -
Page 100: Voice Editing Basics
Voice Algorithm Examples Voice Editing Basics The EL-87 Electone uses a versatile tone generation system developed by Yamaha that is capable of producing an exceptionally wide range of voices. To be more specific, the system uses individual sound sources that "modulate" each other's frequencies and thus create complex sounds not possible by the ordinary mixing of those sound sources. - Page 101 The filter removes a specified range of frequencies from the sound and allows the rest to pass through, thus giving you powerful control over the sound's characteristics. The EL-87 has three types of filters: High Pass Filter which passes the...
- Page 102 N O T E : With the too stressed resonance a noise may occur or no sound may be produced. N O T E : Some voices may not have remarkable resonance effect. N O T E : When the D2R is set to 0, the level set by the D1L will be maintained until the key is released.
- Page 103 Envelope Parameters By using the modulators and setting them to various output levels, you can create all kinds of sounds. These sounds will be static, however, unless you have the output levels change in time. That is precisely what an envelope does. It varies the output of an Operator in time so that you can vary the tone or the level.
- Page 104 1 To change the overall volume: 2 To change the overall tone: 3 To change how the volume varies over time: 4 To change how the tone varies over time: Change 2, 3 or 5 of the modulator. 5 To raise the volume: 6 To lower the volume: 7 To make the sound brighter: 8 To make the sound softer:...
- Page 105 (6) Some Voice Editing Examples The following examples illustrate some specific uses of the Voice Edit controls. Make the changes as described in the examples, then go on to explore some other voices on your own, making changes as you like. Ex.
- Page 107 FM Voice Voice Character Well-vibrated Strings Synth. Strings Brilliant Strings Synth. Strings HS-Style Strings Pizz. Strings Varied Vibrated Strings Synth. Strings 1 Synth. Strings 2 Violin 1 Violin 2 Violin 3 Violin 4 Pizz. Violin Cello Sustained Contrabass Synth. Strings Pizz.
- Page 109 FM Voice Voice Character Addition to Flute Flute Breath Recorder Addition to the Lower Range OL1:Whistle OL3:Noise Oboe Oboe Oboe Bassoon Bassoon Clarinet Clarinet Harder playing=Syn.Cla, Soffer playing=Cosmic Saxophone 16' Saxophone 16' Saxophone 4' Saxophone 8' OL1:Clarinet OL3:Flute OL1:Slow Strings OL3:Synth. Brass Brass Brass Horn...
- Page 111 FM Voice Voice Character Organ Bass 1 Organ Bass 2 Organ Bass 3 Lower Range Elec. Piano Harpsichord Soft Elec. Piano Elec. Piano 1 Elec. Piano 2 Harpsichord 16' Clavi. Guitar Addition to Guitar Guitar Plucking Voice Mandolin Elec. Guitar Dist.
-
Page 112: Rhythm Pattern Program And Rhythm Sequence Program
Rhythm Pattern Program and Rhythm Sequence Program The Electone also includes powerful Rhythm Program functions: the Rhythm Pattern Program and the Rhythm Sequence Program. The Rhythm Pattern Program allows you to record your own origianl rhythms using the high-quality percussion sounds of the Electone. The Rhythm Sequence Program lets you connect your original rhythms together with the Preset rhythms to create complete rhythm tracks, which you can automatically play back during your performance. -
Page 113: Rhythm Pattern Program
Rhythm Pattern Program The Rhythm Pattern Program works with the Keyboard Percussion feature to let you use any of 75 different percussion sounds in creating your own rhythms. Up to 16 separate rhythm “tracks” are provided in a single pattern for each instrument part, and up to 40 patterns—eight User numbers, each with five variations—... - Page 114 N O T E : The User rhythm you have created can also be copied to the Rhythm Pattern Program. You can edit it again and improve it. N O T E : When preset rhythms are copied to the Rhythm Pattern Program, the copied patterns may differ in volume from the original patterns.
-
Page 115: Percussion Sounds Used For Rhythm Pattern Program
(2) Percussion Sounds Used for Rhythm Pattern Program The total of 75 different instrument sounds are available for the Rhythm Pattern Programming and are assigned to each key on the Upper and Lower keyboard, as shown in the following chart.. Assigned to the Upper Keyboard (35 types) Assigned to the Lower Keyboard (43 types) * The instrument assignments are the same as the ones... -
Page 116: Step Write And Real Time Write
(3) Step Write and Real Time Write There are two different methods you can use to program rhythms: Step Write and Real Time Write. Step Write allows you to enter percussion sounds as individual note values. As a method, it is very similar to writing down the notes on a sheet of music paper;... -
Page 117: Entering Percussion Sounds To A Rhythm Pattern
BEAT/QUANTIZE Page—Step Write BEAT Determines the time signature used for the rhythm. Available time signatures are 2/4, 3/4 and 4/4. The 4/4 time is the default setting when a blank pattern has been selected. QUANTIZE Determines the resolution of the Step Write function. Step Write operations involve advancing in “steps”... -
Page 118: Editing With Step Write
(7) Editing with Step Write To enter sounds with Step Write: Raise the rhythm volume, and turn off all the Upper and Lower keyboard voices by setting each section’s volume to MIN. Select the EDIT page with the Page buttons. Select the percussion sound you wish to enter. - Page 119 CLEAR The Clear function is used to erase an instrument from the rhythm. All instances of the selected instrument, irrespective of which tracks they occupy, will be erased from the pattern. There are two ways to use Clear: [1] While holding down the Data Control button corresponding to CLEAR, press the key on the keyboard corresponding to the instrument you wish to erase.
- Page 120 N O T E : You can return to the BEAT/QUANTIZE page in the middle of editing and change the time signature and/or the Quantize value. N O T E : You can record up to sixteen different instrument sounds in a single rhythm, with each instrument occupying one of the sixteen available tracks.
- Page 121 About Quantize The Quantize function is a process of rounding off timing and/or duration values. With Real Time Write It allows you to automatically correct the timing of the notes you play, according to the specified Quantize resolution. The range can be corrected is within 50 percent of the selected note (Quantize) value.
-
Page 122: Editing With Real Time Write
N O T E : As in Step Write, you can record up to sixteen different instrument sounds in a single rhythm, with each instrument occupying one of the sixteen available tracks. The Rhythm Pattern Program has polyphonic capacity for playing up to sixteen sounds simultaneously. -
Page 123: Selecting Accompaniment Patterns
(9) Selecting Accompaniment Patterns This function of the Rhythm Pattern Program allows you to use one of the Electone’s Accompaniment patterns with your original rhythm. You can select and save the Accompaniment pattern that best matches the rhythm that you have created. However, you cannot save the Accompaniment type and volume setting. -
Page 124: Saving Rhythm Patterns
(10) Saving Rhythm Patterns To save a newly created rhythm to a User pattern number: Select the SAVE page with the Page buttons. The current rhythm, if playing, will automatically be stopped when this page is selected. Using the appropriate Data Control buttons, select both the User number and variation type to which you wish to save the newly created rhythm. -
Page 125: Quitting Rhythm Pattern Program
Once you have selected a User number and type, the following display will appear, prompting confirmation of the operation. Select “OK” to save the rhythm or “Cancel” to abort the operation and return to the previous display. When the pattern has been saved, the message "Completed!!" momentarily appears. -
Page 126: Recalling User Rhythm Patterns
(12) Recalling User Rhythm Patterns The User rhythms you have created in the Rhythm Pattern Program can be selected and played from the panel Rhythm controls. To call up the User rhythms: Press one of the Dotted buttons in the Rhythm section. Select the USER page with the Page buttons. -
Page 127: Rhythm Sequence Program
Rhythm Sequence Program With the Rhythm Sequence Program function, you can connect any of the Electone’s existing rhythms and the rhythms of your own creation together to make complete rhythm compositions. You can save four rhythm compositions to the Sequence buttons on the panel for future recall. -
Page 128: Programming A Sequence
You can program the rhythm sequence a measure at a time. Every User rhythm consists of two measures. If you want to program two-measure User rhythms, you are required to enter it twice, for the first measure and the second measure. When entered, the first measure is displayed as positive box and the... - Page 129 Rhythm Pattern Number Table March 1 Bolero March 2 Swing 1 Swing 2 March 3 Polka 1 Swing 3 Polka 2 Swing 4 Country 1 Swing 5 Country 2 Swing 6 Broadway Jazz Ballad Baroque Dixieland 1 Waltz 1 Dixieland 2 Waltz 2 Bounce 1 Waltz 3...
- Page 130 Any existing pattern data that follows an Ending pattern is automatically deleted. N O T E : An Intro or Fill In pattern entered to the first position is not registered as a measure, and the current measure display shows “-Bar” even though a pattern has been entered.
-
Page 131: Quitting Rhythm Sequence Program
Audition: You can play the rhythm sequence at any time during the editing process by moving the cursor to the point at which you wish to begin playback and pressing the Rhythm START button. About Using Registration Memory with the Rhythm Sequence Program: The rhythms (Rhythm Menu) used to program the sequence can be changed during editing by selecting different registrations. -
Page 132: Playing All Sequences In Order
(5) Playing All Sequences in Order You can also have up to all four rhythm sequences automatically play in order, one after the other. To do this: Press the desired Sequence buttons, making sure that their LEDs are all lit. Press the START button. - Page 133 Saving Rhythm Pattern and Rhythm Sequence Data to Disk: Once you have created your own rhythms and rhythm sequences, you’ll want to save them to disk. Doing so allows you to free up memory in the Electone for creating additional rhythms and sequences. Also, the User rhythms and sequences you’ve saved to disk can be loaded back to the Electone any time.
-
Page 134: Footswitches, Knee Lever And Expression Pedals
Footswitches, Knee Lever and Expression Pedals These leg- and foot-operated controls allow you to turn on and execute various performance functions without taking your hands from the keyboards. Footswitch The Electone has two footswitches on the main expression pedal that can be used to control various functions. The right footswitch is used for the Registration Shift functions (see page 64). - Page 135 (1) Rhythm Control Selection of left footswitch control over rhythm functions. When this is chosen, the following display appears: FOOT SWITCH-LEFT Page—Rhythm One of the three Rhythm Control functions can be selected. Pressing the footswitch executes the corresponding function. STOP Functions as an off/on switch for the rhythm once the rhythm is started.
-
Page 136: Knee Lever
(3) Tremolo Control Selection of footswitch control over Tremolo. Pressing the footswitch turns the Tremolo effect on and off (Chorus), performing the same function as the TREMOLO (FAST) button in the DISPLAY SELECT section. If you want to use this function, the tremolo settings require to be set properly. - Page 137 (2) Melody On Chord To select knee lever control over Melody On Chord: Press the A.B.C./M.O.C. button in the DISPLAY SELECT section to select the A.B.C./M.O.C. page. Then set the KNEE control to ON, and select one of the modes. Press the knee lever continuously to the right to get the Melody On Chord effect in the middle of the performance.
-
Page 138: Expression Pedals
Expression Pedals You can control the volume during performance with your toe. Expression Depth This display shows how far the expression pedal is pressed. To select the Expression page: Press the EXP. PITCH/MIDI button in the DISPLAY SELECT section. EXPRESSION Page DEPTH The Depth level increases when the Expression pedal is pressed down. -
Page 139: Tempo Control
Second Expression Pedal—Pitch Bend And Tempo The EL-87 is equipped with another pedal, Second Expression Pedal, which can control the Pitch Bend and Tempo. EXPRESSION 2ND EXPRESSION Page Pitch Bend Control MODE Determines the range of the Pitch Bend control. The NARROW setting results in a small amount of pitch variation (within ±two... -
Page 140: Transpose And Pitch Controls
Transpose and Pitch Controls There are two pitch-related controls on the Electone: Transpose and Pitch. Transpose allows you to change the key of the instrument and Pitch lets you finely adjust the tuning. These features make it easy to change the key of a song to accommodate a vocalist’s range or to precisely match the tuning of another instrument. -
Page 141: Midi
MIDI MIDI (Musical Instrument Digital Interface) is a kind of communication system for electronic musical instruments. It is built into most every modern digital musical instrument and allows different instruments to “talk” to each other and control each other’s functions. For example, the Upper keyboard of your Electone could be used to play sounds on a connected synthesizer. - Page 142 MIDI CONTROL Page 2 Internal/External Control LEAD Determines Internal or External control of the Lead Voices. When set to Internal, Lead Voices are played from the Electone and the sounds from a connected MIDI instrument can be played via MIDI channel 1 (or channel 2, when the To Lower function is on).
-
Page 143: Accessory Jacks And Controls
Accessory Jacks and Controls On the underside of the Electone keyboard is a separate panel equipped with various input/output terminals and miscellaneous controls, the functions of which are described below. RHYTHM IN (Phone, L/R) This pair of phone jacks are for connection to an external rhythm machine. -
Page 144: Appendix
Appendix NOTE: See page 141 for more detailed information on the MIDI messages. MIDI MIDI is an acronym that stands for Musical Instrument Digital Interface, which allows electronic musical instruments to communicate with each other, by sending and receiving MIDI messages. - Page 148 Switch Code Functions Selector Volume Flute Voice To Lower Brilliance Sustain Keybord Percussion Disable Tremolo Rhythm Sequence Program Switches Code UK Voices 1 LK Voices 1 UK Voices 2 LK Voices 2 LEAD PK Voice 1 PK Voice 2 Rhythm UK Voices 1 LK Voices 1 UK Voices 2...
-
Page 150: Troubleshooting
Troubleshooting Please note that the appearance of any of following phenomena does not indicate a mechanical failure of the Electone. Problem GENERAL OPERATION Some of the LEDs in the DISPLAY SELECT section do not light. No sound is produced from the Electone’s speakers. - Page 151 Problem VOICES/RHYTHMS Only one sound is heard when two notes of the Lead or Pedal voices are simultaneously played. The Pedal voices do not sound, even though the volume is properly set. The Touch Tone function does not operate. While an intro./Ending pattern is automatically playing, the Lower keyboard does not produce any sound, even when the keys are played.
- Page 152 Problem REGISTRATION MEMORY Certain functions have not been memorized to Registration Memory. VOICE EDITING During voice editing, the specified voice isn't heard, even when the keyboard is played. MUSIC DISK RECORDER Recording or playback cannot be performed. A total of 40 songs cannot be recorded. Recording is stopped before the performance is finished, or the Song Copy function cannot be executed.
-
Page 153: Specifications
Specifications... -
Page 154: Index
INDEX A.B.C...56 A.B.C./M.O.C ...57, 61 ACC. (ACCOMPANIMENT)...58 ACC. (RHYTHM PROGRAM)...119 ACCENT(RHYTHM PROGRAM)...116 AFTER...37 ALG (ALGORITHM) ...89, 96 AR (VOICE EDIT)...98 ATTACK ...33 Attack Rate ...98 AUTO VARI...52 AUX IN/OUT...139 AWM...97 BAL. (DELAY)...41 BAL. (PERCUSSION)...52 BAR/BEAT ...51 BASIC REGIST..7 BEAT...113 BRIL. - Page 155 REAL TIME WRITE...118 RECORD ...71 REGIST SHIFT...64 Registration Data...73 Registration Memory...62 Registration Menu Disk1...8 Remaining Memory (MDR) ...86 Remaining Memory (Rhythm Pattern) ...120 Repeat (Song)...80 RES. (RESONANCE)...98 RESP. (FLUTE VOICE) ...33 Retry (M.D.R) ...72 REVERB ...42 RHYTHM...49 Rhythm Clock...116 Rhythm Condition Page...52 RHYTHM CONTROL...131 RHYTHM IN ...139 Rhythm Menus ...54...