Table of Contents
Quick Links
Installation Instructions
Models SC2000, SC2001, SC3004
Signal Conditioning Self-Calibrating Digital Indicators
WARNING
The operator of this instrument is advised that if equipment is
used in a manner not specified in this manual, the protection
provided by the equipment may be impaired.
Failure to comply with these instructions could result in
death or serious injury.
Test and Measurement
SC2001
WARNING
PERSONAL INJURY
DO NOT use these devices as safety or emergency stop
devices, or in any other application where failure of the
product could result in personal injury.
Failure to comply with these instructions could result in
death or serious injury.
CAUTION
Only qualified, service-trained personnel who are aware of the
hazards involved should remove the cover from the instrument
or connect external wiring to the instrument.
Rev. G
008-0608-00
SC2000
SC3004
Table of Contents
Troubleshooting

Related Manuals for Honeywell SC Series


Summary of Contents for Honeywell SC Series
- Page 1 Installation Instructions Models SC2000, SC2001, SC3004 Rev. G 008-0608-00 Signal Conditioning Self-Calibrating Digital Indicators SC2001 SC2000 SC3004 WARNING PERSONAL INJURY DO NOT use these devices as safety or emergency stop devices, or in any other application where failure of the product could result in personal injury.
-
Page 2: Table Of Contents
4.4 Model SC2001....12 1.3 What is the SC Series? ....2 4.4.1 Differences . - Page 3 10.5 Channel Menu ....29 12.2.5 3-wire Current” Amplifier ... 52 10.5.1 OPERATION Sub-Menu... . 29 Honeywell Sensing and Control...
- Page 4 14.6.2 Channel Menu Items ... . . 68 14.6.3 Output Selection ....68 Honeywell Sensing and Control...
- Page 5 Figure 14-1: Digital-to-Analog Output Jumper Locations ....... 68 Honeywell Sensing and Control...
- Page 6 Table 18-13: Mathematics Virtual Channel ........87 Honeywell Sensing and Control...
-
Page 7: Chapter 1 - Introduction
Signature Calibration is used. Chapter 3, “Operating Modes”, discusses the significant fea- tures of the SC Series and operation procedures when the instru- ment is in the INITIALIZE, RUN, ERROR or SETUP modes. -
Page 8: Related Documents
Communications Guide number. Currently, they are available for the following types of The “SC Series Communications Guide”, document 008-0610- sensors: 00, describes in detail how to communicate with an SC Series instrument using RS-232 and RS-485. Wiring diagrams, sample • Strain-gage sensors, such as unamplified pressure transduc- programs, and descriptions of each command are included. -
Page 9: What Is Signature Calibration
SIGNAL and (-)EXCITATION leads. the instrument. • Shunt Resistance: The resistance value, in Ohms, that was The Strain-Gage Input channel of the SC Series is designed to used to obtain the shunt-cal mV/V value above. operate with Signature Calibration. It will automatically set itself • Full-Scale Value: The full scale value of the transducer, in up with transducers which contain the memory device, but can engineering units. -
Page 10: Chapter 2 Getting Started Quickly
Information nel. The instrument is prompting you to apply the requested The following items are required to set up an SC Series instru- load to the transducer so that a “mV/V Calibration” or a “Shunt ment with your transducer: Calibration”... -
Page 11: Use The Setup Menus To Enter Information
See the appro- priate chapter of this manual for that card type. 2.6 The SC Series Instrument is Ready for Use See “RUN Mode” on page 6 for information on how to operate the instrument while it is in the RUN mode. -
Page 12: Chapter 3 Operating Modes
3.1 Operating Modes The display will show a channel number on the far left, followed by the channel’s operation messages. The SC Series instruments have four modes of operation: For example, a Strain Gage amplifier channel will use the format •... -
Page 13: Clear] Button
MENU -> LOWER MODE” menu item as “LIMIT 01-04”, then the lower line will monitor the status of Limits 1, 2, 3 and 4. A “¸“ symbol indicates a limit is deactivated; a “®“ symbol indicates a limit is activated. For example: L1¸ L2¸ L3® L4® Honeywell Sensing and Control... -
Page 14: Moving Through Setup Menus
To abandon changes, press [EXIT]. To accept the new setting and move to the next item, press [ENTER]. 3.5.4 Exiting the SETUP Menu mode To leave SETUP mode and return to the RUN mode, press [EXIT] at any time. Honeywell Sensing and Control... -
Page 15: Chapter 4 Chassis Models
Rev. G, Chapter 4 Chassis Models 4.1 Introduction The SC Series of Signal Conditioners/Indicators are available in pin connectors are located on the rear panel to connect to each several different chassis models. In general, each chassis model Input or Output Channel. Each channel in the instrument is identi- operates in an identical fashion and can be ordered with any type fied by a number (channel 01, channel 02, etc.). -
Page 16: Model Sc2000
VACUUM FLUORESCENT DISPLAY 5.3" (135mm) SC SERIES 0123456789ABCDEF 0123456789ABCDEF VALUE CLEAR CHAN. TARE DOWN ENTER EXIT IEC POWER ENTRY 12-PIN CHANNEL CONNECTOR MODULE CABLE SHIELD 25-PIN SYSTEM CONNECTION SCREW CONNECTOR 8.6" (218mm) 2.8" 2.6" (71mm) (66mm) Honeywell Sensing and Control... -
Page 17: Rear Panel
SC2000 into a 19”, 2U rack. It includes the Panel- Mounting Jacks described above as well as the 19” rack panel. 4.3.5 Bench Mounting If bench mounting the instrument, you may want the optional car- rying handle/bench stand (order code AA926). Honeywell Sensing and Control... -
Page 18: Internal Arrangement
See “Specifications” on page 9 voltage and power requirements. NOTICE Due to the momentary startup inrush current of the instru- ment’s power supply, the use of switching power supplies with the SC are not recommended. Honeywell Sensing and Control... -
Page 19: Model Sc2001
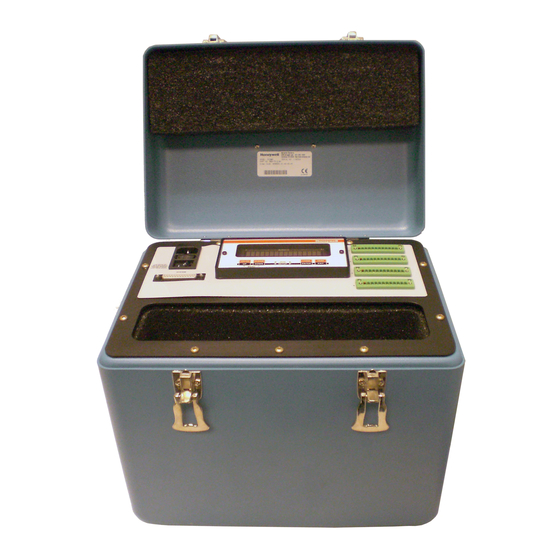
SC SERIES MODULE 0123456789ABCDEF 0123456789ABCDEF 25-PIN SYSTEM CABLE SHIELD CONNECTOR VALUE CLEAR CHAN. TARE CONNECTION SCREW DOWN ENTER EXIT STORAGE COMPARTMENT 11.0"L x 2.5"W x 8.5"D [28.0cm L x 6.3cm W x 21.6cm D] FRONT PANEL LAYOUT Honeywell Sensing and Control... -
Page 20: Case Removal
See the Model SC2000 “Internal Arrangement” on page 12. 4.4.6 Cleaning Turn off the instrument and unplug all connectors. Use a soft cloth or tissue and a mild cleaner. Do not use liquid or aerosol cleaners. Do not allow any cleaner inside the instrument. Honeywell Sensing and Control... -
Page 21: Model Sc3004
The pinouts for the individual channels are located removed if they are not needed. in the chapter for that channel. 4.5.3. Panel Mounting The panel space necessary conforms to the EIA 19” rack-mount standard. Panel mounting ears are attached to the instrument. Honeywell Sensing and Control... -
Page 22: Case Removal
Step 5: Remove eight Phillips screws from the rear panel, including the two cable shield connection screws. NOTE: Do not remove the four screws which secure the cooling fan to the rear panel. • Step 6: Remove the rear panel. Honeywell Sensing and Control... -
Page 23: Chapter 5 System Connector
The Limit Output pins and Function Input pins are electrically isolated from the rest of the instrument. The RS-232 and RS-485 communications pins are electrically isolated from the rest of the instrument. The RS-232 and RS-485 interfaces are exclusive; an instrument cannot have both. Honeywell Sensing and Control... -
Page 24: Function Input Pins
Limit Output pin on the System connector will be con- nected to the DGND (Digital Ground) pin. However, a SensoCode program running on a Mathematics Virtual Channel may override this behavior. Consult the Customer Information Sheet included with your instrument for details. Honeywell Sensing and Control... -
Page 25: Chapter 6 System Menu
When selected, a sub-menu is displayed which lists all avail- Note the highest channel number that is presently installed. able channels in an SC Series instrument. By pressing [ENTER] The new circuit card for the new channel will be installed as when a channel number is displayed, the card type installed in the next channel number. -
Page 26: Delete Channel Menu Item
[EXIT] button. If “YES” is selected, the channel’s settings will physically inside the chassis. be reset. NOTICE Defaulting a channel is an operation that cannot be undone. All calibration information and other settings will be erased. Honeywell Sensing and Control... -
Page 27: Chapter 7 Serial Communications
600, 1200, 2400, 4800, 9600, 19200 and 38400. As shipped from the factory, all instruments are set at 9600 baud. The baud The SC Series instruments are designed to communicate with a rate can be selected though the front panel. -
Page 28: Transmit Test Menu Item
PLC. 7.4.7 LEAVE MENU Menu Item When the menu item is displayed, press [ENTER] to leave this menu. Press [EXIT] to return to the RUN mode. Honeywell Sensing and Control... -
Page 29: Chapter 8 Display Menu
“LIMIT 01-04” means that the status of Limit 1, Limit 2, Limit 3, and Limit 4 are displayed as described in “Indicator Lights” on page 7 • “CHANNEL” means that the channel specified with the “LOWER CHANNEL” menu item is displayed. Honeywell Sensing and Control... -
Page 30: Chapter 9 Limits
9.3.3 LIMIT.SETPOINT Menu Item channel, the display will indicate the status of these limits. This is the numeric value in engineering units for the signal level • On a Model SC3004, the front panel light for the limit will that activates the limit. illuminate. • The relay for the limit on this Relay Output channel will acti- vate. Honeywell Sensing and Control... -
Page 31: Limit.return Pnt Menu Item
The figures below further illustrate the differences between these settings. Figure 9-1: Limit Operation when LIMIT.ENERGIZE = SIGNAL > SETPOINT Figure 9-4: Limit Operation when LIMIT.ENERGIZE = SIGNAL OUTSIDE Honeywell Sensing and Control... -
Page 32: Limit.latching Menu Item
Calibration”. If you wish to use Shunt Calibration with an FP2000 transducer, use an FP2000 with Buffered Shunt cal and amplified output (e.g. 5 Vdc, 10 Vdc or 4 mA to 20 mA) connected to an SC’s High-Level Input channel. Honeywell Sensing and Control... -
Page 33: Wiring
DESIGNATION (+)EXCITATION (+)EXCITATION (+)SENSE (-)SENSE (-)EXCITATION (+)SIGNAL (-)SIGNAL (+)ANALOG OUTPUT (+)OUTPUT (-)ANALOG OUTPUT (+)SIGNATURE (-)SIGNATURE/DGND AUX1 AUX2 NOTE KEYED CONNECTOR (-)EXCITATION (-)OUTPUT CABLE SHIELD CONNECTION SCREW (+)SIGNATURE SIGNATURE (CONNECT TO CABLE SHIELD) MODULE (-)SIGNATURE (OPTION 53e) Honeywell Sensing and Control... -
Page 34: Calibration Procedure
4 mA to 20 mA (optional current output channels) Source any channel’s track, peak, or valley value Isolation 500 V Resolution 13 bits Frequency response same as input when driven by the same channel’s tracking data Honeywell Sensing and Control... -
Page 35: Channel Menu
(typical) underrange capability) Signature Module. ±50000 002. HERTZ/ FAST ±50000 002. HERTZ ±25000 008. HERTZ ±20000 016. HERTZ ±10000 032. HERTZ ±5000 050. HERTZ ±5000 100. HERTZ ±2000 250. HERTZ ±2000 500. HERTZ ±2000 800. HERTZ Honeywell Sensing and Control... -
Page 36: Auxn Function Menu Items
“ON” means that the display will update four times each sec- ond. The channel’s values will be averaged for 1/4 second, then displayed. • “OFF” means that the channel’s display will update as quickly as possible. Honeywell Sensing and Control... -
Page 37: Calibration Type Menu Item
CALIBRATION DATA sub-menu. when shunt resistor applied Linearity correction data data 2-point: from... stored in stored in none; 3- or Signature Signature Module (if Module (if 5-point: available) available) applied load Honeywell Sensing and Control... -
Page 38: Calibration Data Sub-Menu
Normally, the instrument has a shunt calibration resistor of Signature Module. It is available for all calibration types. 59000 (59K) ohms installed. If your transducer and instrument were purchased at the same time from Honeywell, the correct FULL SCALE VALUE Menu Item shunt resistor has been installed. -
Page 39: Calibrate Menu Item
• “KNOWN POINT 4/5”: point 4 of 5, usually 75% of the transduc- er’s full-scale capacity. • “KNOWN POINT 5/5”: point 5 of 5, usually 100% of the trans- ducer’s full-scale capacity. Honeywell Sensing and Control... -
Page 40: Dac Setup Sub-Menu
Analog Output will have the frequency response speci- transducer, press [ENTER]. fied by the channel’s FREQ. RESPONSE menu item. Otherwise, • Upon completion, the display will indicate DONE and the the Analog Output will operate more slowly. instrument will return to the RUN mode. Honeywell Sensing and Control... -
Page 41: Signature Module Sub-Menu
The options for this menu item are: • “YES” will allow a newly detected Signature Module to update the Analog Output settings. • “NO” will not allow automatic updating of the Analog Output settings. Honeywell Sensing and Control... -
Page 42: Diagnostics Sub-Menu
This is the recom- mended option. • “OFF” will not allow linearization data to effect the channel’s scaled values. This is useful when diagnosing problems in a calibration procedure. Honeywell Sensing and Control... -
Page 43: Troubleshooting
“ON”; in the RUN mode this will allow the [VALUE] button to dis- play raw A/D readings as a percentage of its full-scale. If the raw A/D readings display more than +/-10% when there is no load on the transducer, the transducer has a high zero offset. Honeywell Sensing and Control... - Page 44 Make sure that the AUX1 FUNCTION or AUX2 FUNCTION SETUP menu items are set correctly; if they are set to DISABLED then they will not operate. The Auxiliary Function (“AUX1” and “AUX2”) pins must be con- nected to pin 10, not pin 8, to activate them. Honeywell Sensing and Control...
-
Page 45: Chapter 11 Ac/Ac-Lvdt Input Channel
Figure 11-1: Connection of Four- or Five-wire ac/ac-LVDT AC-AC LVDT TRANSDUCER CABLE INSTRUMENT CONNECTIONS DESIGNATION (+)SUPPLY (+)EXCITATION (-)EXCITATION (+)OUTPUT (+)SIGNAL (-)SIGNAL (+)ANALOG OUTPUT (-)ANALOG OUTPUT DGND AUX1 OUTPUT RETURN AUX2 NOTE KEYED CONNECTOR SUPPLY RETURN CABLE SHIELD CONNECTION SCREW (CONNECT TO CABLE SHIELD) Honeywell Sensing and Control... -
Page 46: Calibration Procedure
You will be prompted to apply displacements to the value transducer as required. Isolation 500 V Resolution 13 bits Frequency response same as input when driven by the same channel’s tracking data Honeywell Sensing and Control... -
Page 47: Channel Menu
100. HERTZ • “00010” ±2000 250. HERTZ • “00020” ±2000 500. HERTZ • “00050” ±2000 800. HERTZ • “00100” • “00200” NOTICE Your particular LVDT may have a lower frequency response than the ac-ac LVDT Input channel. Honeywell Sensing and Control... -
Page 48: Auxn Function Menu Items
• “TARE OFF” deactivates the channel’s Tare function. As the Auxiliary Function pins are not isolated, it is recommended that a push-button switch or relay is used to connect these pins to the DGND pin. Honeywell Sensing and Control... -
Page 49: Calibrate Menu Item
1/2. You may need to swap the (+)Signal and (-)Signal wires and DISPLAY. UNITS). When you have applied this displace- on the 12-pin channel connector to accomplish this. ment to the transducer, press [ENTER]. • Upon completion, the display will indicate DONE and the instrument will return to the RUN mode. Honeywell Sensing and Control... -
Page 50: Dac Setup Sub-Menu
When this menu item is selected, the Analog Output of the channel is forced to its zero-scale output, then DAC UPDATED is displayed. This is useful when calibrating or trimming the readout connected to the Analog Output. Honeywell Sensing and Control... -
Page 51: Electrical Null And Transducer Mounting
The track, peak and valley values of the channel are Signal pins (labeled as “+SIG” and “-SIG”) on the channel’s forced to 0. 12-pin connector to make the reading positive. • “OFF” will allow normal operation of the channel. Honeywell Sensing and Control... -
Page 52: Analog Output Configuration
20 mA open closed valley value. See the “Channel Menu” section earlier in this chapter for a com- plete listing of SETUP menu items available on the DAC. SETUP sub-menu. Figure 11-2: Digital-to-Analog Output Jumper Locations Honeywell Sensing and Control... -
Page 53: Troubleshooting
Auxiliary Function Pins Not Operating • Make sure that the AUX1 FUNCTION or AUX2 FUNCTION SETUP menu items are set correctly; if they are set to DISABLED then they will not operate. • The Auxiliary Function (“AUX1” and “AUX2”) pins must be connected to pin 10, not pin 8, to activate them. Honeywell Sensing and Control... -
Page 54: Chapter 12 High-Level Input Channel
Use this information to select the correct wiring diagram on the following pages. Incorrect wiring can damage both the transducer and the instrument. Failure to comply with these instructions may result in product damage. Honeywell Sensing and Control... -
Page 55: Bi-Polar Voltage Amplifiers
(-)SIGNAL SUPPLY (+)ANALOG OUTPUT (-)ANALOG OUTPUT (+)OUTPUT DGND (-)OUTPUT AUX1 AUX2 NOTE KEYED CONNECTOR NOTE: SHUNT CALIBRATION SHUNT CAL 1 NOT AVAILABLE ON ALL DEVICES. SHUNT CAL 2 CABLE SHIELD CONNECTION SCREW (CONNECT TO CABLE SHIELD) Honeywell Sensing and Control... -
Page 56: 3-Wire Voltage" Amplifiers
(+)ANALOG OUTPUT (-)ANALOG OUTPUT (+)OUTPUT NOTE: INTERNAL CONNECTION DGND (-)OUTPUT AUX1 AUX2 NOTE KEYED CONNECTOR NOTE: SHUNT CALIBRATION SHUNT CAL 1 NOT AVAILABLE ON ALL DEVICES. SHUNT CAL 2 CABLE SHIELD CONNECTION SCREW (CONNECT TO CABLE SHIELD) Honeywell Sensing and Control... -
Page 57: Figure 12-3: "3-Wire Voltage Amp W/Single-Wire Shunt Cal" Connection To High-Level Input Channel
POWER SUPPLY (-)SIGNAL (+)ANALOG OUTPUT (-)ANALOG OUTPUT (+)OUTPUT NOTE: INTERNAL DGND CONNECTION (-)OUTPUT AUX1 AUX2 NOTE KEYED CONNECTOR NOTE: SHUNT CALIBRATION NOT AVAILABLE ON ALL DEVICES. SHUNT CAL CABLE SHIELD CONNECTION SCREW (CONNECT TO CABLE SHIELD) Honeywell Sensing and Control... -
Page 58: 3-Wire Current" Amplifier
(+)ANALOG OUTPUT (-)ANALOG OUTPUT (+)OUTPUT NOTE: INTERNAL CONNECTION DGND (-)OUTPUT AUX1 AUX2 NOTE KEYED CONNECTOR NOTE: SHUNT CALIBRATION SHUNT CAL 1 NOT AVAILABLE ON ALL DEVICES. SHUNT CAL 2 CABLE SHIELD CONNECTION SCREW (CONNECT TO CABLE SHIELD) Honeywell Sensing and Control... -
Page 59: 2-Wire Current" Amps Buff. Shunt Cal
REMOTE-BUFFERED (+)ANALOG OUTPUT (-)ANALOG OUTPUT SHUNT CAL (+)OUTPUT DGND AUX1 AUX2 NOTE KEYED CONNECTOR NOTE: SHUNT CALIBRATION SHUNT CAL 1 NOT AVAILABLE ON ALL DEVICES. SHUNT CAL 2 CABLE SHIELD CONNECTION SCREW (CONNECT TO CABLE SHIELD) Honeywell Sensing and Control... -
Page 60: 2-Wire Current" Amps 1-Wire Shunt Cal
LOOP POWERED, (-)SIGNAL SINGLE-WIRE (+)ANALOG OUTPUT (-)ANALOG OUTPUT SHUNT CAL (+)OUTPUT DGND AUX1 AUX2 NOTE KEYED CONNECTOR NOTE: SHUNT CALIBRATION SHUNT CAL 1 NOT AVAILABLE ON ALL DEVICES. CABLE SHIELD CONNECTION SCREW (CONNECT TO CABLE SHIELD) Honeywell Sensing and Control... -
Page 61: Low Voltage Dc-Dc Lvdts
SHUNT CAL 1 SHUNT CAL 2 SUPPLY COMMON (-)EXCITATION (+)SIGNAL (-)SIGNAL (+)ANALOG OUTPUT (-)ANALOG OUTPUT (+)OUTPUT DGND OUTPUT RETURN AUX1 AUX2 NOTE KEYED CONNECTOR +5V REG. INPUT +5V REG. OUTPUT CABLE SHIELD CONNECTION SCREW (CONNECT TO CABLE SHIELD) Honeywell Sensing and Control... -
Page 62: Excitation And Signal Jumpers
You will be prompted to apply loads to the transducer SIGNAL TYPE (1 of 2) as required. (-)EXCITATION SIGNAL REFERENCE SUPPLY (+)EXCITATION SIGNAL TYPE (2 of 2) SUPPLY CURRENT = J23 INSTALLED VOLTAGE = J23 REMOVED Honeywell Sensing and Control... -
Page 63: Specifications
13 bits Frequency response same as input when driven by the same channel’s tracking data Total excitation current of all channels must not exceed 120 mA for Models SC2000 or SC2001 and 310 mA for Model SC3004. Honeywell Sensing and Control... -
Page 64: Display Setup Sub-Menu
TION DATA -> FULL SCALE VALUE” menu item and then performing a re-calibration. When a character position is flashing press the [UP] or [DOWN] button to change the character. Press [ENTER] to advance to the next character. Honeywell Sensing and Control... -
Page 65: Auxn Function Menu Items
Linearity correction from... 2-point: none; As the Auxiliary Function pins are not isolated, it is recommended 3- or 5-point: that a push-button switch or relay is used to connect these pins applied load to the Digital Ground pin. Honeywell Sensing and Control... -
Page 66: Calibration Data Sub-Menu
To verify proper transducer/amplifier operation, you can activate the transducer’s/amplifier’s shunt calibration function while the instrument is in the RUN mode. Press and hold the [ENTER] but- ton for three seconds; this will activate the transducer’s/amplifier’s shunt calibration function and display the reading. Honeywell Sensing and Control... -
Page 67: Calibrate Menu Item
For example, the load applied at Known-Load Point 2/2 must instrument will return to the RUN mode. cause the transducer to produce a more positive voltage or current than at Known-Load Point 1/2. These menu items are only available with the Known-Load Cali- bration types. Honeywell Sensing and Control... -
Page 68: Dac Setup Sub-Menu
“Full output” might be 5 Volts, 10 Volts or 20 mA depending on if the channel has a voltage or current output and how it is config- ured. See “Analog Output Configuration” on page 68 for details. Honeywell Sensing and Control... -
Page 69: Diagnostics Sub-Menu
The options for this menu item are: • “ON” will bypass the INITIALIZE and RUN modes of the chan- nel. The track, peak and valley values of the channel are forced to 0. • “OFF” will allow normal operation of the channel. Honeywell Sensing and Control... -
Page 70: Troubleshooting
(+)Signal (“+SIG”) or (-)Signal (“-SIG”) “External Arrangement of Model SC3004” on page 15. pins. If you remove all load from the transducer and you get a numeric reading, the transducer may have a high zero offset. Use the Honeywell Sensing and Control... -
Page 71: Chapter 13 Relay Output Channel
Consult the Customer Information Sheet included with your instrument for details. 13.4 Specifications RELAY OUTPUT Quantity and Type 4 form C Contact rating 0.5 A @ 50 Vac max. (consult factory for 125 Vac max. operation) 1 A @ 30 Vdc max. Honeywell Sensing and Control... -
Page 72: Channel Menu
“ON” will turn the relay on. No connection • “OFF” will turn the relay off. No connection No connection (bottom) The Analog Output and Analog Return pins are electrically iso- lated from all other pins on the instrument. Honeywell Sensing and Control... -
Page 73: Setup Procedure
See the “Digital-to-Analog Output” section of this chapter for details. This menu item is not automatically updated by another chan- nel’s Signature Module equipped transducer. Honeywell Sensing and Control... -
Page 74: Diagnostics Sub-Menu
VOLTAGE DAC, it has a voltage output. If the 4 mA to 20 mA 12 mA 20 mA bottom open channel’s type is CURRENT DAC, it has a current output. • Examining the channel’s circuit board as shown in the figure below. Figure 14-1: Digital-to-Analog Output Jumper Locations Honeywell Sensing and Control... -
Page 75: Troubleshooting
To obtain maximum immunity to electromagnetic or radio fre- quency interference, make certain that the shield of the cable is connected to ground/earth only at the readout device. The shield of the cable should not be connected to the instrument. Honeywell Sensing and Control... -
Page 76: Chapter 15 Split Display Virtual Channel
[CLEAR] or [TARE] buttons. diagram of all menus is located in “Setup Menu Reference” on page 77. LEFT CHANNEL Menu Item This specifies the channel that is displayed on the left half of the split display. Honeywell Sensing and Control... -
Page 77: Chapter 16 Mathematics Virtual Channel
The Mathematics Virtual Channel is a powerful, flexible means to about what each Mathematics Channel does and what Func- allow SC Series Instruments to perform simple to moderate func- tion Inputs and/or Limit Output pins of the System connector tions that previously required the use of expensive programmable are used. -
Page 78: Display Setup Sub-Menu
Specifies the four character label that is displayed to the right of the channel’s values. This menu item doesn’t change the mathe- matical scaling of the channel’s values; that is determined by the “CALIBRATION DATA -> FULL SCALE VALUE” menu item. Honeywell Sensing and Control... -
Page 79: Chapter 17 Error Messages
Error 31 BLANK IDENT The channel does not appear to have been installed properly. This occurs if you swap Input or Output boards without using SYSTEM MENU -> INSTALL CHANNEL to format the chan- nel’s EEPROM. Honeywell Sensing and Control... - Page 80 When installing a channel, the EEPROM type requested by the channel is not valid. Con- Error 47 BAD EE TYPE REQ tact Honeywell with the information found in the SYSTEM MENU -> SOFTWARE REV. menu item. Error 48 NULL MENU A menu contains a NULL item.
- Page 81 The first step of a SensoCode program must be an Operand. The SensoCode program OPERAND EXPECTED loaded in the Mathematics Virtual channel is invalid. The SensoCode program loaded into a Mathematics Virtual channel contains a bad oper- Error 82 BAD OPERAND and. Honeywell Sensing and Control...
- Page 82 The SensoCode program loaded in the Mathematics Virtual channel is invalid. Error 87 GOTO NOT JUMP The SensoCode program contains a “Go to” Instruction that has not been converted into a “Jump” Instruction. Restart the instrument. Honeywell Sensing and Control...
-
Page 83: Chapter 18 Setup Menu Reference
LIMIT 14 MENU –––– (optional)(see LIMIT MENU) LIMIT 15 MENU –––– (optional)(see LIMIT MENU) LIMIT 16 MENU –––– (see SYSTEM MENU) SYSTEM MENU –––– (see SERIAL COM MENU) SERIAL COM MENU –––– (see DISPLAY MENU) DISPLAY MENU Honeywell Sensing and Control... -
Page 84: Table 18-2: System Menu
68 HIGH-LEVEL I 6B LVDT V OUT 6C LVDT I OUT 90 LIMIT 01-04 91 LIMIT 05-08 92 LIMIT 09-12 93 LIMIT 13-16 AB SPLIT DISPLAY AE MATHEMATICS page 20 DELETE CHANNEL page 20 DEFAULT CHANNEL LEAVE MENU Honeywell Sensing and Control... -
Page 85: Table 18-3: Limit Menu
DISPLAY MENU UPPER CHANNEL page 23 LOWER CHANNEL page 23 LOWER MODE BLANK LIMITS 01-04 CHANNEL page 23 DISPLAY DISABLE LEAVE MENU Table 18-6: Display Menu for Model SC3004 page 23 DISPLAY MENU POWERON CHANNEL LEAVE MENU Honeywell Sensing and Control... -
Page 86: Table 18-7: Strain Gage Input Channel Menu
AUX1 FUNCTION DISABLED TRACK HOLD HIGH/LOW HOLD HIGH/LOW CLEAR TARE ON TARE OFF page 30 AUX2 FUNCTION DISABLED TRACK HOLD HIGH/LOW HOLD HIGH/LOW CLEAR TARE ON TARE OFF page 31 CALIBRATION TYPE TYPE=SHUNT CAL TYPE=MV/V CAL Honeywell Sensing and Control... -
Page 87: Table 18-7: Strain Gage Input Channel Menu, Continued
DAC. FULL-SCALE LEAVE SUB-MENU page 35 SIGNATURE MODULE UPDATE SIG.MOD? DEFAULT SIG.MOD? UPDATE DAC SETUP? LEAVE SUB-MENU page 36 DIAGNOSTICS DAC FULL SCALE DAC ZERO SCALE VERSION INFO DISPLAY ADC LINEARIZATION DISABLE CHANNEL LEAVE SUB-MENU LEAVE MENU Honeywell Sensing and Control... -
Page 88: Table 18-8: Ac-Ac Lvdt Input Channel Menu
DISABLED TRACK HOLD HIGH/LOW HOLD HIGH/LOW CLEAR TARE ON TARE OFF page 42 AUX2 FUNCTION DISABLED TRACK HOLD HIGH/LOW HOLD HIGH/LOW CLEAR TARE ON TARE OFF page 42 CALIBRATION TYPE TYPE=2 POINT CAL TYPE=3 POINT CAL Honeywell Sensing and Control... -
Page 89: Table 18-8: Ac-Ac Lvdt Input Channel Menu, Continued
CALIBRATE page 44 DAC SETUP DAC. CHANNEL DAC. SOURCE TRACK PEAK VALLEY DAC. ZERO-SCALE DAC. FULL-SCALE LEAVE SUB-MENU page 44 DIAGNOSTICS DAC FULL SCALE DAC ZERO SCALE VERSION INFO DISPLAY ADC LINEARIZATION LEAVE SUB-MENU LEAVE MENU Honeywell Sensing and Control... -
Page 90: Table 18-9: High Level Input Channel Menu
AUX1 FUNCTION DISABLED TRACK HOLD HIGH/LOW HOLD HIGH/LOW CLEAR TARE ON TARE OFF page 59 AUX2 FUNCTION DISABLED TRACK HOLD HIGH/LOW HOLD HIGH/LOW CLEAR TARE ON TARE OFF page 59 CALIBRATION TYPE TYPE=SHUNT CAL TYPE=2 POINT CAL Honeywell Sensing and Control... -
Page 91: Table 18-9: High Level Input Channel Menu, Continued
62 DAC SETUP DAC. CHANNEL DAC. SOURCE TRACK PEAK VALLEY DAC. ZERO-SCALE DAC. FULL-SCALE LEAVE SUB-MENU page 63 DIAGNOSTICS DAC FULL SCALE DAC ZERO SCALE VERSION INFO DISPLAY ADC LINEARIZATION DISABLE CHANNEL LEAVE SUB-MENU LEAVE MENU Honeywell Sensing and Control... -
Page 92: Table 18-10: Relay Output Channel
LEAVE SUB-MENU LEAVE MENU Table 18-12: Split Display Virtual Channel page 70 CHANNEL xx MENU LEFT CHANNEL page 70 LEFT SOURCE TRACK PEAK VALLEY page 70 RIGHT CHANNEL page 70 RIGHT SOURCE TRACK PEAK VALLEY LEAVE MENU Honeywell Sensing and Control... -
Page 93: Table 18-13: Mathematics Virtual Channel
00100 00200 page 72 DISPLAY. UNITS page 72 DISPLAY. AVERAGE LEAVE SUB-MENU page 72 POWER-ON SOURCE TRACK PEAK VALLEY (SC3004 only) TRACK / PEAK (SC3004 only) TRACK / VALLEY (SC3004 only) PEAK / VALLEY LEAVE MENU Honeywell Sensing and Control... - Page 94 DELETE CHANNEL Menu Item ......20 DIAGNOSTICS Sub-Menu ......19 Honeywell Sensing and Control...
- Page 95 Model SC2000 Case Removal ......11 SC Series Features ........2 Model SC2000 Cleaning .
- Page 96 While we provide application assistance personally, through our literature and the Honeywell web site, it is up to the customer to determine the suitability of the product in the application. Specifications may change without notice. The information we supply is believed to be accurate and reliable as of this printing.