Table of Contents
Table of Contents

Related Manuals for Yamaha 585


Summary of Contents for Yamaha 585
- Page 1 CDC-685/585 COMPACT DISC AUTOMATIC CHANGER OWNER’S MANUAL...
-
Page 2: Important Safety Instructions
IMPORTANT SAFETY INSTRUCTIONS CAUTION RISK OF ELECTRIC SHOCK DO NOT OPEN CAUTION: TO REDUCE THE RISK OF ELECTRIC SHOCK, DO NOT REMOVE COVER (OR BACK). NO USER-SERVICEABLE PARTS INSIDE. REFER SERVICING TO QUALIFIED SERVICE PERSONNEL. • Explanation of Graphical Symbols The lightning flash with arrowhead symbol, within an equilateral triangle, is intended to alert you to the presence of uninsulated “dangerous voltage”... - Page 3 – and, most importantly, without affecting your sensitive hearing. Since hearing damage from loud sounds is often undetectable until it is too late, YAMAHA and the Electronic Industries Association’s Consumer Electronics Group recommend you to avoid prolonged exposure from excessive volume levels.
-
Page 4: Getting Started
Only voltage specified on this unit must be used. Using this unit with a higher voltage than specified is dangerous and may result in fire or other accidents. YAMAHA will not be held responsible for any damage resulting from the use of this unit with a voltage other than that specified. -
Page 5: Table Of Contents
Getting Started Introduction Thank you for purchasing this YAMAHA product. We hope it will give you many years of trouble-free enjoyment. For the best performance, read this manual carefully. It will guide you in operating your YAMAHA product. Features 5-Discs Carousel Auto-changer Full Opening Disc Tray for Changing 5 Discs at a Time PLAYXCHANGE;... -
Page 6: Cd Preventive Cares
• This compact disc player is designed for playing compact discs bearing the Never attempt to load any other type of disc into the unit. The unit will also play 8-cm (3-inch) compact discs. • Compact discs are not subjected to wear during play, but damage to the disc surface when the disc is being handled can adversely affect the disc’s play. -
Page 7: Preparations
Supplied Accessories Remote Control Transmitter OPEN/ SYNCHRO DIMMER CLOSE TEXT/ TIME PEAK TAPE CLEAR PROG — INDEX MODE — OUTPUT LEVEL — DISC SCAN DISC SKIP REPEAT RANDOM Remote Control Transmitter Battery installation Battery replacement If you find that the remote control transmitter must be used closer to the main unit, the batteries are weak. -
Page 8: Connections
• The LINE OUT terminals of this unit are numbered !. When connecting this unit with a YAMAHA amplifier or receiver whose terminals on the rear panel are numbered as !, @, #, etc., connect the LINE OUT terminals of this unit to the input terminals numbered ! on the rear of the amplifier or receiver. -
Page 9: Controls And Functions
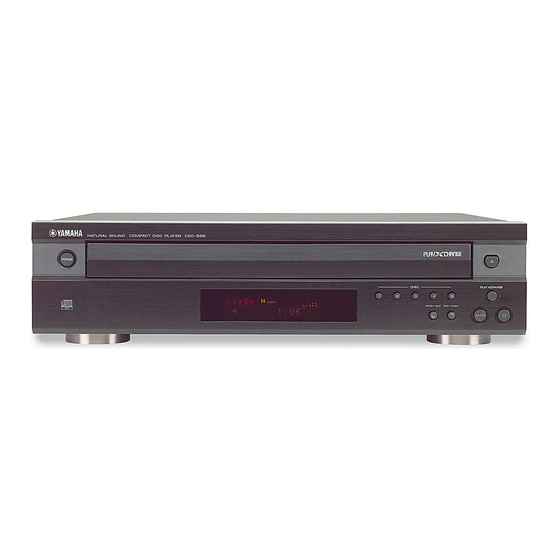
CONTROLS AND FUNCTIONS Front Panel CDC-685 NATURAL SOUND COMPACT DISC PLAYER POWER PROG PHONES CDC-585 NATURAL SOUND COMPACT DISC PLAYER POWER 1 POWER ... P.8,9 2 Disc tray ... P.8,9 3 v (Open/Close) PHONES jack ... P.15 PROG ... P.12,18 Numeric buttons ... -
Page 10: Remote Control Transmitter
CONTROLS AND FUNCTIONS Remote Control Transmitter Parts in the shaded areas are provided for SYNCHRO DIMMER TEXT/ TIME TAPE CLEAR — — MODE OUTPUT LEVEL DISC SCAN DISC SKIP REPEAT CDC-685 only 1 DIMMER ... P.7 2 SYNCHRO ... P.16 3 TEXT/TIME ... -
Page 11: Display
Display The display located in the center of this unit provides information about discs. After closing the disc tray by pressing the OPEN/CLOSE button or selecting any disc by using the DISC SKIP buttons when this unit is stopped, the display shows the total number of tracks and the total recorded time of the selected disc for a few seconds. -
Page 12: Playing Cds
This manual describes how to operate this unit by using the remote control transmitter. To operate this unit on the front panel, use the correspond- ing buttons on the front panel. Loading and Playing Discs NATURAL SOUND COMPACT DISC PLAYER POWER PROG PHONES... -
Page 13: Playxchange
To stop play temporarily On the front panel To resume play, press the d button again (or press the w button). * The w/d button on the front panel can also be used to stop play temporarily or to resume play. To stop play completely On the front panel To turn off the power... -
Page 14: Skipping Tracks
BASIC OPERATION Skipping Tracks To play from the beginning of the track following the one now playing To play from the beginning of the track now playing To play from the beginning of the track before the one now playing •... -
Page 15: Various Functions
Random Sequence Play You can play the tracks on one or more discs in a random sequence. The unit will automatically mix up tracks from all discs or a designated disc on the disc tray. DISC SCAN REPEAT OPEN/ SYNCHRO DIMMER CLOSE TEXT/ TIME... -
Page 16: Program Play
VARIOUS FUNCTIONS Program Play You can enjoy listening to your favorite tracks selected from one or more discs in any desired order by programming tracks. DISC SCAN REPEAT OPEN/ SYNCHRO DIMMER CLOSE TEXT/ TIME PEAK TAPE CLEAR PROG — INDEX MODE —... - Page 17 Display information during pro- gramming 1DISC REP RNDM SAVE BEST EDIT FILE 1 2 3 4 5 5DISCS PROG SEARCH TITLE ARTIST TRACK S T E P 1DISC REP RNDM SAVE BEST EDIT FILE 1 2 3 4 5 5DISCS PROG CD- TEXT TITLE...
-
Page 18: Repeat Play
VARIOUS FUNCTIONS Repeat Play You can play any desired track or disc (or a set of discs) repeatedly by pressing the REPEAT button. The repeat play mode will change whenever you press the REPEAT button. (OFF) 1DISC RNDM SA 5DISCS F PROG C T T E ART ST TRAC... -
Page 19: Adjusting The Level
Adjusting the Level CDC-685 only Adjusting the level of signals output into an amplifier, etc. You can adjust the level of sound signals output from the LINE OUT terminals on the rear panel into an amplifier, etc. as you prefer by using the OUTPUT LEVEL –/+ buttons. -
Page 20: Functions For Recording
CD SYNCHRONIZED RECORDING Using a compatible YAMAHA tape deck, you can synchro- nize the tape deck to start recording automatically when a CD starts playing. With this function, you can record a CD on tape more easily and precisely. (Refer to the tape deck’s operation manual to know whether it is compatible or not.) -
Page 21: Track Programming For Recording
TRACK PROGRAMMING FOR RECORDING This convenient feature can be used to program tracks for recording to tape. By only memorizing the tape’s total possible recording time, the unit will automatically program tracks or help you to program tracks so they will fit onto the tape with the least amount of unrecorded space remaining at each end of the tape. -
Page 22: Manual Tape Programming
TRACK PROGRAMMING FOR RECORDING Display information during pro- gramming 1DISC REP RNDM SAVE BEST EDIT FILE 1 2 3 4 5 5DISCS SEARCH TITLE ARTIST TRACK 2 0 : 0 0 1 Shows the number of programmed tracks for each side in turn just after the automatic programming is finished, and then it is replaced by the number of the first programmed track for side A. - Page 23 When you finish the programming for side A, program the pause mode by pressing the TAPE button. TAPE * “PAUSE” lights up in the display, and after then you can begin programming for side B. Repeat steps 5 and 6 to program more tracks for side B of the tape.
-
Page 24: Random Tape Programming
TRACK PROGRAMMING FOR RECORDING Random Tape Programming The unit will automatically program tracks on a disc in random sequential order for recording to tape. DISC SCAN DISC SKIP REPEAT RANDOM Follow steps 1 – 3 on page 17. Press the RANDOM button. RANDOM The unit will automatically program tracks for side A and side B separately considering the tape’s total time. -
Page 25: Automatic Peak Level Searching
AUTOMATIC PEAK LEVEL SEARCHING This convenient feature automatically searches a disc for a part where the source level peaks, and next plays the part repeatedly. For recording to tape, this feature is very helpful to adjust the recording level on the tape deck. DISC SCAN REPEAT OPEN/... -
Page 26: Additional Information
If the unit fails to operate normally, check the following points to determine whether the problem can be corrected by the simple measures suggested. If it cannot, or if the problem is not listed in the SYMPTOM column, disconnect the unit’s power cord and contact your authorized YAMAHA dealer or service center for help. SYMPTOM This unit does not switch ON when the POWER switch is pressed. -
Page 27: Specifications
Audio Section Frequency response ... 2 Hz – 20 kHz, ±0.5 dB Harmonic distortion+noise (1 kHz) ... 0.003% S/N ratio ... 106 dB Dynamic range ... 96 dB Output level (1 kHz, 0 dB) ... 2.0±0.5 V Headphones output (–20 dB) ... 200±40 mV/150 ohms Laser Diode Properties Material ... - Page 28 YAMAHA ELECTRONICS (UK) LTD. YAMAHA HOUSE, 200 RICKMANSWORTH ROAD WATFORD, HERTS WD1 7JS, ENGLAND YAMAHA SCANDINAVIA A.B. J A WETTERGRENS GATA 1, BOX 30053, 400 43 VÄSTRA FRÖLUNDA, SWEDEN YAMAHA MUSIC AUSTRALIA PTY, LTD. 17-33 MARKET ST., SOUTH MELBOURNE, 3205 VIC., AUSTRALIA...