
Related Manuals for Sealey TA320


Summary of Contents for Sealey TA320
- Page 1 TA320 Digital Automotive Analyser/Insulation Tester - Hybrid Vehicles Original Language Version © Jack Sealey Limited TA320 Issue No.2(L) 17/06/14...
-
Page 2: Technical Specification
Low Battery Indicator: Yes Batteries (supplied): 6 x 1.5V AA Hi-Impact Case: Size (L x W x D): 220 x 95 x 56mm Weight: 700g PC Compatibility: Windows 2000, XP, Win7, Vista Original Language Version © Jack Sealey Limited TA320 Issue No.2(L) 17/06/14... - Page 3 3) Remove the battery cover. 4) Remove the batteries. Under the Waste Batteries and Accumulators Regulations 2009, Jack Sealey Ltd are required to inform potential purchasers of products containing b atteries (as defined within these regulations), that they are registered with Valpak’s registered compliance scheme. Jack Sealey Ltd’s Batteries Producer Registration Number (BPRN) is BPRN00705.
- Page 4 Thank you for purchasing a Sealey product. Manufactured to a high standard, this product will give you years of trouble free performance, if these instructions are carefully followed and the product is correctly maintained.
-
Page 5: Ec Declaration Of Conformity
TA320 Model/Type: ..................................Manufacturing Date / Serial number (optional): ......................... Manufacturer's authorised representative within the EC: Jack Sealey Ltd. Kempson Way, Suffolk Business Park, Bury St. Edmunds, Suffolk, IP32 7AR Conforms to the requirements of the following Directives, as indicated. - Page 6 Safety Symbols This symbol adjacent to another symbol, terminal or operating device indicates that the operator must refer to an explanation in the Operating Instructions to avoid personal injury or damage to the meter. This WARNING symbol indicates a potentially WARNING hazardous situation, which if not avoided, could result in death or serious injury.
- Page 7 PER IEC1010 OVERVOLTAGE INSTALLATION CATEGORY OVERVOLTAGE CATEGORY I Equipment of OVERVOLTAGE CATEGORY I is equipment for connection to circuits in which measures are taken to limit the transient overvoltages to an appropriate low level. Note – Examples include protected electronic circuits. OVERVOLTAGE CATEGORY II Equipment of OVERVOLTAGE CATEGORY II is energy-consuming equipment to be supplied from the fixed installation.
-
Page 8: Electrical Safety Precautions
ELECTRICAL SAFETY PRECAUTIONS This meter has been designed for safe use, but must be operated with caution. The rules listed below must be carefully followed for safe operation. NEVER apply voltage or current to the meter that exceeds the specified maximum: Input Protection Limits Function Maximum Input... - Page 9 NEVER operate the meter unless the back cover and the battery and fuse covers are in place and fastened securely. If the equipment is used in a manner not specified by the manufacturer, the protection provided by the equipment may be impaired.
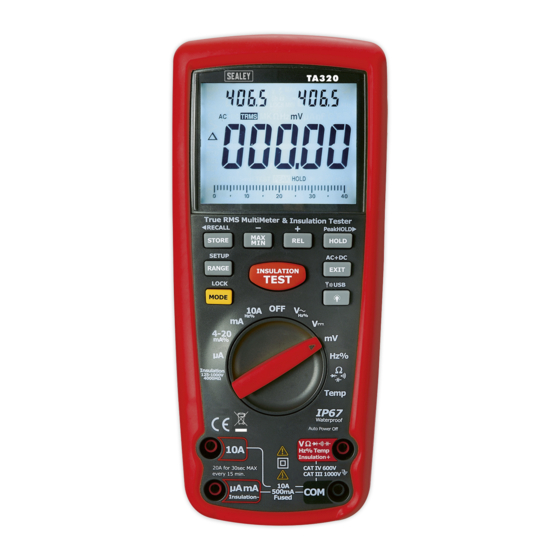
- Page 10 Symbols and Annunciators •))) Continuity Diode test Battery status nano (10 ) (capacitance) µ micro (10 ) (amps, cap) milli (10 ) (volts, amps) Amps kilo (10 ) (ohms) Farads (capacitance) mega (10 ) (ohms) Ω Ohms PEAK Peak Hold Hertz (frequency) Volts Percent (duty ratio)
-
Page 11: Dc Voltage Measurements
Operating Instructions WARNING: Risk of electrocution. High-voltage circuits, both AC and DC, are very dangerous and should be measured with great care. 1. ALWAYS turn the function switch to the OFF position when the meter is not in use. 2. If “OL” appears in the display during a measurement, the value exceeds the range you have selected. - Page 12 AC VOLTAGE (FREQUENCY, DUTY CYCLE) MEASUREMENTS WARNING: Risk of Electrocution. The probe tips may not be long enough to contact the live parts inside some 240V outlets for appliances because the contacts are recessed deep in the outlets. As a result, the reading may show 0 volts when the outlet actually has voltage on it.
-
Page 13: Mv Voltage Measurements
MV VOLTAGE MEASUREMENTS CAUTION: Do not measure mV voltages if a motor on the circuit is being switched ON or OFF. Large voltage surges may occur that can damage the meter. 1. Set the function switch to the green mV position. 2. -
Page 14: Dc Current Measurements
DC CURRENT MEASUREMENTS CAUTION: Do not make 20A current measurements for longer than 30 seconds. Exceeding 30 seconds may cause damage to the meter and/or the test leads. 1. Insert the black test lead banana plug into the negative COM jack. 2. -
Page 15: Ac Current (Frequency, Duty Cycle) Measurements
AC CURRENT (FREQUENCY, DUTY CYCLE) MEASUREMENTS CAUTION: Do not make 20A current measurements for longer than 30 seconds. Exceeding 30 seconds may cause damage to the meter and/or the test leads. Insert the black test lead banana plug into the negative COM jack. For current measurements up to 4000µA AC, set the function switch to the yellow µA position and insert the... -
Page 16: Resistance Measurements
13. Read the % duty cycle in the display. 14. Press and hold the MODE button to return to current measurement. 15. Press EXIT for 2 seconds into the function of AC+DC. Test DC and AC True Rms. RESISTANCE MEASUREMENTS WARNING: To avoid electric shock, disconnect power to the unit under test and discharge all capacitors before taking any resistance measurements. -
Page 17: Continuity Check
CONTINUITY CHECK WARNING: To avoid electric shock, never measure continuity on circuits or wires that have voltage on them. 1. Set the function switch to the green Ω CAP position. 2. Insert the black lead banana plug into the negative COM jack. Insert the red test lead banana plug into the positive Ω... -
Page 18: Capacitance Measurements
CAPACITANCE MEASUREMENTS WARNING: To avoid electric shock, disconnect power to the unit under test and discharge all capacitors before taking any capacitance measurements. Remove the batteries and unplug the line cords. 1. Set the rotary function switch to the green Ω... -
Page 19: Insulation Resistance Measurements
FREQUENCY (DUTY CYCLE) MEASUREMENTS (ELECTRONIC) 1. Set the rotary function switch to the green Hz/% position. 2. Insert the black lead banana plug into the negative COM jack and the red test lead banana plug into the positive Hz jack. 3. -
Page 20: Power Tools And Small Appliances
tested insulation voltage in V (DC) is indicated, the symbol “ ” flashes and the buzzer will sound. d)Releasing the “TEST” button or pushing down the “TEST” button in the “LOCK “ status will exit from the “LOCK” status and shut-off the testing voltage, simultaneously the resistance value indicated in the primary display will be held, and the top right corner display will still show the status of the insulation voltage for the item tested. - Page 21 connect one megohmmeter lead to the grounded motor housing and the other lead to the brush on the commutator. If the resistance measurement indicates a weakness, raise the brushes off the commutator and separately test the armature, field coils and brush rigging by connecting one megohmmeter lead to each of them individually, leaving the other connected to the grounded motor housing.
- Page 22 CABLES Disconnect the cable from the line. Also disconnect opposite end to avoid errors due to leakage from other equipment. Check each conductor to ground and /or lead sheath by connecting one megohmmeter lead to a ground and /or lead sheather and the other megohmmeter lead to each of the conductors in turn.
-
Page 23: Autoranging/Manual Range Selection
AUTORANGING/MANUAL RANGE SELECTION When the meter is first turned on, it automatically goes into AutoRanging. This automatically selects the best range for the measurements being made and is generally the best mode for most measurements. For measurement situations requiring that a range be manually selected, perform the following: 1. -
Page 24: Data Storage
3. Left auxiliary display shows the margin of initial value and the current value. Right auxiliary display shows the initial reading. Main displays the reading after REL TEST. 4. Press the EXIT button to exit the relative mode. Display Backlight Press the key to turn the backlight on. -
Page 25: Clear All Data
Set the sample rate (from 1 to 255 S) for automatic recording. In this mode, pressing the STORE button will start data recording at the programmed sample rate. The auxiliary display on the left indicates the current storage location (0000 to 9999). New measurements will begin storing into the next available location. - Page 26 PC WIRELESS COMMUNICATION Install and launch the PC software (refer to the HELP utility contained in the software for more details) Press and Hold the backlight/USB button for two seconds to enter RF wireless transmit mode The RF icon will appear on the display When communication is established, the RF icon on the display will blink and the LED indicator on the receiver will blink...
-
Page 27: Alarm Limits
Press the RANGE/SETUP button until the meter returns to the normal display to exit this mode. ALARM LIMITS Press and Hold the SETUP button for two seconds to enter the High Limit function. Press the ► button to select a digit for adjustment Press the + or –... -
Page 28: Battery Installation
Maintenance WARNING: To avoid electric shock, disconnect the test leads from any source of voltage before removing the back cover or the battery or fuse covers. WARNING: To avoid electric shock, do not operate your meter until the battery and fuse covers are in place and fastened securely. This Meter is designed to provide years of dependable service, if the following care instructions are performed: 1. - Page 29 3. Insert the batteries into battery holder, observing the correct polarity. 4. Put the battery cover back in place. Secure with the screws. WARNING: To avoid electric shock, do not operate the meter until the battery cover is in place and fastened securely. NOTE: If your meter does not work properly, check the fuses and batteries to make sure that they are still good and that they are properly inserted.
-
Page 30: Replacing The Fuses
REPLACING THE FUSES WARNING: To avoid electric shock, disconnect the test leads from any source of voltage before removing the meter cover. 1. Disconnect the test leads from the meter. 2. Remove the protective rubber holster. 3. Remove the battery cover (4 screws) and the batteries. 4. - Page 31 Specifications Function Range Resolution Accuracy DC Voltage 400mV 0.01mV 0.0001V ± (0.06% reading + 4digits) 0.001V 400V 0.01V ± (0.1% reading + 5digits) 1000V 0.1V AC Voltage 50 to 1000Hz 400mV 0.1mV ± (1.0% reading + 7digits) 0.001V 0.01V 400V 0.1V ±...
- Page 32 (20A: 30 sec max with reduced accuracy) AC Current 400µA 0.1µA 4000µA 1µA ± (1.5% reading + 7digits) 40mA 0.01mA (50 to 1000Hz) 400mA 0.1mA 0.01A ± (1.5% reading + 7digits) AC+DCCurrent 400µA 0.1µA (50/60HZ) 4000µA 1µA 40mA 0.01mA 400mA 0.1mA 0.01A (20A: 30 sec max with reduced accuracy)
- Page 33 Capacitance 40nF 0.001nF ± (3.5% reading + 40 digits) 400nF 0.01nF 4µF 0.0001µF ± (3.5% reading + 10 digits) 40µF 0.001µF 400µF 0.01µF 4000µF 0.1µF ± (5% reading + 10 digits) 40mF 0.001mF Frequency 40Hz 0.001Hz (electronic) 400Hz 0.01Hz 4kHz 0.0001kHz ±...
- Page 34 Meg OHMS Test Short Terminal Range Accuracy Resolution Current circuit Voltage current Ω Ω ≤ 125V(0 0.125~4.000 M 0.001M +(2%+10) Ω Ω @load1 %~+10 4.001~40.00 M 0.01M +(2%+10) Ω Ω 25kΩ 40.01~400.0 M 0.1M +(4%+5) Ω Ω 400.1~4000 M +(5%+5) Ω...
- Page 35 Store capacitance 2000 Enclosure Double molded, waterproof Shock (Drop Test) 6.5 feet (2 meters) Diode Test Test current of 0.9mA maximum, open circuit voltage 2.8V DC typical Continuity Check Audible signal will sound if the resistance is less than 35Ω (approx.), test current <0.35mA Peak Captures peaks >1ms...
- Page 36 Battery 6 x AA batteries Fuses mA, µA ranges; 0.5A/1000V ceramic fast blow A range; 10A/1000V ceramic fast blow Operating Temperature 41ºF to 104ºF (5ºC to 40ºC) Storage Temperature F to 140 F (-20 C to 60 Operating Humidity Max 80% up to 87ºF (31ºC) decreasing linearly to 50% at 104ºF (40ºC) Storage Humidity <80%...