
Related Manuals for Eaton RE Series


Summary of Contents for Eaton RE Series
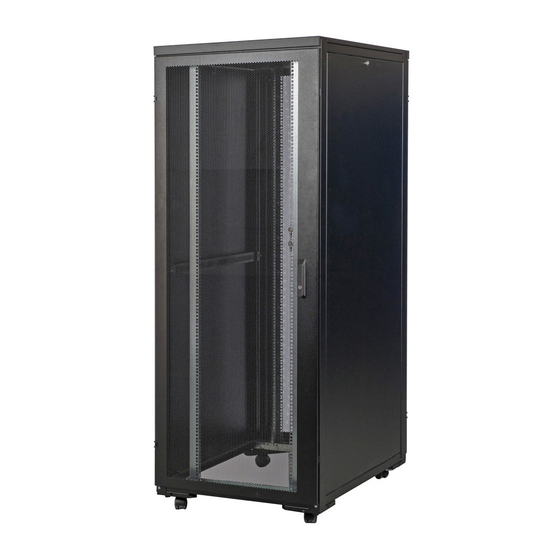
- Page 1 Installation Guide RE SERIES RACK INSTALLATION GUIDE RE Series Enclosure Installation Guide Issue 8 ©2015 Eaton Corporation All rights reserved...
-
Page 2: Table Of Contents
Installation Guide TABLE OF CONTENTS SECTION SAFETY WARNINGS 600 WIDE EXPLODED VIEW 800 WIDE EXPLODED VIEW SWITCHING DOOR HANDING STABILIZING BAYING THE ENCLOSURE SIDE PANEL RACK MOUNT ADJUSTMENT RACK EARTH BONDING RE Series Enclosure Installation Guide Issue 8... -
Page 3: Safety Warnings
WARNING! The RE Series enclosure is designed to support a Static Load of 800kg or a Dynamic Combined Load of 200kg. Dynamic Combined Load is the combined weight of the rack and installed equipment. -
Page 4: 600 Wide Exploded View
Steel door assy option Glass door assy option Vented door assy option Side panel Steel door supplied with vented front door Vented door supplied with glass/steel front door Enclosure frame RE Series Enclosure Installation Guide Issue 8 ©2015 Eaton Corporation All rights reserved... -
Page 5: 800 Wide Exploded View
Glass door assy option Vented door assy option Side panel Steel door supplied with vented/double front door Double vented door supplied with glass/steel front door Enclosure frame RE Series Enclosure Installation Guide Issue 8 ©2015 Eaton Corporation All rights reserved... -
Page 6: Switching Door Handing
6. Loosen the two screws which secure the locking rods (Fig 3). 7. Remove the two screws on the back of the door lock and fixing plate (Fig 3). RE Series Enclosure Installation Guide Issue 8 ©2015 Eaton Corporation All rights reserved... -
Page 7: Stabilizing
Using a level, adjust the leveling feet as required to level the enclosure. For enclosures that have casters, extend the leveling feet so that the casters are approximately 3 mm off the floor. RE Series Enclosure Installation Guide Issue 8 ©2015 Eaton Corporation All rights reserved... -
Page 8: Baying The Enclosure
3. Bolt the adjacent frames together with the 4 nuts, bolts, plain washers and serrated washers included in the baying kit, part number NRA BTK. IMAGE WITH DOORS AND SIDE PANELS REMOVED RE Series Enclosure Installation Guide Issue 8 ©2015 Eaton Corporation All rights reserved... -
Page 9: Side Panel
1. Align the two holes on the bottom of the side panel with the two pins on the enclo- sure frame. (Fig 2) 2. Then lower the side panel on to the pins. 3. Lock the side panel with the key supplied (Fig 1). RE Series Enclosure Installation Guide Issue 8 ©2015 Eaton Corporation All rights reserved... -
Page 10: Rack Mount Adjustment
1. Loosen the four bolts using a 5mm Allen key, do not remove the bolt (Fig 1). 2. Slide rails to desired location. 3. Ensuring the rails are vertical, tighten the bolt with 5mm Allen key (Fig 1). RE Series Enclosure Installation Guide Issue 8 ©2015 Eaton Corporation All rights reserved... -
Page 11: Rack Earth Bonding
M6 x 12mm Setscrew (4mm Allen) 12mm M6 Plain Washers M6 Serrated Hexagonal Flange Nut Earth Lead 500mm Earth Lead 350mm Tools required; 10mm spanner x 2 4mm Allen Key RE Series Enclosure Installation Guide Issue 8 ©2015 Eaton Corporation All rights reserved... - Page 12 M6 Shake proof washer ensure that the components are M6 Thread forming screw earthed to the rack frame. RE Series Enclosure Installation Guide Issue 8 ©2015 Eaton Corporation All rights reserved...
- Page 13 Tighten to 12Nm. Repeat this step at the rear of the rack. Fig 1.0 M6 x 25 Setscrew M6 Shake proof washer M6 Serrated hex flange nut RE Series Enclosure Installation Guide Issue 8 ©2015 Eaton Corporation All rights reserved...
- Page 14 Fig M6 Earth lead (350mm) - connect to corner gusset M6 Shake proof washer M6 X 12 Setscrew M6 Plain washer M6 Serrated hex flange Fig 3.0 RE Series Enclosure Installation Guide Issue 8 ©2015 Eaton Corporation All rights reserved...
- Page 15 - To 19-inch rails Fig 6.0 M6 Earth lead (500mm) - To side panels M6 Serrated hex flange nut M6 Plain washers (X2) M6 Earth lead (350mm) - To doors RE Series Enclosure Installation Guide Issue 8 ©2015 Eaton Corporation All rights reserved...
- Page 16 Only order confirmations and technical documentation by Eaton is binding. Photos and pictures also do not warrant a specific layout or functionality. Their use in whatever form is subject to prior approval by Eaton. The same applies to Trademarks (especially Eaton, Moeller, and Cutler-Hammer). The Terms and Conditions of Eaton apply, as referenced on Eaton internet pages and Eaton order confirmations.