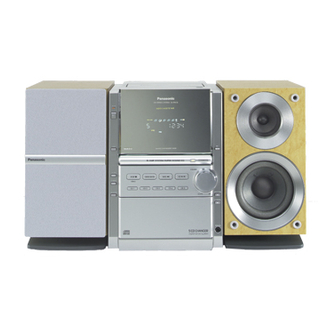
Panasonic SC-PM18 Operating Instructions Manual
Micro system with 5-cd changer
Hide thumbs
Also See for SC-PM18:
- Operating instructions manual (44 pages) ,
- Operating instructions manual (28 pages) ,
- Operating instructions manual (28 pages)
Table of Contents

Related Manuals for Panasonic SC-PM18


Summary of Contents for Panasonic SC-PM18
-
Page 1: Operating Instructions
CD Stereo System Operating Instructions Model No. Before connecting, operating or adjusting this product, please read these instructions completely. Please keep this manual for future reference. SC-PM16 is available in the U.S.A. only. SC-PM18 SC-PM16 RQT6683-2P... -
Page 2: Table Of Contents
Dear customer Thank you for purchasing this product. For optimum performance and safety, please read these instructions carefully. These operating instructions are applicable to the following systems. System SC-PM18 Main unit SA-PM18 Speakers SB-PM18 The model number and serial number of this product can be found on either the back or the bottom of the unit. -
Page 3: Supplied Accessories
Use numbers indicated in parentheses when asking for replacement parts. (Only for U.S.A.) order accessories 1-800-332-5368 (http://www.panasonic.com). AC power supply cord ... 1 pc. (K2CB2CB00006) FM indoor antenna ... 1 pc. (RSA0006-L) AM loop antenna ... 1 pc. (RSA0033A-1) Remote control transmitter ... -
Page 4: Important Safety Instructions
IMPORTANT SAFETY INSTRUCTIONS Read these operating instructions carefully before using the unit. Follow the safety instructions on the unit and the applicable safety instructions listed below. Keep these operating instructions handy for future reference. Read these instructions. Keep these instructions. Heed all warnings. -
Page 5: Listening Caution
Listening caution EST. 1924 Selecting fine audio equipment such as the unit you’ve just purchased is only the start of your musical enjoyment. Now it’s time to consider how you can maximize the fun and ex- citement your equipment offers. This manufacturer and the Electronic Industries Association’s Consumer Electronics Group want you to get the most out of your equipment by playing it at a safe level. -
Page 6: Connections
FM indoor antenna AM loop antenna Gray (+) Blue (–) Red (ª · · ) · · Black (· H IG H ( 6 L O W ( 6 Black (–) Red (+) RQT6683 • Plug the AC power supply cord into a household AC outlet •... - Page 7 FM outdoor antenna (not included) AM outdoor antenna (not included) 5-12 m (16-40 ft) AM loop antenna (included) "LINE OUT" position Analog player (not included) Rear panel of this unit Connections Optional antenna connections You may need an outdoor antenna if you use this system in a mountainous region or inside a reinforced-concrete building, etc.
-
Page 8: Front Panel Controls
AC IN POWER STOP TUNER BAND DEMO CD 1 CD 2 CD 3 CD CHECK STOP TUNER BAND DEMO CD 1 CD 2 RQT6683 OPEN " Ä S.SOUND EQ Å VOLUME Ç TAPE É CD 4 CD 5 OPEN/CLOSE DOWN Ñ... - Page 9 SLEEP CLOCK PLAY AUTO OFF TIMER > DISC PLAY MODE CLEAR TUNER/ TAPE BAND BAND MUTING < S.SOUND EQ S.SOUND EQ PRESET EQ DISPLAY DIMMER Front panel controls Remote Control Buttons such as function in exactly the same way as the å...
-
Page 10: The Radio: Manual Tuning
SLEEP CLOCK CLOCK PLAY AUTO OFF TIMER TIMER DISC DISC PLAY MODE CLEAR CLEAR TUNER/ TAPE BAND MUTING MUTING S.SOUND EQ S.SOUND EQ PRESET EQ PRESET EQ DISPLA DISPLAY DIMMER DIMMER TUNER BAND PLAY MODE VOLUME DOWN SLEEP SLEEP CLOCK PLAY AUTO OFF UTO OFF... -
Page 11: The Radio: Preset Tuning
SLEEP SLEEP CLOCK PLAY AUTO OFF UTO OFF TIMER DISC PLAY MODE Y MODE CLEAR CLEAR TUNER/BAND TUNER/ TAPE BAND MUTING S.SOUND EQ S.SOUND EQ PRESET EQ PRESET EQ DISPLAY DIMMER DIMMER CLOCK PLAY SLEEP SLEEP AUTO OFF UTO OFF TIMER DISC PLAY MODE... -
Page 12: Cds
STOP DEMO /FF, /REW (CD 1) ~ (CD 5) OPEN/CLOSE Label must face upward. Disc tray CD indicator Track number VOLUME DOWN RQT6683 This unit can play CD-DA (digital audio) format audio CD-R and CD-RW that have been finalized (a process that enables CD-R/CD-RW players to play audio CD-R and CD-RW) upon completion of recording. - Page 13 STOP DEMO CD CHECK CD CHANGE CD 1 CD 2 CD 3 CD 4 Label must face upward. Disc tray CD 1 CD 2 CD 3 CD 4 CD indicator Track number VOLUME DOWN CD CHECK CD CHECK Listening to a CD placed in a specific tray Preparation: Press [CD 2/J] and then [STOP L, –DEMO].
- Page 14 AUTO OFF UTO OFF DISC PLAY MODE Y MODE TUNER/ BAND MUTING S.SOUND EQ S.SOUND EQ PRESET EQ PRESET EQ CLEAR PLAY MODE DISC Specified disc indicator RQT6683 PLAY SLEEP SLEEP CLOCK TIMER By remote control only CLEAR CLEAR TAPE This function makes it easier for you to select specific CDs and tracks from those loaded in the player.
- Page 15 CLOCK PLAY SLEEP SLEEP AUTO OFF UTO OFF TIMER DISC PLAY MODE Y MODE PLAY MODE CLEAR CLEAR TUNER/ TAPE BAND MUTING S.SOUND EQ S.SOUND EQ PRESET EQ PRESET EQ DISPLAY DIMMER DIMMER DISC PLAY MODE DISPLAY Direct access play By remote control only Direct access allows you to start normal play from a specific track to the last track of the CD.
- Page 16 SLEEP SLEEP AUTO OFF UTO OFF DISC PLAY MODE Y MODE TUNER/ BAND MUTING S.SOUND EQ S.SOUND EQ PRESET EQ PRESET EQ CLEAR DISC Specified track number Indicates program mode RQT6683 CLOCK PLAY TIMER By remote control only This function allows you to program up to 24 tracks. CLEAR CLEAR TAPE...
-
Page 17: Cassette Tapes
STOP DEMO /FF, /REW OPEN Forward side TAPE VOLUME DOWN Cassette tapes Press [c OPEN], insert a cassette with the tape facing in. When the button is pressed, the unit comes on automatically. Make sure the cassette is fully inserted and close the OPEN lid by hand. -
Page 18: Before Recording
To protect tapes against further recording Side A Tab for side B Tab for side A To re-record Normal position tape Adhesive tape OPEN RQT6683 Before recording Types of tapes which can be recorded correctly The system automatically identifies the type of tape. NORMAL POSITION/TYPE I HIGH POSITION/TYPE II METAL POSITION/TYPE IV... -
Page 19: Recording From The Radio
STOP DEMO SLEEP SLEEP CLOCK PLAY AUTO OFF UTO OFF TIMER DISC PLAY MODE Y MODE PLAY MODE CLEAR CLEAR TUNER/ TAPE BAND MUTING S.SOUND EQ S.SOUND EQ PRESET EQ PRESET EQ DISPLAY DIMMER DIMMER STOP DEMO Recording from the radio Preparation: Do the preparatory steps (\ page 18). -
Page 20: Using The Built-In Sound Quality Settings
S.SOUND EQ PRESET EQ S.SOUND EQ RQT6683 By remote control only You can choose one of three types of sound quality. HEAVY: Adds punch to rock CLEAR: Clarifies higher sounds SLEEP CLOCK CLOCK PLAY AUTO OFF TIMER TIMER SOFT: For background music DISC DISC Press [PRESET EQ] to select a setting. -
Page 21: Auto-Off Function
SLEEP SLEEP SLEEP CLOCK PLAY AUTO OFF UTO OFF TIMER AUTO OFF DISC PLAY MODE Y MODE CLEAR CLEAR TUNER/ TAPE BAND MUTING S.SOUND EQ S.SOUND EQ PRESET EQ PRESET EQ DISPLAY DIMMER DIMMER SLEEP AUTO OFF STOP DEMO STOP DEMO Auto-off function By remote control only... -
Page 22: Setting The Time
DISC PLAY MODE Y MODE TUNER/ BAND MUTING S.SOUND EQ CLOCK/ TIMER CLOCK/ TIMER DISC PLAY MODE Y MODE TUNER/ BAND MUTING MUTING S.SOUND EQ DIMMER MUTING RQT6683 SLEEP CLOCK PLAY AUTO OFF UTO OFF TIMER By remote control only This is a 12-hour clock. -
Page 23: Using The Timers
SLEEP SLEEP CLOCK PLAY AUTO OFF UTO OFF TIMER DISC PLAY MODE Y MODE CLEAR CLEAR TUNER/ TAPE BAND MUTING S.SOUND EQ S.SOUND EQ PRESET EQ PRESET EQ DISPLAY DIMMER DIMMER CLOCK/ TIMER FOR RECORD TIMER FOR PLAY TIMER CLOCK/ TIMER CLOCK/ TIMER... - Page 24 DISC PLAY MODE Y MODE TUNER/ BAND MUTING S.SOUND EQ S.SOUND EQ SLEEP AUTO OFF DISC PLAY MODE Y MODE TUNER/ BAND MUTING S.SOUND EQ S.SOUND EQ SLEEP AUTO OFF RQT6683 PLAY/ SLEEP SLEEP CLOCK PLAY By remote control only AUTO OFF UTO OFF TIMER...
-
Page 25: Troubleshooting Guide
U.S.A., contact [email protected], or web site (http://www.panasonic.com). In Canada, contact Panasonic Canada Inc. Customer Care Centre at 905-624-5505, web site (www.panasonic.ca), or an authorized Servicentre closest to you. Reference pages are shown as black circled numbers 6. Common Problems No sound. -
Page 26: Warranty (Only For U.s.a.)
Carry-In or Mail-In Service For Carry-In or Mail-In Service in the United States call 1-800-211-PANA (1-800- 211-7262) or visit Panasonic web site: http://www.panasonic.com For assistance in Puerto Rico call Panasonic Sales Company (787)-750-4300 or fax (787)-768-2910. Limited Warranty Limits And Exclusions This warranty ONLY COVERS failures due to defects in materials or workmanship, and DOES NOT COVER normal wear and tear or cosmetic damage. -
Page 27: Specifications
Specifications AMPLIFIER SECTION SC-PM18 Power output 10% Total harmonic distortion 60 Hz–3 kHz, both channels driven 25 W per channel (6 Ω) (Low channel) 3 kHz–16 kHz, both channels driven 25 W per channel (6 Ω) (High channel) Total Bi-Amp power Power output 10% Total harmonic distortion 1 kHz, both channels driven... -
Page 28: Product Service
Product information For product information or assistance with product operation: In the U.S.A., contact the Panasonic Customer Call Center 1-800-211-7262, [email protected], or web site (http://www.panasonic.com). In Canada, contact Panasonic Canada Inc. Customer...