Table of Contents
Quick Links
Table of Contents

Related Manuals for Bosch Divar -Digital Versatile Recorder


Summary of Contents for Bosch Divar -Digital Versatile Recorder
- Page 1 Divar - Digital Versatile Recorder Installation Instructions...
- Page 3 Divar | Installation Manual Bosch Security Systems Divar Digital Versatile Recorder Installation manual Chapters Introduction Quick install Operating instructions Hardware setup Menu system Using the Configuration Tool Menu default values Technical specifications EN | i...
-
Page 4: Table Of Contents
Divar | Installation Manual Introduction ....... . 1-1 Digital video recorder for security applications ..... . 1-1 Versions . - Page 5 Divar | Installation Manual Console port connection ........4-3 Keyboard connections .
-
Page 6: Safety Precautions
Divar | Installation Manual SAFETY PRECAUTIONS CAUTION RISK OF ELECTRIC SHOCK. DO NOT OPEN! CAUTION: TO REDUCE THE RISK OF ELECTRICAL SHOCK, DO NOT OPEN COVERS. NO USER SERVICEABLE PARTS INSIDE. REFER SERVICING TO QUALIFIED SERVICE PERSONNEL. This label may appear on the bottom of the unit due to space limitations. The lightning flash with an arrowhead symbol within an equilateral triangle is intended to alert the user to the presence of uninsulated "dangerous voltage"... - Page 7 Divar | Installation Manual 12. Use only with the cart, stand, tripod, bracket, or table specified by the manufacturer, or sold with the apparatus. When a cart is used, use caution when moving the cart/ apparatus combination to avoid injury from tip-over. 13.
- Page 8 Divar | Installation Manual FCC & ICES INFORMATION (U.S.A. and Canadian Models Only) This is a Class B product. This device complies with Part 15 of the FCC rules. Operation is subject to the following two conditions: (1) this device may not cause harmful interference, and (2) this device must accept any interference received, including interference that may cause undisired operation.
-
Page 9: Introduction
Divar | Installation Manual | Introduction EN | 1-1 Introduction CHAPTER 1 Digital video recorder for security applications The Divar is a video recording system that can record multiple camera signals while simultaneously providing live multiscreen viewing and playback. It combines the functionality of a digital recorder with a multiplexer and a switcher. -
Page 10: Versions
Divar | Installation Manual | Introduction a web browser on a PC can be used to view live images or playback recordings from a Divar. The PC-based Configuration Tool facilitates the setup of the unit. ATM/POS transaction data can be recorded and viewed if the Divar is connected to an ATM or POS device via an ATM/POS bridge unit and has a license installed. -
Page 11: On-Screen Help
Divar | Installation Manual | Introduction On-screen help On-screen context-sensitive help is available for all topics. Just press the yellow ALT key for at least one second to see the help text associated with your current activity. Press the escape key to exit help. -
Page 12: Associated Equipment
Divar | Installation Manual | Introduction Associated equipment A typical system could contain the following components (not included with the unit): • A primary monitor for multiscreen monitoring (monitor A). • A second monitor for spot/alarm monitoring (monitor B). • Cameras with 1 Vpp composite video outputs. -
Page 13: Quick Install
Divar | Installation Manual | Quick install EN | 2-1 Quick install CHAPTER 2 This chapter gives instructions on how to quickly get the unit operational. Make the connections described on the following pages and then enter the relevant data in the quick install menu. The Quick Install menu appears the first time you start the unit. -
Page 14: Quick Connection
Divar | Installation Manual | Quick install Quick connection ATM/POS bridge LAN / WAN RS232 Terminator** Storage Array AutoDome Bosch Security Systems DIVAR / 390 Ohm SHIELD CTRL 1 SHIELD CTRL 2 SHIELD CTRL 3 SHIELD CTRL 4 SHIELD CTRL 5 SHIELD EN | 2-2 x16*... -
Page 15: Primary Connections
Divar | Installation Manual | Quick install Primary connections 1. Connect the cameras to the BNC loop-through camera inputs (automatically terminated). 2. Connect monitor A to the BNC output MON A. Optional connections 3. Connect monitor B to the BNC output MON B. 4. -
Page 16: Quick Install Menu
Divar | Installation Manual | Quick install > UICK INSTALL MENU QUICK INSTALL LANGUAGE ENGLISH TIME ZONE GMT +01:00 WEST EUROPE TIME FORMAT 24-HOUR TIME 19:45:00 DATE FORMAT YYYY-MM-DD DATE 2002-06-20 ACTIVE CAMS ALARM MONITOR MON A ONLY RECORDING SETTINGS NETWORK SETTINGS SAVE &... -
Page 17: Recording Settings
Divar | Installation Manual | Quick install >> RECORDING SETTINGS RECORDING SETTINGS DAY PERIOD 8:00 18:00 WEEKEND SAT AND SUN REC DAY 1 IPS/CAM REC WEEKEND/NIGHT 2 IPS/CAM ENABLE ALARM INPUTS FOR DAY/NIGHT ALARM INPUT RECORDING 12.5 IPS/INPUT ENABLE MOTION FOR NIGHT MOTION RECORDING 5 IPS/CAM... -
Page 18: Approximate Recording Duration
Divar | Installation Manual | Quick install >> APPROXIMATE RECORDING DURATION • This is an estimate of the recording duration based on the total amount of storage space available and the recording setup. For event recording, the following parameters are used: •... -
Page 19: Operating Instructions
Divar | Installation Manual | Operating instructions EN | 3-1 Operating instructions CHAPTER 3 The instructions in this chapter explain the purpose of the front panel keys. The functions available can be limited by setting passwords. Some functions may also require a software license. -
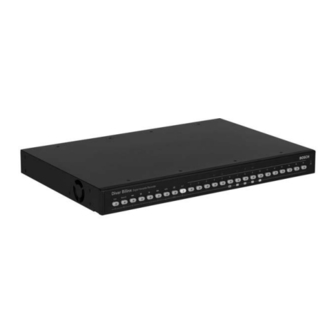
Page 20: Front Panel Controls
Divar | Installation Manual | Operating instructions Front panel controls Divar Bilinx Divar Bilinx Divar Bilinx with internal DVD writer Divar Bilinx Bosch Security Systems DVD writer Open/Close button DVD writer Read/Write LED EN | 3-2... -
Page 21: Indicators
Divar | Installation Manual | Operating instructions Indicators The power indicator lights to indicate that power is being supplied to the unit. The indicators across the top of the controls light or flash to alert you to various operating conditions. Record lights when the unit is recording video. -
Page 22: Primary Functions
Divar | Installation Manual | Operating instructions Primary functions (light below ALT key off) Live key press to switch to live viewing. Search key press to open a search menu to look for recorded events. Reverse key in live mode, press to start reverse playback of recordings for the displayed cameras. -
Page 23: Alternate Functions
Divar | Installation Manual | Operating instructions Alternate functions (light below ALT key is lit) F1 key restores defaults in active menu. F2 key is assigned a specific function in some submenus. Arrow keys: move around through menu items or values. Left Down Right... -
Page 24: Viewing Pictures
Divar | Installation Manual | Operating instructions Viewing pictures The unit has two monitor outputs, A and B. The way in which these monitors display pictures depends on how the system has been set up. Monitor A Monitor A is the main monitor. It shows full-screen, quad or multiscreen live or playback camera pictures. - Page 25 Divar | Installation Manual | Operating instructions Multiscreen To view different multiscreen displays on monitor A: 1. Press the multiscreen key > A multiscreen display of camera pictures appears on monitor A. 2. Press the multiscreen key again to go to the next programmed multiscreen view.
- Page 26 Divar | Installation Manual | Operating instructions Zoom To zoom in on a camera picture: 1. Press the ALT key > The ALT indicator lights. 2. Press the zoom key > The zoom indicator lights. > The picture is enlarged by a factor of 2. 3.
-
Page 27: Live, Playback And Search Modes
Divar | Installation Manual | Operating instructions Live, playback and search modes Live mode The live mode is the normal operating mode of the unit where you watch live pictures from the cameras. From the live mode you can switch to the search mode, the playback mode or to the system menu. -
Page 28: Search Mode
Divar | Installation Manual | Operating instructions Protecting or archiving a video recording 1. Press the pause key for longer than one second during playback to mark the beginning of a video segment for protection or archiving. > A dialog window appears. >... -
Page 29: Search Results
Divar | Installation Manual | Operating instructions • Fill in a time and date from which to start the search. • Fill in an end time and date to limit the time span of the search. • If ATM/POS is selected, fill in the text string (16 characters maximum) you wish to search for. -
Page 30: Triggers And Alarms
Divar | Installation Manual | Operating instructions Triggers and alarms Various types of events can change the way the unit works. These events can be: • An alarm input signal applied to the unit. • Motion detection in a camera signal. •... -
Page 31: Alarm Inputs
Divar | Installation Manual | Operating instructions Alarm inputs If an input causes an alarm • Monitors A and B can switch to a pre-programmed view mode. • Monitor A: The border around the displayed cameos is red. The alarm icon is displayed in each cameo. -
Page 32: Video Loss Alarm
Divar | Installation Manual | Operating instructions Video loss alarm If the loss of a video signal causes an alarm: Monitor A or B can be set up to show the video loss signal. • Monitor A switches to multiscreen view. The lost camera signal is displayed as a black cameo with the video loss message. -
Page 33: Hardware Setup
Divar | Installation Manual | Hardware setup EN | 4-1 Hardware setup CHAPTER 4 This chapter contains detailed information about the connection of external equipment to the unit. The connector types and their pin signals are described. All the connectors are located at the rear panel of the unit. Bosch Security Systems... -
Page 34: Rack Mounting
Divar | Installation Manual | Hardware setup Rack mounting The Divar can be mounted in a 19-inch rack. A rack mounting kit is supplied with the unit that includes: • left and right rack mount ears • four Torx screws with integrated lock washers. •... -
Page 35: Monitor Connections
Divar | Installation Manual | Hardware setup Monitor connections Connect the unit to the monitors using 75-ohm video coaxial cables with BNC connectors. The unit provides a 1Vpp CVBS signal. If the monitor has a loop-through connection and you are not using the loop- through output, then select the 75-ohm impedance setting on the monitor. -
Page 36: Keyboard Connections
Divar | Installation Manual | Hardware setup Keyboard connections The keyboard input and output connectors are used to connect an external keyboard to the unit. Connect the keyboard to the KBD IN connector. Up to 4 external keyboards can be connected when the optional keyboard port expander (LTC2604) is used. -
Page 37: Ethernet Connection
Divar | Installation Manual | Hardware setup Ethernet connection The standard RJ-45 Ethernet socket is used to connect the unit directly to a PC or to a network. The Ethernet is also used to connect to an ATM/POS bridge unit. To connect directly to a network hub, use a straight-through network cable. To connect directly to a PC, use the supplied cross-over network cable. -
Page 38: Control Port
Divar | Installation Manual | Hardware setup Control port The control port is a bi-phase port for connecting the control units of controllable cameras. Five bi-phase outputs are provided for dome camera and pan, tilt and zoom control. The screw terminal connection board supplied with the unit simplifies all bi-phase connections to the unit. -
Page 39: External I/O Connection
Divar | Installation Manual | Hardware setup External I/O connection Alarm inputs and outputs are supplied via a 25-pole D-type socket. The screw terminal input/output connection board supplied with the unit simplifies all alarm connections to the unit. Bosch Security Systems Connecting the Inputs Each (alarm) input line can be switched by a relay contact from devices such as pressure pads, passive infra-red detectors, smoke detectors and similar devices. -
Page 40: Scsi Connection
Divar | Installation Manual | Hardware setup Signal name: Pin no. Description Alarm_in_6 Alarm input 6 Alarm_in_7 Alarm input 7 Alarm_in_8 Alarm input 8 Alarm_in_9 Alarm input 9 Alarm_in_10 Alarm input 10 Alarm_in_11 Alarm input 11 Alarm_in_12 Alarm input 12 Alarm_in_13 Alarm input 13 Alarm_in_14... -
Page 41: Power Supply
Divar | Installation Manual | Hardware setup Power Supply Power is supplied to the unit via the IEC-style socket. The unit has no on/off switch for security reasons. This means that the unit is always powered as long as the power cable is connected from the unit to a live power socket. Specifications: Input Voltage: 100 - 240 Vac ±10%... - Page 42 Divar | Installation Manual | Hardware setup EN | 4-10 Bosch Security Systems...
-
Page 43: Menu System
Divar | Installation Manual | Menu system EN | 5-1 Menu system CHAPTER 5 You access all the parameters used to set up the unit via the menu system. The large number of parameters available gives you the opportunity to program an extensive functionality. -
Page 44: Overview Of The Menu System
Divar | Installation Manual | Menu system Overview of the menu system The main menu consists of six menu groups: History. The History menu allows you to trace all events that have occurred on the unit. Disk manager. The Disk Manager menu provides information and functions that relate to the maintenance of the storage system including internal and external hard disks. -
Page 45: Main Menu
Divar | Installation Manual | Menu system The main menu gives access to six major menu groups. Each of these groups has a submenu tree where the values and functions can be selected. • Set Advanced Menus to Yes to see all items; set to No for standard features only. -
Page 46: History
Divar | Installation Manual | Menu system > ISTORY The History menu provides a list of all events that have occurred. This list can be filtered to show only those events you wish to see. MAIN MENU HISTORY VIEW HISTORY LIST BEGIN TIME 2002-03-14 13:00 END TIME... -
Page 47: Local Archiving
Divar | Installation Manual | Menu system >> LOCAL ARCHIVING • Segments of recorded video can be written to (re)writable disks using the local archiving menu. • Select Archive Setup to check the status of the writer, the progress of the writing, or to erase or format rewritable disks. -
Page 48: Authenticity Check
Divar | Installation Manual | Menu system >> AUTHENTICITY CHECK • This check verifies that video images and associated data have not been modified. • Select the period within which the authenticity check runs. The default values are the same as the earliest and latest available recording times. •... -
Page 49: Time/Date
Divar | Installation Manual | Menu system > MAIN MENU TIME/DATE TIME ZONE +01:00 WEST-EUROPE TIME FORMAT 24 HOUR TIME 14:00:17 DATE FORMAT YYYY-MM-DD DATE 2002-06-19 SYNCHRONIZE DAYLIGHT SAVING START DATE/TIME LAST SUN MAR 02:00 END DATE/TIME LAST SUN SEP 03:00 OFFSET 01:00 •... -
Page 50: Camera Controllable
Divar | Installation Manual | Menu system Adjust contrast • Select a camera in the menu or press a camera key on the unit. The selected camera image appears. • Vary the manual gain value between -100 and +100 to adjust the contrast. -
Page 51: System Settings
Divar | Installation Manual | Menu system >>> Multiscreen modes • Pressing the multiscreen key on the unit cycles through all enabled multiple view modes. • Enable only those views you wish to see when you use the multiscreen key. •... -
Page 52: Playback Setup
Divar | Installation Manual | Menu system >>> Disk Full Alarm Setup • Set the percentage of used disk space at which the disk-full warning message is displayed. • Set the time in minutes before the disk is full at which a disk-full alarm is generated. -
Page 53: History Log Setup
Divar | Installation Manual | Menu system Auto-protect • Four inputs can be used to trigger automatic protection of video clips. • Select the inputs you want to use for each of these triggers. Set to None if you do not want automatic protection. •... -
Page 54: Local Passwords
Divar | Installation Manual | Menu system • The entire history list is erased if you select the Clear History item. • Date/time changes of stored video are always logged and cannot be disabled or cleared. >> LOCAL PASSWORDS • Set or change the password that allows access to playback functions. -
Page 55: Licenses
Divar | Installation Manual | Menu system >>> COM port • The COM port is an RS232 serial port used mainly for connecting a PC or an alarm panel to the unit. • Most parameters are fixed. Select the appropriate baud rate. >>>... -
Page 56: Profile Override
Divar | Installation Manual | Menu system Add schedule • Select the profile name, the begin and end times, and the days on which you want the profile to be active. • Only five profiles changes can occur in any one day. •... - Page 57 Divar | Installation Manual | Menu system >>> Output handling • Select the profile for which you wish to configure the output handling. • Select the number of the output relays to be activated when an enabled event in the selected profile is activated. •...
- Page 58 Divar | Installation Manual | Menu system EN | 5-16 Bosch Security Systems...
-
Page 59: Using The Configuration Tool
Divar | Installation Manual | Using the Configuration Tool Bosch Security Systems Using the CHAPTER 6 Configuration Tool The Configuration Tool is a software application that makes the installation and configuration of a unit faster and easier. The Configuration Tool runs on a PC that is connected to the Divar either directly via an RS232 serial connection or via an Ethernet network connection. -
Page 60: Getting Started
Divar | Installation Manual | Using the Configuration Tool Getting started To use the Configuration Tool to change settings, the unit must be physically connected to a PC via the RS232 Console Port or via a network connection. The Configuration Tool application must be installed on the PC. System requirements Operating platform: A PC or compatible running Windows 95, Windows 98,... -
Page 61: How To Log In
Divar | Installation Manual | Using the Configuration Tool How to Log in When you start the Configuration Tool as a stand-alone application via a network, the Login window appears. (Click Cancel to discontinue login and exit the application.) When the Configuration Tool application is started for the first time, the Divar list is empty. -
Page 62: Menu Structure Differences
Divar | Installation Manual | Using the Configuration Tool Login When you start the Configuration tool application, the Login window appears. (Click Cancel to discontinue login and exit the application.) To control a particular Divar: 1. Select the Divars you want to control by placing check marks next to them. >... -
Page 63: Introducing The Main Window
Divar | Installation Manual | Using the Configuration Tool Introducing the main window The Configuration Tool window is divided into 3 panes. The buttons in the left pane are always available. Clicking one of these buttons changes the contents of the center pane. -
Page 64: Service Button
Divar | Installation Manual | Using the Configuration Tool Service button Click the Service button to get a list of diagnostic messages and to access the firmware update function. This function is only available if you are connected to the unit via a serial connection and is password protected. Help button Click the Help button at any time to get help. - Page 65 Divar | Installation Manual | Using the Configuration Tool Refining settings When you select Import, Export or Download a pop-up window allows you to select particular groups of settings. You can select All settings, All settings except or Only to determine how the list is constructed. To refine your selection click and place a check mark next to the settings you want to include in the list.
- Page 66 Divar | Installation Manual | Using the Configuration Tool EN | 6-8 Bosch Security Systems...
-
Page 67: Menu Default Values
Divar | Installation Manual | Menu default values EN | 7-1 Menu default values CHAPTER 7 The table on the following pages lists the items of the menu system of the unit with default values. The righthand column of the table gives the default values of these menu items. - Page 68 Divar | Installation Manual | Menu default values Level 1 Level 2 Level 3 History Show alarms Show motions Show network connectivity Show errors Time / Date Time zone Time format Date format Synchronize Use timer server IP address Daylight saving View Settings Camera setup Camera name...
- Page 69 Divar | Installation Manual | Menu default values Level 1 Level 2 Level 3 Camera control Camera controllable Bilinx camera enabled Sequences List Fullscreen monitor A List Fullscreen monitor B Dwell time monitor A Dwell time monitor B Configure Monitors Display titles monitor A Display titles monitor B Display time / date monitor A...
- Page 70 Divar | Installation Manual | Menu default values Level 1 Level 2 Level 3 System Settings Language Recording Setup Record mode Overwrite protection Pre-event time Disk Full Alarm Setup Playback Setup List of (camera, block after) Event Setup Alarm dwell time Trigger dwell time Input Setup Bosch Security Systems...
- Page 71 Divar | Installation Manual | Menu default values Level 1 Level 2 Level 3 Motion Setup Video loss Setup History log setup Log alarms Log motions Log video loss Log errors Log network Connectivity Keyboard access Network setup Bosch Security Systems Level 4 Level 5 Protected after event...
- Page 72 Divar | Installation Manual | Menu default values Level 1 Level 2 Level 3 Network access Expand system Com port Input and Output contacts Inputs Outputs Bosch Security Systems Level 4 Level 5 Default gateway HTTP port Bandwidth limit IP Range List of IP addresses List of users User name...
- Page 73 Divar | Installation Manual | Menu default values Level 1 Level 2 Level 3 Profiles Profile manager Camera pre-position on profile change System behavior Event handling Output handling Recording setup Bosch Security Systems Level 4 Level 5 Camera pre-position Select profile Inputs enable Inputs alarm Motion enable...
- Page 74 Divar | Installation Manual | Menu default values Level 1 Level 2 Level 3 Access restrictions Copy system behavior Advanced menus Bosch Security Systems Level 4 Level 5 Motion Cameras not in alarm IPS Recording duration Select profile Local playback password User 2 User 3 User 4...
-
Page 75: Technical Specifications
Divar | Installation Manual | Technical specifications EN | 8-1 Technical specifications CHAPTER 8 The following pages give the technical specifications of the unit. Bosch Security Systems... -
Page 76: Electrical
Divar | Installation Manual | Technical specifications Electrical Voltage and Power All models 100-240 VAC; 0.7-0.3A, 50/60Hz Video Video standard: PAL/NTSC auto-detect Resolution: 720 x 576 PAL - 720 x 484 NTSC AGC: Automatic adjustment or manual adjustment of gain for each video input Digital Zoom: 2 or 4 times... -
Page 77: Mechanical
Divar | Installation Manual | Technical specifications DVD writer Write speeds: DVD+R / DVD+RW: 4x (or higher) CD-R: 40x (or higher) CD-RW: 24x (or higher) Divar write speed: 1MB/sec. approx. Display Modes: Monitor A: Full, full sequence, quad, quad sequence, multiscreen, alarm call-up (live and playback) Monitor B: Full, full sequence and alarm call-up... - Page 78 Divar | Installation Manual | Technical specifications EN | 8-4 Bosch Security Systems...
- Page 80 Bosch Sicherheitssysteme GmbH Bosch Security Systems B.V. Ludwig-Bölkow-Allee P.O. Box 80002 85521 Ottobrunn 5600 JB Eindhoven Germany The Netherlands www.bosch-sicherheitssysteme.de www.boschsecuritysystems.com © 2005 Bosch Security Systems B.V. Subject to change. Printed in Portugal.