Table of Contents
Assembly and
Owner's Manual
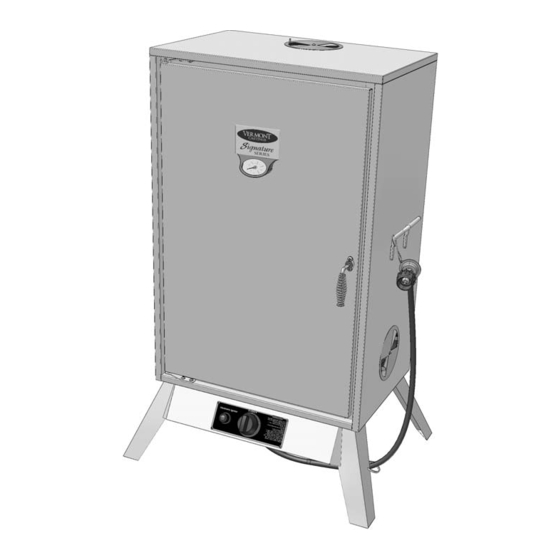
VC3624GS
Stainless Steel
Gas Smoker
DANGER
If you smell gas:
1. Shut off gas to the appliance.
2. Extinguish any open flames.
3. Open door.
4. If odor continues, keep away from the appliance
and immediately call your fire department.
Failure to follow these instructions could result
in fire, explosion or burn hazard, which could
cause property damage, personal injury or death.
ASSEMBLER / INSTALLER: Leave these instructions with the consumer.
CONSUMER / USER: This instruction manual contains important
information necessary for the proper assembly and safe use of the appliance.
Read and follow all warnings and instructions before assembling and using
the appliance. Follow all warnings and instructions when using the appliance.
Keep this manual for future reference.
DANGER
1. Never operate this appliance unattended.
2. Never operate this appliance within 10 feet
(3.05m) of any other gas cylinder.
3. Never operate this appliance within 10 feet
(3.05m) of any flammable liquid.
Failure to follow these instructions could result
in fire, explosion or burn hazard, which could
cause property damage, personal injury or death.
50003XXX 05/06 Rev.1 Sp
Table of Contents

Related Manuals for Vermont Castings Signature VC3624GS

Summary of Contents for Vermont Castings Signature VC3624GS
-
Page 1: Stainless Steel
Assembly and Owner’s Manual VC3624GS Stainless Steel Gas Smoker DANGER If you smell gas: 1. Shut off gas to the appliance. 2. Extinguish any open flames. 3. Open door. 4. If odor continues, keep away from the appliance and immediately call your fire department. -
Page 2: Table Of Contents
Table of Contents Important Warnings Assembly Identifying the Parts Attach the Legs Attach the Control Panel Attach the Burner Chamber Attach the Carry Handles Assemble the Door Handle Assemble the Rack Supports Install the Internal Components Battery Installation Connecting the LP Cylinder Operating Instructions Adding Water Adding Wood... - Page 3 READ ALL INSTRUCTIONS AND WARNINGS! YOUR SAFETY IS VERY IMPORTANT - FAILURE TO FOLLOW PROPER PROCEDURES AND SAFEGUARDS MAY RESULT IN SERIOUS PERSONAL INJURY OR PROPERTY DAMAGE. DO NOT use this smoker in a manner other than its intended purpose. It is NOT intended for commercial use. It is NOT intended to be installed or used in or on a recreational vehicle and/or boats.
-
Page 4: Save These Instructions
DO NOT obstruct the flow of combustion air and/or ventilation air for the smoker. Use caution when opening the door of the smoker while in operation. Keep hands, face, and body safe from hot steam or flare-ups. Protect your nose and mouth from smoke inhalation. DO NOT wear loose clothing while operating the smoker. -
Page 5: Assembly
Assembly Step 1 - Check your package contents for these parts. If you are missing any parts, or if any parts are damaged, please call our toll-free customer service line to order parts. DO NOT RETURN YOUR SMOKER TO THE RETAILER - CALL US FIRST! Hardware Bags: 1/4-20 x 5/8”... - Page 6 Identifying the Parts - Continued Check your package contents for these parts. If you are missing any parts, or if any parts are damaged, please call our toll-free customer service line to order parts. DO NOT RETURN YOUR SMOKER TO THE RETAILER - CALL US FIRST! “AAA”...
-
Page 7: Attach The Legs
Locate these parts: 4 Legs Hardware: 1/4-20 x 5/8” Bolts 16 Required 2. For each leg, line up the holes and insert the bolts. Nuts are pre-welded to the cabinet. DO NOT yet insert the two front bolts indicated by the red arrows. They will be used in the next assembly step. -
Page 8: Attach The Control Panel
Locate these parts: Hardware: 1/4-20 x 5/8” Bolts (2 remaining from previous step) FRONT 1. Leave the cabinet upside down. 2. From the front side, position the control panel upside down between the front legs as shown. 3. Set the control panel between the front legs and line up the mounting holes. -
Page 9: Attach The Burner Chamber
Locate these parts: Venturi Tube F R O 5. Open the cabinet door to access the burner chamber mounting holes. 6. From the inside of the cabinet, e that the mounting holes and mounting tabs are properly aligned; insert the 3 bolts into the mounting holes and securely tighten. -
Page 10: Attach The Carry Handles
Locate these parts: 3 Damper Plates Hardware: 10-24 Lock 10-24x5/8” Bolts Washers 3 Required 3 Required Assembly Step 5 HARDWARE BAG HARDWARE BAG 10-24 Nuts 1/4-20 Nuts 3 Required 1. For each damper plate, line it up with 2. Insert a 10-24x5/8” bolt into the center 3. -
Page 11: Assemble The Door Handle
Locate these parts: Door Handle Kit Handle Spring, Handle Washer, Mounting Plate Nameplate with Heat Indicator Assembly Step 6 HARDWARE BAG HARDWARE BAG Push Nuts 2 required 1. Assemble the door handle components as shown. With the handle washer and spring mounted to the door handle, insert the door handle into the front of the door as shown. -
Page 12: Assemble The Rack Supports
Locate these parts: Small Rack Supports (10 included) (2 included) 1. Insert the rack supports into the mounting tracks inside the smoker cabinet as shown. The large rack supports must be placed in the position shown. Place small rack supports into the bottom most positions of both sides,... -
Page 13: Install The Internal Components
Locate these parts: Cooking Grids (4 included) Water Pan 1. Insert the 4 cooking grids into the top 4 grid rack positions. 2. Place the water pan onto the large rack supports. Insert the wood box rack into the lower most rack position. -
Page 14: Battery Installation
Locate these parts: Zip Tie 1. Using the zip tie, secure the hose to the front leg as shown. Do not pull the zip tie tight - leave it just loose enough so that the hose can be adjusted if needed. -
Page 15: Connecting The Lp Cylinder
ALL INSTRUCTIONS AND SAFEGUARDS ON THIS PAGE MUST BE FOLLOWED TO PREVENT FIRE, DAMAGE, AND / OR INJURY. . The knob on the LP tank must be closed. See that the knob is turned clockwise to a full stop. . Check that the control knob on the smoker is turned off. . -
Page 16: Checking For Leaks
Connecting the LP Tank ALL INSTRUCTIONS AND SAFEGUARDS ON THIS PAGE MUST BE FOLLOWED TO PREVENT FIRE, DAMAGE, AND / OR INJURY. Cylinders must be filled before initial use. All handling, transport, filling and storage of LP gas cylinders must be in accordance with NFPA 58 Storage and Handling of Liquid Petroleum Gases, or CAN/CGA b149.2 Propane Installation Code. -
Page 17: Operating Instructions
Pre-Use Procedures Your smoker has been packaged with a retail store level point-of-purchase label that hangs on the front of the door panel. This label must be removed before use. To remove the label, simply cut or tear along the indicated line and pull the top portion of the label from behind the name plate. Before you cook food in your smoker, it is important to “season”... -
Page 18: Adding Wood
Adding Wood To add wood chips before cooking, simply fill the wood chip box with your choice of flavoring hardwood chips. The amount and type of wood you use is entirely up to you. One full box is typically enough for several hours of smoking. -
Page 19: Lighting Procedure
Lighting Procedure Ignitor Lighting System: 1. Check all connections for leaks using the "soapy water” test as explained on page 16. 2. Open the smoker cabinet door. 3. Check for any blockage to the venturi tube or burner. Remove any foreign objects or matter. 4. -
Page 20: Shut-Down
Cooking Tip Damper Adjustments: For better performance, rotate the smoker to where the front or back of the cabinet is facing the wind. This allows the adjustment of the dampers to be more effective and accurate. The dampers should never be fully closed. Opening a side damper allows more oxygen to be consumed by the fire, fueling the flames and causing an increase in temperature. -
Page 21: Cooking Instructions
Cooking Instructions IMPORTANT: Before each use, clean and inspect the hose and the connection to the LP cylinder. If there is evidence of abrasion, wear, cuts or leaks, the hose must be replaced before the smoker is used. Refer to the “leak test” instructions in the LP Tank connection portion of this manual. Fill the wood chip box with flavoring wood chips and place the box inside the smoker as instructed in the assembly section of this manual. -
Page 22: Temperature Chart
Temperature Chart Here is a chart for measuring properly cooked meat temperature: (USDA standard) Ground Meat & Meat Mixtures Turkey, Chicken 165°F / 74°C Veal, Lamb 160°F / 72°C Beef, Pork 160°F / 72°C Fresh Beef Medium Rare 145°F / 63°C Medium 160°F / 72°C Well Done... -
Page 23: After Use Safety And Maintenance
After Use Safety and Maintenance Use caution when lifting and moving the smoker to avoid strains or back injury. 2 people are recommended to lift or the smoker. DO NOT store the smoker near gasoline or other combustible liquids or where combustible vapors may be present. the area around the smoker clear and free of combustible materials and vapors. -
Page 24: Warranty
Manufacturer’s Limited Warranty The Vermont Casting Signature Series smoker is guaranteed against broken or damaged parts at the time of purchase. The cast brass burner is guaranteed for 5 years. All other parts carry a 1- year limited warranty except the water bowl, which is guaranteed to be free of defects for 90 days.