Table of Contents
Available languages
Available languages
Quick Links
See also:
Owner's Manual
Chapters
Table of Contents

Related Manuals for Panasonic Lumix H-ES200


Summary of Contents for Panasonic Lumix H-ES200
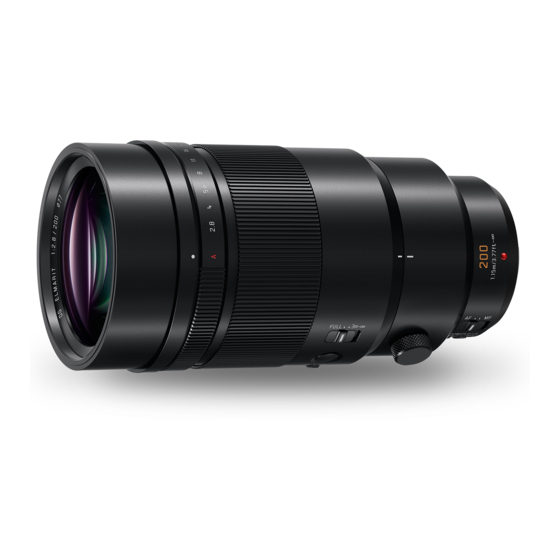
- Page 1 Operating Instructions INTERCHANGEABLE LENS FOR DIGITAL CAMERA H-ES200 Model No. Please read these instructions carefully before using this product, and save this manual for future use. E GC DVQX1304ZA F1017KD0...
-
Page 2: Table Of Contents
Contents The lens can be used with a digital camera compatible with the lens mount standard for the “Micro Four Thirds System”. Information for Your Safety........ 2 • It cannot be mounted on the Four Thirds mount Precautions............3 specification camera. Supplied Accessories ........ -
Page 3: Precautions
ENGLISH -If you see this symbol- and splash-proof when attached to a digital camera without dust-proofing and splash-proofing. Disposal of Old Equipment – When attaching or removing the lens, be careful so that Only for European Union and countries with recycling foreign materials such as sand, dust, and water droplets systems do not adhere to or enter the lens mount rubber, contact... -
Page 4: Supplied Accessories
Supplied Accessories • To prevent dust and other particles from accumulating on or entering the lens, Product numbers correct as of November 2017. These may attach the lens rear cap be subject to change. when the lens is not in use. •... -
Page 5: Names And Functions Of Components
Names and Functions of Components Rotate to focus when taking pictures with manual focus (MF). 4 Focusing distance range selector switch [FULL]: It can focus between the ranges of 1.15 m (3.8 feet) to ¶. [3m-¶]: It can focus between the ranges of 3.0 m (9.8 feet) to ¶. -
Page 6: Attaching/Detaching The Lens
• Before attaching the lens to the Note digital camera, remove the lens • Operational sound may be recorded when Auto Focus is rear cap. ( 1 , 2 ) operated while recording a motion picture. If the sound • To prevent dust and other particles bothers you, we recommend performing recording with a from accumulating on or entering function such as Manual Focus (MF) to lock the focus. -
Page 7: Attaching/Removing The 1.4K Teleconverter
(H-ES200). (As of November 2017) While pressing and • For the most up-to-date information on compatible lenses other than this lens, check the Panasonic website. holding the lens release • Do not attach any parts other than a compatible lens. -
Page 8: Focus Preset Function
Adjust the focus to the position you want to While pressing and store in the memory. holding the lens release button on the Press the focus button (2) to store the focus teleconverter, rotate the position in the memory. teleconverter in the arrow •... -
Page 9: Using The Tripod Mount
2 Rotate the external tripod mount Note attachment screw in the direction of the • Before removing the lens, verify that the digital camera is arrows to fasten it firmly. turned off. If the lens is removed while the digital camera is turned on, the focus position will not be stored in the memory. -
Page 10: Cautions For Use
Cautions for Use • Refer also to the operating instructions of the digital camera. • When the unit is not going to be used for a prolonged Take care not to drop or knock the lens. Also take care period, we recommend storing with a desiccant (silica gel). not to put a lot of pressure on the lens. -
Page 11: Specifications
Specifications Specifications are subject to change without notice. INTERCHANGEABLE LENS FOR DIGITAL CAMERA 1.4k Teleconverter “LEICA DG ELMARIT 200 mm/F2.8/POWER O.I.S.” Focal length f=200 mm (35 mm film camera equivalent: 400 mm) 1.4k that of the attached lens. Aperture type 9 diaphragm blades/circular aperture diaphragm Maximum aperture F2.8 (When the 1.4k Teleconverter is attached: F4.0) -
Page 12: Limited Warranty (Only For Australia)
DVQX1304... -
Page 13: Informationen Für Ihre Sicherheit
DEUTSCH Inhalt Sie den Akku dann wieder ein und/oder stecken Sie das Netzadapter wieder ein und schalten Sie die Kamera ein. Informationen für Ihre Sicherheit ....13 Das Objektiv kann mit Digitalkameras verwendet werden, Vermeidung von Störungen ......14 ™ deren Objektivfassung mit dem “Micro Four Thirds Beiliegendes Zubehör........ -
Page 14: Vermeidung Von Störungen
• Andere Namen von Systemen oder Produkten welche in dieser Wenn das Objektiv nicht richtig funktioniert, wenden Sie sich an Ihren Händler oder Ihr nächstgelegenes Service-Center. Bedienungsanleitung genannt werden, sind normalerweise – Bringen Sie das Objektiv an einer staub- und Warenzeichen oder eingetragene Warenzeichen der Hersteller spritzwasserdichten Digital-Kamera an. -
Page 15: Beiliegendes Zubehör
Beiliegendes Zubehör • Bringen Sie den hinteren Objektivdeckel an, wenn das Objektiv nicht verwendet wird, damit keine Staub- oder Die Produktnummern beziehen sich auf den Stand von anderen Partikel auf die Linse November 2017. Änderungen sind vorbehalten. oder in das Objektiv geraten. •... -
Page 16: Bezeichnungen Und Funktionen Der Einzelnen Kamerateile
Bezeichnungen und Funktionen • Wenn Sie die Position des Blendenringes auf [A] stellen, wird der Blendenwert der Kamera aktiviert. der einzelnen Kamerateile Schärfenring Drehen Sie auf Fokus, wenn Sie Bilder mit dem manuellen Fokus (MF) aufnehmen. Bereichswahlschalter für den Fokusabstand [FULL]: Scharfstellung im Bereich von 1,15 m bis ¶. -
Page 17: Objektiv Ansetzen/Abnehmen
• Nehmen Sie den hinteren Hinweis Objektivdeckel ab, bevor Sie das Objektiv auf die Digital-Kamera • Möglicherweise werden Betriebsgeräusche aufgenommen, wenn aufsetzen. ( 1 , 2 ) der Autofokus während einer Videoaufnahme bedient wird. Wird • Bringen Sie den Objektivdeckel/hinteren dies als störend empfunden, so wird empfohlen, bei der Objektivdeckel an, wenn Sie das Objektiv Aufnahme beispielsweise den Manuellen Fokus (MF) zu... -
Page 18: Anbringen/Entfernen Des 1.4K -Telekonverters
Entfernen des Telekonverters (H-ES200) verwendet werden. (Stand: November 2017) • Aktuelle Informationen zu weiteren kompatiblen Objektiven Halten Sie die finden Sie auf der Website von Panasonic. Entriegelungstaste • Bringen Sie keine anderen Objekte als kompatible Objektive an. Objektivs an der Digital- Anderenfalls kann es zu Beschädigungen des Objektivs oder des... -
Page 19: Fokus-Voreinstellungsfunktion
Stellen Sie den Fokus-Wahlschalter auf [MEMORY] Halten Sie die (1) ein. Entriegelungstaste Stellen Sie den Fokus auf die Position ein, die Telekonverters gedrückt, gespeichert werden soll. drehen Sie den Telekonverter so weit wie Drücken Sie die Fokustaste (2), um die möglich in Pfeilrichtung und Fokusposition zu speichern. -
Page 20: Stativanschluss
Hinweis • Bevor Sie das Objektiv entfernen, vergewissern Sie sich, dass die Digital-Kamera ausgeschaltet ist. Wenn das Objektiv bei eingeschalteter Digital-Kamera entfernt wird, so wird die Fokusposition nicht gespeichert. Stativanschluss • Vergewissern Sie sich vor der Benutzung, dass die Befestigungsschraube des externen Stativanschlusses Wenn Sie ein Stativ verwenden, nicht locker ist. -
Page 21: Vorsichtsmaßnahmen
Vorsichtsmaßnahmen – In einem Fahrzeug • Weiter Informationen finden Sie auch in der Bedienungsanleitung der Kamera. • Wenn für längere Zeit kein Einsatz erfolgt, lagern Sie das Achten Sie darauf, das Objektiv nicht fallen zu lassen Objektiv gemeinsam mit einem Trocknungsmittel (Silica-Gel). und keinen starken Stößen auszusetzen. -
Page 22: Spezifikationen
Spezifikationen Die Spezifikationen können ohne Ankündigung geändert werden. WECHSELOBJEKTIV FÜR DIGITAL-KAMERA 1.4k-Telekonverter “LEICA DG ELMARIT 200 mm/F2.8/POWER O.I.S.” Brennweite f=200 mm (35 mm Filmkamera-Äquivalent: 400 mm) 1,4k Wert des angebrachten Objektivs. Blende 9 Blendenlamellen/runde Öffnungsblende Maximale Blendenöffnung F2.8 (Wenn der 1.4k-Telekonverter angebracht ist: F4.0) Minimale Blende F22 (Wenn der 1.4k-Telekonverter angebracht ist: F22) Objektivaufbau... -
Page 23: Précautions À Prendre
FRANÇAIS Table des matières L’objectif peut être utilisé de pair avec un appareil photo numérique compatible avec la monture d’objectif standard Précautions à prendre ........23 prise en charge par le système “Micro Four Thirds System”. Précautions ........... 24 • Il ne peut pas être monté sur les appareils à monture Four Thirds Accessoires fournis ......... -
Page 24: Précautions
-Si vous voyez ce symbole- Précautions L’élimination des équipements usagés ∫ Entretien de l’objectif Applicable uniquement dans les pays membres de • Cet objectif possède un dispositif anti-poussière et anti- l’Union européenne et les pays disposant de éclaboussure. Lorsque vous l’utilisez, soyez attentif aux systèmes de recyclage. -
Page 25: Accessoires Fournis
Accessoires fournis • Lorsqu’il a des salissures (eau, huile, traces de doigts, etc.) sur la surface de l’objectif, cela peut avoir une incidence sur l’image. Essuyez légèrement la surface de l’objectif avec un chiffon sec et doux avant et après la Les codes du produit sont corrects à... -
Page 26: Noms Et Fonctions Des Composants
Noms et fonctions des composants Bague de mise au point Tournez la mise au point pour prendre des photos avec la mise au point manuelle (MF). Sélecteur de la plage de distance de la mise au point [FULL] : La mise au point se fait dans une plage allant de 1,15 m (3,8 pi) à... -
Page 27: Fixation/Retrait De L'objectif
Fixation/Retrait de l’objectif Nota • Le son de fonctionnement peut être enregistré si la mise Pour de plus amples informations sur la manière au point automatique est utilisée durant l’enregistrement d’installer et de retirer l’objectif, consultez le mode d’une vidéo. Si le son vous dérange, nous vous d’emploi de l’appareil photo numérique. -
Page 28: Mise En Place/Retrait Du Téléconvertisseur 1,4K
∫Fixation du parasoleil objectifs compatibles autre celui-ci, visitez le site Web de Tournez la vis du parasoleil Panasonic. dans le sens de la flèche • N’installez rien d’autre qu’un objectif compatible. Le cas échéant cela pourrait endommager l’objectif ou le téléconvertisseur ou pour le desserrer ( 1 ). -
Page 29: Fonction De Présélection De La Mise Au Point
∫ Retrait du téléconvertisseur Tout en appuyant sur la touche de déverrouillage de l’objectif de l’appareil photo, tournez l’objectif muni du téléconvertisseur dans le sens de la flèche jusqu’à ce qu’il s’arrête et (Pour mémoriser une position de mise au point dans l’objectif) retirez-le (1, 2). -
Page 30: Utilisation De La Monture Pour Trépied
∫ • Nous vous conseillons de régler le sélecteur de la plage de Installation de la monture externe pour trépied (fournie) distance de la mise au point sur [FULL] lors de l’utilisation Insérez la vis de fixation de la monture externe pour de la fonction de présélection de la mise au point. -
Page 31: Précautions D'utilisation
– Où il y a des vibrations Précautions d’utilisation – À l’intérieur d’un véhicule • Reportez-vous également au manuel d’utilisation de l’appareil photo. Prenez soin de ne pas faire tomber ni de cogner l’objectif. • Si l’appareil ne doit plus être utilisé pendant une période De plus ne mettez pas trop de pression dessus. -
Page 32: Spécifications
Spécifications Ces spécifications peuvent subir des changements sans avis préalable. OBJECTIF INTERCHANGEABLE POUR APPAREIL PHOTO NUMÉRIQUE Téléconvertisseur 1,4k “LEICA DG ELMARIT 200 mm/F2.8/POWER O.I.S.” Distance focale f=200 mm (Équivalence 35 mm : 400 mm) Tout genre d’objectif 1,4k installé. Type d’ouverture 9 lamelles de diaphragme/diaphragme à... -
Page 33: Información Para Su Seguridad
ESPAÑOL Índice El objetivo puede usarse con una cámara digital compatible con el estándar de montaje de objetivos del “Micro Four Información para su seguridad ......33 Thirds System”. • No se puede montar en una cámara con estándar de Prevención contra las averías ....... -
Page 34: Prevención Contra Las Averías
-Si ve este símbolo- – Coloque la lente en una cámara digital con resistencia al polvo y las salpicaduras. La lente no está diseñada para ser Eliminación de Aparatos Viejos resistente al polvo ni las salpicaduras cuando se coloca en una Solamente para la Unión Europea y países con cámara digital no resistente al polvo ni las salpicaduras. -
Page 35: Accesorios Suministrados
Accesorios suministrados • Para proteger los puntos de contacto de la lente 1, no la coloque con la superficie de Números de productos correctos a partir de noviembre de montaje orientada hacia 2017. Pueden estar sujetos a cambio. abajo. Evite además que los puntos de contacto de la lente se ensucien. -
Page 36: Nombres Y Funciones De Los Componentes
Nombres y funciones de los • Si ajusta la posición del anillo de apertura a [A], se habilitará el valor de apertura de la cámara. componentes Anillo del enfoque Gire para enfocar cuando tome fotografías con el enfoque manual (MF). Interruptor selector del rango de distancia de enfoque [FULL]: Puede enfocar entre los rangos de 1,15 m (3,8 pies) a ¶. -
Page 37: Unir Y Quitar El Objetivo
• Antes de colocar la lente en la Nota cámara digital, quite la tapa trasera • Cuando se opera el Enfoque Automático mientras se de la lente. ( 1 , 2 ) graba una imagen en movimiento, puede que se grabe el •... -
Page 38: Colocar/Quitar El Tele Convertidor 1.4K
• Para acceder a la información más actualizada sobre lentes Mientras mantiene pulsado compatibles aparte de esta lente, consulte el sitio web de el botón de liberación de Panasonic. lente en la cámara digital, • No coloque ninguna pieza que no sea una lente compatible. -
Page 39: Función De Preajuste De Enfoque
Ajuste el selector de enfoque a [MEMORY] (1). Mientras mantiene pulsado Ajuste el enfoque en la posición que quiera el botón de liberación guardar en la memoria. el tele convertidor, gire el tele convertidor en la Pulse el botón de enfoque (2) para guardar la dirección de la flecha hasta posición de enfoque en la memoria. -
Page 40: Cómo Usar El Montaje Del Trípode
Nota • Antes de quitar la lente, compruebe que la cámara digital esté apagada. Si se quita la lente mientras la cámara digital está encendida, la posición de enfoque no se guardará en la memoria. Cómo usar el montaje del trípode •... -
Page 41: Precauciones Para El Uso
Precauciones para el uso – Dentro de un vehículo • Se refiera también a las instrucciones de funcionamiento de la cámara digital. Tenga cuidado de no hacer caer el objetivo ni le choque contra. • Cuando no ha de ser usada la unidad por un período Asimismo tenga cuidado de no presionarlo demasiado. -
Page 42: Especificaciones
Especificaciones Las especificaciones están sujetas a cambio sin previo aviso. ÓPTICA INTERCAMBIABLE PARA CÁMARA DIGITAL Tele convertidor 1.4k “LEICA DG ELMARIT 200 mm/F2.8/POWER O.I.S.” Longitud focal f=200 mm (Igual a una cámara de película de 35 mm: 400 mm) 1,4k de la lente colocada. Tipo de abertura 9 aspas de diafragma/Diafragma de apertura circular Apertura máxima... -
Page 43: Informazioni Per La Sua Sicurezza
ITALIANO Indice L’obiettivo può essere utilizzato con una fotocamera digitale dotata di un supporto dell’obiettivo compatibile con lo Informazioni per la sua sicurezza ....43 standard “Micro Four Thirds System”. Prevenzione guasti ........44 • Non montabile su una fotocamera con specifiche sul supporto Four Thirds Accessori in dotazione........ -
Page 44: Prevenzione Guasti
-Se vedete questo simbolo- quando viene installato su una fotocamera digitale non resistente alla polvere e agli schizzi. Smaltimento di vecchie apparecchiature – Quando si installa o si rimuove l'obiettivo, fare Solo per Unione Europea e Nazioni con sistemi di attenzione che materiali estranei come sabbia, polvere, e goccioline di acqua non aderiscano o penetrino nella raccolta e smaltimento... -
Page 45: Accessori In Dotazione
Accessori in dotazione • Per evitare che polvere ed altre particelle si accumulino sull'obiettivo o penetrino al I codici dei prodotti sono aggiornati a novembre 2017. È suo interno, fissare il possibile che subiscano delle modifiche. copriobiettivo posteriore quando non si utilizza l'obiettivo. -
Page 46: Nomi E Funzioni Dei Componenti
Nomi e funzioni dei componenti Ruotare questa ghiera per eseguire la messa a fuoco quando si riprendono delle immagini in modalità Messa a fuoco manuale (MF). Selettore gamma distanza messa a fuoco [FULL]: La distanza utile di messa a fuoco è di 1,15 m a ¶. -
Page 47: Installazione/Rimozione Dell'obiettivo
∫ • Se si imposta O.I.S. su [ON] quando si riprende un'immagine in Installazione dei filtri movimento, è possibile che il suono prodotto dal funzionamento • Se si usano due o più filtri contemporaneamente, parte di dello stabilizzatore venga registrato. Se questo dovesse un'immagine registrata può... -
Page 48: Installazione/Rimozione Di 1.4K Teleconverter
Panasonic. un clic. (4) • Non installare parti diverse da un obiettivo compatibile. • Quando si installa l’obiettivo sulla fotocamera digitale, non Farlo può... -
Page 49: Funzione Preset Messa A Fuoco
• La posizione di messa a fuoco memorizzata rimarrà attiva Nota sino a che non si memorizza una nuova posizione. • Quando è installato il teleconverter, l’apertura verrà (Per richiamare la posizione di messa a fuoco memorizzata) impostata ad uno stop in più rispetto al valore indice sulla Posizionare il selettore della messa a fuoco su ghiera dell’apertura. -
Page 50: Utilizzo Dell'attacco Del Treppiede
Utilizzo dell'attacco del treppiede Quando si usa un treppiede, fissarlo all’attacco treppiede dell’obiettivo. • Raccomandiamo di evitare di fissare il treppiede all’attacco treppiede della fotocamera digitale per evitare danni all’obiettivo che possono • Controllare che la vite di fissaggio dell'attacco del verificarsi quando si trasporta l’obiettivo. -
Page 51: Precauzioni Per L'uso
Precauzioni per l’uso • Quando si prevede di non utilizzare l’unità per un periodo prolungato, si consiglia di porvi accanto un disseccante (silica gel). In caso contrario potrebbero verificarsi dei Fare attenzione a non lasciar cadere o a non urtare l’obiettivo. malfunzionamenti dovuti alla presenza di muffe ecc. -
Page 52: Specifiche
Specifiche È possibile che le specifiche subiscano delle modifiche senza preavviso. LENTI INTERCAMBIABILI PER FOTOCAMERA DIGITALE 1.4k Teleconverter “LEICA DG ELMARIT 200 mm/F2.8/POWER O.I.S.” Lunghezza focale f=200 mm (equivalente per fotocamera con pellicola da 35 mm: 400 mm) 1,4k quella dell’obiettivo installato. Tipo di apertura 9 lamelle diaframma/diaframma con apertura circolare Apertura massima... -
Page 53: 目錄 安全注意事項
中文 (繁體) • Micro Four Thirds™ 和 Micro Four Thirds 標誌是 Olympus 目錄 Corporation 在日本、美國、歐盟和其他國家的商標或註冊商標。 安全注意事項 ......53 • Four Thirds™ 和 Four Thirds 標誌是 Olympus Corporation 在日本、美國、歐盟和其他國家的商標或註冊商標。 故障預防 ....... 53 • G MICRO SYSTEM 是 LUMIX 的鏡頭互換式數位相機系統 , 操作部中文表示對照表 ....54 基於微型... -
Page 54: 操作部中文表示對照表
• 請勿用力按壓鏡頭。 提供的配件 • 當鏡頭表面有污垢 (水、油和 手印等)時,相片可能會受到 產品號碼截至 2017 年 11 月為準 。 此後可能會有變更 。 影響。 拍攝前後,請用一塊軟 乾布輕輕擦拭鏡頭表面。 • 為了防止灰塵和其他顆粒積 聚在鏡頭上或者進入鏡頭, 請在不使用鏡頭時安裝鏡頭 後蓋。 SFC0360 DVZE1018Z 1GE1Z253Z VFC4605 SYQ0680 • 為了保護鏡頭接觸點 1,請 DMW-TC14 勿在其安裝面朝下的狀態下 放置鏡頭。 此外,請勿讓鏡頭接觸點變髒。 ∫ 關於水汽凝結 (鏡頭的霧化) • 冷凝現象會在環境溫度或濕度改變時發生。請注意,這可 能會令鏡頭變得骯髒,造成發霉及故障。... -
Page 55: 元件的名稱及功能
4 對焦距離範圍選擇開關 元件的名稱及功能 [FULL] : 可以在 1.15 m 至 ¶ 的範圍內對焦 。 [3m-¶] : 可以在 3.0 m 至 ¶ 的範圍內對焦 。 自動對焦的對焦 速度將會變快 。 5 對焦按鈕 (P58) 6 對焦選擇開關 (P58) 7 三腳架台座 (P58) 8 方向鎖定旋鈕 (P58) 9 [AF/MF] 開關 使用此開關可以在自動對焦 (AF) 和手動對焦 (MF) 之間進行 切換... -
Page 56: 安裝 / 取下鏡頭
∫ ∫ 1.4k 增距鏡 安裝鏡頭遮光罩 朝箭頭指示的方向轉動鏡頭遮 安裝標記 光罩螺絲將其鬆開 ( 1 )。 鏡頭釋放按鈕 插入鏡頭遮光罩直到停止為止 鏡頭安裝標記 (2)。 接觸點 朝箭頭指示的方向轉動鏡頭遮 鏡頭接口橡膠 光罩螺絲牢牢地固定住鏡頭遮 光罩 (3)。 安裝 / 取下鏡頭 注意 • 使用鏡頭時,若已安裝鏡頭遮光罩,請檢查鏡頭遮光罩的 有關安裝及取下鏡頭的方法的資訊 , 請參閱數位相機的使用 螺絲是否有鬆脫。 說明書 。 • 裝上閃光燈及鏡頭遮光罩拍照時,畫面下半部可能會變 • 安裝或取下鏡頭前 , 請確認數位相機是否已關閉 。 暗,您亦可能無法控制閃光燈,因為拍攝時閃光可能會被... -
Page 57: 安裝/拆除 1.4K 增距鏡
按住數位相機上的鏡頭釋放 按鈕 時,朝鏡頭指示的 • 增距鏡可配合此鏡頭 (H-ES200) 使用 。 (截至 2017 年 11 月) 方向轉動增距鏡,直至其停 • 關於此鏡頭外其他兼容鏡頭的最新資訊 , 敬請瀏覽 下,然後將其拆除 (1、 Panasonic 網站 。 2) 。 • 切勿安裝兼容鏡頭以外的任何零件 。 否則可能會損壞鏡頭或 增距鏡 , 或嚴重影響其性能 。 • 安裝或拆除增距鏡前 , 請確保數位相機電源已關閉 。 按住增距鏡上的釋放按鈕... -
Page 58: 對焦預設功能
• 使用對焦預設功能時,我們建議您將對焦範圍選擇開關設 對焦預設功能 定為 [FULL]。 ∫ 鎖定對焦 您可調用鏡頭記憶體內儲存的對焦位置 。 除此之外 , 亦可以鎖 將對焦選擇開關設定到 [Fn] (1) 。 定對焦 。 按下對焦按鈕 (2) 。 • 按住對焦按鈕時,便可鎖定對焦。 • 您亦可調用在數位相機上支援 [Fn] 功能的設定。 注意 • 拆除鏡頭前,請確保數位相機電源已關閉。若在數位相機 電源開啟期間拆除鏡頭,則對焦位置不會儲存在記憶體 內。 (在鏡頭記憶體內儲存對焦位置) 使用三腳架台座 將對焦選擇開關設定到 [MEMORY] (1) 。 調整對焦位置至您希望儲存在記憶體內的位置。 使用三腳架時 , 將其安裝在鏡頭 按下對焦按鈕... -
Page 59: 使用時的注意事項
朝箭頭指示的方向轉動外部三腳架台座安裝螺絲 在相機周圍使用殺蟲劑或其他揮發性的物質時 , 請勿使其接 將其牢牢地固定住。 觸到鏡頭 。 • 如果此類化學藥品接觸到鏡頭,可能會損壞鏡頭,表面漆 可能也會剝落。 請勿將鏡頭對著太陽或其他強光源 。 • 這會使鏡頭聚集過多的光量,導致火災和故障。 • 請避免在下列地點使用或儲存鏡頭,因為這可能會導致操 作失誤或故障。 – 太陽直射的地方或夏天的海邊 – 溫度和濕度較高或者溫度和濕度變化劇烈的地方 – 沙子 、 灰塵或污垢比較集中的地方 – 有火的地方 • 使用前,請確認外部三腳架台座安裝螺絲不鬆動。 – 靠近加熱器 、 空調或加濕器的地方 – 水可能打濕本裝置的地方 • 切勿擊打外接三腳架接環或對其用力過猛。 – 受到震動的地方 ∫ 改變縱向... - Page 60 規格 規格如有變更 , 恕不另行通知 。 數位相機用可替換鏡頭 1.4k 增距鏡 “LEICA DG ELMARIT 200 mm/F2.8/POWER O.I.S.” 已裝鏡頭的 1.4k 長度 。 f=200 mm (相當於 35 mm 菲林相機 : 400 mm) 焦距 9 片控光片 / 圓形虹膜光圈 光圈類型 F2.8 (當安裝了 1.4k 增距鏡時 : F4.0) 最大光圈 F22 (當安裝了...
-
Page 61: Информация Для Вашей Безопасности
РУССКИЙ ЯЗЫК Содержание Затем снова вставьте батарею и/или снова подключите сетевой адаптер переменного тока и включите камеру. Информация для вашей безопасности..61 Объектив может использоваться с цифровой камерой, Правила эксплуатации ........ 62 совместимой со стандартом крепления объективов Принадлежности, входящие в комплект ..63 “Micro Four Thirds System”. -
Page 62: Правила Эксплуатации
• Другие названия систем и продуктов, упомянутые в кольцо объектива. После неоднократной смены объектива можно заметить появление отпечатка от данной инструкции по эксплуатации, обычно являются резинового уплотнительного кольца объектива в месте зарегистрированными товарными знаками или прикрепления объектива на корпусе цифровой камеры. товарными... -
Page 63: Принадлежности, Входящие В Комплект
Принадлежности, • На момент покупки задняя крышка объектива и крышка объектива прикреплены к сменному объективу входящие в комплект и 1.4k Телеконвертер. Названия и функции Номера изделий верны по состоянию на ноябрь 2017 г. составных частей Они могут изменяться. SFC0360 DVZE1018Z 1GE1Z253Z VFC4605 SYQ0680 DMW-TC14... - Page 64 11 Монтажная поверхность • Если установить на камере режим приоритета диафрагмы AЭ или режим ручной экспозиции, 12 Резиновое уплотнительное кольцо объектива активируется показатель диафрагмы кольца. 13 Метка установки объектива • Если установить кольцо диафрагмы в положение [A], активируется показатель диафрагмы камеры. Примечание...
-
Page 65: Установка/Снятие Объектива
Установка/Снятие объектива ∫ Присоединение бленды объектива Поверните винт бленды объектива в направлении, Информацию о прикреплении и снятии объектива см. указанном стрелкой, в инструкции по эксплуатации цифровой фотокамеры. чтобы его ослабить ( 1 ). • Прежде чем прикреплять или снимать объектив, убедитесь, что... -
Page 66: Прикрепление/Снятие 1.4K Телеконвертер
объективом (H-ES200). (По состоянию на ноябрь 2017 г.) кнопку блокировки • Самую актуальную информацию о совместимых объектива на цифровой объективах см. на веб-сайте Panasonic. фотокамере, поверните • Не прикрепляйте никаких других компонентов, кроме объектив с установленным совместимого объектива, так как это может привести к... -
Page 67: Функция Предварительно Заданной Фокусировки
Функция предварительно Нажмите кнопку фокусировки (2), чтобы вызвать сохраненное в памяти положение заданной фокусировки фокусировки. • При нажатии и удерживании кнопки фокусировки временно включается [MF]. Вы можете вызвать сохраненное в памяти объектива • Даже в случае установки переключателя диапазона положение фокусировки. Кроме того, фокусировку можно фокусного... -
Page 68: Использование Крепления Для Штатива
Использование крепления для штатива • До использования проверьте, не ослаблен ли винт внешнего крепления для штатива. • Не ударяйте и не подвергайте воздействию сильного давления внешнее крепление для штатива. При использовании штатива прикрепите его к креплению ∫ Изменение вертикальной/горизонтальной для штатива на объективе. ориентации... -
Page 69: Предосторожности При Использовании Фотокамеры
Предосторожности при – В автомобиле • См. также инструкции по эксплуатации цифровой камеры. использовании фотокамеры • Если камера не будет использоваться в течение длительного времени, рекомендуется хранить ее вместе с влагопоглотителем (силикагелем). Невыполнение данной рекомендации может привести Старайтесь не ронять и не ударять объектив. Также к... -
Page 70: Технические Характеристики
Технические характеристики Технические характеристики могут быть изменены без уведомления. СМЕННЫЙ ОБЪЕКТИВ ДЛЯ ЦИФРОВОЙ ФОТОKAMEРЫ 1.4k Телеконвертер “LEICA DG ELMARIT 200 мм/F2.8/POWER O.I.S.” Фокусное расстояние f=200 мм (Эквивалент 35 мм пленочной камеры: 400 мм) 1,4k фокусного расстояния прикрепленного объектива. Тип диафрагмы 9 лепестки... - Page 71 Установленный производителем в порядке п. 2 ст. 5 Федерального Закона РФ “О защите прав потребителей” срок службы данного изделия равен 7 годам с даты производства при условии, что изделие используется в строгом соответствии с настоящей инструкцией по эксплуатации и применимыми техническими стандартами. Импортёр...
- Page 72 Manufactured by: Panasonic Corporation Kadoma, Osaka, Japan Importer for Europe: Panasonic Marketing Europe GmbH Panasonic Testing Centre Winsbergring 15, 22525 Hamburg, Germany Panasonic Corporation Web Site: http://www.panasonic.com Panasonic Corporation 2017...