Table of Contents
Table of Contents

Related Manuals for Siemens SIMATIC HMI TP27


Summary of Contents for Siemens SIMATIC HMI TP27
- Page 1 Artisan Technology Group is your source for quality new and certified-used/pre-owned equipment SERVICE CENTER REPAIRS WE BUY USED EQUIPMENT • FAST SHIPPING AND DELIVERY Experienced engineers and technicians on staff Sell your excess, underutilized, and idle used equipment at our full-service, in-house repair center We also offer credit for buy-backs and trade-ins •...
- Page 2 Preface, Contents Part I Introduction SIMATIC HMI Part II Functions of the TP27, TP37 Touch Panels Touch Panels Equipment Manual Part III Installation and Commissioning Part IV Device Description and Maintenance Part V Appendices Glossary, Index 6AV3991–1AJ02–0AB0 Release 01/00...
- Page 3 Trademarks SIMATICR, SIMATIC HMIR, SIMATIC Multi PanelR, SIMATIC Multifunctional PanelR, ProTool/LiteR, ProToolR, ProTool/ProR and MP270R are registered trademarks of Siemens Some of the other designations used in these documents are also registered trademarks; the owner’s rights may be violated if they are used be third parties for their own purposes.
- Page 4 Preface Purpose This equipment manual provides operation, installation, configuration and system service personnel with information concerning functionality, opera- tion and technical design of the Touch Panels TP27 and TP37. Organization of The equipment manual Touch Panel TP27, TP37 is organized into five parts: the manual Part Chapters...
- Page 5 Preface History The various releases of the equipment manual correspond to the following firmware and ProTool versions: Release Remarks ProTool version 04/97 First release of the TP37 equipment V 3.0 and later manual 10/97 Inclusion of TP27, V 4.0 and later inclusion of touch screen functionality V 4.0 and later 09/98...
- Page 6 Preface Other support In the case of technical queries, please contact your local Siemens in the sub- sidiaries and branches responsible for your area. SIMATIC Customer Support Hotline Available worldwide, at all times: Nuernberg Johnson City Singapur Simatic Basic Hotline...
- Page 7 SIMATIC Customer Support offers comprehensive additional information concerning SIMATIC products through its Online services as follows: Up–to–date general information is provided – in Internet under http://www.ad.siemens.de/simatic – via Fax-Polling under 08765-93 02 77 95 00 Up–to–date product information and downloads for practical use can be found: –...
-
Page 8: Table Of Contents
Contents Part I INTRODUCTION Product Description ........... . Visualizing and Controlling Processes . - Page 9 Contents Printing Messages ..........6-16 ALARM_S Messages .
- Page 10 Contents Commissioning ............13-1 13.1 Initial Startup...
- Page 11 Contents Part V APPENDICES Technical Data ............Direct Key Module and Control Panel Interface .
- Page 12 Part INTRODUCTION Product Description Functionality...
-
Page 13: Release
TP27, TP37 Equipment Manual Release 01/00... -
Page 14: Release
Product Description Use of TP27 and By implementing the Touch Panels TP27 and TP37 operating statuses, current TP37 process values and faults in respect of a connected PLC can be graphically represented and the monitoring machine or system easily operated. This is made possible by using the Touch Panels which have of a number of standard functions for this purpose. - Page 15 Product Description Set up data areas Before commissioning, the Touch Panel must be prepared for the task of visualizing data from the PLC. This means that data areas must be created in the PLC memory in your configuration which are then used by the Touch Panel to communicate with the PLC.
-
Page 16: Visualizing And Controlling Processes
Product Description Visualizing and Controlling Processes Display and The basic function of the Touch Panels TP27 and TP37 is the visualization of operating process statuses and the operation of processes. The following display and functions operating functions can be configured: screens input/output of process values bar graphs and trends... - Page 17 Product Description Messages Messages appear on the Touch Panel in plain text. The message text may also contain current process values. Incoming messages are stored in a message buffer together with their date and time. Event messages provide information and operating notes on current processes or machine states, for example Motor running at 3000 revs.
-
Page 18: The Touch Panels At A Glance
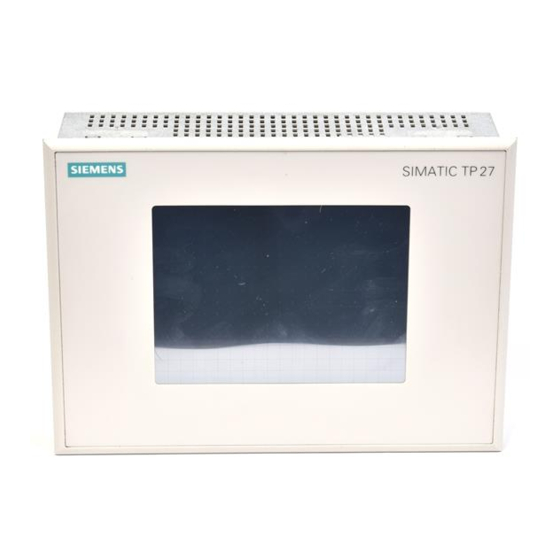
Product Description The Touch Panels at a Glance SIMATIC TP27 SIMATIC TP37 Hardware TP27-6 TP27-6 TP27-10 TP37 Monochrome Color Color Color Models Monochrome – display – Color display Display Type -LCD -LCD Size 5.7” 10.3” Touch screen Matrix 20 x 15 Analog, resistive Resolution (pixels) 320 x 240... - Page 19 Product Description Hardware TP27-6 TP27-6 TP27-10 TP37 Monochrome Color Color Color Processor Type 80486 Pentium Clock 33 MHz 100 MHz Memory Flash EPROM for firmware and user 1 MB 2 MB data Main memory 2 MB 4 MB 8 MB (DRAM) Special features Hardware clock...
-
Page 20: Functionality
Functionality The table below summarizes the functions of the Touch Panels TP27 and TP37. The values quoted are the maximum values which can be managed by the Touch Panels. The values are limited by the size of the user memory. Functions TP27-6 TP27-10... - Page 21 Functionality Functions TP27-6 TP27-10 TP37 Message acquisition Time of occurrence Date and time Message events Arrive, depart, acknowledge Screens View Printout Static screen elements Pixel graphics Text Character graphics Input/Output elements Input fields Output fields Combined input/output fields Symbolic input fields Symbolic output fields Bar graphs Trends...
- Page 22 Functionality Functions TP27-6 TP27-10 TP37 Recipes Number Data records per recipe Entries per data record 3000 (SIMATIC S7) PLCTP ! Data medium Save (create) data records Data medium ! TP/PLC Load data records Delete data records On data medium Modify (edit) data records On data medium PLC ! TP Transfer current values...
- Page 23 Functionality Functions TP27-6 TP27-10 TP37 Communication SIMATIC S5 – AS511 – – PROFIBUS-DP SIMATIC S7/M7 – – – PROFIBUS-DP SIMATIC 500/505 – NITP NATIVE driver – AEG/Modicon (Modbus) – Allen Bradley (DF1)O – Mitsubishi (FX) – Omron – Telemecanique (Adjust, Uni-Telway) TP27, TP37 Equipment Manual Release 01/00...
-
Page 24: Part Ii Functions Of The Touch Panels
FUNCTIONS OF THE Part TOUCH PANELS General Operation Screens Password Protection Messages Printing Recipes Storing and Loading Data Status/Force Tag Using the TP System Settings... - Page 25 TP27, TP37 Equipment Manual Release 01/00...
-
Page 26: General Operation
General Operation Operating concept Using the Touch Panel screen, it is possible to observe the operating status of the machine or system being monitored and, at the same time, to intervene di- rectly in the process running simply by touching the buttons and input fields displayed. - Page 27 General Operation Fixed window The fixed window can be used to display important process magnitudes or date and time, since the contents are not affected by the screen currently open. Main area The main area comprises the entire display. It is superimposed by all other areas (fixed window, message window etc.).
- Page 28 General Operation Window positions Input window: Regardless of the absolute position of the selected field, the input window al- ways appears at the bottom right of the screen. After clicking on the top edge of the window, it skips to the opposite edge of the screen (only with TP37 and TP27-10) Message window: The system message window appears in the upper part of the screen.
-
Page 29: Operating Touch Elements
General Operation Operating Touch Elements Definition Touch elements are contact–sensitive operating elements on the screen of the Touch Panel, such as buttons, input fields, message windows and help win- dows. Their operation is basically no different from pressing conventional keys. Touch elements are operated by lightly touching them with your finger or a pointer. - Page 30 General Operation Visual The type of visual operation acknowledgement is dependent on the operating acknowledgement element touched. Visible buttons The border color of the button touched changes: Start Untouched Start Touched Input fields The foreground and background colors of a touched input field are inter- changed.
-
Page 31: Entering Values
General Operation Entering Values Principle Values can be entered in the input fields and combined input/output fields which are then transferred to the PLC. To do so, touch the corresponding field. The foreground and background colors of a selected input field are inter- changed. - Page 32 General Operation Meanings of Button Function Purpose buttons Enter digits Enter digits Enter hexadecimal Enter the hexadecimal numbers numbers (after pressing Change sign Change sign from and back. – +/– Enter decimal point Enter decimal point or comma. Hexadecimal mode Change numbers to characters Display help text...
-
Page 33: Entering Alphanumeric Values
General Operation Help text After pressing the button, the help text configured for the relevant input HELP field appears. See figure 3-5 on page 3-11 for an example. Terminate input Confirm the value entered by pressing the button, press to cancel ENTER the input process. - Page 34 General Operation Button Function Purpose Keyboard levels Activate/Deactivate the keyboard Shift Shift level from normal level. Cursor left Cursor moves one character to the left. Cursor right Cursor moves one character to the right. Cancel (Es- Discard input and close window. cape) Enter Confirm input and close window.
-
Page 35: Entering Symbolic Values
General Operation 3.2.3 Entering Symbolic Values Input window Text is entered and displayed in symbolic input fields instead of a value. Select the text from the configured text list. Figure 3-4 depicts the input window. Selection 1 Selection 2 HELP Selection 3 Selection 4 Selection 5... -
Page 36: Help Text
General Operation Help Text Purpose Help texts are created during configuration using ProTool and provide addi- tional information on the respective subject in the language selected on the Touch Panel. Help texts can be configured for event and alarm messages screens input and combined input/output fields. - Page 37 General Operation TP27, TP37 Equipment Manual 3-12 Release 01/00...
-
Page 38: Screens
Screens Process control Processes (e.g. a processing machine or mixing station) are displayed on and and monitoring can be influenced by screens which appear on the Touch Panel. These screens are created during configuration with ProTool for specific applications. Logically related process values are acquired on screens and thus provide an overview of a process or a system. - Page 39 Screens Figure 4-1 illustrates how the configured screen may appear on the Touch Panel. Mixing Unit Tank 1 Tank 2 Tank 3 ¯ ° OPEN OPEN CLOSED ± Amount in Valve 4 the mixer (l) ® 5300 ² HELP ³...
-
Page 40: Standard Screens
Screens Standard Screens Purpose A standard configuration containing standard screens is supplied with the con- figuration software ProTool for the respective Touch Panel. The functions needed for basic operation of the Touch Panel have been implemented in the standard screens. They include, for example, Call Message Buffer, Edit Pass- words and Change Parameters Online. - Page 41 Screens Main Screen Edit Password Login/Logout View Edit Printer Settings General Hardcopy Assign Color Status/Control Tag Status Tag Control Tag System Settings Operating Mode Display Message Message Logging Buffer Overflow Warning Date and Time Language Backup/Restore Blank Audio Signal Contrast Calibrate Screen Clean Screen Edit Message...
- Page 42 Screens Calling functions Functions are called in on the Touch Panel by means of configured buttons. To prevent unauthorized access, some functions have to be protected beforehand by means of a password at a specific password level (see chapter 5). Calling Help texts Configured help texts can be called int the standard screens by HELP...
- Page 43 Screens TP27, TP37 Equipment Manual Release 01/00...
-
Page 44: Password Protection
Password Protection Access protection Password protection can be configured for buttons and input fields to prevent operation of the Touch Panel by unauthorized personnel. Password Level and Access Permissions Password During the configuration phase with ProTool, the configurer assigns the but- hierarchy tons and input fields hierarchically ascending password levels from 0 to 9. - Page 45 Password Superuser The superuser password is defined during configuration. The default value in password the standard configuration is “100”. This setting can be changed using the Touch Panel. Passwords from le- The passwords from levels 1 to 8 are not assigned during configuration but vels 1 to 8 during operation by using the Touch Panel.
-
Page 46: Login/Logout On The Touch Panel
Password Login/Logout on the Touch Panel Login Login on the Touch Panel using the Password Processing standard screen by calling a function for which the current password level is too low. In this case, the Touch Panel automatically requests a password. Logging in on Step Action... - Page 47 Password Automatic call If a password level higher than the current one is required for a button or an input field, the Touch Panel automatically requests the entry of an appropriate password beforehand. Logout If the Touch Panel screen is not touched within a configured time, the current password level is automatically reset to zero.
-
Page 48: Password Management
Password Password Management Functions The Password Processing standard screen provides the following functions for password management: create passwords and assign password levels, delete passwords, change passwords and password levels, view password list. These functions can only be called in password level 9 (exception: view pass- word list). - Page 49 Password Deleting a Step Action Result password Touch the Edit input field. The password input window opens. Enter the password to be deleted If the password level in the ad- in the input field Edit and con- jacent input field is set to 0, the firm by pressing password has been deleted.
- Page 50 Password Viewing the The password list contains all the passwords set up on the Touch Panel. The password list only passwords displayed are those with a password level lower or equal to that with which the user logged in on the Touch Panel. The supervisor pass- word is not displayed.
- Page 51 Password TP27, TP37 Equipment Manual Release 01/00...
-
Page 52: Messages
Messages Overview Messages on the Touch Panel indicate events and statuses related to control processes. A message consists of static text, at least. It may also contain tags. The following types of message are displayed in plain text on the Touch Panel. event messages alarm messages system messages... -
Page 53: Types Of Message
Messages Types of Message Event and alarm Event and alarm messages must be configured. Event messages indicate a sta- messages tus in the process, whereas alarm messages indicate faults or errors. Event mes- sages and alarm messages are issued by the PLC. Alarm messages have to be acknowledged on account of their significance. - Page 54 Messages Presentation Alarm and event messages can be configured so that text components flash in order to distinguish them from other message texts. Messages may contain text and tag fields. Tag fields display current PLC ac- tual values in numeric form. Standby message A sub–category of the event message is the standby message.
- Page 55 Messages Message line When a message line has been configured it is always displayed, regardless of the screen selected. Only the latest message is displayed in the message line. Message window Messages in the configured message window contain additional information on the message, such as message number and date/time the message arrived.
- Page 56 Messages Event message window: The event message window must be selected by the operator or the PLC and can also be deselected. If a current event message is not waiting, the standby message is displayed. Activate the event message window by touching the OPEN EVENT button on the Edit Message standard screen.
-
Page 57: Alarm Messages
Messages 6.1.2 Alarm Messages Acknowledging Alarm messages have to be acknowledged on account of their ur- alarm messages gency. This can be done manually or automatically by the PLC. To acknowledge an alarm message manually, simply touch the button in the alarm message window (figure 6-1 on page 6-4). - Page 58 Messages Setting alarm The alarm message window can be set in the background so that if messages in the there are numerous alarm messages pending, it is not necessary to background acknowledge them all before rectifying what may be a critical system condition at the machine.
-
Page 59: System Messages
Messages 6.1.3 System Messages Definition System messages indicate internal Touch Panel operating statuses. They indi- cate, for example, maloperations or communication malfunctions. Touch the system message window to close it. Structure A system message consists of a message number and text, e.g.: 222 AM remaining buffer reached Message text may contain internal system tags for defining the cause of the message more precisely. -
Page 60: Displaying Messages
Messages Displaying Messages Message archive All message events are written in the message archive in chronological order. Message events are the arrival, clearing and acknowledgment of a message. A maximum of 512 message events can be stored in the Touch Panel message ar- chive. - Page 61 Messages Display The message events in the message archive can be filtered according to various criteria and displayed on the Touch Panel (figure 6-3). – All waiting event messages are displayed on the event message page. – All message events for event messages are displayed in the event mes- sage buffer.
-
Page 62: Opening A Message Page
Messages 6.2.1 Opening a Message Page Purpose An overview of the alarm and message events still pending on the Touch Panel is provided from the alarm message screen and the event message page. Open message pages are constantly updated. Alarm message In order to open an alarm message page, touch page the message indicator... - Page 63 Messages Message indicator 0000049 11:32:00 27.03.97 AGR:01 Boiler pressure too high: 12.7 bar 0000049 AK 11:33:20 27.03.97 AGR:01 Boiler pressure too high: 10.3 bar 0000010 11:34:36 27.03.97 AGR:02 Oil supply stopped 0000010 AK 11:35:18 27.03.97 AGR:02 Oil supply stopped HELP (example TP37 ) Figure 6-4 Alarm message screen...
-
Page 64: Opening A Message Buffer
Messages 6.2.2 Opening a Message Buffer Purpose An overview of the message events which have arrived on the Touch Panel is provided concerning the alarm message buffer event message buffer. Open message buffers are constantly updated. Alarm message In order to open the alarm message buffer, touch buffer the message indicator on the alarm message screen button on the... -
Page 65: Deleting Messages
Messages Deleting Messages Purpose All message events from event and alarm messages are stored automatically in the message archive. The message archive can contain as many as 512 message events. Message events are deleted automatically in the case of buffer overflow by means of the Edit Message standard screen. - Page 66 Messages Deleting via The following messages can be deleted from the message archive via standard standard screen screen Edit Message: all (not individual) acknowledged and cleared alarm messages all (not individual) arrived and cleared event messages. Delete alarm messages by pressing the DELETE ALARM MESSAGE button.
-
Page 67: Printing Messages
Messages Printing Messages How to print Alarm and event messages can be printed out automatically following buffer overflow (see chapter 6.3), automatically as direct message logging, manually (see chapter 6.5.2). Set the printer parameters in the Printer Settings standard screen. The standard screen is described in chapter 7. - Page 68 Messages Manual printout of The buffer contents can be printed out in the following ways: buffer content The Edit Message standard screen (see chapter 6.6.1) has buttons to print out alarm and event messages. The Output Messages standard screen (see chapter 6.6.2) has buttons to print out alarm and event messages.
-
Page 69: Alarm_S Messages
Messages ALARM_S Messages The STEP 7 option packages S7–PDIAG and S7–GRAPH only issue ALARM_S messages. For that reason, the message number procedure ALARM_S must be used for configuring process diagnosis in ProTool as well. ALARM_S messages are not configured in ProTool but in STEP 7. Incorporating When configuring messages in STEP 7 the message text and attributes entered ALARM_S... -
Page 70: Communication Sequence
Messages 6.5.1 Communication Sequence Logging On For More than one station (e.g. more than one OP, PU, etc.) on a network can log ALARM_S on for ALARM_S messages. Each station that wants to display ALARM_S messages logs on to the CPU for ALARM_S. Figure 6-6 MPI Network When A Message When a message–triggering event occurs, the CPU actively sends telegrams to... -
Page 71: Message Acknowledgement
Messages 6.5.2 Message Acknowledgement ALARM_S When a message is acknowledged by a station on the network, the CPU is im- Messages mediately notified. The CPU then distributes the acknowledgement to all con- Requiring nected stations. It is only to this message that the operating unit responds, i.e. Acknowledgement only at this point does it enter the acknowledgement in the message buffer. -
Page 72: Message Overload
Messages 6.5.4 Message Overload It can happen that a large number of ALARM_S messages are issued within a short space of time. This can result in the build–up of processing backlogs. Communication If the time gap between the first occurrence of a message and a subsequent Overload occurrence is very short, it may be that the first message has not yet even been sent. -
Page 73: Updating
Messages Example: A CPU 315 can process a maximum of 50 simultaneously pending messages. Accordingly, an operating unit can handle a maximum of four CPU 315s send- ing ALARM_S messages without overflow problems occurring. 6.5.5 Updating Since the CPU stores the message information when a fault occurs, individual network stations (e.g. -
Page 74: Buffer Overflow
Messages 6.5.6 Buffer Overflow Message Archive All message events for event and alarm messages are automatically stored in a message archive. The message archive can hold up to 512 message events. Overflow Warning When the remaining buffer capacity specified in ProTool (default setting 10%) is reached, an overflow warning is automatically issued. -
Page 75: Standard Screens For Messages
Messages Standard Screens for Messages Overview The two standard standard screens below are significant for messages: Edit Message Output messages System Settings 6.6.1 “Edit Message” Standard Screen Purpose Functions are configured in the Edit Message standard screen which are neces- sary to view, delete and print messages (figure 6-10). - Page 76 Messages Meanings of Open event message window buttons Open event message page Open event message buffer Delete event message buffer Print event message buffer Open alarm message screen Open alarm message buffer Delete alarm message buffer Print alarm message buffer Call Help text on standard screen Help Exit from standard screen...
-
Page 77: Output Messages" Standard Screen
Messages 6.6.2 “Output Messages” Standard Screen Condition In order to select and print messages via the Touch Panel according to filter criteria, the Output Messages standard screen must be integrated in the config- uration. Purpose The Output Messages standard screen enables the selection and printing of messages according to various, user–defined filter criteria (figure 6-11). - Page 78 Messages Meaning of Output medium PRINTER operating elements The factory setting for output from units TP27 and TP37, is to a printer. Message event All the alarm messages or event message buffer contents are printed out. This includes all message events which have Arrived, Cleared or been Acknowledged.
-
Page 79: System Settings" Standard Screen
Messages 6.6.3 “System Settings” Standard Screen Purpose Different settings can be defined for messages using the symbolic input fields in the System Settings standard screen. Open the System Settings standard screen from the main screen by pressing the adjacent button Structure TP27 and TP37 have different System Settings standard screens. - Page 80 Messages Overflow warning A system message is issued when the remaining buffer size is reached. No message is issued when the remaining buffer size is reached. Call Help text on standard screen Help Exit from standard screen TP27, TP37 Equipment Manual 6-29 Release 01/00...
- Page 81 Messages TP27, TP37 Equipment Manual 6-30 Release 01/00...
-
Page 82: Printing
Printing Connecting a A monochrome printer or color printer can be connected to the Touch Panels. printer Configuration of the connection is described in section 12.2.4. Descriptions of the interfaces is provided in Appendix B. Print functions The following print functions are provided on the Touch Panel: Print Messages (see section 6.4). - Page 83 Printing Standard screen The settings configured for printer type and printer parameters can be modified online via the symbolic input fields with the TP27-6 in standard screens Printer Settings General, Print Screen and Assign Color (figure 7-1), with the TP37 and TP27-10 in standard screen Printer Settings (figure 7-2). Make sure that the parameters on the Touch Panel match those on the printer.
- Page 84 Printing Printer Settings Print Screen: General: Interface: Printout: Baud rate: Color: Data bits: Bold: Stop bits: Density: Timeout (sec): Needles: Parity: Type: Printer: Assign Color <–> <–> Printer Printer (0) Black: (4) Red: (1) Blue: (5) Magenta: (2) Green: (6) Yellow: (3) Cyan: (–1) White: ( Value –1 = “No color”...
- Page 85 Printing Print Screen (default setting): ASCII Only ASCII characters are printed in a screen printout (no graphics or character graphics). An ASCII screen print is appreciably quicker than a graphic screen print. A screen which contains text characters be- longing to an Asiatic character set is always printed in graphics mode, irrespective of the ASCII default setting.
-
Page 86: Recipes
Recipes Purpose Recipes consist of combinations of tags for a specific application. The purpose of recipes is to transfer several items of data collectively to the PLC. This transfer requires synchronization between the touch screen and the PLC. Data records The data structure is defined with the data record in the configuration. - Page 87 Recipes Ingredients of a A recipe consists of a series of recipe entries. Each entry contains no more than recipe one input field (tag). The Mixture recipe might contain the following entries: Name: Orange: Water: Sugar: Flavor: Input fields (variables) Data records on Values are assigned to the input field variables on the Touch Panel and stored.
-
Page 88: Standard Screens For Recipes
Recipes Standard Screens for Recipes Condition In order to create, save and download data records using the Touch Panel, the standard screen Data Record Processing and Transmission must be integrated in the configuration. The Selective Data Record Transmission standard screen need only be integrated in the configuration when current data has to be exchanged between the Touch Panel and PLC. - Page 89 Recipes Data Record Processing and Transmission Recipe: Data record name: Comment: Sort order: Data medium: Format Help Figure 8-2 Input fields and buttons in standard screen Data Record Processing and Transmission (exampleTP37) Meaning of Copy current values from the PLC to the main memory of operating elements the Touch Panel and save them as a data record on the data medium flash or module (memory card).
- Page 90 Recipes Recipe Select a recipe from the list of configured recipes. Data record Enter the name of the new data record or the data record to name be edited. Comment Enter a comment in respect of the data record to be edited. The comment entered is only accepted when the data record is stored on the data medium.
- Page 91 Recipes Selective Data Record Transmission Recipe: Data record name: Comment: Sort order: Data medium: Help Figure 8-3 Input fields and buttons in standard screen Selective Data Record Transmission (example TP37) Meaning of Transfer current values from the PLC to the main memory operating elements of the Touch Panel (update values in the Touch Panel) Transfer the current values from the main memory of the...
- Page 92 Recipes Recipe Select a recipe from the list of configured recipes. Data record Enter the name of the data record you wish to transfer. name Comment Enter a comment in respect of the data record to be edited. Sort order Define the sort criteria for the data records to be transferred.
-
Page 93: Creating, Editing And Saving Data Records
Recipes 8.1.1 Creating, Editing and Saving Data Records In this section The data structure is defined with the recipe during configuration. Initially, there are no data records. They are created, edited and stored on data media directly on the Touch Panel using the standard screen Data Record Processing and Transmission. - Page 94 Recipes Creating a new Step Action data record Touch the Recipe field of the standard screen Data Record Processing and Transmission. Select the recipe for the new data record in the selection window. Touch the Data Medium field. Select from the selection window the data medium on which you want to save the new data record.
- Page 95 Recipes Edit window The entries of the selected data record are listed in the Edit window (figure 8-4). Each line contains the configured name on the left and the editable value of the entry on the right. Values Entries Data record name Recipe name Mixture Beverage...
- Page 96 Recipes Saving data Current values can be copied from the PLC to the Touch Panel main memory records and saved on a data medium. The time at which the data record was saved is also stored. Step Action Touch the Recipe field in standard screen Data Record Processing and Transmission.
- Page 97 Recipes Deleting data The following section describes the sequence for deleting individual data records records fro the selected data medium. If all the data records on the data medium are to be deleted, it is more practical to use the Format function (see Page 8-8).
-
Page 98: Transferring Data Records
Recipes 8.1.2 Transferring Data Records In this section The following section describes how to operate the Selective Data Record Transmission standard screen. This standard screen contains special functions configured for transferring data records between the Touch Panel and PLC and between Touch Panels and data medium. - Page 99 Recipes Data medium Proceed as follows to load a data record from a data medium in the Touch Touch Panel Panel main memory: Step Action Touch the Recipe field in standard screen Selective Data Record Transmission. Select a recipe for the data record to be loaded from the selection window.
-
Page 100: Record Sets
Recipes Record Sets Definition A record set combines one data record from several different recipes under a common name. In its data records, a record set contains all the values required to set up a ma- chine or system. This means, for example, that the basic settings for machines which operate simultaneously can be loaded to produce different products. - Page 101 Recipes Save (Create) A Record Set can be created in standard screen Data Record Processing and Transmission in two different ways, i.e. saved on a data medium: 1. Save a data record for each recipe Step Action Select RecordSet as the recipe. Define the data record name and the data medium.
- Page 102 Recipes Delete Complete record set: The sequence of steps corresponds to the procedure described on Page 8-12 under Deleting data records. Partial record set: Delete the data records with the corresponding name individually from the selected data records. The sequence of steps corresponds to the procedure described on Page 8-12 under Deleting data records.
- Page 103 Recipes TP27, TP37 Equipment Manual 8-18 Release 01/00...
-
Page 104: Storing And Loading Data
Storing and Loading Data In this chapter This chapter explains how to transfer data to different data media, which settings have to be performed, what must be taken into consideration. Purpose Depending on the type and quantity, data is loaded onto data media to back up data, restore data, load or store recipe data records,... - Page 105 Storing and Loading Data Memory card The memory card is an external memory medium, comparable to a disk. Compared to the internal flash memory, the memory card features the following advantages: The memory card is a portable storage medium. This means that, for example, recipe data can be transported from one TP to another.
-
Page 106: Delete Storage Medium
1. Touch the top left corner of the screen as the Touch Panel is starting up. The menu illustrated in figure 9-1 appears with the first confirmation request. SIMATIC TP37, V x.xxx Copyright (c) SIEMENS AG 1997 ALL DATA ON FLASH/MODULE WILL BE ERASED ! ARE YOU SURE ? CANCEL... - Page 107 Storing and Loading Data Reserved memory A memory area, with the following default settings, is reserved for recipe data area for recipe in the flash memory and on the memory card: data 64 kB (flash memory) 128 kB (memory card). If the default values are not sufficient, reset them in ProTool.
-
Page 108: Backup/Restore
Storing and Loading Data Backup/Restore Application The memory card offers the possibility of loading data stored in a Touch Panel directly onto a machine or system. This means that a configuration or recipe data records can be updated or modified irrespective of the location at which the system is being used. - Page 109 Storing and Loading Data Call Help text on standard screen Help Exit from standard screen Insert memory Use Slot B to plug the memory card into the TP37 and TP27–10. Only one slot card is available in the TP27–6. The slot is described for TP37 in chapter 16.3, for TP27-10 in chapter 15.3 and for TP27-6 in chapter 14.3.
- Page 110 Storing and Loading Data Restore firmware/ Proceed as follows to restore a firmware/configuration backup on the Touch configuration Panel: Step Action Insert the memory card with the firmware/configuration in Slot B of the Touch Panel. Restart the TP37. The Touch Panel starts up wih the firmware/configuration contained on the memory card.
- Page 111 Storing and Loading Data TP27, TP37 Equipment Manual Release 01/00...
-
Page 112: Status/Force Variable Using The Tp
Status/Force Variable Using the TP Purpose The Touch Panels provide two functions, namely Status Variable and Force Variable, which enable operand values from the connected PLC to be dis- played in a standard screen and modified in a second screen. This means that PLC operands can be edited directly on the TP in online mode without having to connect a programming unit to the PLC to do it. -
Page 113: Status Variable
Status/Force Variable Using the TP 10.1 Status Variable Standard screen The standard screen Status Variable is selected from the main Status Variable screen using a soft key. Status Variable Operand Format Value DB, DBB 100 BIN = 0000000000000000 ?????? ????????? ?????? ????????? ?????? - Page 114 Status/Force Variable Using the TP Operands for Figure 10-2 illustrates the structure of a line for the SIMATIC S5 in the form SIMATIC S5 of an example: DB, DW Operand value Data format Operand address (for data types DB, DW, DB, DD: Number of DW or DD) DB number (applicable only to data types DB,...
- Page 115 Status/Force Variable Using the TP Control sequence Carry out the following steps to view operand values on the PLC: Step Action Enter operands Once the screen has been selected, status processing is at Status Stop. Proceed as follows: 1. Call in the relevant screen for entering values by clicking on the first line.
-
Page 116: Force Variable
Status/Force Variable Using the TP 10.2 Force Variable Function In addition to the function provided by Status Variable, operand values can be modified using the Force Variable screen ( = force). Standard screen: The Force Variable screen is not integrated in the ProTool standard screens Force Variable and, therefore, must be assigned to a button in the configuration. - Page 117 Status/Force Variable Using the TP Control sequence Carry out the following steps to comntrol operand values: Step Action START updating Press the function key assigned to the icon depicted on the right and set status processing to Status Running. Force INPUT Switch status processing to the Force Input state using: Status processing is stopped and input is possible.
-
Page 118: System Settings
System Settings Standard Screen The standard screen System Settings is used to configure functions which influ- ence general Touch Panel settings. The following settings are possible: Blank screen Select language Initiate backup/restore, Adjust volume, Adjust contrast (TP27 only), Calibtate touch screen (TP37 and TP27-10 only) Deactivate touch screen (clean screen) Set TP mode Set parameters for messages... - Page 119 System Settings System Settings Operating mode: Display message: Message logging: Buffer overflow warning: Date: Time: Help Figure 11-2 System Settings standard screen for TP27-10 System Settings Operating mode: Display message: Message logging: Buffer overflow warning: Date: Time: Help TP37 Figure 11-3 System Settings standard screen for and TP27-10 Purpose of Operating mode...
- Page 120 System Settings Buffer overflow warning For a description, refer to chapter 6 Date and time Set current date and time of day Blank screen Switch language F GBR Call Backup/Restore function (for a description, refer to section 9.3) Adjust volume TP27: Adjust contrast TP37 and TP27-10: Calibrate touch screen...
-
Page 121: Setting An Operating Mode
System Settings 11.1 Setting an Operating Mode Operating modes The following TP operating modes can be adjusted: Online Offline Download – Serial – MPI (S7) Online This is the standard operating mode for unrestricted process operation and pro- cess visualization. In Online mode, a logical connection is established between the Touch Panel and PLC or the Touch Panel attempts to establish a connec- tion. -
Page 122: Blanking The Screen
System Settings 11.2 Blanking the Screen Purpose The brightness of the LCD back–lighting is reduced during the course of time due to technological reasons. To extend its useful life: reduce the brightness of the back–lighting on the TP27, switch off the back–lighting on the TP37. Action Trigger using the standard screen Touch the button depicted on the right of the System Settings... -
Page 123: Deactivate Touch Screen
System Settings 11.3 Deactivate Touch Screen Purpose Soiling the touch screen cannot be avoided during normal operation. There- fore, it should be cleaned at regular intervals. In order to prevent functions be- ing activated inadvertently while cleaning the screen, it can be deactivated via the System Settings screen for a limited period of time. -
Page 124: Calibrating The Touch Screen (Tp37 And Tp27-10 Only)
System Settings 11.4 Calibrating the Touch Screen (TP37 and TP27-10 only) Purpose Depending on the installation position and viewing angle, it is possible that when operating the TP37 and TP27-10 one or more parallel axes appear, some more some less strongly highlighted. To prevent any operating errors occuring as a result of this, the TP37 and TP27-10 screens can be calibrated using the System Settings standard screen. -
Page 125: Other Settings
System Settings 11.5 Other Settings Date/Time The current date and time can be set on the Touch Panel in order, for example, to make adjustments for summer and winter time. Any change affects all the fields which display a date and time variable. The display format for date and time is set in the configuration and cannot be changed later on the Touch Panel. - Page 126 System Settings Procedure, TP37: The default setting is signal tone ON. Touch the button shown here in the System Settings standard screen to switch off the signal tone. Toggle between signal tone ON and OFF by repeatedly touching the button. The volume can also be adjusted by means of the potentiometer on the underside of the housing (see section 13.2).
- Page 127 System Settings TP27, TP37 Equipment Manual 11-10 Release 01/00...
-
Page 128: Part Iii Installation And Commissioning
Part INSTALLATION AND COMMISSIONING Installation Commissioning... - Page 129 TP27, TP37 Equipment Manual 11-2 Release 01/00...
-
Page 130: Installation
Installation Installation The Touch Panels TP27 and TP37 are designed for vertical installation in the location and front panels of switching cabinets. Cut a mounting slot in the front panel in conditions preparation for installation of the Touch Panel. The thickness of the front panel must not exceed 6 mm. -
Page 131: Mechanical Installation
Installation 12.1 Mechanical Installation How to install the Step Action TP27-6 Slide the enclosed seal from the rear over the housing and, work- ing from the front, install the TP27-6 in the mounting cutout pre- pared. Make sure the TP cannot drop out of the front panel before it has been secured. - Page 132 Installation How to install the Step Action TP27-10 Install the TP27-10 from the front in the pre–prepared mounting cutout. Ensure the TP cannot drop out of the front panel before it has been secured. Place the hooks of the screw–type clamps enclosed in the corre- sponding recesses in the housing of the TP27-10.
- Page 133 Installation Maximum torque It must be ensured that the threaded spindles of the screw-type clamps are tightened with the recommended torque of 0,5 Nm. Seal After correct fixing of the equipment, the seal remains visible owing to construction reasons. Caution Do not try to upset the seal until the TP27-10 and the front panel lie on each other at the same level.
- Page 134 Installation How to install the Step Action TP37 Working from the front, position the TP37 in the slot cut in the cabinet. Make sure the TP cannot drop out of the front panel before it has been secured. Locate the hooks of the six screw–type clamps enclosed with the TP in the corresponding recesses in the housing of the TP37.
-
Page 135: Electrical Installation
Screw or lock all plug connections. Do not install signal lines in the same cable ducts as power cables. Siemens AG refuses to accept liability for malfunctions and damage aris- ing from use of self–made cables or cables from other manufacturers. - Page 136 Installation Configuration Figure 12-1 illustrates a number of configuration options for Touch Panels, options PLCs and periphery equipment. Configuration PROFIBUS-DP computer SIMATIC S5 SIMATIC 500/505 SIMATIC 500/505 SIMATIC S7 Other PLCs PG 7xx Other PLCs optionally Relay contact for tem- switches perature monitoring IF1A...
-
Page 137: Power Supply And Relay Contacts
Installation 12.2.1 Power Supply and Relay Contacts Power supply The power supply for the Touch Panel is connected at the 4–pin plug connector on the underside of the unit . Use the 4–pin terminal block supplied with the TP for this purpose. The terminal block is designed for cables with a cross–section not larger than 2.5 mm . -
Page 138: Connecting The Configuration Computer
PC or PU IF1B with MPI card Do not use the Siemens converter cable for connection by TTY/passive, because the Touch Panel does not supply 5 V. Figure 12-2 Connection configuration diagram for configuration computer TP27, TP37 Equipment Manual 12-9... -
Page 139: Connecting The Plc
RS485 S7/M7 RS485 PROFIBUS-DP Do not use the Siemens converter cable for connection by TTY/passive, because the Touch Panel does not supply 5 V. Use only the approved cables for connection to SIMATIC S7/M7. Any PROFIBUS-DP bus terminal (except FSK) For operation via the serial interface, connect either IF1A (RS232/TTY) or IF1B (RS422/485), but not both. - Page 140 Installation Configure interface The IF1B interface can be configured by using the DIL switches, located IF1B beside the 9–pin Sub-D connector. This interchanges the RS422 receive data and the RTS signal. By default, the RTS signal is not required by the communication peer.
-
Page 141: Connecting A Printer
Touch Panel: Serial connection: Parallel connection: LPT (TP37 only) Cables with integral connectors are available for connecting Siemens printers (refer to the ST80.1 catalog). When connecting printers from other manufac- turers, use the cables supplied or specially made cables. TP27, TP37... -
Page 142: Commissioning
Commissioning Flowchart The guide to commissioning, depicted below, describes the individual steps required for commissioning Touch Panels TP27 and TP37. Figure 13-1 illus- trates the most important steps for the initial startup, recommissioning and nor- mal operation of the Touch Panels. Initial startup Recommissioning Normal operation... - Page 143 Commissioning Before Before commissioning the Touch Panel please observe the following: commissioning Caution With the SIMATIC S5, compression of the internal program memory on the PLC (PU “Compress” function, integrated FB COMPR) is not allowed when a Touch Panel is connected. Compression modifies the absolute ad- dresses of the blocks in the program memory.
-
Page 144: Initial Startup
Commissioning 13.1 Initial Startup Procedure The firmware and configuration must be downloaded to the Touch Panel when it is started up for the first time. All the units in the SIMATIC HMI family are equipped with reverse battery backup. The reverse battery backup is not effective if a connection to the con- figuration computer already exists to download the generated project. -
Page 145: Recommissioning
Commissioning 13.2 Recommissioning Types of When recommissioning, the configuration/firmware already loaded in the downloading Touch Panel is replaced by another. Downloading can be performed by means serial download or MPI download (for SIMATIC S7). Serial download In the case of a serial downloading operation, the configuration/firmware is transferred from the PC/PG to the Touch Panel via an RS232/TTY connection. - Page 146 Commissioning TP27, Boot V x.xxx Copyright (c) SIEMENS AG 1997 READY FOR SERIAL TRANSFER CANCEL SERIAL DOWNLOAD BOOT CONFIGURATION CONTRAST Figure 13-2 TP27 in Serial Download Before downloading to a TP27, the display contrast can be adjusted in the Boot window by pressing the fields.
- Page 147 Commissioning MPI download If a configuration is already loaded for the SIMATIC S7 on the Touch Panel, other S7 configurations can be downloaded to the Touch Panel via an MPI con- nection. Step Action Switch on the Touch Panel’s power supply. Connect the IF1B interface on the Touch Panel to the PC or PU using a standard cable.
- Page 148 Commissioning M P I D O W N L O A D MPI Baud Rate: 187.5 kBaud MPI OP Station Address: Tel.: Download Address: SERIAL BOOT DOWNLOAD CONFIGURATION Figure 13-4 Touch Panel in MPI Download mode Fault diagnosis A fault occurring during commissioning or operation is normally displayed on the Touch Panel by means of a system message.
-
Page 149: Startup Behavior
Commissioning 13.3 Startup Behavior After the power supply has been switched on, the Touch Panel per- Self test forms a self test. During the test, it checks the operability of the most important TP components and displays the test results. The test re- sults are then deleted. -
Page 150: Testing A Configuration In Offline Mode
Commissioning 13.4 Testing a Configuration in OFFLINE Mode Purpose In operating mode OFFLINE, individual functions and configurations down- loaded from the PC/PG to the Touch Panel can be tested without being in- fluenced by the PLC. PLC tags are not updated in OFFLINE mode. Action Step Action... -
Page 151: Testing The Configuration In Conjunction With The Plc
Commissioning 13.5 Testing the Configuration in Conjunction with the PLC Test with PLC If the tests have been successfully performed in Offline mode, test the TP27, connected TP37 in conjunction with the connected PLC. This checks that the correct data areas have been configured. - Page 152 Part IV DEVICE DESCRIPTION AND MAINTENANCE Device Description TP27–6 Device Description TP27–10 Device Description TP37 Options Maintenance/Upkeep...
- Page 153 TP27, TP37 Equipment Manual 13-2 Release 01/00...
-
Page 154: Unit Description Tp27-6
Unit Description TP27-6 In this chapter This chapter provides information on: dimensions operating and display elements connection elements and communication options of Touch Panel TP27-6. 14.1 Dimensions Unit dimensions The following figure indicates the dimensions of the TP27-6 with the housing of the direct key module/control panel which is available on option. -
Page 155: Operating Elements
Unit Description 14.2 Operating elements Touch screen The TP27-6 touch screen is used to operate and monitor processes. Operation is effected by means of contact–sensitive buttons and input fields which are defined in the configuration for a specific application. No additional keyboard is necessary. -
Page 156: Communication Options
Unit Description 14.4 Communication options Device Connection Interface SIMATIC S5 – AS511 (TTY) IF1A – FAP (TTY/RS232) IF1A – PROFIBUS-DP IF1B SIMATIC S7/M7 – PPI IF1B – MPI IF1B – PROFIBUS-DP IF1B SIMATIC 500/505 – RS232 IF1A – RS422/RS485 IF1B Other PLCs –... - Page 157 Unit Description TP27, TP37 Equipment Manual 14-4 Release 01/00...
-
Page 158: Unit Description Tp27-10
Unit Description TP27-10 In this chapter This chapter provides information on: dimensions operating and display elements connection elements and communication options of Touch Panel TP27-10. TP27, TP37 Equipment Manual 15-1 Release 01/00... -
Page 159: Dimensions
Unit Description 15.1 Dimensions Unit dimensions The following figure indicates the dimensions of the TP27-10 with the housing of the direct key module/control panel which is available on option. Side view Front view SIMATIC TP27 É É É É É É É... -
Page 160: Operating Elements
Unit Description 15.2 Operating elements Touch Screen The TP27-10 touch screen is used to operate and monitor processes. The touch screen is operated by means of touching contact–sensitive buttons and input fields, located on the screen, which are defined in configurations for specific applications. - Page 161 Unit Description 15.4 Communication options Device Connection Interface SIMATIC S5 – AS511 (TTY) IF1A – FAP (TTY/RS232) IF1A – PROFIBUS-DP IF1B SIMATIC S7/M7 – PPI IF1B – MPI IF1B – PROFIBUS-DP IF1B SIMATIC 500/505 – RS232 IF1A – RS422/RS485 IF1B Other PLCs –...
-
Page 162: Unit Description Tp37
Unit Description TP37 In this chapter This chapter provides information on: dimensions operating and display elements connection elements and communication options of Touch Panel TP37. TP27, TP37 Equipment Manual 16-1 Release 01/00... -
Page 163: Dimensions
Unit Description 16.1 Dimensions Unit dimensions The figure below indicates the dimensions of the TP37 with the housing of the direct key module/control panel which is available on option. Side view Front view SIMATIC TP37 Ç Ç Ç Ç Ç Ç Ç... -
Page 164: Operating And Display Elements
Unit Description 16.2 Operating and Display Elements Touch screen The TP37 touch screen is used to operate and monitor processes. The touch screen is operated by means of touching contact–sensitive buttons and input fields, located on the screen, which are defined in configurations for specific applications. - Page 165 Unit Description Volume control On the underside of the unit, below the power supply/relay connection, is a potentiometer to adjust the volume of acoustic signals. The potentiometer is inside the device and can be adjusted by inserting a screwdriver though the ventilation slits.
-
Page 166: Connection Elements
Unit Description 16.3 Connection Elements 11 12 Figure 16-1 Arrangement of connections Name/Purpose Description – Currently unassigned – Currently unassigned DIL switch For configuring the IF1B interface. Serial interfaces Level Usage IF1A RS232/TTY (active/passive) RS232/TTY (active/passive) PC, PU, printer IF1B RS422/RS485 (floating) TTY (passive)/RS422/RS485 Not used at present... -
Page 167: Communication Options
Unit Description 16.4 Communication options Device Connection Interface SIMATIC S5 – AS511 (TTY) IF1A – FAP (TTY/RS232) IF1A – PROFIBUS-DP IF1B SIMATIC S7/M7 – PPI IF1B – MPI IF1B – PROFIBUS-DP IF1B SIMATIC 500/505 – RS232 IF1A – RS422/RS485 IF1B Other PLCs –... -
Page 168: Options
Options Overview This chapter contains desriptions of the follwng units which can be optionally connected: Direct Key Module (DKM) Control Panel Interface (CPI) 17.1 Direct Key Module A Direct Key Module (DKM) is available as an option for connection to the Touch Panel. -
Page 169: Installing The Direct Key Module
Options 17.1.1 Installing the Direct Key Module A Touch Panel can accommodate either a direct key module or a control panel interface (see section 17.2). The procedure for installing a direct key module is as follows: 1. Place the front panel of the Touch Panel on a workbench. Caution Make sure that the Touch Panel is disconnected from the voltage supply. - Page 170 Options 3. Connect the plug of the DKM ribbon cable to the Touch Panel pin array so that the colored side of the ribbon cable faces in towards the inside of the unit (illustrated in an example of the TP37 in figure 17-2). Color coding Ribbon Pins...
-
Page 171: Connectors And Adjusters
Options 17.1.2 Connectors and Adjusters Each DKM board has a 10–pin array for connecting the outputs and external voltage supply, and a DIL switch for configuring the outputs so that they can be set by the soft- ware. When installed, the pin array and DIL switch are on the rear side of the Touch Panel (illustrated in an example of the TP37 in figure 17-4). - Page 172 Options Pin arrays The pin arrays of the module boards DKM A and DKM B have the following pin assgnment: 1 2 3 4 5 6 7 8 9 10 +24V DC ext. DO 1 DO 8 DKM A DO 3 DO 6 DO 5 DO 4...
-
Page 173: Control Panel Interface
Options 17.2 Control Panel Interface A Control Panel Interface (CPI) is available as an option for Touch Panels con- nected to SIMATIC S7 PLCs. The following variants are available: Operator Control Panel Interface with panel 16 inputs/outputs 16 inputs/outputs 32 inputs/outputs TP27 –... -
Page 174: Installing The Control Panel Interface
Options 17.2.1 Installing the Control Panel Interface A Touch Panel can accommodate either a control panel interface or a direct key module (see section 17.1.1). Use the following procedure to install a con- trol panel interface: Caution Make sure that the Touch Panel is disconnected from the voltage supply. Always follow the ESD guidelines in the Appendix when working on open devices. - Page 175 Options 3. Connect the plug of the CPI ribbon cable to the Touch Panel pin array so that the colored side of the ribbon cable faces in towards the inside of the unit (illustrated in an example of the TP37 in figure 17-6). Color coding Ribbon Pins...
-
Page 176: Connectors
Options 17.2.2 Connectors Each of the two module boards has a 36–pin adapter for connecting the inputs/ outputs and the external voltage supply. When the module is installed, the connectors are located on the rear side of the Touch Panel (illustrated in an example of the TP37 in figure 17-8) +24V Adapter DKM A... - Page 177 Options Connectors The connectors of module boards CPI 1 und CPI 2 have the following pin as- signment when installed (see figure 17-8): CPI 1 +24V DC ext. DO 16 to DO 1 +24V DC ext. DI 16 to DI 1 CPI 2 DO 32 to DO 17 +24V DC ext.
-
Page 178: Maintenance/Upkeep
Never use aggres- sive solvents or scouring powder. Protective foil The protective foil for the TP prevents the screen being scratched or soiled. It is available as an option at your local Siemens branch. TP27, TP37 Equipment Manual 18-1 Release 01/00... -
Page 179: Replacing The Backup Battery
Touch Panel. Replace the backup battery as quickly as possible after the mes- sage is received. Source of supply The battery can be ordered via the Siemens spare parts service. It is shipped ready for installation with a lead and connector. See our catalog ST80.1 for the order number. - Page 180 Maintenance/Upkeep Action Step Action If a direct key module or control panel interface is connected to the TP37, remove it (see section 17.1 or 17.2) in order to gain access to the cover of the battery compartment. Switch off the voltage supply before removing the DKM or CPI. After removing the direct key module or the control panel inter- face, switch on the voltage supply before removing the battery.
-
Page 181: Replacing The Back-Lighting (Tp37 Only)
Replacing the Back–Lighting (TP37 only) Note on TP27 The back–lighting of the TP27 cannot be replaced by the user. Please contact your Siemens representative if the back–lighting is defective. Service life The brightness of the LCD back–lighting decreases during the course of time for technological reasons. - Page 182 Maintenance/Upkeep Procedure Step Action Slacken the two knurled screws at the rear of the TP and loosen the two screws at the top and underside. Carefully tilt the hinged rear panel backwards until the plug con- nections for the ribbon cable and 8–pin socket housing can be re- moved.
- Page 183 Maintenance/Upkeep TP27, TP37 Equipment Manual 18-6 Release 01/00...
-
Page 184: Part V Appendices
Part APPENDICES Technical Data Interface Assignments System Messages SIMATIC HMI Documentation ESD Guidelines... - Page 185 TP27, TP37 Equipment Manual Release 01/00...
- Page 186 Technical Data Housing TP27-6 TP27-10 TP37 External dimensions W x H x T (mm) 212 x 156 x 69 335 x 275 x 78 335 x 275 x 128 without option Mounting cutout W x H (mm) x 147 x 248 Mounting depth (mm) without option Degree of protection Front panel...
- Page 187 Technical Data Display TP27-6 TP27-10 TP37 Type STN LCD TFT LCD Resolution (horizontal x vertical) 320 x 240 640 x 480 Active screen area (mm x mm) 106 x 79 215 x 165 211 x 158 Back–lighting 1 CCFL tube 2 CCFL tubes 2 CCFL tubes Service life...
- Page 188 Technical Data Ambient conditions TP27-6 TP27-10 TP37 Location vertical Maximum permissible angle of inclina- 35° tion Ambient temperature Operation in vertical position 0 ... 50° C 5 to 45° C 4 to 45° C 0 ... 35° C Operation at 35° angle of inclination 4 to 45°...
- Page 189 Technical Data Compliance of the named products with the regulations of Directive 89/336 EEC is verified by confor- mance with the following standards: Noise immunity EN 50082-1 TP27-6 TP27-10 TP37 Static discharge (contact discharge) EN 61000-4-2 Class 3 RF irradiation EN 61000-4-3 Class 3 Pulse modulation ENV 50204 (900 MHz...
-
Page 190: Direct Key Module And Control Panel Interface
Technical Data Direct Key Module and Control Panel Interface Direct key module (DKM) Voltage supply for outputs, load voltage supply and internal logic circuitry Voltage supply rated value + 24 V DC permissible range +18.0 to +30.0 V value at t < 0.5 sec 35 V Power consumption of logic circuitry 50 mA... - Page 191 Technical Data Control Panel Interface Voltage supply for outputs, load voltage supply and internal logic circuitry Voltage supply OP37 24 V DC rated value +18.0 to +30.0 V permissible range 35 V value at t < 0.5 sec Power consumption of logic circuitry 40 mA Short-circuit protection upon polarity rever- sal of load voltage...
- Page 192 Technical Data Control Panel Interface Inputs No. of inputs Optical isolation from internal logic – circuitry Input voltage rated value 24 V DC with signal “0” 0 to 5 V 15 to 30 V with signal “1” Input current with signal “1” Typically 5 mA at 24 V Input delay 0.3 msec...
-
Page 193: Chemical Resistance Of The Touch Panel
Technical Data Chemical Resistance of the Touch Panel Chemical resist- The surface of the TP27-6 complies to DIN 42 115 Teil 2 and shows no visible ance of TP27-6 signs of change when exposed to the chemicals listed in Table A-1 for a period of over 24 hours. - Page 194 Technical Data Chemical Resist- The surfaces of the TP37 and TP27-10 complies to DIN 42 115 Teil 2 and ance of the TP37 shows no visible signs of change when exposed to the chemicals listed in Table and TP27-10 A-2 for a period exceeding 24 hours. Table A-2 Resistance of the surfaces of the TP37 and TP27-10 Acetone...
- Page 195 Technical Data TP27, TP37 Equipment Manual A-10 Release 01/00...
-
Page 196: Interface Assignments
Interface Assignments IF1A and IF2 Pin assignment of the 15–pin Sub-D socket: General RS232 Housing RxD– TxD+ TxD– Housing RxD+ +20 mA +20 mA +5 V Not IF2 TP27, TP37 Equipment Manual Release 01/00... - Page 197 Interface Assignments IF1B Pin assignment of the 9–pin Sub-D socket (Configuration via DIL switch, see Chapter 12.2.3): General PROFIBUS-DP RS422 RS485 Data B TxD (B) Data B RxD (B) GND (floating ) +5 V (floating ) Housing Data A TxD (A) Data A RxD (A) IF3 (TP37 only)
- Page 198 Interface Assignments LPT (TP37 only) Pin assignment of the 25–pin Sub–D socket: TTL (Centronics) – Strobe + Data Bit 0 + Data Bit 1 + Data Bit 2 + Data Bit 3 + Data Bit 4 + Data Bit 5 + Data Bit 6 + Data Bit 7 –...
- Page 199 Interface Assignments TP27, TP37 Equipment Manual Release 01/00...
-
Page 200: System Messages
System Messages Message number OP system messages can be subdivided into various categories. The information as to which category a system message belongs to is contained in the message number as indicated below. Message number Message text Driver error Startup message Warning Information message Operator error... - Page 201 System Messages Message Cause Remedy Please wait Mode change in progress or recipe function started. Ready for trans- Waiting for data from PU/PC Data transfer Data transfer between PU/PC and OP in prog- ress Firmware not The firmware can not be used for the current compatible configuration EPROM...
- Page 202 System Messages Message Cause Remedy: 026...029 Storage medium not ready, contains errors or status unde- Reset hardware, remove then refit Flash finable. memory module or carry out hardware test. Storage medium not intialized. Switch to download mode. Error accessing module, Flash may not be supported or Check whether module is properly inserted initialized by incorrect OP.
- Page 203 System Messages Message Cause Remedy: Battery power no longer sufficient for internal data buffer Replace battery. on OP. Note: Battery on memory is discharged, data may no longer be Replace the battery while the unit is readable. switched on in order to prevent loss of data.
- Page 204 Communication with PLC has been re- sumed. Status processing in progress on PU/PC. The OP can not be used while this is going on. Internal error With non-Siemens connections: data block error Network node has illegal address. Max. addresses: S7-MPI: PROFIBUS-DP:...
-
Page 205: Index
System Messages Message Cause Remedy: You are attempting to select a screen that does not exist or has been disabled by the function Hide. The minimum value is greater than the maximum value Minimum and maximum values are being for variable scales. confused by OP. - Page 206 System Messages Message Cause Remedy: Data block error x DB no. y Correct the block length/block number as This message indicates a data block error. The variables x necessary or send the correct data block. and y identify the cause of the fault ( )) and the number of the receive block concerned ( Variable x:...
- Page 207 System Messages Message Cause Remedy: Data record not present. A process link with a non-existent data block has been configured in a recipe or the recipe data contains errors. Configured data block length is too short. Change configuration and retransfer. The variable transferred with the message identifies the number of the data block.
- Page 208 System Messages Message Cause Remedy: On transferring a global data record, it is established that Only returned in the case of data records not all entries are present. that are transferable from one recipe to You have the following options: another.
- Page 209 System Messages Message Cause Remedy: Event message is not configured Configure event message (–> message num- ber) fully. Alarm message is not configured Configure alarm message (–> message number). Internal error Press key to restart. PLC co-ordination area not receivable during startup. If the fault is not corrected by performing a restart, please contact the SIMATIC Hot- line.
- Page 210 System Messages Message Cause Remedy: Overload caused by too many variables (setpoints/actual Check the interface parameters. values). Fault in connection between the OP and PLC. Incorrect interface parameters configured. Configure fewer process links for the screen displayed. Configuration error: Correct the limits and retransfer configura- upper limit = lower limit tion.
- Page 211 During startup, set the OP to download mode, downlaod the configuration again and then restart the OP and PLC again. c) If the fault recurs, please contact your nearest Siemens representative. When doing so, please quote the number of the error that has occurred and any variables referred to in the message.
-
Page 212: Simatic Hmi Documentation
SIMATIC HMI Documentation Target groups This manual is part of the SIMATIC HMI documentation. The documentation is aimed at the following target groups: Newcomers Users Configurers Programmers Commissioning engineers How the documentation is organized The SIMATIC HMI documentation consists of the following components: User’s Guides / User’s Manuals for: –... - Page 213 SIMATIC HMI Documentation Documentation Target Group Content First Steps with ProTool Newcomers This documentation guides you step by step through the configuration of Product Brief a screen with various objects changing from one screen to another a message. This documentation is available for: OP3, OP5, OP7, OP15, OP17 OP25, OP27, OP35, OP37, TP27, TP37 Windows-based systems...
- Page 214 SIMATIC HMI Documentation Documentation Target Group Content Application Example Newcomers ProTool is supplied with example configurations and the corresponding PLC programs. This documentation describes Start–up Guide how you load the examplesonto the operating unit and PLC run the examples and upgrade the connection to the PLC to suit your own spe- cific application.
- Page 215 SIMATIC HMI Documentation Documentation Target Group Content Communication for Programmers Provides information on connecting Windows-based systems Windows-based Systems to the following PLCs: User’s Manual SIMATIC S5 SIMATIC S7 SIMATIC 505 Allen Bradley PLC 5/SLC 500 This documentation describes the configuration and parameters required for connecting devices to the PLC and the network user data areas used for exchanging data between operat- ing unit and PLC.
- Page 216 ESD Guidelines What does ESD Virtually all present-day modules incorporate highly integrated MOS devices mean? or components. For technological reasons, these electronic components are very sensitive to overvoltages and consequently therefore to electrostatic dis- charge: These devices are referred to in German as Elektrostatisch Gefährdeten Bauelemente/ Baugruppen: ”EGB”...
- Page 217 ESD Guidelines Handling ESD as- A general rule is that assemblies should be touched only when this cannot be semblies avoided owing to the work that has to performed on them. Under no circum- stances should you handle printed-circuit boards by touching device pins or circuitry.
- Page 218 Glossary Alarm message Calls attention to high-priority operating states and has therefore to be ac- knowledged. Alarm time Time between the arrival and departure of an alarm message. Area pointer Required for data exchange between the TP and the PLC. It contains informa- tion concerning the length and size of data areas on the PLC.
- Page 219 Glossary Configuration Definition of system-specific basic settings, messages and screens using the ProTool configuration software. Control Panel Option for Touch Panel with 16 (TP27–6) or 32 TP27–10/TP37) digital input/ Interface outputs for fast key input without any communication–based delay. Can be used with SIMATIC S/ and PROFIBUS–DP.
- Page 220 Glossary Loop-through Operating mode of the TP. It covers normal operation and also handles com- mode munication between a PU or PC and the PLC via the TD. This operating mode is only possible when connection to the PLC is made via the AS511 protocol. Message log Printout of alarm messages and event messages simultaneously with their out- put to the display.
- Page 221 Glossary Screen Form of displaying logically associated process data which may be shown col- lectively on the TP and modified individually. Selection field Field for the value setting of a parameter (one value can be selected as the de- fault value). Startup test Checks the state of the CPU and memories every time the power supply volt- age is turned on.
- Page 222 Index Printing messages in the event of a buffer overflow, 6-20 Access permissions, 5-1 updating, 6-22 Access protection, 5-1 use of resources, 6-18 Acknowledge, alarm message, 6-2, 6-4, 6-6 Alphanumeric keyboard, 3-8 Acknowledged, message, 6-1, 6-9 cancel entry, 3-9 Acknowledgement, on contact, 3-4 confirm entry, 3-9 Acknowledgment group, 6-6, 6-9 cursor left, 3-9...
- Page 223 Index Battery compartment, 18-3 Color assignment, printer, 7-4 Baud rate, printer, 7-3 Combination Blanking, screen, 11-5 Message window/Message line, 6-3 Boot operation, 13-6 variables, 8-1 Bordercolor, button, 3-5 Commissioning, 13-1 Bottling machine, example, 8-1 Communication, 1-2, 2-4 Brightness, back–lighting, 18-4 Communication options, 16-6 Buffer overflow, ALARM_S Messages, 6-23 TP27–10, 15-4...
- Page 224 Index Correct, parallax, 11-7 Departed, message, 6-1, 6-9 Create Description, TP, 14-1, 15-1, 16-1 data record, 8-9 Design, interference–free, 12-6 password, 5-5 Device variants, 1-1 record set, 8-16 Digital outputs, 17-1, 17-6 CSA certification, A-4 DIL switch Cursor, 3-10 direct key module, 17-5 move left, 3-9 IF1B interface, 12-11, 14-2, 15-3, 16-5 move right, 3-9...
- Page 225 Index DRAM, A-1 Fixation TP27–10, 12-3 TP27–6, 12-2 Fixed window, 3-1, 3-2 Flash, 1-6, 9-1 Edit delete, 9-3 data record, 8-9 Flash memory, A-1 password, 5-6 Fluorescent tube, 18-4 record set, 8-15 FM certification, A-4 Edit Message, standard scren, 6-15 Force Variable, 10-1 Edit Password, standard screen, 5-2 control sequence, 10-6...
- Page 226 Index Help window, 3-1, 3-3 Installation position, 12-1 closing, 3-11 Installation possibilities, 1-1 HEX, 3-7 Interface, 1-5 Hexadecimal mode, 3-7 control panel interface, 14-2, 15-3, 16-5 Hide direct key module, 14-2, 15-3, 16-5 event messages, 6-3 IF1A, 14-3, 15-4, 16-6, B-1 system message, 6-8 IF1B, 12-11, 14-3, 15-4, 16-6, B-2 Hierarchy...
- Page 227 6-3, 6-9 printing, 6-16 type, 6-2 NATIVE driverr, 2-4 Message acknowledgement, ALARM_S Mes- Noise immunity, A-4 sages, 6-20 Non–Siemens PLC, connection, 14-3, 15-4, Message acquisition, 2-2 16-6 Message archive, 6-9 Normal operation, 13-1 TP27, TP37 Equipment Manual Index-6 Release 01/00...
- Page 228 Index Number Operating status, TP, 16-3 alarm messages, 2-1 Operating temperature, A-3 character sets, 2-3 Operation, general, 3-1 characters Operation acknowledgement, 3-4 alarm message, 2-1 Operator permission, 5-1 event message, 2-1 Operator process control, 1-4 data records per recipe, 2-3 Operator prompting, 2-2 entries per data record, 2-3 Options, 17-1...
- Page 229 Index Power consumption, A-2 Power supply, 14-2, 15-3, 16-5, A-2 Radio interference, A-4 connecting, 12-8 Rated voltage, A-2 Power supply unit, 12-8 Recipe, 1-4, 2-3, 8-1 PPI, connection, 14-3, 15-4, 16-6 identifying, 8-2 Presentation, message, 6-3 Recommissioning, 13-1, 13-4 Pressure variation, display, 1-3 Record sets, 8-15 Principle Recording, 1-4...
- Page 230 Index Screw–type clamp, 12-2, 12-3, 12-5 SIMATIC S5, connection, 14-3, 15-4, 16-6 Scroll, alarm message screen, 6-12 SIMATIC S7, connection, 14-3, 15-4, 16-6 Scrolling, 3-10 Sort order, messages, 6-11 Sections of a screen, 4-1 Source of supply, backup battery, 18-2 Securing, TP, 12-5 Spare parts service, 18-2 Select...
- Page 231 Index Superuser, 5-1 TP27–10, installation, 12-3 Supervisor, 5-1 TP27–6, installation, 12-2 password change, 5-6 TP37, installing, 12-5 Switch, IF1B interface, 12-11 Transfer, data record, 8-13 Switch off, acoustic signal, 11-8 Transfer parameters, printer, 7-3 Switch on, acoustic signal, 11-9 Transients, A-2 Switching power, relay contacts, A-2 Trends, 1-3 Switchover, keyboard , 3-9...
- Page 232 Artisan Technology Group is your source for quality new and certified-used/pre-owned equipment SERVICE CENTER REPAIRS WE BUY USED EQUIPMENT • FAST SHIPPING AND DELIVERY Experienced engineers and technicians on staff Sell your excess, underutilized, and idle used equipment at our full-service, in-house repair center We also offer credit for buy-backs and trade-ins •...