
Related Manuals for Thermo Scientific Fisher Scientific Fisherbrand GT1R Centrifuge


Summary of Contents for Thermo Scientific Fisher Scientific Fisherbrand GT1R Centrifuge
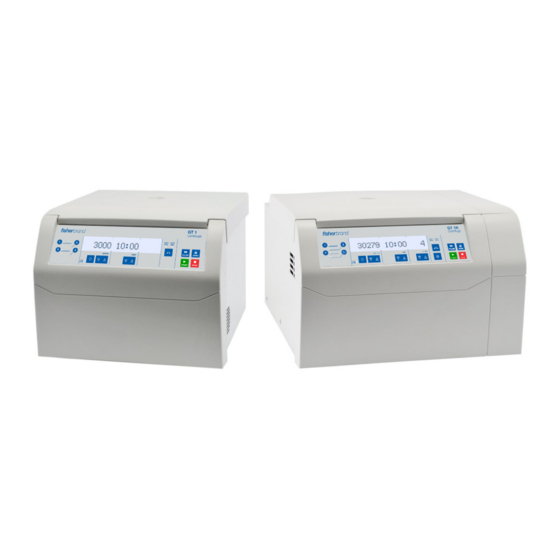
- Page 1 Instruction manual Fisherbrand GT1 Centrifuge Fisherbrand GT1R Centrifuge 50156465_a • 05 / 2018 15878722 15868722...
- Page 2 IMPORTANT Read this instruction manual. Failure to follow the instructions in this manual can result in damage to the unit, injury to operating personnel and poor equipment performance. CAUTION All internal adjustments and maintenance must be performed by qualified service personnel. Material in this manual is for informational purposes only.
-
Page 3: Table Of Contents
Contents Preface ................ 1 Items Supplied ............1 Intended Use............1 Precautions .............. 1 Symbols used on the Centrifuge....... 2 Technical Specifications..........3 Technical Data ............3 Directives, Standards and Guidelines ...... 4 Mains Supply ............4 Rotor Selection ............4 Transport and Set Up .......... - Page 4 Acceleration / Deceleration Rates......10 Programs ..............12 Centrifugation............12 Short-term Centrifugation......... 13 Removing the Rotor ..........13 Aerosol-Tight Rotors ..........14 Switch off Centrifuge ..........14 System Menu............... 15 Flowchart System Menu........... 15 Maintenance and Care..........16 Cleaning Intervals ............. 16 Basics ..............
-
Page 5: Preface
This centrifuge is designed to separate sample mixtures of different densities like chemicals, environmental samples and • Use only with rotors which have been properly installed. other non-human body samples. Follow the instructions on the Thermo Scientific™ Auto-Lock™ rotor exchange in section Rotor Installation. Precautions •... -
Page 6: Symbols Used On The Centrifuge
• Implement measures which ensure that no one can • Do not place anything on top of the centrifuge during a approach the centrifuge for longer than absolutely run. necessary while it is running. • Never open the centrifuge door until the rotor has come •... -
Page 7: Technical Specifications
Technical Specifications Technical Data The technical data of the Fisherbrand GT 1 / 1R Centrifuge is listed in the following table. Table 1. Technical Data Fisherbrand GT 1 / 1R Centrifuge Feature GT 1 GT 1R Use in interior spaces Altitudes of up to 2 000 m above sea level Environmental conditions Max. -
Page 8: Directives, Standards And Guidelines
Directives, Standards and Guidelines Table 2. Directives, Standards and Guidelines Region Directive Standard Europe 2006/42/EC Machinery EN 61010-1, 2 Edition 220-230 V 2014/35/EU Low Voltage IEC 61010-2-020, 2 Edition 50 / 60 Hz (Protective Goals) EN 61326-1 2014/30/EC Electromagnetic Compatibility (EMC) EN ISO 14971 2011/65/EC RoHS EN ISO 9001... - Page 9 75005715 MicroClick™ 24x2 microtube rotor 75005719 MicroClick™ 30x2 microtube rotor 75005720 8x8 PCR Strip rotor 75003694 8 x 50 mL Individually Sealed rotor (only usable in the Centrifuge GT 1R) 75005765 MicroClick™ 18x5 microtube rotor (only usable in the Centrifuge GT 1R) 75003602 Microliter 48x2 microtube rotor For further details on rotor use and safety, additional accessories, adapters and spare parts, refer to the rotor manual.
-
Page 10: Transport And Set Up
Transport and Set Up • To prevent possible injuries, at least two people should lift Before Setting Up and carry the centrifuge by holding it at the bottom from opposite sides. 1. Check the centrifuge and the packaging for any shipping damage. -
Page 11: Mains Connection
Mains Connection Storage Note: Plug the centrifuge into grounded electrical sockets WARNING: When removing the centrifuge and only. accessories from use if necessary clean, disinfect or decontaminate the entire system. In doubt 1. Turn off the power supply switch. contact the Fisher Scientific customer service. •... -
Page 12: Control Panel
Control Panel Control Panel The control panel contains the keys and displays of the centrifuge (only the power switch is located on the right side (Centrifuge GT 1R) or on the backside (Centrifuge GT 1) of the device). Program Keys Status Acceleration / Deceleration Profiles Speed / RCF value... -
Page 13: Operation
Operation Note: Only display pictures of the Centrifuge GT 1R are Keep hands and objects well clear of the underside and side shown. The display of the Centrifuge GT 1 is the same, of the centrifuge door when closing. except missing the details for temperature. Close the centrifuge door by pressing down on it lightly in the middle or on both sides of it. -
Page 14: Acceleration / Deceleration Rates
2. Place the rotor over the centrifuge spindle and let it slide the chosen settings. The last profile is saved, if you restart the slowly down the centrifuge spindle. If necessary a light centrifuge. push may be required to ensure connection. The rotor clicks automatically into place. - Page 15 the desired temperature is displayed. Temperature will change in steps of single degrees celsius. 11.18 × × ------------ - 1000 r = centrifuging radius in cm n = rotational speed in rpm The temperature cannot be adapted until the rotor has been The maximum RCF value is related to the maximum radius of positively identified;...
-
Page 16: Programs
Rotors can run at high speeds. Each rotor is specifically Programs designed to run at its maximum speed with a defined load. For further details refer to the rotor manual supplied with the The Fisherbrand 1 Centrifuge is able to save up to 4 rotor. -
Page 17: Short-Term Centrifugation
If no action is taken, the centrifuge will decelerate until stop, Short-term Centrifugation then the lid should be opened and the rotor checked. For quick centrifugation, the Centrifuge GT 1 / 1R has a Imbalance Indicator PULSE-function. By holding down the PULSE key , spinning will start at The centrifuge is fitted with an imbalance detector, to ensure maximum acceleration rate, continue at maximum rotor... -
Page 18: Aerosol-Tight Rotors
Aerosol-Tight Rotors For your protection when using an aerosol tight lid the rotor should only be removed with the lid closed. Note: Rotors supplied with a lid for aerosol-tight applications come with a mandrel, which belongs to the Auto-Lock. Be sure not to place the lid onto this mandrel to prevent it from being damaged. -
Page 19: System Menu
System Menu To get into the system menu, press and hold any key on the English, Deutsch, Francaise front panel turning on the centrifuge. Keep this key depressed Español, Italiano, Nederlands, Language until system menu appears in display. Navigate through the Росский... -
Page 20: Maintenance And Care
Maintenance and Care • Use only disinfectants with a pH of 6-8. Cleaning Intervals Rotor and Accessories For the sake of personal, environmental, and material protection, it is your duty to clean and if necessary disinfect Inspection the centrifuge on a regular basis. After thoroughly cleaning rotors, they should be inspected for Maintenance Recommended Interval... -
Page 21: Disinfection
3. Rinse rotor and all accessories with warm water and a 6. Screw the ventilation grid onto the centrifuge. neutral detergent that is suitable for use with the materials. If in doubt contact the manufacturer of the cleaning agents. Ensure grease on rotor trunnions (pivot Disinfection point for swinging buckets) is cleaned. -
Page 22: Decontamination
Decontamination Autoclaving 1. Before autoclaving clean rotor and accessories as WARNING: Radiation is possible when touching described above. the contaminated rotor and centrifuge parts. Radioactive material can get into the centrifuge 2. Place the rotor on a flat surface. when a tube breaks or as a result of spills. •... -
Page 23: Shipping And Disposal
Shipping and Disposal WARNING: When removing the centrifuge and accessories from use for disposal you have to clean and if necessary disinfect or decontaminate the entire system. In doubt contact the Fisher Scientific customer service. For the disposal of the centrifuge mind the regulations in your country. -
Page 24: Troubleshooting
Troubleshooting b. GT 1R Mechanical Emergency At the bottom of the housing is one white plastic plug Door Release which can be removed from the plate with a small flat screwdriver. It is located below the front side of the centrifuge. -
Page 25: Troubleshooting By Guide
Troubleshooting by Guide If problems occur other than those listed in this table, the authorized customer service representative must be contacted. Error number Error message Troubleshooting E-002; E-005; E-008; E-010; Read Manual Restart the centrifuge. E-011; E-012; E-015; E-016; If the error message appears again, inform the service. E-034;... -
Page 26: When To Contact Customer Service
Error number Error message Troubleshooting E-098 Imbalance Load Check the load placed in the rotor. Check that the rotor cross bolts are greased well. Restart the centrifuge. If the error message appears again, inform the service. E-060 Temp Low! CAUTION Icy metal parts! Restart the centrifuge. -
Page 27: Chemical Compatibility Chart
Chemical Compatibility Chart CHEMICAL 2-mercaptoethanol S S U - S M S - S U S S S S - S S S S U S S S S S S Acetaldehyde S - U U - - M - U - M U U U M M - M S U - S - Acetone M S U U S U M S S U U S... - Page 28 CHEMICAL Benzyl Alcohol S - U U - - M M - M - S U U U U U U - M S M - S - Boric Acid U S S M S S U S S S S S S S S U S S S S S S S S S S Cesium Acetate M - S - S S S - S S S S...
- Page 29 CHEMICAL Ethylene Oxide S - U - - U - - S U - S S M - - S S S U S U S S S U Vapor Ficoll-Hypaque M S S - S S S - S S S S S S - S S S S S S S M S S S Hydrofluoric Acid U U U M -...
- Page 30 CHEMICAL Sodium Chloride S - S S S S S S - S S S - S S S S - S S M - (10 %) Iodoacetic Acid U - S U S S S - S S S - S S - S - S S M - Carbon U U M S S U M U S U U S M U S S M M S M M M M U S S...
- Page 31 CHEMICAL Sodium Sulphite S S S - S S S S M S S S S S M - S S S S S S S S S S Nickel Salts U S S S S S - S S S - S S S - S S S S S S M S S S Oils (Petroleum) S S S -...
- Page 32 CHEMICAL Sulfuric Acid (50 %) M U U U S U U - S S M U S U U M S S S S S U U U M S Schwefelsäure M U U U - U U M - - M U S U U U M S U M S U U U - (konz.)
- Page 33 WEEE Compliance WEEE Compliance. This product is required to comply with the European Union’s Waste Great Britain Electrical & Electronic Equipment (WEEE) Directive 2012/19/EU. It is marked with the following symbol. Fisher Scientific has contracted with one or more recycling/disposal companies in each EU Member State, and this product should be disposed of or recycled through them.
- Page 34 IF YOU NEED ASSISTANCE: Fisher Scientific products are backed by a global technical support team ready to support your applications. We offer cold storage accessories, including remote alarms, temperature recorders, and validation services. Visit eu.fishersci.com or call: Countries Sales Services +43 (0)800 20 88 40 +43 1 333 50340 Austria:...
- Page 35 Fisherbrand GT1 Centrifuge: Thermo Electron LED GmbH Zweigniederlassung Osterode Am Kalkberg, 37520 Osterode am Harz Germany Country of Origin: Thermo Fisher (Suzhou) Instruments Co., Ltd. No. 297 Taishan Road, New District, Suzhou, Jiangsu P. R. China Fisherbrand GT1R Centrifuge: Thermo Electron LED GmbH Zweigniederlassung Osterode Am Kalkberg, 37520 Osterode am Harz Germany...